How to Make a Shirred Dress With Puff Sleeves Out of Old Pillowcases

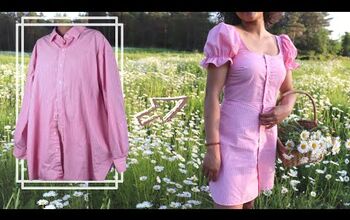
If you’re into upcycling, I have an exciting tutorial for you; I’ll show you how to make a shirred dress with puff sleeves from bedding!
If you think about it, bedding is really just blocks of fabric, and you can literally do anything with it. Also, it's a bonus if you have bedding with cute prints.
I can’t wait to show you how to make this fabulous, body-hugging DIY shirred dress with puff sleeves. Let’s get started.
Tools and materials:
- Fabric (you can use large pillowcases or a bedsheet)
- Elastic thread
- Normal thread
- Sewing machine
- Measuring tape
- Marker
- Pins
- Scissors
1. Take your measurements
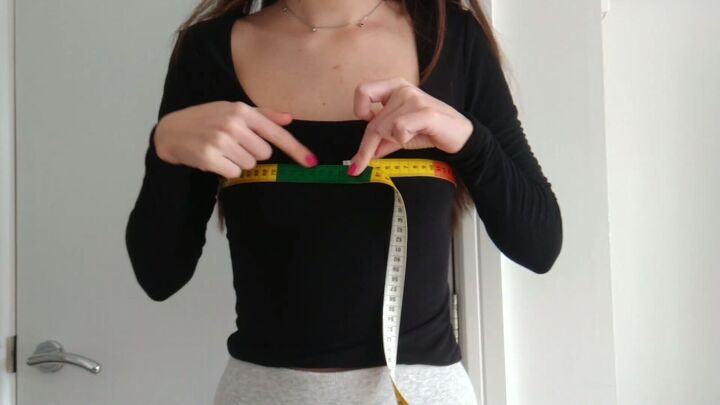
Before we get into the fun part, you’ll need to take your bust, waist, and hips measurements. Also, measure the desired length of your dress.
2. Cut the pattern
I’m actually using two large pillowcases for this project, but an actual bed sheet or any other fabric would do.
Start by folding both fabric pieces in half and mark the length of your dress with a 2cm (0.78 inches) seam allowance on each end.
Next, split the length of your dress into three equal sections and mark them on your fabric.
Take your bust, waist, and hip measurements and multiply them by 1.5. Then, divide that number in two. You’ll need this for all three measurements.
On the bottom third of the dress, mark your multiplied hip measurement. Then, going up a third from the bottom, mark your hip measurement again.
Going up to the middle third marking, mark your waist measurement.
Lastly, mark your bust measurement from the top third mark.
Connect all your markings, making slight curves to accommodate the actual shape that will form.
Now, cut your pieces.
You should have two large pieces to work with.
To make space for those gorgeous puff sleeves, you’ll need to make some space for them on the top sides of the dress.
So, measure 8cm (3.14 inches) into the width of the dress and 4cm (1.57 inches) down the length.
Connect the two markings and cut out a triangle shape. Repeat on the other side and both pieces.
This is what you should have.
3. Hem the edges
Hem the top and bottom of both pieces with a rolled hem.
4. Make the DIY shirred dress
Now, the shirring begins! Be sure to change your thread to an elastic one, as shown.
Tip: When you wind the elastic thread onto the bobbin, ensure that you’re not stretching it.
Loosen your bobbin casing to ensure the elastic isn’t tight when sewn onto the fabric. Then, change the settings on your sewing machine to the largest stitch and make it a straight stitch.
When shirring the fabric, make sure the right sides are facing up. Also, always backstitch at the beginning and end of every row.
Go ahead and shir both dress pieces. Stretch the already shirred fabric when sewing the following rows. This may take a while, but the results are breathtaking and worth the effort.
Here are the shirred pieces.
5. Assemble the DIY shirred dress
Place both pieces together, right sides facing, and sew the side seams. Use a zigzag stitch for this part.
Trim the seam allowance and finish the seams with another zigzag stitch.
6. Make the sleeves
For the sleeve part, measure your shoulder from front to back and the length of your arm, including your shoulder.
On another piece of fabric, take the length of your arm and mark it with a 2cm (0.78 inches) seam allowance on each end.
From your top marking, vertically mark your shoulder measurement that is divided by 1.5.
Repeat the same at the bottom to create a rectangle.
Next, cut out your two-sleeve pieces.
Create the same notches on the top of your sleeve, the same way you did on the DIY shirred dress.
Hem the bottom and top of your sleeves with a rolled hem.
Sew two rows of shirring along the top and bottom of each sleeve piece (by the hem).
Fold your sleeves in half and sew with a zigzag stitch, right sides facing.
Attach the sleeves to the dress by matching up both notches. Sew along the edges with a zigzag stitch.
How to make a shirred dress with puff sleeves
What do you think of my new DIY shirred dress? No one would ever say this was made from two pillowcases. I hope you learned a trick or two on how to sew a shirred dress.
Thanks for joining me, and good luck!
Enjoyed the project?
Suggested materials:
- Fabric (you can use large pillowcases or a bedsheet)
- Elastic thread
- Normal thread
- Sewing machine
- Measuring tape
- Marker
- Pins
- Scissors
The author may collect a small share of sales from the links on this page.


Comments
Join the conversation
I would say your very talented!
I’m confused,did you shirr the whole dress or is the case material stretchy already? I luv this so much..I’ve seen so many gorgeous patterns in sheets that I’d buy them and over filled my linen Closet..you just can’t find pretty material and a feminine dress like you’ve created..so girly girl..✅