Make This Cute Puff Sleeve Crop Top Out of An Old Men's Shirt

There are many men’s shirt transformations these days, and I totally get it- it’s the perfect upcycle! I’m going to show you my take on the men’s button-down shirt refashion trend - a unique puff sleeve crop top with a front tie!
Scroll down and see my step-by-step cropped puff sleeve tutorial packed with amazing tips and hacks, too!
Tools and materials:
- Oversized men’s shirt
- Ruler
- Measuring tape
- Sewing machine
- Pins
- Thread
- Pen or marker
- Elastic
Upstyle Recommends!
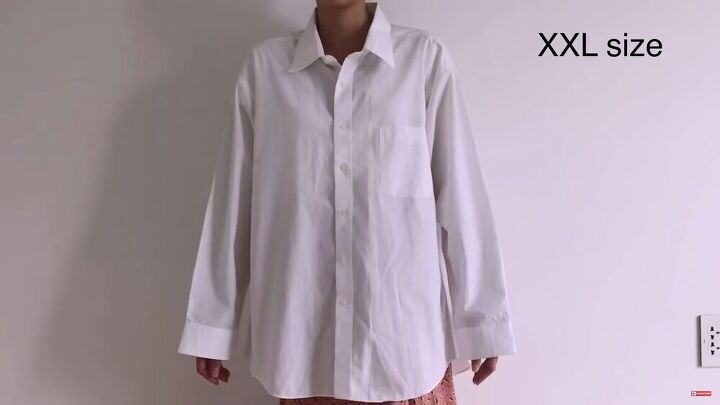
Here's the button-down shirt I decided to turn into a puff sleeve crop top.
1. Remove the pocket and neckline
Remove the front pocket with a seam ripper and cut off the neckline completely. Start from the collar and cut along the neckline seams on both the front and back.
2. Modify the shoulder line and sleeves
If the shoulder line is not equal, simply cut the front part by around 2cm (0.78 inches) to align with the back shoulder line. Pin the shoulder seams together and sew to secure.
Hand-sew a loose seam at the top of the sleeve. Stitch the loose seam around the shoulder area. Then, pull at the string to make the gathers.
Pin the arm seam to the shoulder seam and stitch to secure. Repeat the same process on the other side.
3. Modify the sleeves
Now, measure around 25cm (9.84 inches) from the bottom of your sleeve and draw a line.
Cut along the line to make the sleeve shorter and fold the raw edges over twice. Pin all around and stitch to secure.
4. Add a tunnel with elastic
Measure 5cm (1.96 inches) from the end of your new sleeve and draw a line.
Next, cut two long rectangular strips around 3cm (1.18 inches) wide and 50cm (19.6 inches) long from the excess fabric.
Fold the raw edge of one side by 1cm (0.39 inches) and press to create a neat, straight fold. Then, fold the bottom edge by 1cm (0.39 inches) and press again.
Go ahead and sew the short ends of each strip, thus creating a circle.
Insert the circle over the sleeve and place it on the line you drew. Pin the strip all around the sleeve’s circumference and sew both edges of the strip. Be sure to leave a gap so you can feed through the elastic.
Now, insert elastic into the tunnel you just created with the help of a safety pin. The elastic’s size should be the width of your arm and 1cm (0.93 inches) thick. Sew the ends of the elastic and stitch the opening closed.
5. Modify the front of the shirt
Measure half the width of the total shoulder length, add 1cm (0.39 inches), and from either side of the shoulder seam, make two markings accordingly.
Then, draw straight lines down the shirt from these marks.
Now, draw a line from the shoulder to the belly button and add 2cm (0.78 inches). So, 40cm (15.74 inches) is my desired length for the crop top, but this may be different for you.
Then, draw a line at the 40cm (15.74 inches) mark.
For your bust, mark half of your full bust size on either side of the top; add 3cm (1.18 inches) to this and measure on either side, starting from under the armpit.
When you have those markings down, draw a new diagonal line, starting from your shoulder line as shown.
Now, cut your top to your desired length and cut the middle part along the bust line. Pin the side pieces together and sew.
To make the v-neck, fold the two pieces at the front together. Mark 21cm (8.26 inches) down the center from the top and 9cm (3.54 inches) on either side at the shoulders. Then, connect these points together with lines and cut along them.
Make a new neckline at the back by drawing a curved line with a 3cm (1.18 inches) dip. Then cut it out.
Cut the excess fabric at the front. There is no need for it as you will later attach a tie to this area.
6. Add a strip to the hemline
Cut a long strip of fabric and connect it to the raw edges on the front part of the crop top. Pin all around and sew.
Finish the neckline by folding over the strip of fabric (twice), and sewing the fold to secure it in place. Next, repeat this process for the bottom of the crop top.
7. Make the tie
Using leftover fabric, measure 10cm (3.94 inches) at one end of the folded fabric and 4cm (1.57 inches) at the other. Connect them with a curved line and round the shorter end. Cut out the shape, pin the edges, and sew.
Turn the fabric right side out and attach the tie, as shown.
Puff sleeve crop top tutorial
How chic and stylish is this puff sleeve crop top? I hope you enjoyed this DIY upcycle of refashioning a men's button-down shirt into a puff sleeve top. Let me know what you think about this flip in the comments below!
Enjoyed the project?
Suggested materials:
- Oversized men’s shirt
- Ruler
- Measuring tape
- Sewing machine
- Pins
- Thread
- Pen or marker
- Elastic
The author may collect a small share of sales from the links on this page.


Comments
Join the conversation
Yes. Mist shirts now have the knit built in and sits at the waist line. Or the shirt is half in or out. Looks dumb but "everyones doing it". Lol
Not me though. I'm a conservative/ classic/ contemporary dresser. You know. Ralph Lauren and such.
Great refashion! LOVE IT!