How to Tie-Dye Pants in 6 Simple Steps - Quick & Easy Tutorial

Everyone is tie-dying their shirts, but today, I am going to show you how to tie-dye pants! I will be tie-dying a pair of lovely Dickies pants in brown, and the result is so cool.
Brown is really on-trend at the moment, so I decided to give this neutral color a go. Plus, that means these DIY tie-dye pants will be easy to style as well. Let's get started!
Tools and materials:
- Pants
- Brown tie-dye
- Paper
- Tarp
- Elastic
- Spray bottle
- Gloves
- Plastic bag
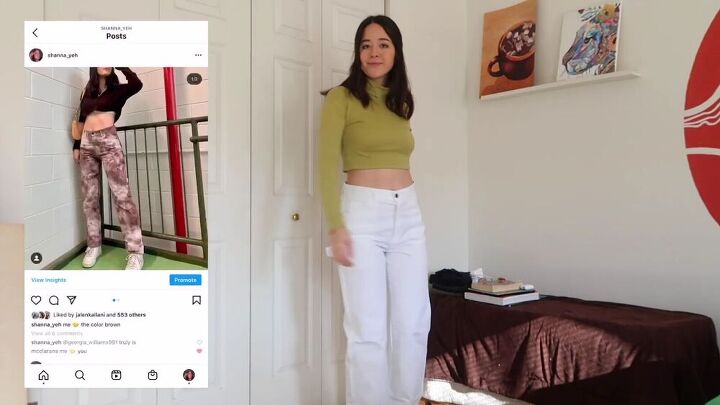
These are the white pants I'll be using, as well as my inspiration for my brown tie-dye pants.
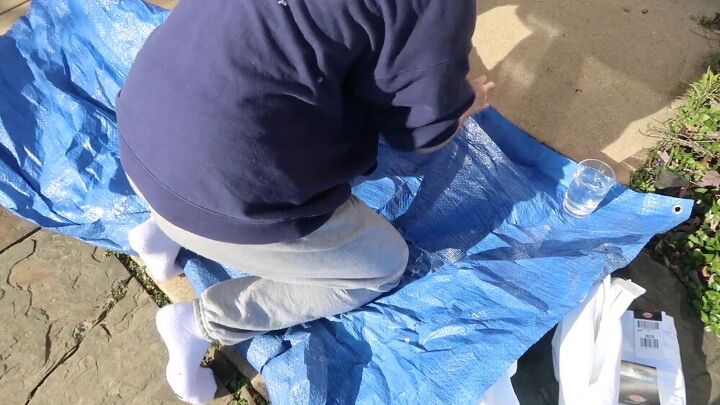
1. Prep your working area
Before getting into the fun part of creating your DIY tie-dye pants, it’s essential to prep your area so that the dye won’t get everywhere and ruin other things.
I think it's best to wear old clothes when working with tie-dye, as well as work outside on some tarp.
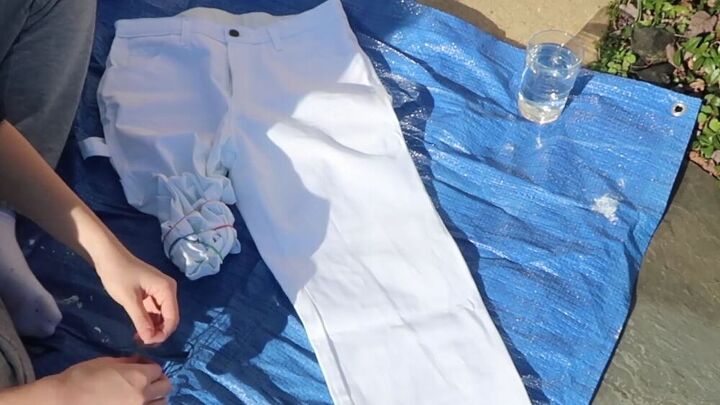
2. Scrunch the pants
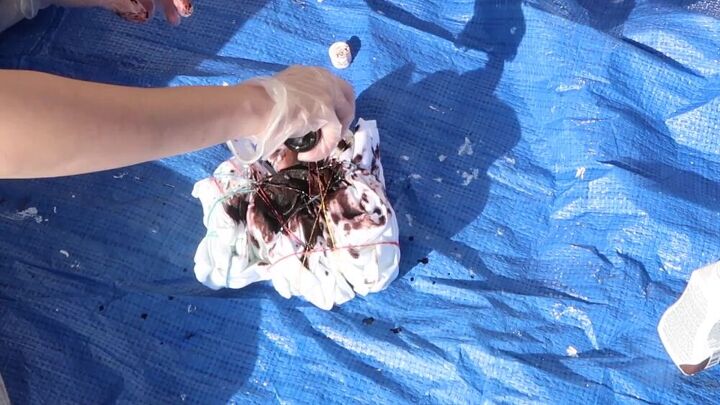
Scrunch your pants and secure them with elastic. This is what you call the scrunch ruffle technique, and it’s pretty easy to do; just scrunch the fabric in increments and secure each part accordingly.

Continue doing this to the entire pants, as shown. Don’t forget to scrunch up the crotch and waist area, too.

3. Mix the tie-dye
I didn’t have a spray bottle, so I used an old travel-size shampoo container. I recommend using a spray bottle as it would be easier to distribute the dye, but this will do if you don’t have a choice.
Add some water and dye to the bottle, tightly secure the lid, and shake!
4. Wear gloves
Put some gloves on before you start. And, a word of advice, dry your hands before; otherwise, you’ll struggle to put them on like me!
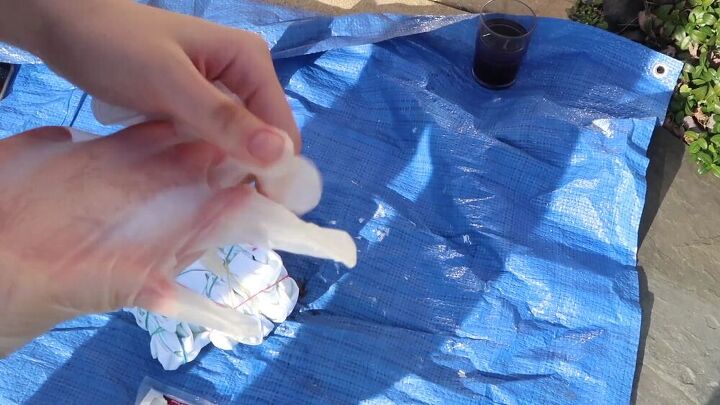
5. Add the dye
Pour the dye mixture onto the fabric and rub it in with your fingers.
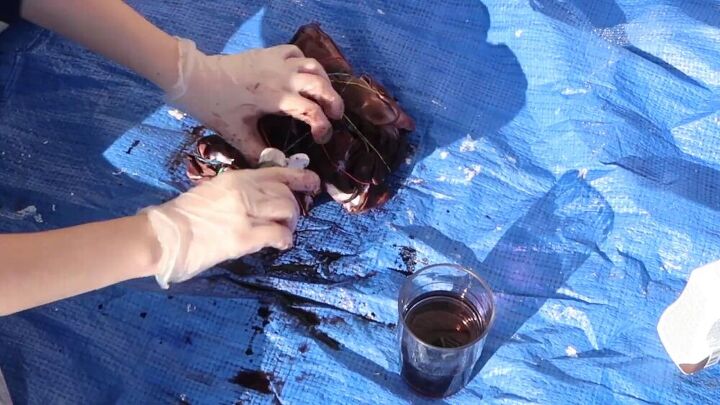
Repeat this method on the other side until there are no white areas visible.
For these tie-dye pants, aim for dark and light brown hues without any white parts. So, reach down into the cracks and add some tie-dye there as well.
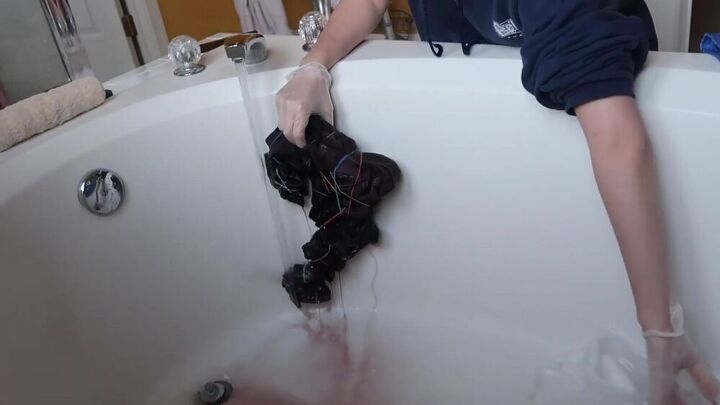
6. Dry and rinse
Place your new brown tie-dye pants in a plastic bag and let them dry for 24 hours. Then, go ahead and rinse it in a tub or bathtub. Make sure you rinse out all the excess dye.
Lastly, hang the pants to dry for a couple of hours.
Tip: If, at first, the dye looks a little purple, don’t worry! Let it dry after the initial rinse, and it will go back to brown.
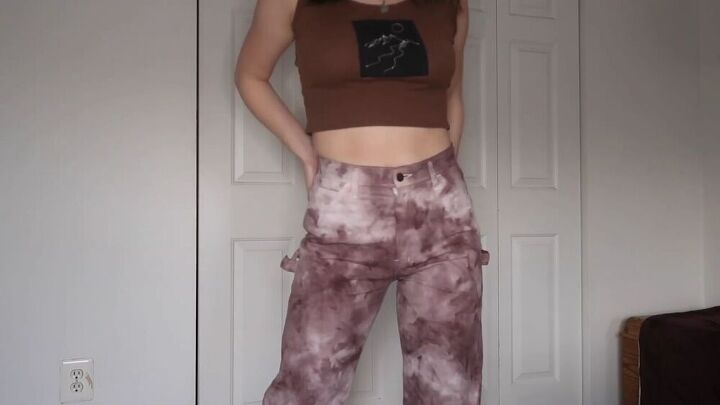
How to tie-dye pants
This is the result! I am absolutely obsessed with these brown tie-dye pants. I hope you got some inspiration from this tutorial and let me know what you think in the comments below. Happy tie-dying!
The author may collect a small share of sales from the links on this page.


Comments
Join the conversation