Need Valentine's Nail Art Ideas? Try This Red "Queen of Hearts" Look

I love painting my nails, and I particularly like making the design to a theme. With Valentine’s Day coming up, I couldn’t resist creating a special Valentine’s Day nail design that has a gorgeous red heart on the middle nail.
Follow along with me as I show you how to create this pretty Valentine nail design that I call my "Queen of Hearts" nails.
Tools and materials:
- Anti-yellowing base coat
- Red nail polish
- White nail polish
- Clear nail polish
- Dotting tool
- Gold beads
- Nail pen
- Cotton
- Acetone
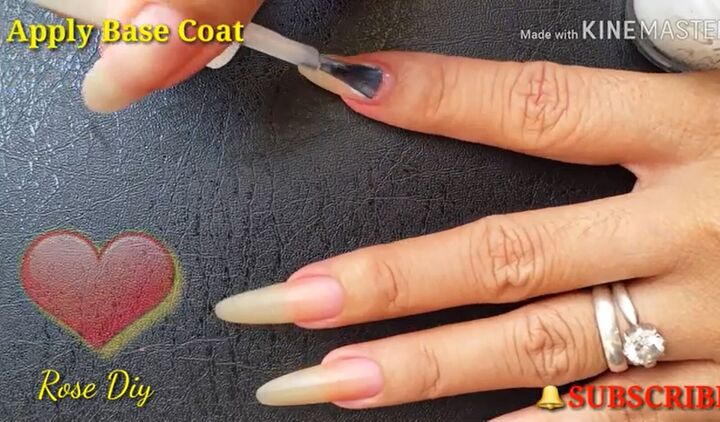
1. Apply base coat
Start by applying your anti-yellowing base coat to all of your nails.

2. Apply red nail polish
Once the base coat has dried, apply red nail polish to all of your nails except the middle one.
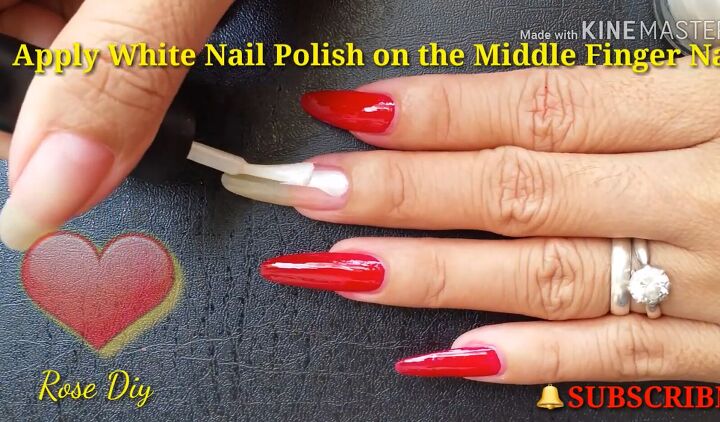
3. Apply white nail polish
Apply white nail polish on the middle fingernail.

4. Add another coat
Next, add another coat of nail polish to all of your nails. Wait for it to dry before moving on to the next step.

5. Paint a heart
On your middle fingernail, draw a heart using red nail polish and your dotting tool.
Tip: It might help you to start by drawing three points like a triangle so that you can then connect them into a heart
If you get nail polish around your finger while you’re drawing the heart, or at any step along the way, you can simply use some acetone and a cotton bud to clear it off.
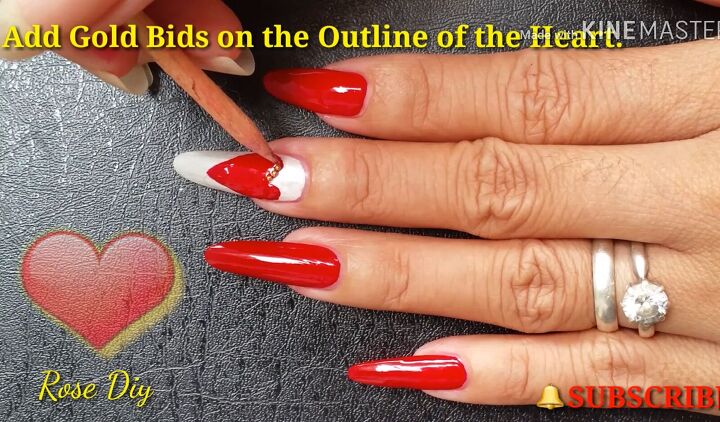
6. Add gold beads
Add little gold beads on the outline of the heart using a nail pen. Try to be as precise as you can so that you get a smooth and even finish.
Depending on the size and shape of your beads, they may adhere to the red nail polish, you could use clear nail polish, or you could use nail glue.
This step may take you a while because the beads are so small, but be patient as the finished effect is worth the effort.

7. Apply clear nail polish
The final step is to apply clear nail polish for a shiny finish. You can apply the nail polish directly over the beads without any problem.
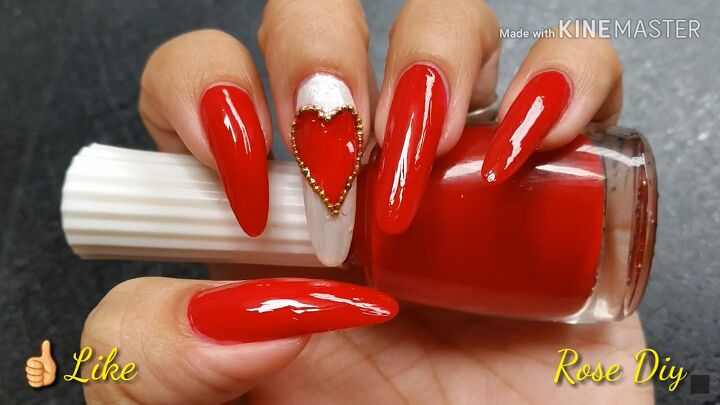
Red Valentine’s Day nails
Here we have the finished Valentine’s Day nail design look. I absolutely love how the middle nail stands out from all the others with its white background and the gorgeous red heart in the center of the nail.
I also adore the gold bead detail going around the outside of the heart; it adds a really special touch to this design. Let me know what you think of the finished look in the comments below.
The author may collect a small share of sales from the links on this page.


Comments
Join the conversation