How to Do Realistic DIY Shark Bite Makeup for a Fun Halloween Costume

Have you seen the Blake Lively movie The Shallows? This movie, like its famous predecessor Jaws, features everyone’s beachside villain, a shark. I wanted to create realistic shark bite makeup, inspired by the movie, and perfect for Halloween. Here’s how to do shark bite special effects makeup!
Tools and materials:
- Red pencil suitable for use on skin
- Distilled witch hazel
- Cotton pads
- 99% isopropyl alcohol
- Rigid collodion
- Collodion remover
- Silicon tip brush
- FX-5 duo fiber brush or other fine tip brushes
- Stippling brush
- TV blood
- Small container
- Alcohol activated illustrator makeup/paints including skin illustration palette
- Skin protector spray (optional if you have sensitive skin)
I also used 2 real-life images of shark bites for inspiration. You can replicate what I show you in this shark bite makeup tutorial, or use your own images.
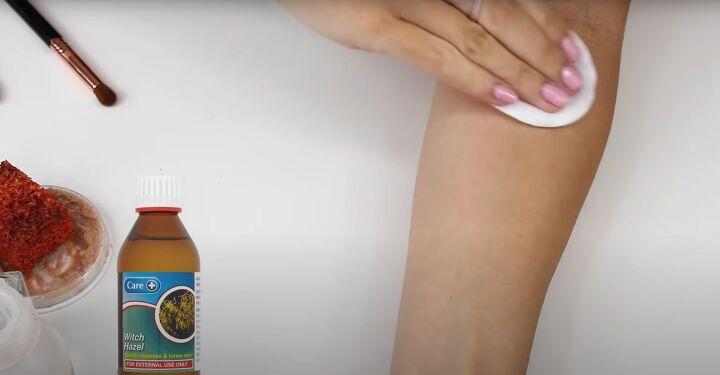
1. Prep the skin
Clean your skin with witch hazel using a cotton pad. If you have sensitive skin, use a skin protector like Krylon spray-on skin protection spray.
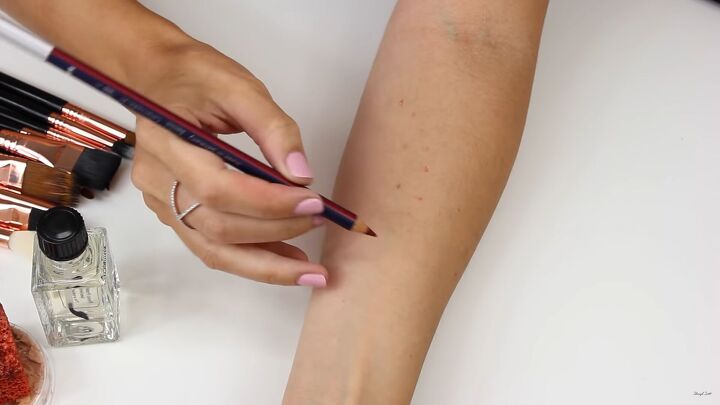
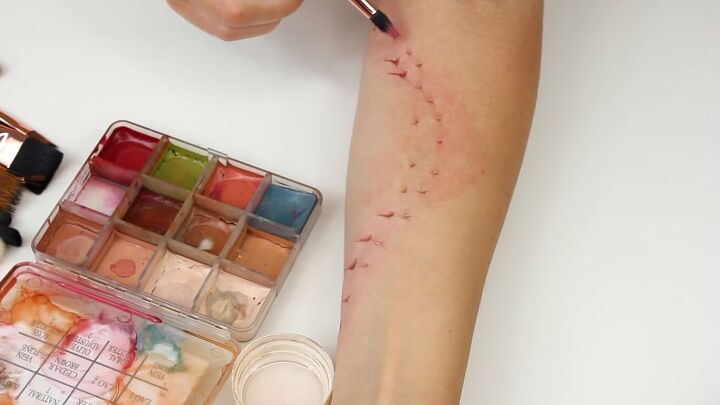
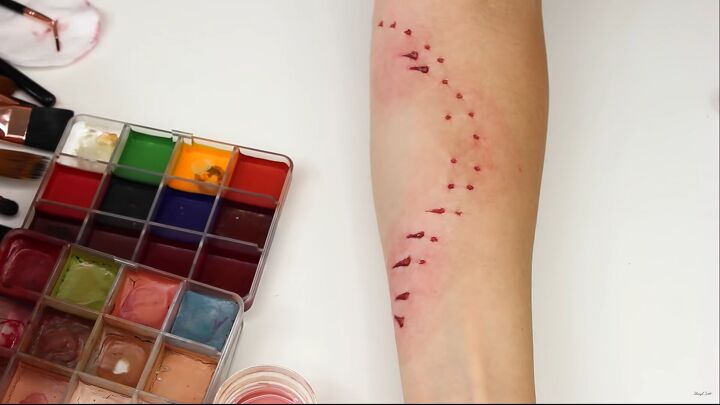
2. Mark the skin
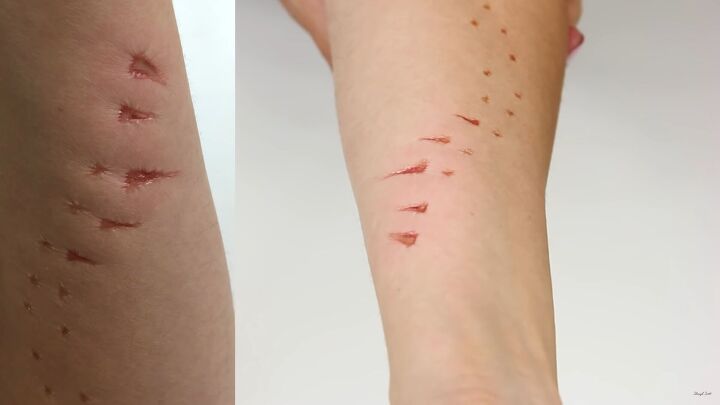
Use a red pencil to mark the skin in a bite shape on your arm. The image I used for the arm is smaller than the leg, probably because the shark that bit the arm was smaller.
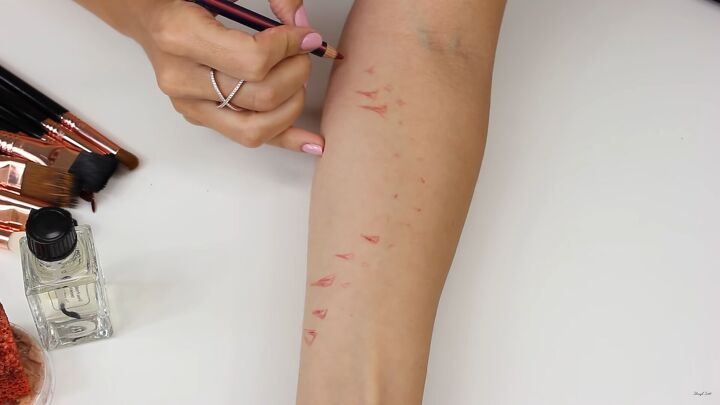
To mimic a real bite, the deeper cuts are at either end of the bite. Draw these more triangular. They will also be deeper than the center.
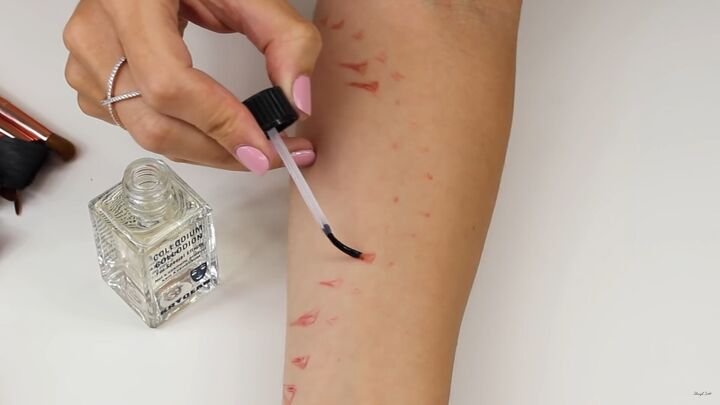
3. Apply collodion
Collodion comes as flexible or rigid (non-flexible). Only use the non-flexible type for this special effect makeup. It is used to make scars.
Use a small silicone brush to apply this product. Do not use a regular or nice brush because the collodion will ruin the bristles! Paint it on in a thin layer on the deeper triangles. As it dries, it shrinks and pulls in the skin. You’ll need to do this several times.
Rigid collodion can be uncomfortable! It pulls on the skin but it is perfectly safe to use on the skin. Make sure you have the right remover for it.
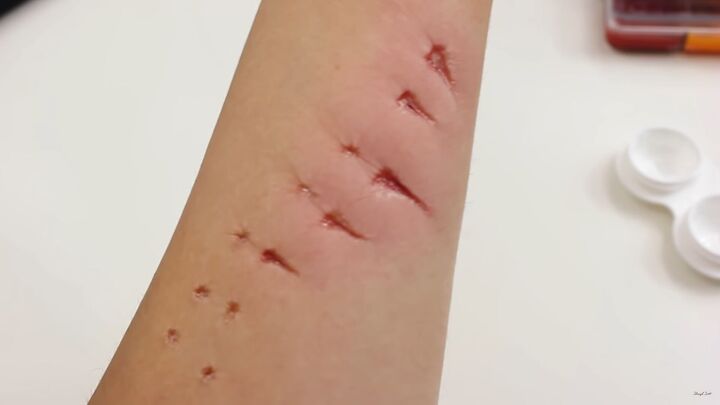
After 10 layers, this is what it looks like.
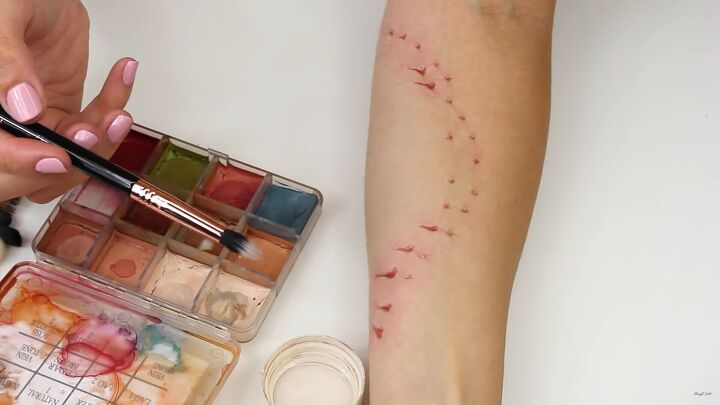
4. Paint the bruising and mottling
When a shark bites, it doesn’t just puncture the skin. The pressure of the jaw also leaves marks, so we’re going to create that effect with some alcohol-activated paint.
Wet the brush with alcohol (IPA) and place a bit of alcohol in a small container.
Dip a bristled brush into the coral adjuster mixed with a hint of the rose adjuster. Really dilute with the alcohol to paint on a realistic pressure mark on the skin. Brush on and dab to diffuse it.
These 2 colors mixed together provide the perfect “pressure” shade. Keep stippling and patting. We don’t want anything that is too uniform as we are going for a mottled appearance.
Add more at the edges where the pressure marks are more intense and the lacerations are deeper. It is important to keep checking your reference image to make sure you are getting the shark bite makeup as realistic as possible.
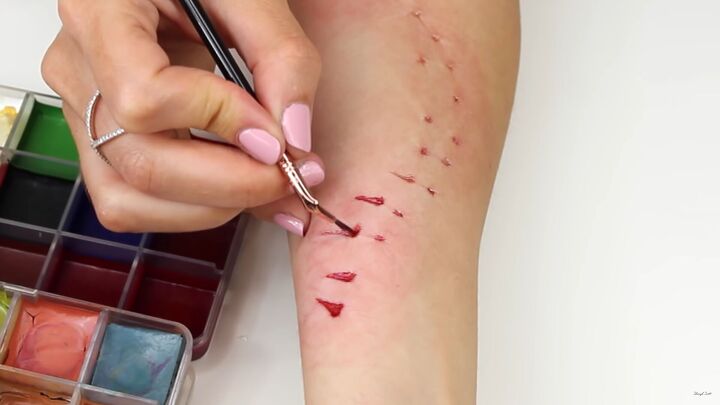
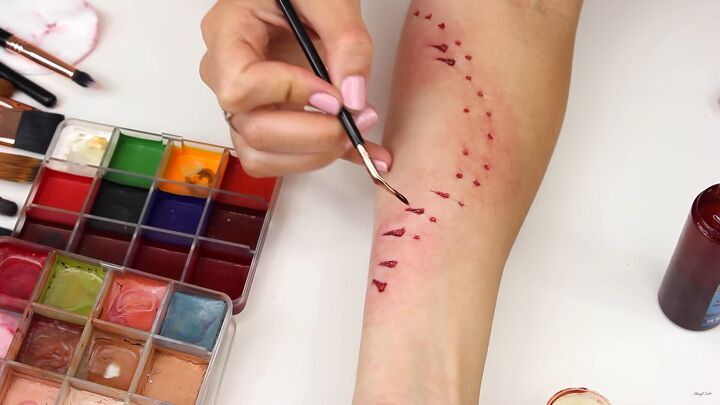
5. Create depth in the lacerations
Use a very thin fine bristled brush like the Sigma FX 10 brush to paint in the lacerations. Use aged blood from the skin illustration palette together with blood tone. Paint these in the lacerations. I use the tip to paint around the inner edges.
Tip: Don’t paint the entire surface in one tone - that leaves it looking too flat.
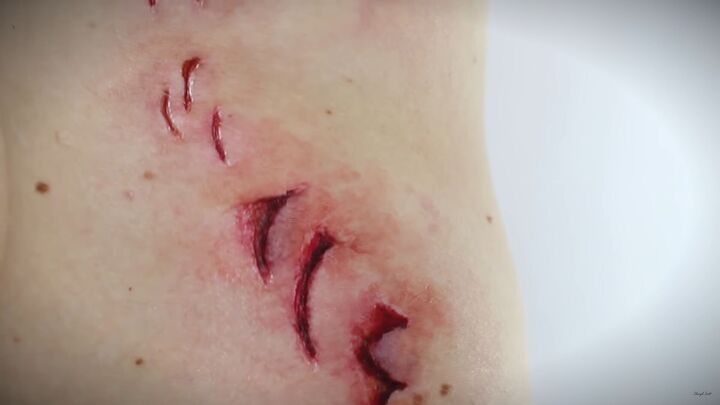
6. Add fat
Once you’ve deepened the lacerations, it’s time to add some fat. The skin has several layers, then there’s fat and muscle, so we want to create texture in the lacerations.
Mix yellow and white together and use the tip of a stipple brush. Stipple the light-colored mixture into a couple of the bumps inside the shark bite. This helps add more tone and creates much-needed texture to make it more realistic.
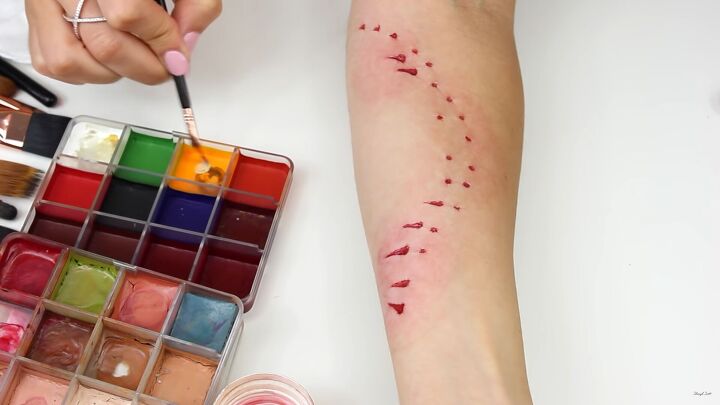
7. Create the deepest lacerations
Mix aged blood and black to add even more depth. I do it in the deepest part to make the laceration look deeper at the edges. Remember to keep the paint diluted with alcohol and layer the product to build up the color.
If the color is too intense, clean your brush with alcohol, and go in with a damp clean brush to remove excess color.
8. Check your work
Go back in and make sure the pressure marks are dark enough. Sometimes, when you add paint to the lacerated areas, the pressure marks fade.
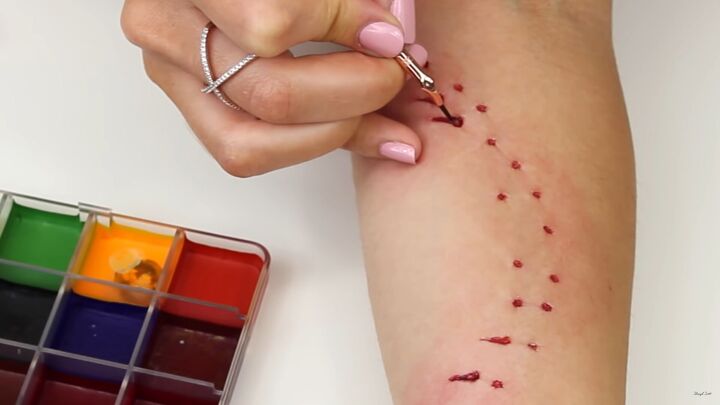
9. Add some shine
To make the cuts and lacerations look realistic, fresh, open, and with a wet look, add TV blood. I use the lightest blood to give a slight wash of color. It’s not going to drain away any of the paintwork we did.
You can also add a blue-purple tone to make it look like the skin flaps have blood under them.
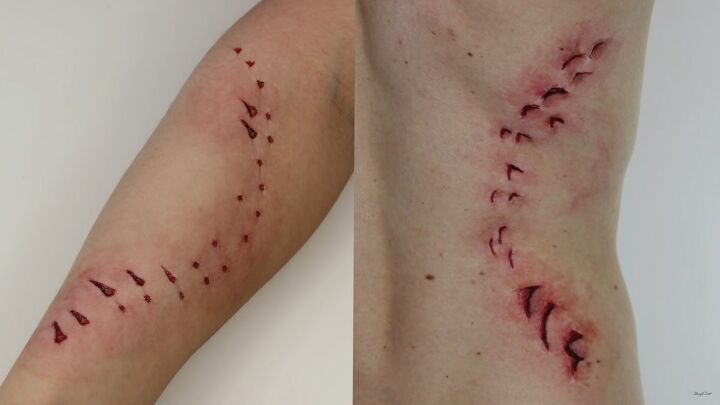
Shark bite makeup tutorial
You’re done! How incredible is this shark bite Halloween makeup? I did makeup on both an arm and leg, though I could only film the arm - it’s hard to film your back!
Please let me know in the comments if you ended up doing this for Halloween or practiced it, and share any photos you have!
Products used
- Witch hazel
- Pro Shield / Derma Shield
- Red Kryolan faceliner
- Rigid collodion
- Sigma FX11 Silicone Brush
- IPA (ISO Propanol Alcohol)
- Skin Illustrator Flesh Tone Palette
- Sigma FX5 Duo Fibre
- Skin Illustrator FX Palette
- Sigma FX10 Angled Liner
The author may collect a small share of sales from the links on this page.


Comments
Join the conversation
This is so cool, I’m saving the instructions for my college senior, they are always looking for something next level.
Wow! 🦈
😆