How to DIY Awesome Metallic Silver Shoes and a Cute Metallic Top

Today's DIY is super easy, super fun, and super high impact.
We’re going to be making foil metallic shirts and shoes. I’ll be showing you how to apply deco foil transfer gel to your clothing so you can create awesome metallic pieces for yourself.
Tools and materials:
- Deco foil transfer gel
- Foil transfer sheets
- Scissors
- Iron
- Paintbrush
- Ribbed tank top
- Boots
- Towel
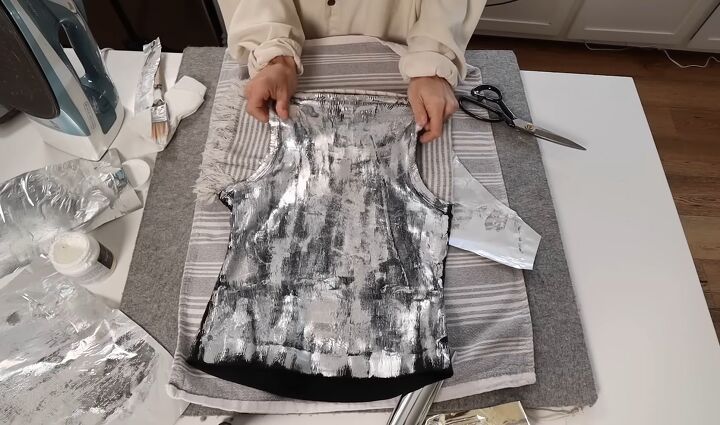
Ribbed tank
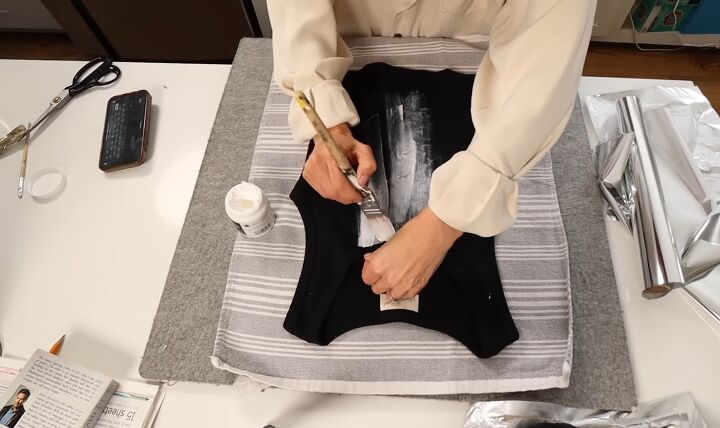
1. Apply transfer gel
First, apply transfer gel to the top.
One of the things to consider is that you're going to lose a little bit of stretch. You can control that by keeping the glue light on the surface instead of buffing it in.
Doing this means that it's only going to put metallic foil on the upper ribs and not the inner ones. This will really help maintain a lot of the stretch.
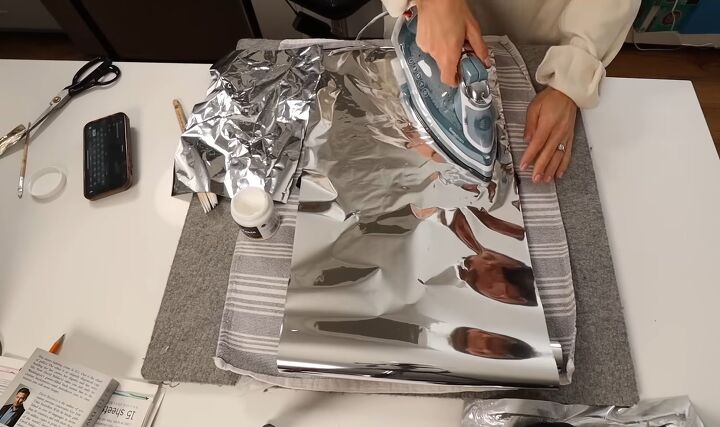
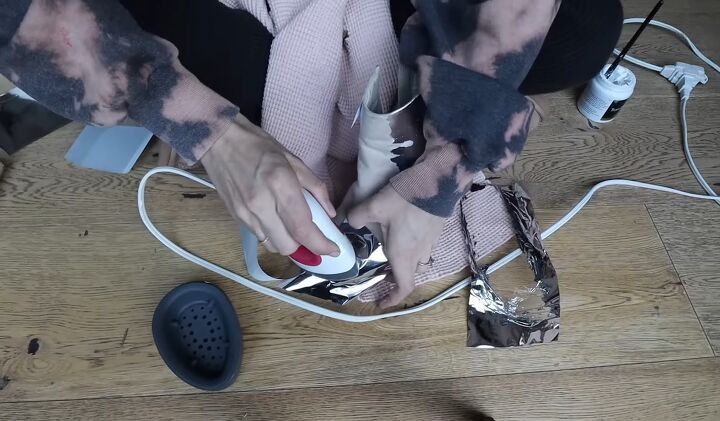
2. Apply foil sheets
Next, lay the foil on top and iron it on. You will hear a bit of sizzle, and that's because the glue is still wet and it's fusing to the foil.
Keep the iron in place until the sizzling stops. That will mean it’s fully fused.
I recommend working in sections because you don't want the glue to dry before you've had time to put the foil on.
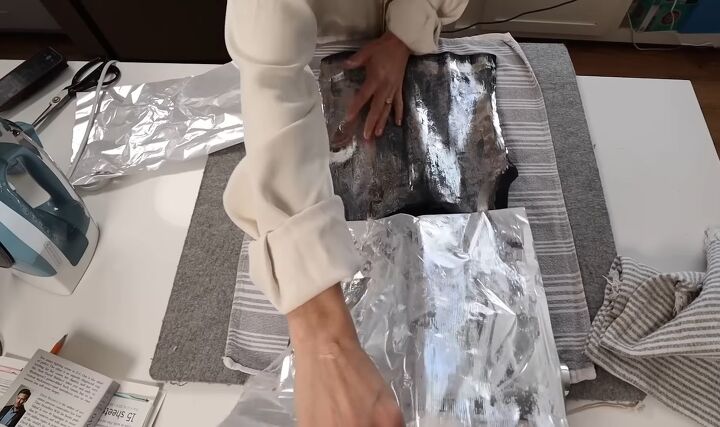
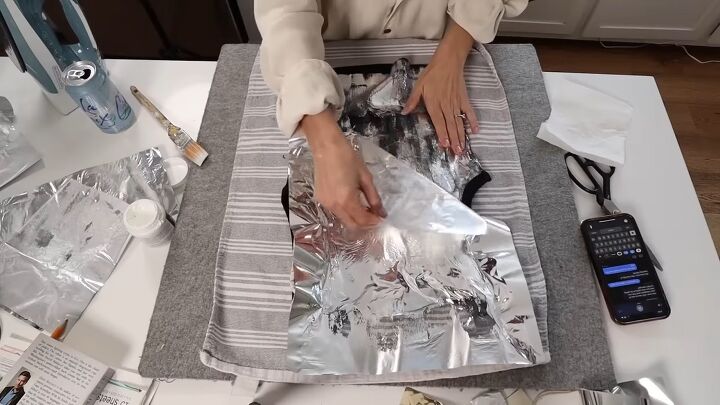
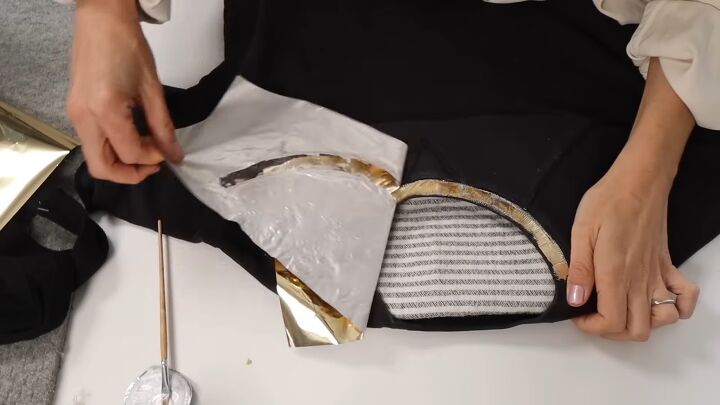
3. Peel the foil off
Let the top cool before you peel. (This though is case by case, some materials are better if you peel them when they’re warm).
Peeling the foil is a real exercise in giving up control because you just cannot control which areas take the foil perfectly and give a mirror-like finish and which areas do not.
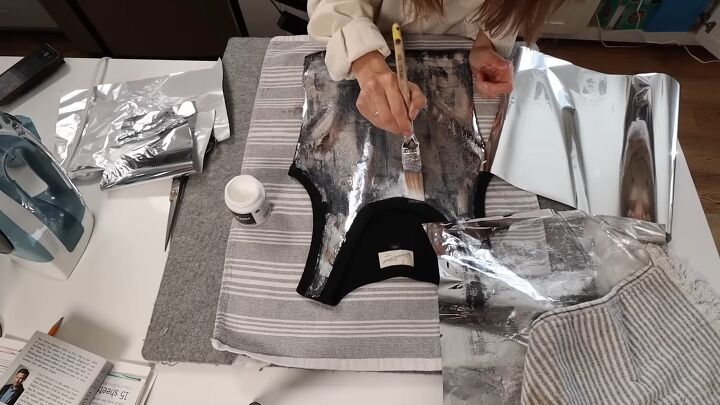
4. Apply more foil
If you want to, you can go back in and add a little bit more of the glue to areas that didn't take as strong as you wanted.
One thing to note, though, is that when you put the iron back on top of areas that had that high metallic sheen, it does fade a little bit.
5. Do the back
While you’re letting that side cool, flip it over and do the same exact process on the back.
Be sure to put a towel inside to create a little bit of padding.
6. Stretch the top
Once done, stretch the top a little bit to maintain the stretch.
Boots
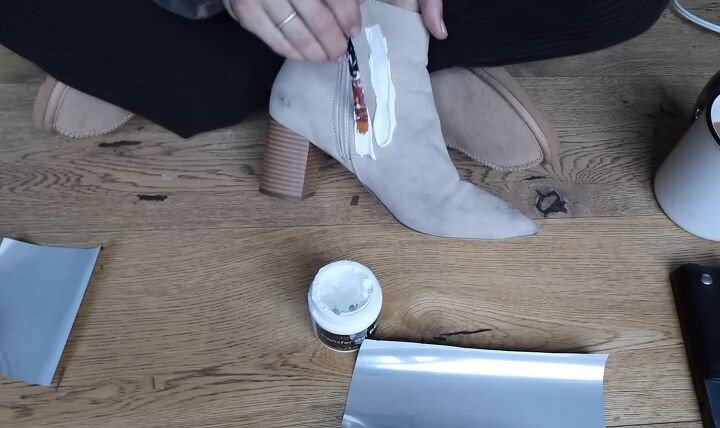
1. Apply gel and foil to boots
Now I’m adding foil to a pair of really old, faded-out boots that I never wear.
You don’t want to work with a pair of patent boots as you need quite a high heat to apply the foil, and faux leather could crack. Go for something like faux suede.
Add gel to the boots and then the foil on top. It’s really important that you work in smaller sections because it's just too hard to do big sections at a time.
2. Iron foil on
I'm using my little mini iron press to iron the foil on.
This is perfect if you have one of these little guys because it really lets you get in around all of the edges.
Make sure to use a towel and put your hand inside the boot so you can press against it without burning your hand.

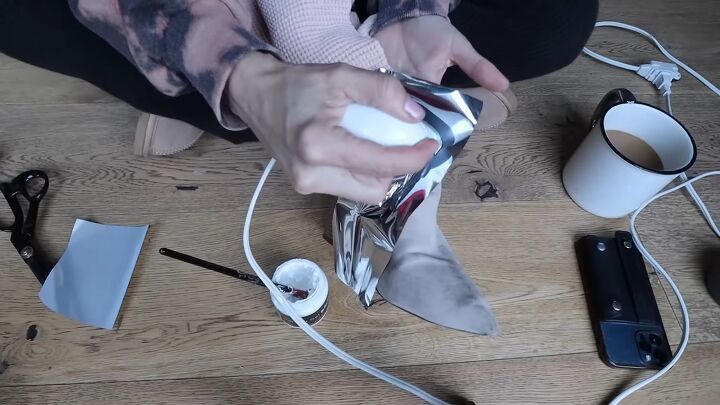
3. Add more foil
Patch on more foil to areas where it didn’t adhere so well.
Something to note is that this is not going to be able to create a high liquid metal look. It is almost going to look like cracked foil leather.
Also, consider the fact that this process will make the boots feel a little tighter than they did before.
Neckline
For those of you who don’t want all of the metallic foil but want some of the metallic foil, you can just add in a little bit of foil detail, such as on the neckline!
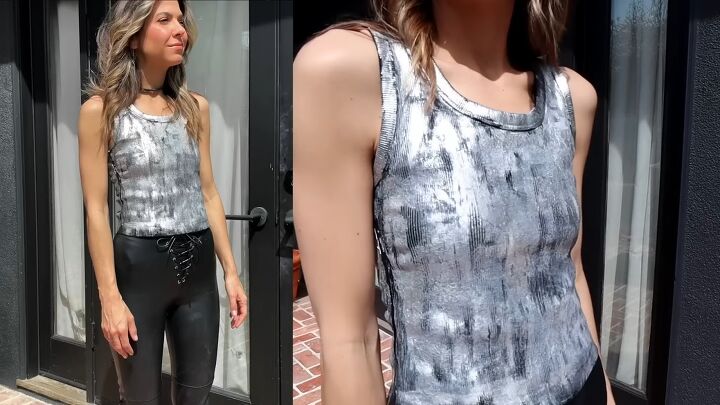
Metallic silver shoes and top
Here are the finished results! I love how I have completely transformed a plain black top, and it’s now all silver and shiny. It looks so trendy and elevated!
By the way, the top is machine washable, I washed my top twice, and there was no change to it.
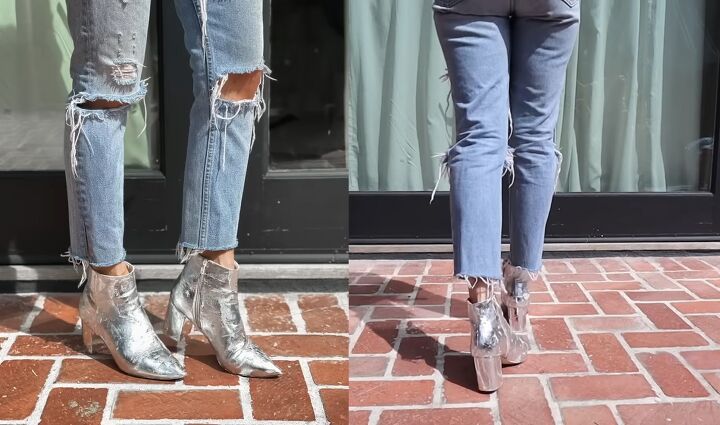
Here are the finished silver foiled boots. Can you believe these were a pair of boring beige boots before?
I would totally buy these in a store and am so thrilled that I was able to make them myself and you can too.
Did you enjoy this DIY? Leave a comment down below.
And check out my post on How to DIY Super Cute Prada Dupe Leg Warmers.
The author may collect a small share of sales from the links on this page.


Comments
Join the conversation