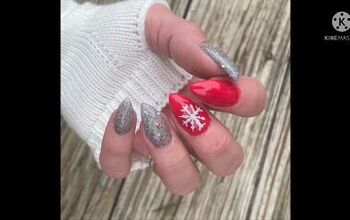
Sparkly Snowflake Nail Polish Art: How to Draw a Snowflake on a Nail

If you are looking for a beautiful and unique nail decoration idea for the holidays, then this glitter snowflake nail polish tutorial is just the thing for you!
Follow the instructions to learn how to draw a freehand snowflake on your nails and you can show off the most glamorous hands at any Christmas party!
Tools and materials:
- Rose-purple nail polish
- Glitter holographic nail polish
- White nail polish
- Nail polish top coat
- Crystal nail decorations

1. Apply base nail color
Apply two coats of rose-purple nail polish to your manicured nails. Make sure this base color is applied very evenly, and let it dry a bit, but not completely.
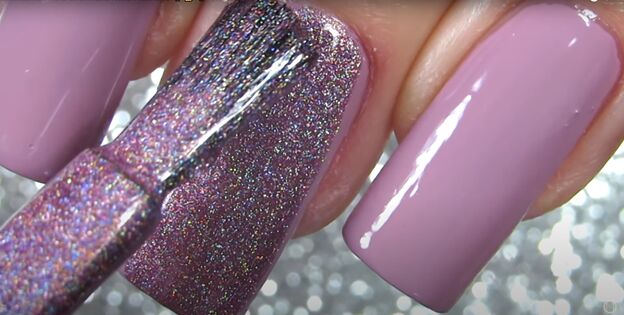
2. Add the holographic polish
Apply one coat of holographic pink-purple glitter nail polish to your middle finger and your pinky finger. You are only going to put the freehand snowflake on your middle finger. but adding the holographic polish to your pinky finger as well helps to balance out your hand.
Let the polish dry a bit.
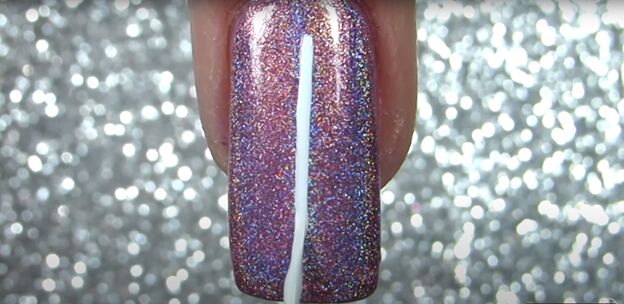
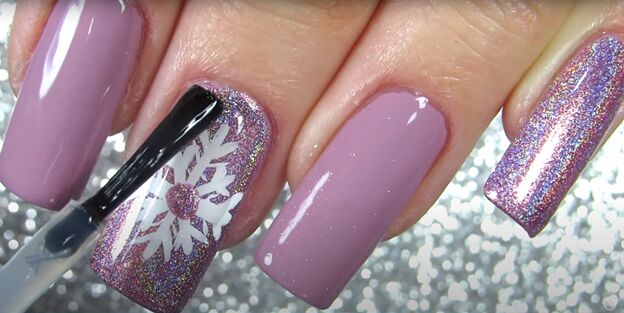
3. How to draw a snowflake on a nail
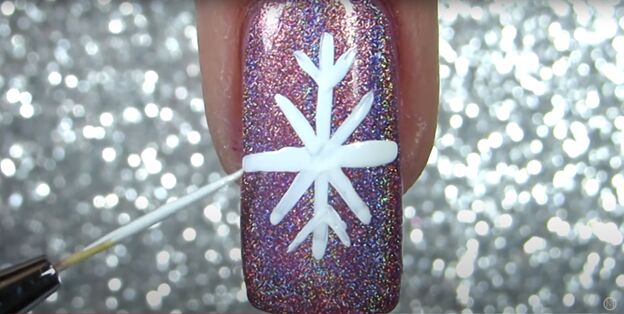
Using white nail polish and your middle finger with the holographic nail polish already on it, paint a thin vertical line down the center of your nail. Start and end the line a bit in from the nail bed and nail tip.
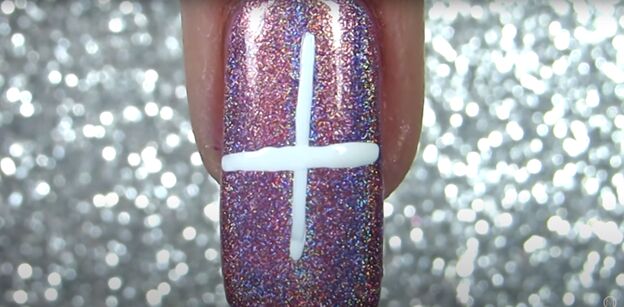
Now paint a horizontal white line across the center of your nail.
Add 2 diagonal lines through the midpoint of the vertical and horizontal lines.
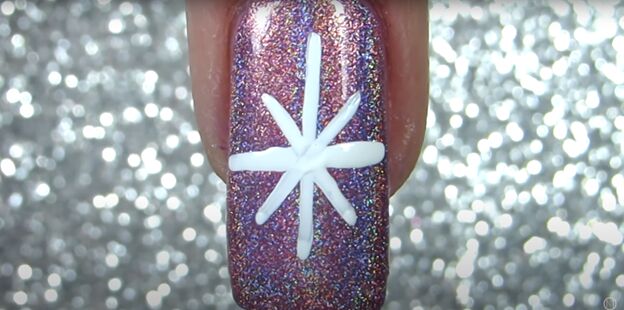
At both the bottom and top of the vertical line, add two small diagonal lines.
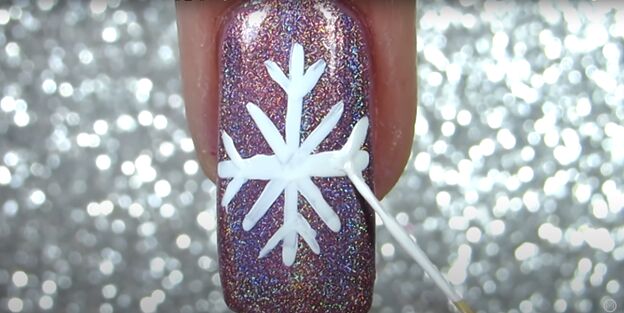
At both ends of the horizontal line, also make two small diagonal lines.
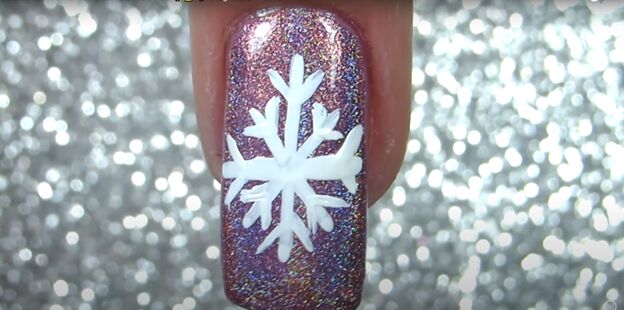
Add two more small diagonal lines at each end of the long diagonal lines to complete the snowflake.
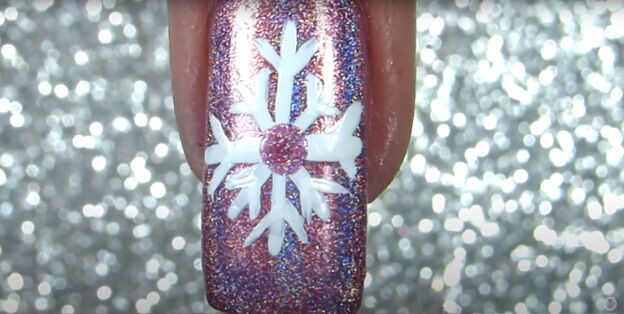
Finish with a dot of holographic nail polish right in the center of the snowflake.
4. Seal with a top coat
Add one coat of clear top coat polish to your snowflake nail and pinky nail.
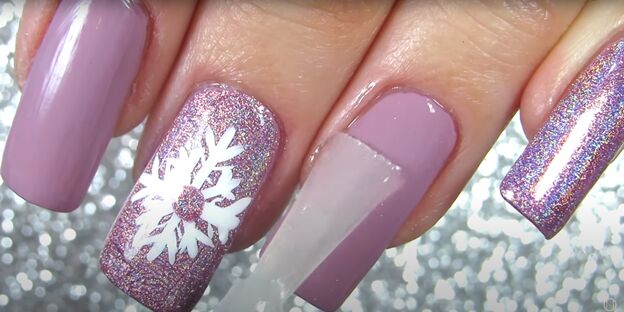
Apply a matte top coat to your plain rose-purple nails.
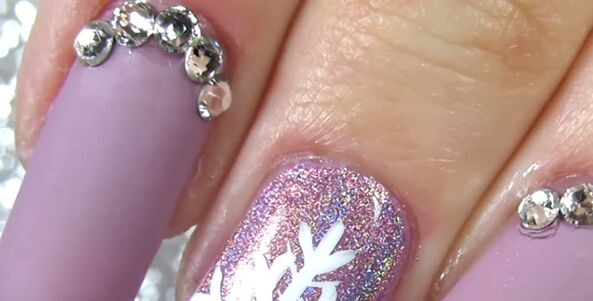
5. Decorate your pointer and ring-finger nails
Now, add crystals to your solid rose-purple nails, using more matte top coat as the glue to hold the crystals in place.
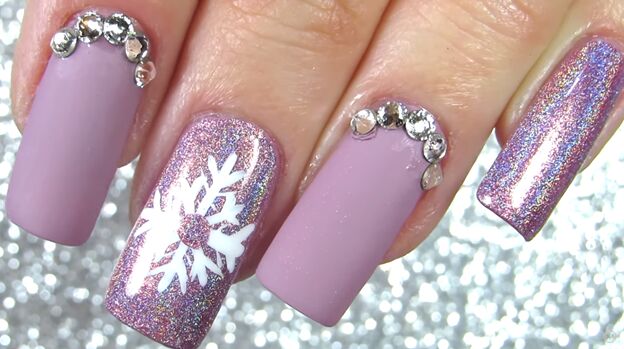
Snowflake nail polish tutorial
You’re all done and now you have the most gorgeous Christmas nails ever! Yes, you just might want to go buy a new Christmas outfit to match these stunning nails. Go for it and let me know how your glitter snowflake nails enhanced your total Christmas party look!
The author may collect a small share of sales from the links on this page.


Comments
Join the conversation