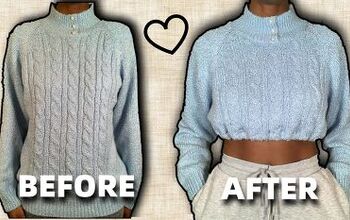
How to Make a DIY Cropped Sweater & Fix an Unflattering Fit

Today, we're covering how to make a super cute DIY cropped sweater. You’ve been gifted or bought or have a sweater, but the fit is kind of off. Here’s how to revamp an old sweater or DIY crop a sweater that is an unflattering length.
In this tutorial, I’ll also show you some cute ways to recycle the sweater as well!
Tools and materials:
- Sweater
- Pen or tailor’s chalk
- Scissors
- Sewing machine
- Ruler
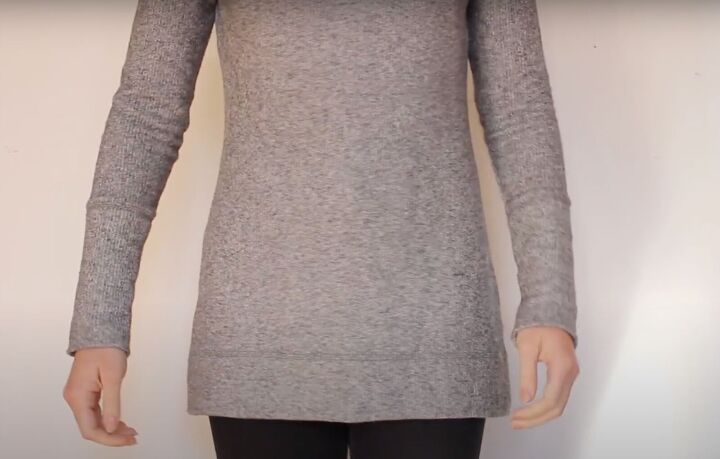
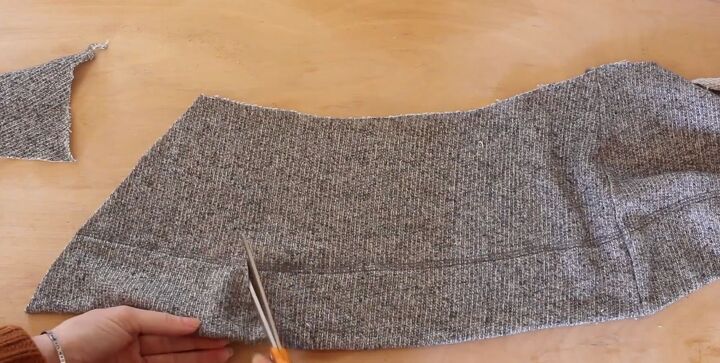
1. Check the length
I cut the excess length to a more flattering length for me.
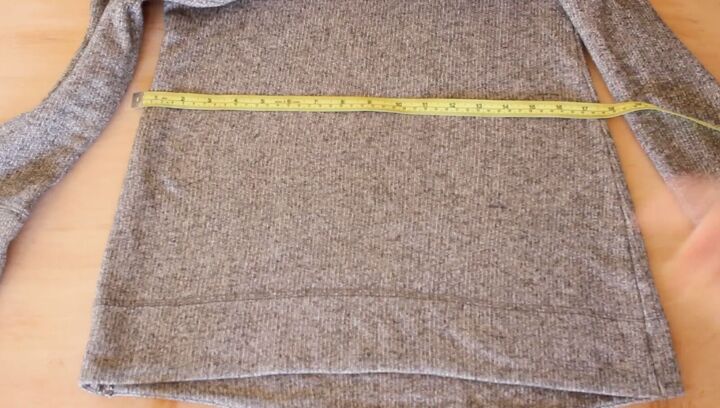
First, measure how short it should be. Mark the area. For sweaters, I like the back to be a bit longer than the front. I didn’t cut across both layers of fabric.
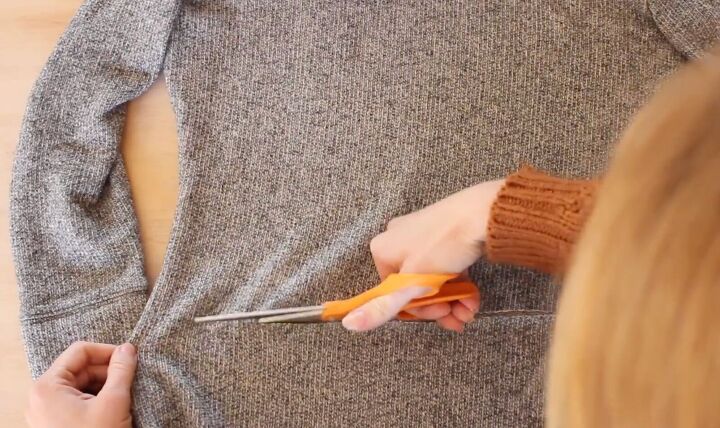
Here I cut the front first, making it shorter.
Then, I cut the back, keeping it a bit longer.

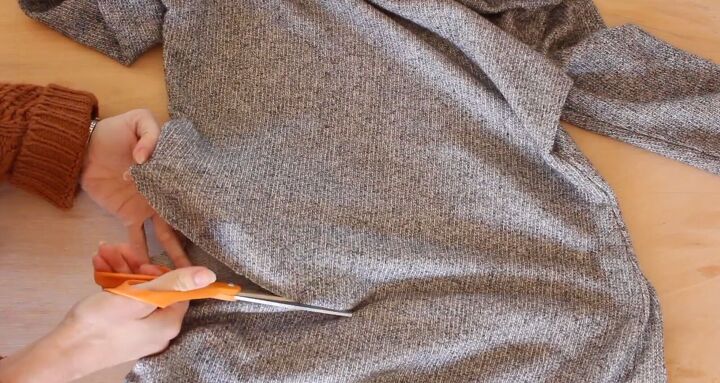
2. Use the extra fabric
To create a soft peplum-like effect, I used the extra fabric to create triangles.
I cut open the loop at the seam.
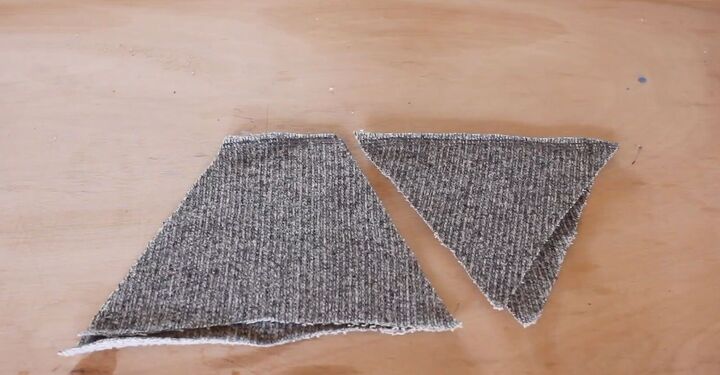
I removed the hem and cut triangles out of the front. For the back, I wanted a larger and skinnier triangle. I placed the fabric on the fabric and cut it out that way.
I ended up with 2 pieces for the sides, 2 pieces for the front, and 1 long one for the back.
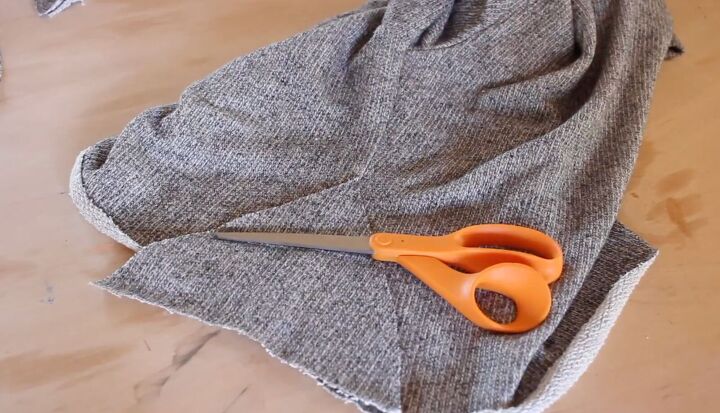
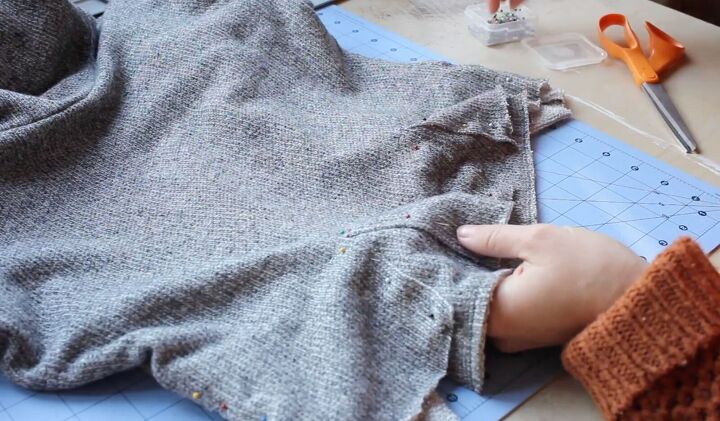
3. Cut the slits
Start with the side seams. Measure how long the side triangles are. Cut the side seams to that length.
For the front slits, measure about 4 inches inward from each one of the sides. Mark these with a pin. This way you know exactly where to cut the slits.
For the back, the slit is super easy. Measure where the center is and cut directly upwards.
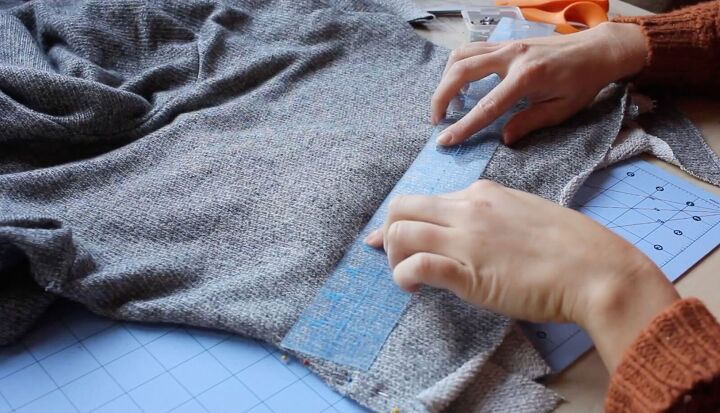
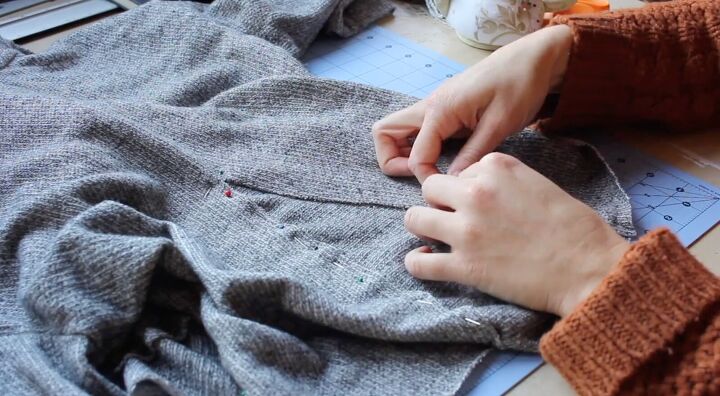
4. Sew the triangles
Pin all the cuts with the triangles. You’ll see the sweater growing wider at the bottom. After everything’s pinned, sew with a single straight stitch.
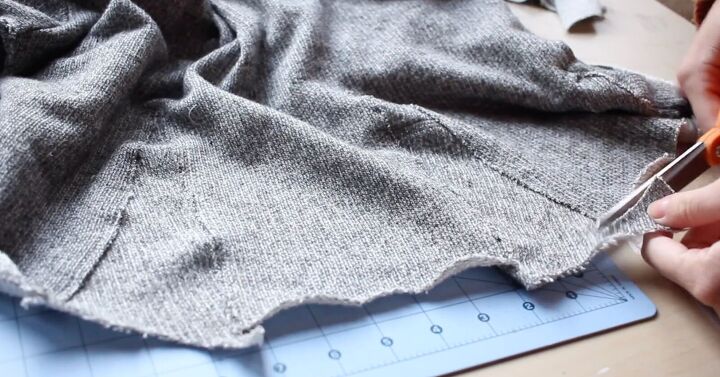
5. Finishing touches
Once everything was sewn, I trimmed the bottom edges and the inner excess seam allowance.

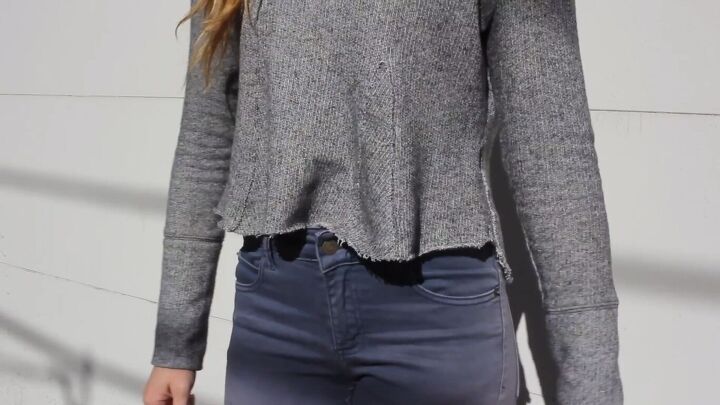
DIY cropped sweater tutorial
Voilà! This is super easy for you to replicate and revamp an old sweater!
Please let me know in the comments how you enjoyed this DIY cropped sweater transformation. Share photos of what you did to fix an unflattering fit!
The author may collect a small share of sales from the links on this page.


Comments
Join the conversation
This is incredible-thanks for the inspiration!
I love that idea! I'm going to have to try it. Thanks!