Revamp Your Old Sweaters With These 2 Awesome Upcycle Ideas

I usually go through my closet every spring and fall, and I get rid of clothing that I haven't worn for a long time. While I’m doing that, I like to think about what I might be able to turn my unwanted clothing into.
Recently, I’ve wanted to try out the cold shoulder trend and here I’m going to be able to do that with a sweater upcycle. I’ll also be showing you a simple way to jazz up or add some extra details to a sweater.
Tools and materials:
- Loose-fitting sweater
- Scissors
- Chalk
- Beads
- Needle and thread
Cold-shoulder sweater
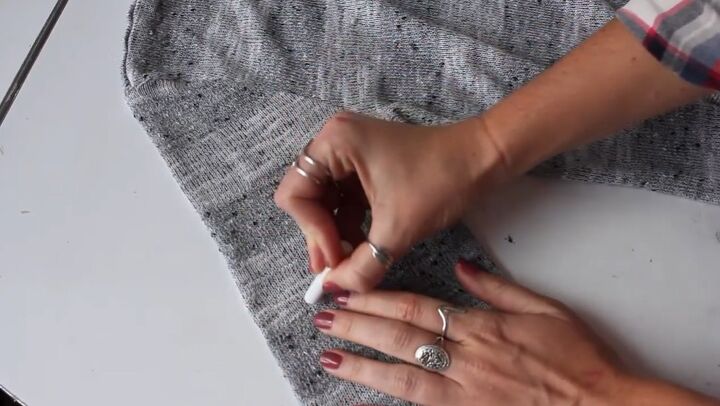
1. Mark the sweater
To create a cold-shoulder sweater, make a little cut-out on the shoulder. I also added a few extra cut-outs on mine. Line it with chalk first to eyeball where you would like to cut.
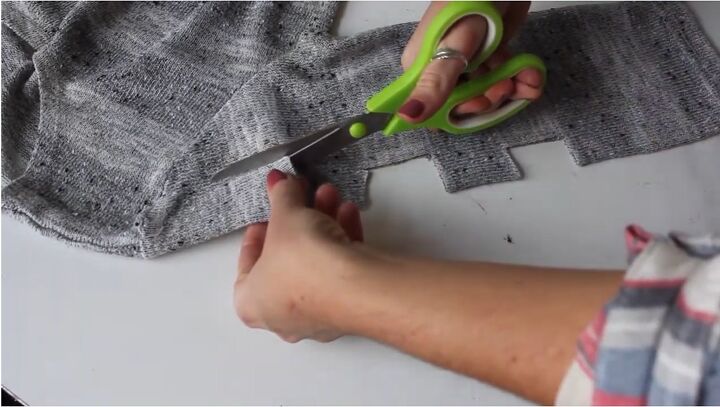
2. Cut the sweater on one arm
Cut into your sweater. Make the cuts a little bit smaller than you think you're going to need because, believe me, it will be larger once you try it on.
Also, keep in mind that the sleeve is folded in half so the cut-outs will be bigger.
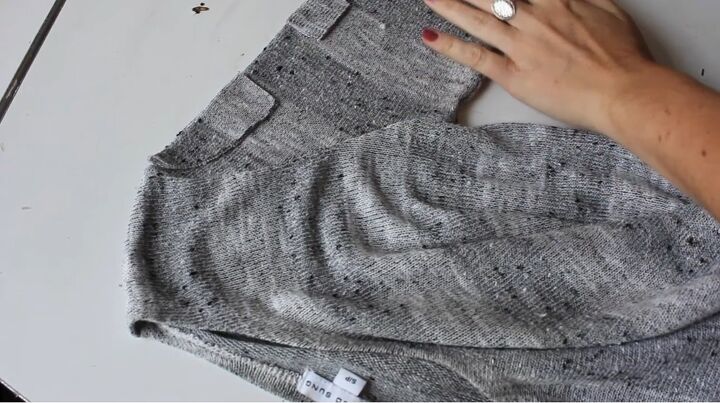
3. Cut the other arm
Use those cut-outs as a template for the other side to make sure that your holes will be the same size on both sides.
Then, try the sweater on to see if you’re happy with how it looks. I ended up going back and cutting out some more because I wanted the holes to be a little bit bigger and go past the shoulder seam.
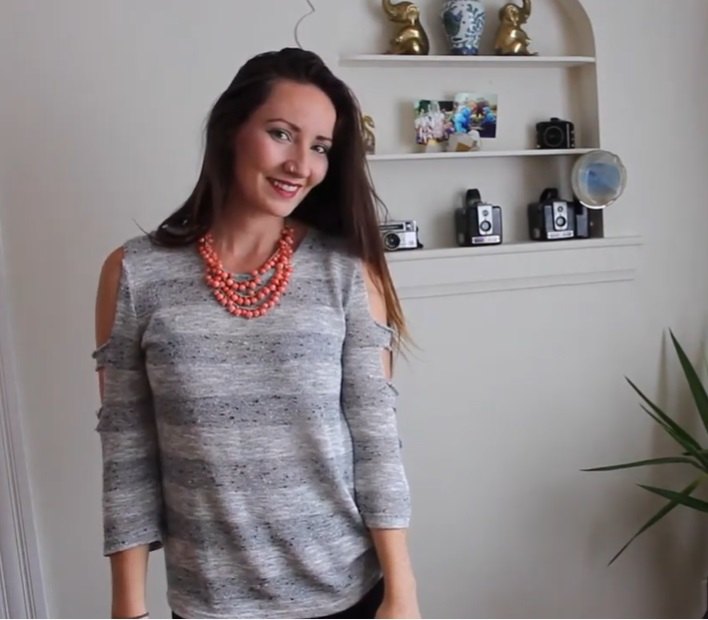
Here is the finished look and I am loving the cold-shoulder style.
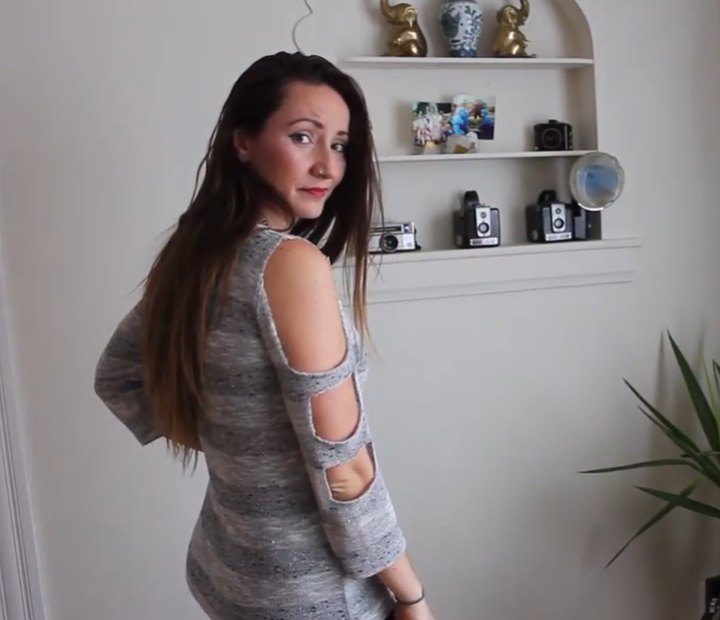
My exposed shoulders and arms give this old sweater a burst of new life. I feel like I have a brand-new piece of clothing that I am so excited to wear!
Beaded sweater
Now I’m going to show you another technique to revamp a plain sweater.
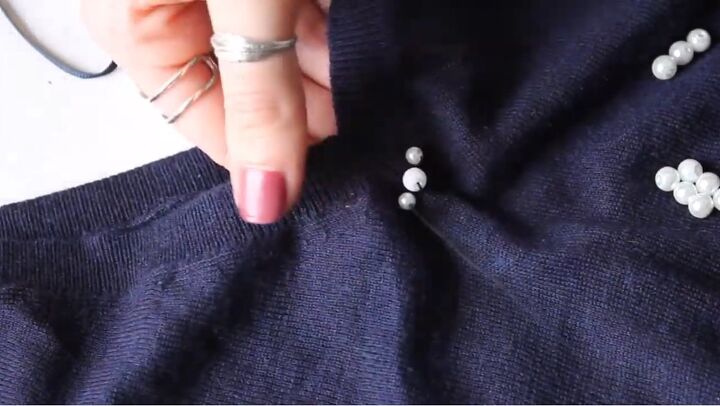
1. Sew on beads
Take a plain sweater and some beads. Then get a needle and thread and sew the beads on with some simple stitches.
My sweater has a deep-V neckline and I'm adding the beads to the back of the deep V. I didn't really have a pattern, you just go in and out, in and out, and stitch whatever you like.
I am going to have all of my beads concentrated in one area but you can use this technique anywhere on a sweater so you could have beads in various different places.
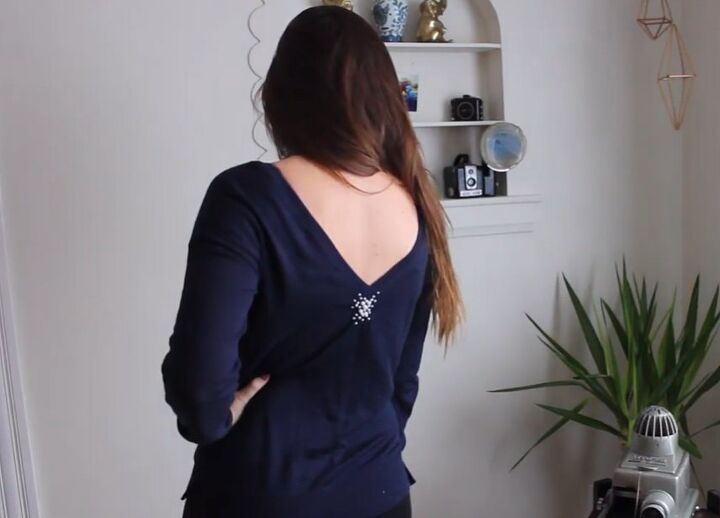
Here is the finished look, a simple smattering of beads at the back of the sweater.
I really like the contrast between the dark navy sweater and the white beads, it reminds me of a snowflake against the night sky and it adds a beautiful touch of interest to the sweater.
Sweater upcycles
That brings us to the end of our DIY.
Go through your wardrobe, figure out what you're not wearing anymore and find yourself a test subject to try out these two DIYs.
Also, remember to think about the box when you're going through your clothes and see what you can kind of repurpose into something that you're actually going to wear and love.
If you enjoyed this DIY tutorial, leave a comment down below!
The author may collect a small share of sales from the links on this page.


Comments
Join the conversation
Loved both ideas ! Think I could use both on some of my not used clothes & repurpose them . Thank you ( I was going to donate them & then search for some pre-loved items to replace them )
The cut outs and the beads are great ideas. The look is very fashionable. The thing I do to dress-up plain sweaters is to sew buttons across the left shoulder or sometimes both. I have bought some sweaters made with such embelishments and it really adds a little "something extra". Thanks for your ideas!