Make a Unique Tie-Dye Shirt- Bonus Design Included

Have a white, boring shirt that you don't like? Instead of letting it lie in your closet and collect dust, you can transform it into a masterpiece! This beautiful tie-dye shirt is like nothing you've seen before because there are also cute embellishments and artwork to make it look extra special. I'll guide you on how to make a painted tie-dye shirt, so what are you waiting for? Grab your materials, and let's get creative!
Tools and materials:
- White t-shirt
- Plastic tub
- Plastic cups
- Dye paint
- Gloves
- Rhinestones
- Iron
- Paper
- Carbon paper
- Tracing pen
- Various sized paintbrushes
- Fabric paint
- Picture of your choice
- Dye salt
- Gold studs
- Rubber bands
Prep time!
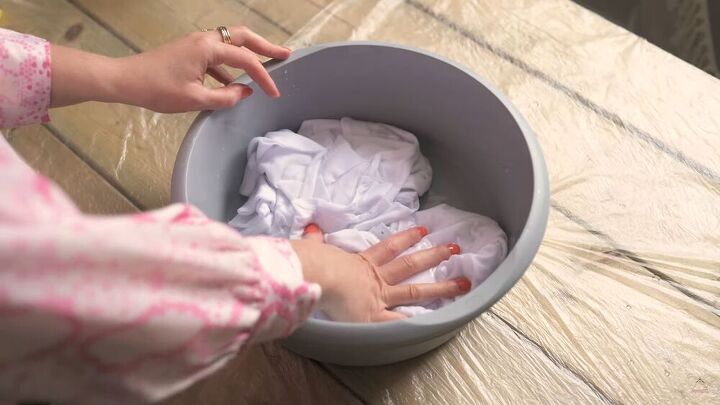
Put your t-shirt in a plastic tub and add water, making sure the entire shirt area is soaked.
Once it's soaked, gently squeeze out the excess water and set it aside.
Now take your preferred tie-dye colored pigments and put each color in a plastic cup. I also added salt so that it helps the pigments penetrate the fabric.
Add the required amount of water to each color and stir, ensuring that the pigments have dissolved.
Make knots and begin the dye process
Scrunch up your t-shirt in small knots and wrap elastic around each knot to hold in place. Place your shirt in your plastic tub and carefully pour your color of choice on it. Let it sit and dry for around 4 hours.
Take off the elastic and wash your t-shirt in 30-degree water. Once your t-shirt has been washed and dried, you can move onto the most exciting part!
Paint and embellish your t-shirt
So, I opted for a natural/animal kind of theme. I printed out a fairly big image of a beetle. I had this black logo on my shirt's front; I wanted to hide it and draw something more interesting and pretty, instead. Cut out around the beetle and trace the beetle on the fabric through a piece of carbon paper. I traced it on top of the big logo, so it will be hidden once I'm done!
Take a paintbrush and black fabric paint and paint the beetle by following the fabric's trace lines.
I added circular patterns to the body and a leaf right underneath the beetle, so it covers the writing on the shirt.
I outlined the beetle with white paint so that it takes shape with some dimension.
Press down
When the painting is out the way and 100% dried, press your artwork down. Place a white piece of paper between the shirt and the iron.
Glue on the stones
Embellishments really go a long way! Again, be creative here. I added some lovely bright red rhinestones to the beetle's body. Since I painted small circles throughout, I glued down the stones in the circles, giving my beetle a lovely depth and sparkle. As you can see, my cat wanted to join in on the fun, too!
Isn't this just so pretty? I literally can't stop staring at it. Everything about it is unique!
Bonus- Second Design
Prep and dye the shirt
I loved this DIY tie-dye project so much; I decided to do another t-shirt—this time with a different design and colors. I also knotted the t-shirt differently. Unlike the first t-shirt, I opted for centered knots. I also knotted the sleeves.
Next, with a large paintbrush, I dabbed on various colors. I started with a pastel yellow down the center and around all the knots, including the knotted sleeves. I then dabbed on some bright pink dye around the white areas on the bottom of the shirt and added purple dye to the shirt's top.
Because there are three colors on this t-shirt, I let it dry in a plastic bag, preventing the colors from mixing. I left it for 4 hours, took out the elastics, and washed it.
Decorate the front part
This white t-shirt's logo is identical to the first. I opted to cover it with the ladybug design, but I took the decorating to a whole other level this time. I traced the design on the shirt with carbon paper.
Next, I used a mix of fabric paints such as gold and different shades of purple. I also covered up the black bits from the logo with some silver touches.
Next, I used gold and silver studs throughout the design and ironed down the embellishments.
The second shirt is done, and it looks like a fashion piece straight out of a fairytale. It's so whimsical and magical! So, there you have it! 2 beautiful tie-dye t-shirt designs. I hope you got an abundance of inspiration from this tutorial and that you now have the confidence to tie-dye like a pro
Enjoyed the project?
Suggested materials:
- White t-shirt
- Plastic tub
- Plastic cups
- Dye paint
- Gloves
- Rhinestones
- Iron
- Paper
- Carbon paper
- Tracing pen
- Paint brushes
- Fabric paint
- Picture
- Dye salt
- Gold studs
- Rubber bands
The author may collect a small share of sales from the links on this page.


Comments
Join the conversation
It would be nice to see the second shirt without your beautiful hair. Lots of posters don’t show their whole project, front and back, like as if modeling it.
What's with the X collusion? Lots of white tees with nothing to have to hide. Huh?