150 Views
DIY Embroidered Crop Pullover With Janome

by
Trish Stitched
(IC: blogger)
$20
5 Hours
Medium
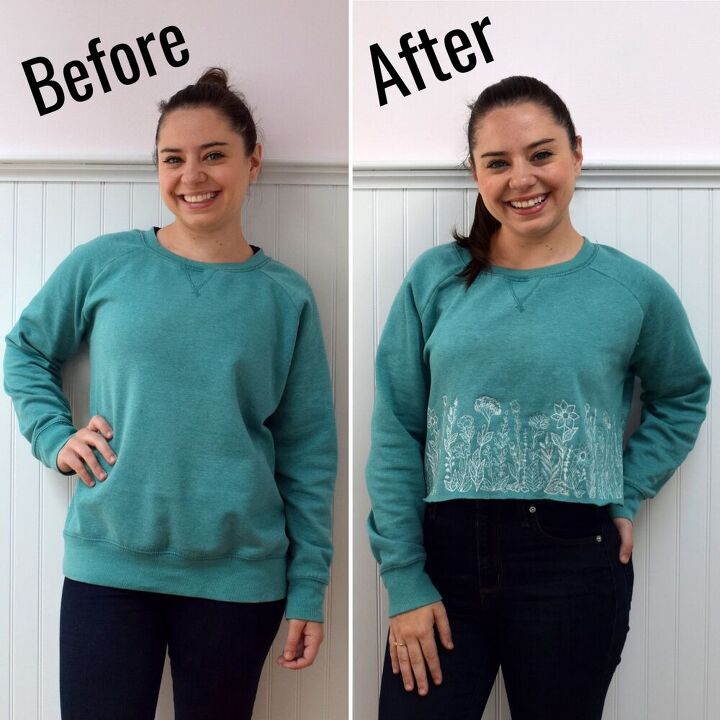
Today I’m sharing a fun tutorial to upcycle an old pullover! One way or another, I wind up with a bunch of them in my wardrobe. This teal one came from my mom! She had worn it over the years and was ready to let it go, but before it ended up in the donation pile I took it to upcycle! This is a really fun refashion, and may take some time at the embroidery machine, but the end result is a really great piece (that I’ve already worn many times!)
Stitched on the most amazing Janome Machine : Horizon Quilt Maker Memory Craft 15000
Watch the full video tutorial here!
Here are the steps!
- Take a pullover sweatshirt and find a good crop length. You can fold the hem under and test length in front of a mirror. Cut length off (I cut 7” off mine)
- Mark center point on new bottom of pullover and line up embroidery hoop. Add stabilizer (I started with tear away but went to cut away mesh, which I preferred for this project) Leave a small space between the start of embroidery and hem of pullover (I left 3/8” blank on hem bottom). Embroider!
- To add continual embroidery, measure the length of the embroidered design – this design measures 9 ½”. From the center point of your original design (4 ¾” is my center point), measure out the total length (9 ½”) to get the center point of your next design. This point will be the new center point in your hoop. If your garment has a flair, you may need to add ½” spacing (¼” on each side). Use your hoop template and the Trace Without Stitching key on Embroidery Machine to check your design.
- I found it helpful to embroider on one side of the original embroidery first, then the other, so that my final embroidery would be done on the center back of the pullover. Continue with this all the way around the pullover.
- If your design leaves a little extra space on the pullover, but not enough for a complete design, use your hoop template as a guide to fit the rest of a design. My design has two colors, so I needed to skip a few floral pieces. On your machine, use the Jump Key (Calculator) to skip patterns you don’t need and jump to the design you want. It is also helpful to have the Cross Key (+ button) on to see where the design is currently stitching.
- Trim away stabilizer, give your pullover a quick press and wear!
Enjoyed the project?
The author may collect a small share of sales from the links on this page.

Want more details about this and other fashion and style ideas? Check out more here!
Published April 20th, 2021 5:53 PM


Comments
Join the conversation