How to Make a Peasant Crop Top Out of an Old Baggy Shirt

In this tutorial, I'll be showing you how to make a peasant crop top out of a thrifted shirt. Follow along with this easy step-by-step tutorial to create a stylish DIY peasant top for yourself. Let's get started.
Tools and materials:
- Oversized top
- Needle
- Thread
- Measuring tape
- Fabric marker
- Ruler
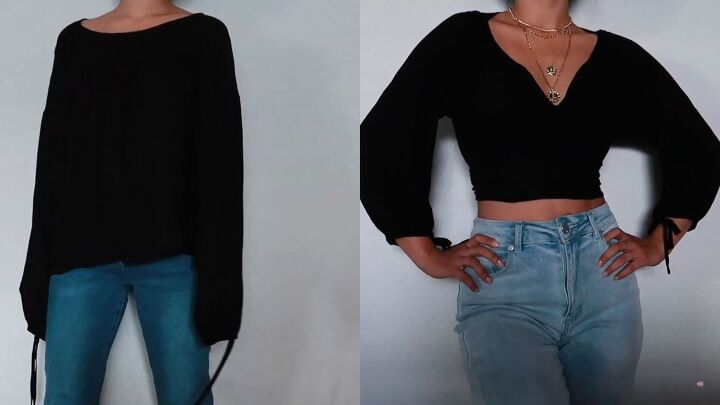
For this thrift flip, I bought a black shirt from a thrift store simply because I like the sleeves. It wasn’t my size or anything like that, but I like a challenge. I liked the sleeves so much that I decided to make a peasant top out of it.
1. Measure and cut
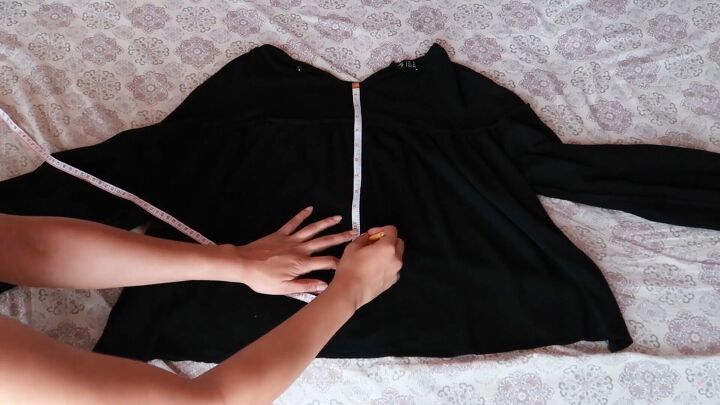
The first thing you want to do is flip the shirt inside out and measure just how long you want the shirt to be. For me, I wanted it to be about 11 inches in length. This gives me more than enough room for seam allowance and adding elastic.
Grabbing the measuring tape, carefully scoot it across the shirt, trying to keep the markings as straight as possible from one another. Continue marking 11 inches (or whatever measurement you go with) down on the inside of your shirt.
Once you’re done, draw a straight line across, making sure everything is nice and even. Proceed to cut along the line.
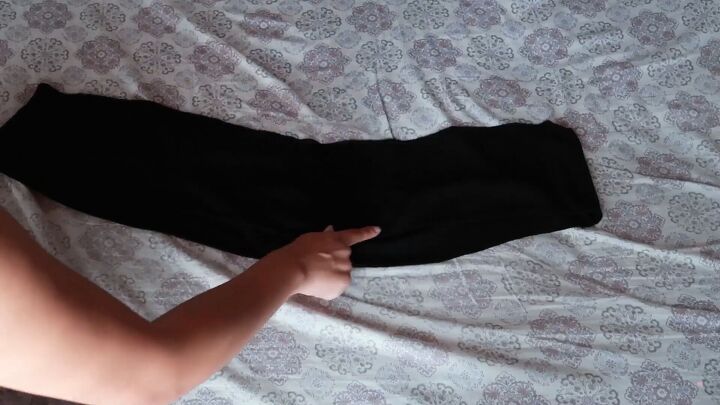
2. Make the waistband
Taking the discarded fabric, overlap the two pieces, making sure that the right side of the fabric is facing outwards. Overlapping your two pieces closes any gaps you see, making it appear like one thick seamless band.
Start by sewing along the center and then seam the top of the band.
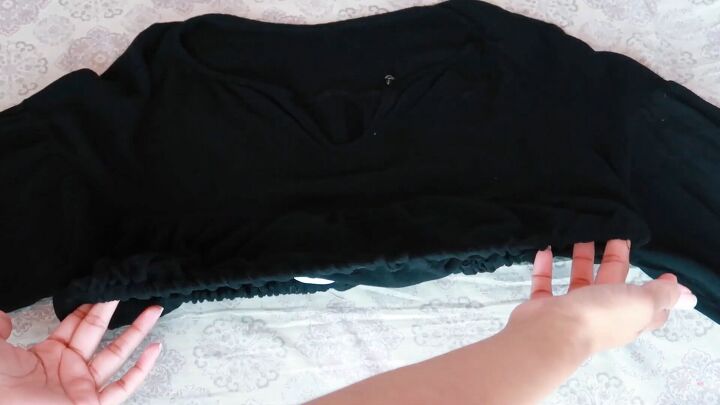
3. Add the elastic
Place the elastic at the end of your shirt, leaving enough room for some fabric at the bottom to cover it. Once you’ve placed your elastic where you want it, pin it in place and continue doing this all along the bottom.
Once the two ends of the elastic meet each other, slit the shirt a little bit to create flaps that can cover the ends of the elastic. Then, proceed to fold the material up and sew above the elastic.
Once done, put the elastic strings together to however loose or tight you want the shirt to be. Then, you just tie a knot at the end and cut off the excess. Now, you can get in and out of your shirt easily and still have it be nice and fitted.
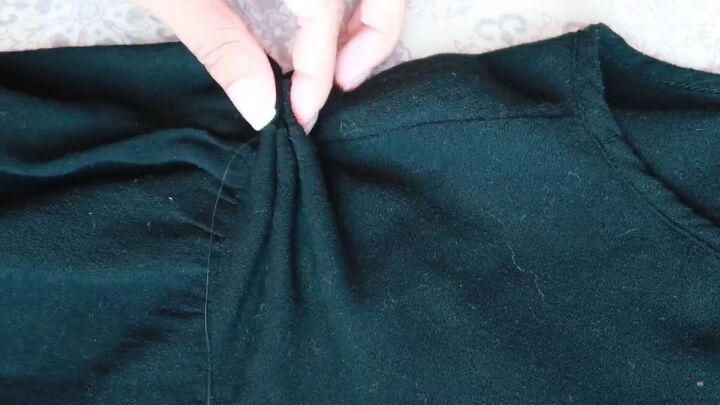
4. Sew the shoulders
Now onto the shoulders. We are going to scrunch the fabric along the seam working with the good side of the fabric. Sewing along the seam keeps the fabric nice and aligned.
Pinch a piece of fabric, then pinch and create another flap, leaving space in the middle. Pull the needle through both flaps, making sure it is aligned well with the seam when it reaches the other side. Then, run the needle through a couple more times to secure the flaps in place.
Create your third flap and needle it through once, and on the second time, you’re going to bring the needle through all three of the flaps and then run it through a couple of times again.
As you will see, it will get a bit harder to have the needle go through the fabric as it thickens, so if that is the case, you can have the new flaps be clumped together with the last two flaps you just did.
Once you’ve reached the end, thread them all together a few times, and then you’re done. Do the same thing to the other shoulder. This will make the deep V of the neckline nice and prominent.
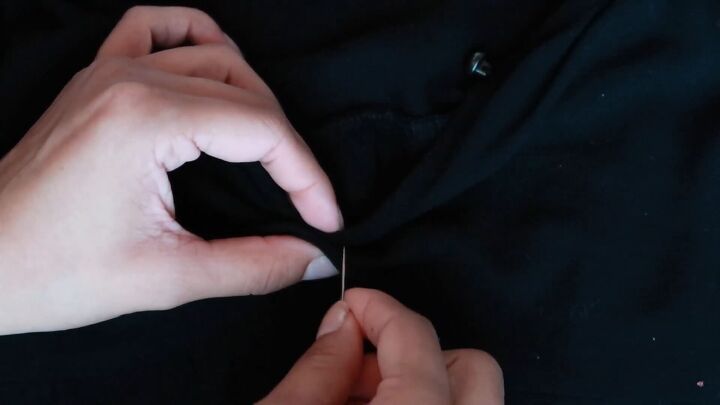
5. Sew the chest
Onto the chest. With this, it is best to take extra precautions and make sure that you’ll be working right in the center of the shirt. Measure the shirt so that you find the midpoint. Then, follow the same steps as you did with the shoulders, working from the outside of the shirt.
All you do is pinch the fabric, leave a gap, pinch the fabric again and sew it together. Pinch the fabric one last time, and make sure you run the needle through a couple of times to secure it.
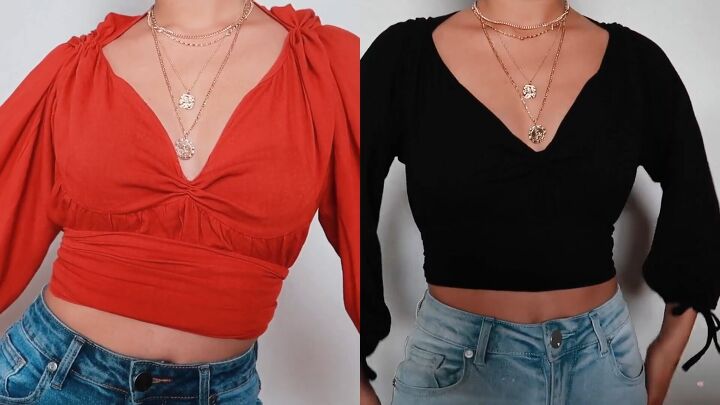
How to make a peasant crop top tutorial
Now we are completely done, and this is how the DIY peasant crop top looks with the final piece tied around the waist. It can be difficult to see the details on the shirt because it’s black, so you can also see an orange one that I made for reference.
I paired the tops with a gold necklace because I love how it looks with the deep v-neckline.
Let me know what you think of this peasant top transformation in the comments below.
The author may collect a small share of sales from the links on this page.


Comments
Join the conversation