Easy No-sew Ruffle T-shirt Upcycle Tutorial

Are you ready for the perfect t-shirt upcycle? Follow along with my step-by-step tutorial to create a no-sew ruffle t-shirt with me!
Tools and materials:
- T-shirt to upcycle
- Fabric scissors
- Ruffle trim
- Fabric glue
- Metallic elastic band
- Straight pins
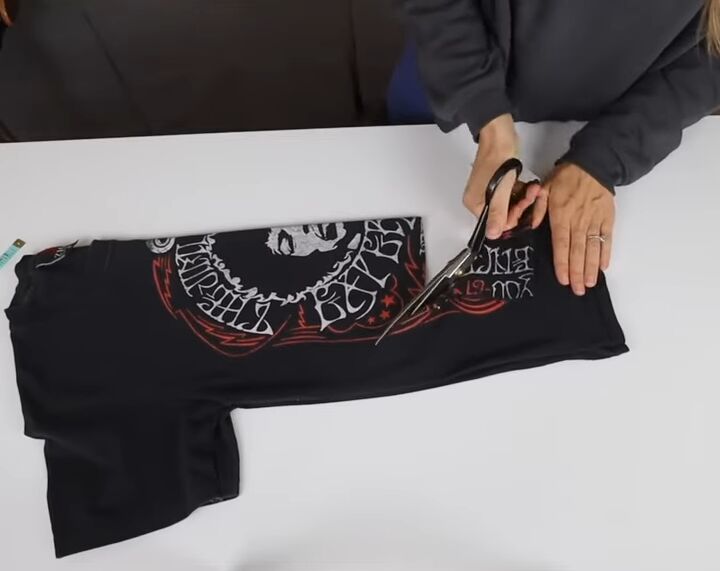
1. Create a bib shape
Fold your t-shirt in half. Then, keeping in mind the length you’re aiming for, start at the bottom to cut a rounded, bib shape with fabric scissors.
Cut off the sleeves from the top, meeting the rounded edge you started from the bottom.
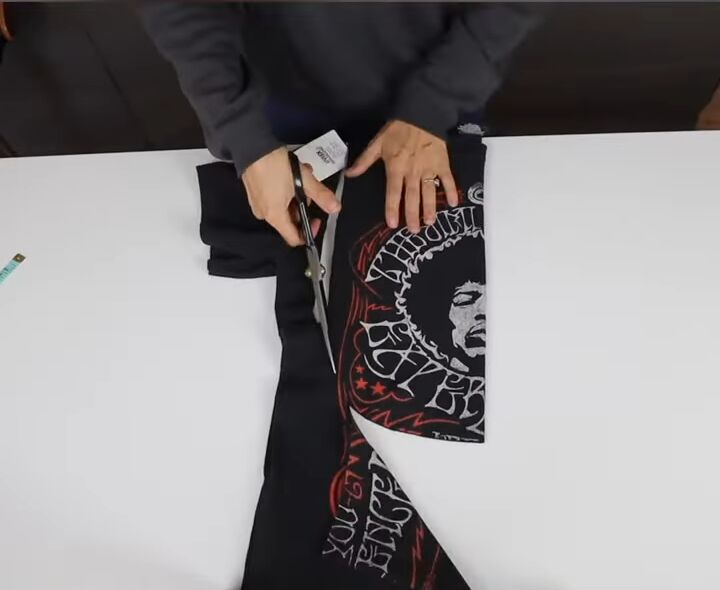
The result is a curved shape that goes around most of the graphic.

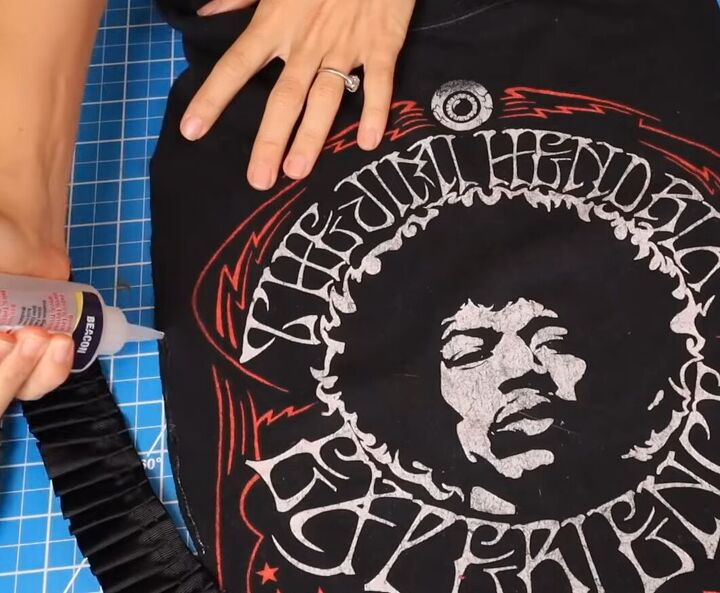
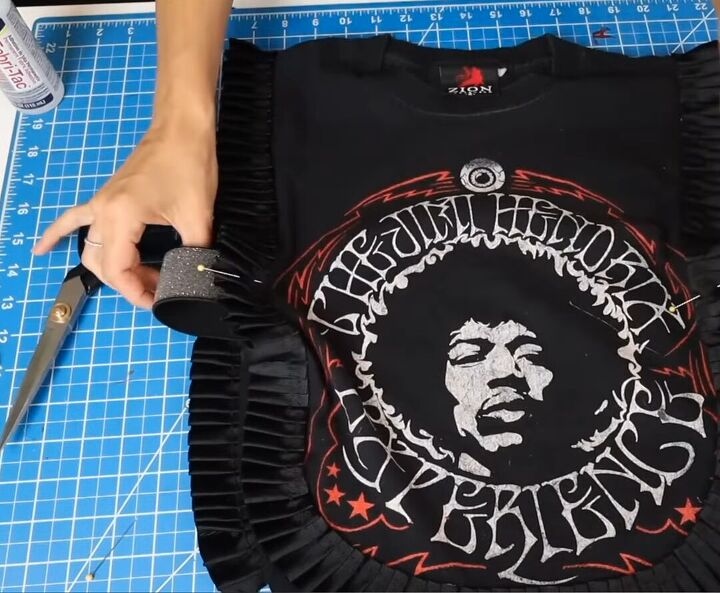
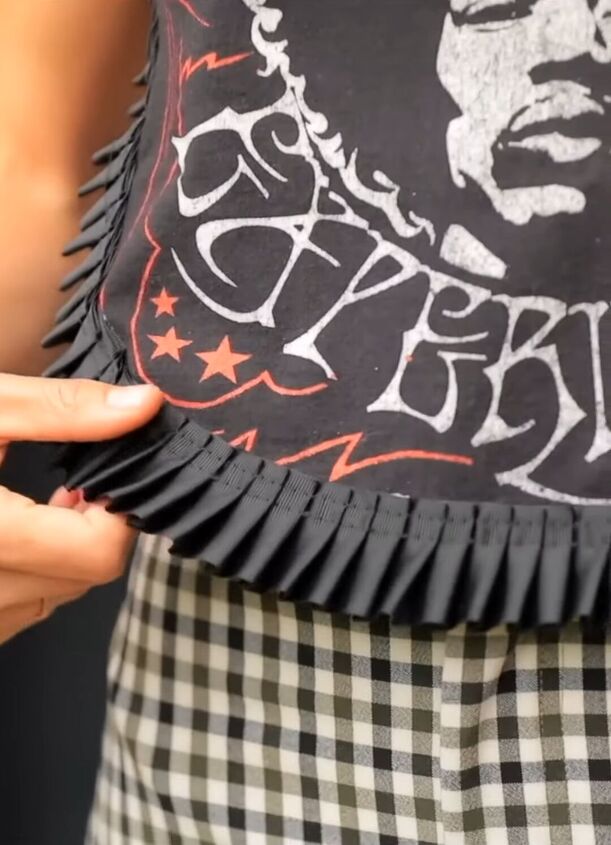
2. Clean up the edges
Instead of sewing, clean up the edges by attaching a ruffle to the edges with fabric glue.
All you need is a super thin line of glue along all of the edges of the shirt for the ruffle to adhere.
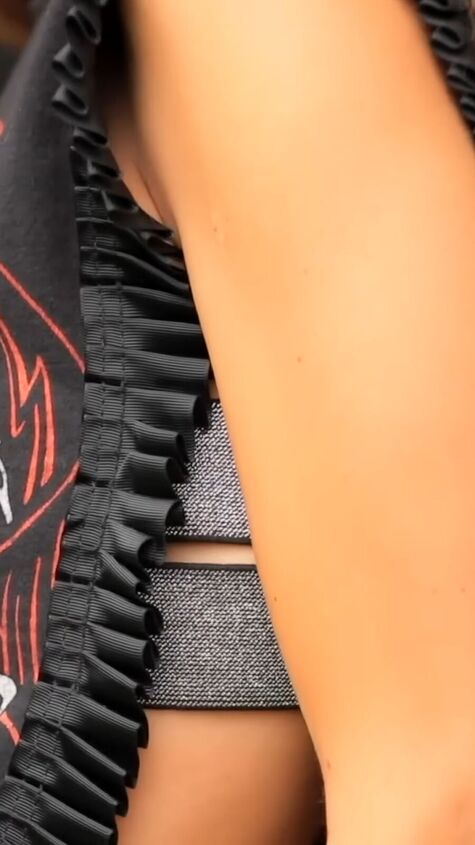
3. Close up the sides
Cut equal pieces of metallic elastic and pin them in place at the sides of the shirt, attaching the front to the back.
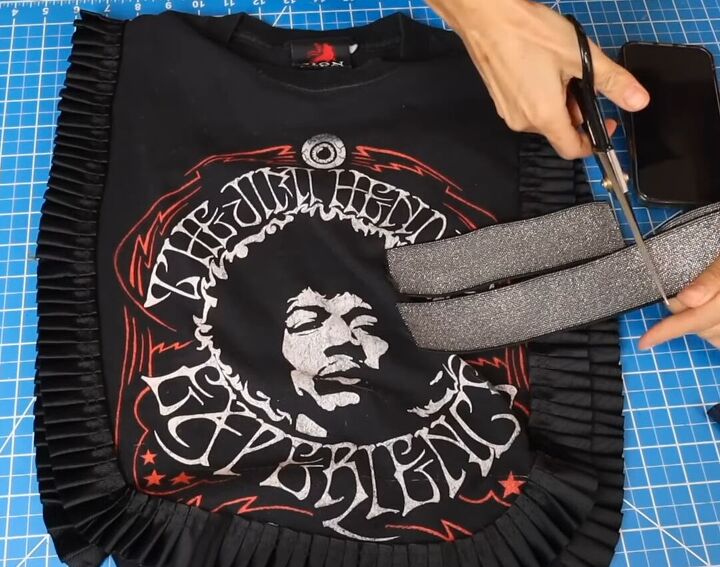
Once the pins are in place, carefully try the shirt on.
Ensure that the bands are the right length to fit your bust and body size and that you only reveal the amount of skin that you want.
Adjust them as needed and then glue the bands in place, or sew them if you prefer. Here’s the final look for this cool t-shirt upcycle:
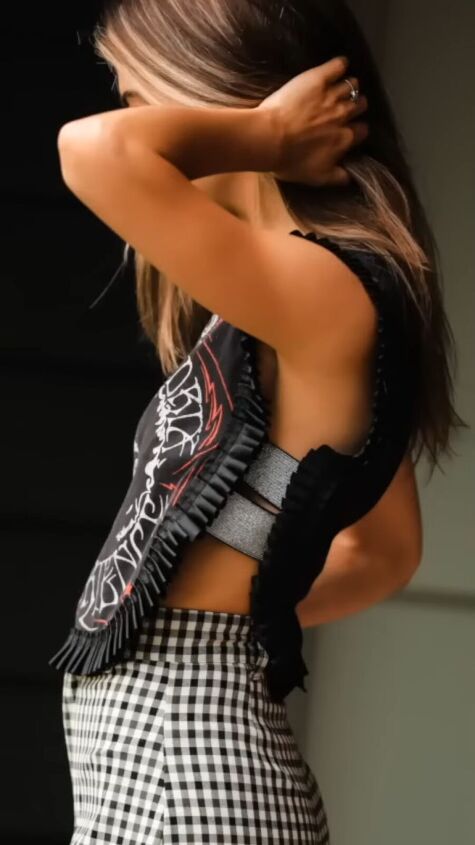

T-shirt upcycle
This no-sew upcycle t-shirt project is so simple and the result is an awesome, one-of-a-kind, edgy top.
If you enjoyed this, leave me a comment!
Then check out how to upcycle old jackets.
The author may collect a small share of sales from the links on this page.


Comments
Join the conversation