How to Sew a Floaty Chiffon Top - Perfect For Hot Weather

Today, we’re going to learn how to make a layered chiffon top using two squares of fabric. This sleeveless chiffon top with a double layer of floaty fabric and a floral design is perfect for summer.
In this step-by-step tutorial, I’ll show you how to measure the chiffon top to your size, as well as how to sew it together. Let’s dive in.
Tools and materials:
- Chiffon fabric
- Scissors
- Pins
- Sewing machine
- Measuring tape
- Calculator
- Paper
- Pencil
- Long hook

1. Measure the fabric
Start with two squares of chiffon fabric measuring 83cm x 83cm (32.68 inches x 32.68 inches). Fold, pin, and sew rolled hems all around both squares.
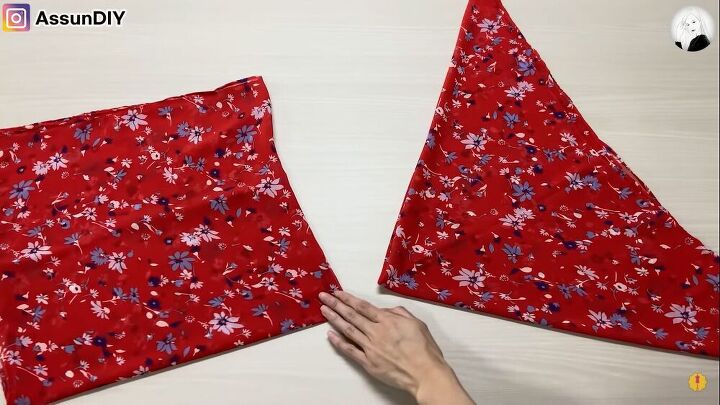
2. Fold the fabric into quarters
Fold the pieces of fabric into quarters - one into a square and the other into a triangle.
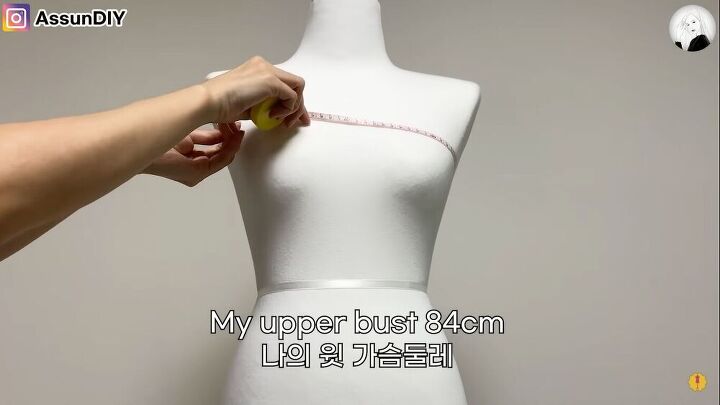
3. Measure your upper bust
Take your upper bust measurement. Mine is 84cm (33 inches).
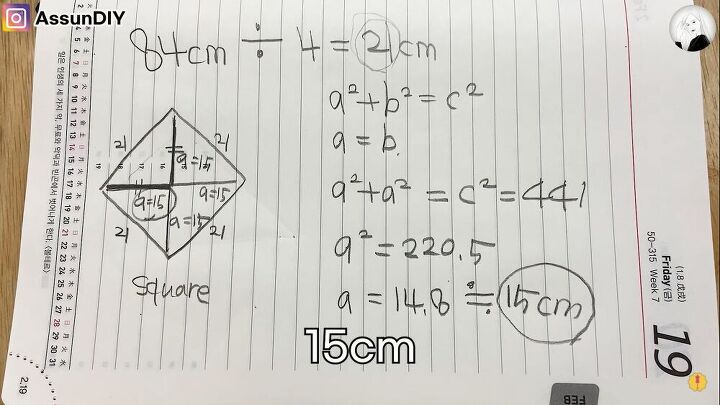
4. Do some math!
The next step requires some math, specifically some Pythagorean theorem! Follow the video from 1:45 to 2:50 to see how I work this out step by step. These equations help me understand where to mark and cut my fabric.
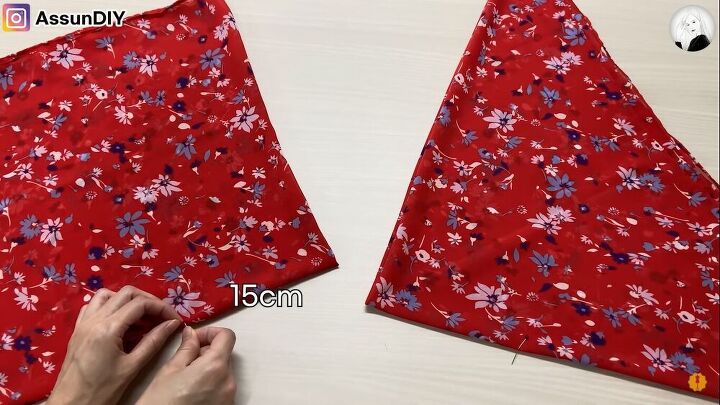
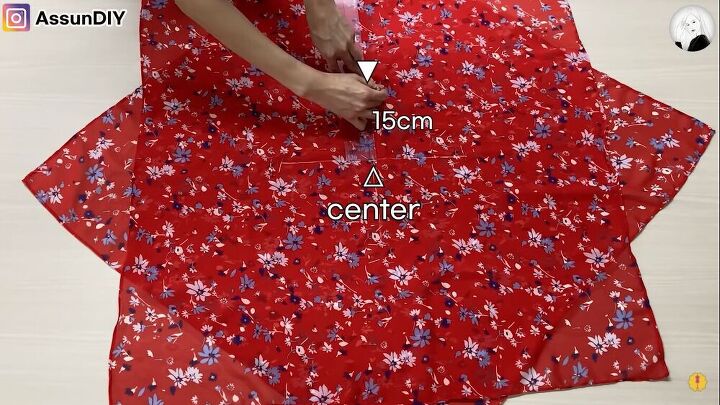
5. Pin your fabric
I came out with 15cm (5.9 inches), so I pinned my fabric 15cm (5.9 inches) in from the folded corner on all sides, and marked the center with a pin as well.
Unfolded, the pins should look something like this.
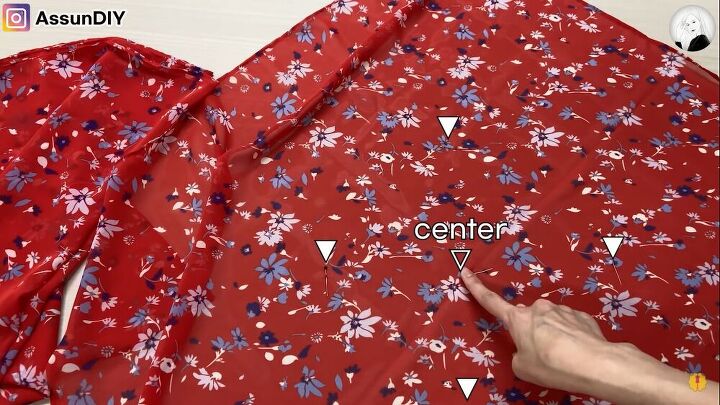
6. Draw a cross on your fabric
Lay the fabric pieces on top of each other, one as a square and the other as a diamond shape, making sure to align the center. The diamond should be on top.
Then, draw lines to the four 15cm (5.9-inch) marks out from the middle. The lines should form a cross with the ends pointing to the corners of the top piece of fabric.
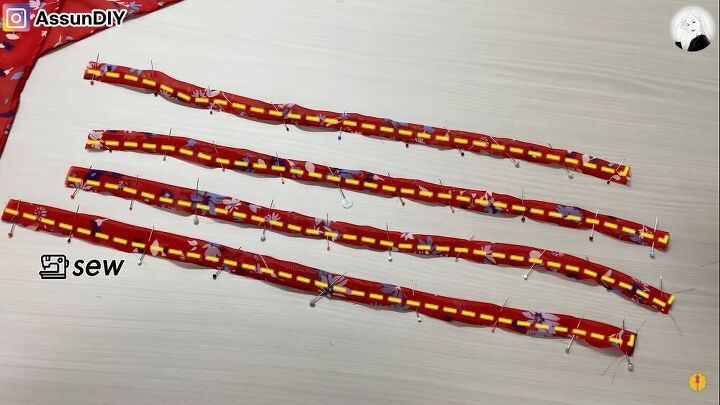
7. Make the straps
To create the straps, cut out four rectangles from the remaining fabric measuring 40cm x 4cm (15.75 inches x 1.57 inches). Fold the strips lengthways, right sides facing. Pin and sew down.
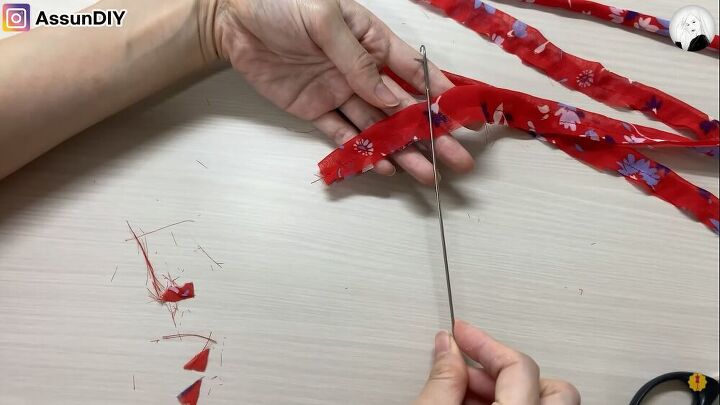
Using a long hook, turn the straps right side out.

Add topstitching.
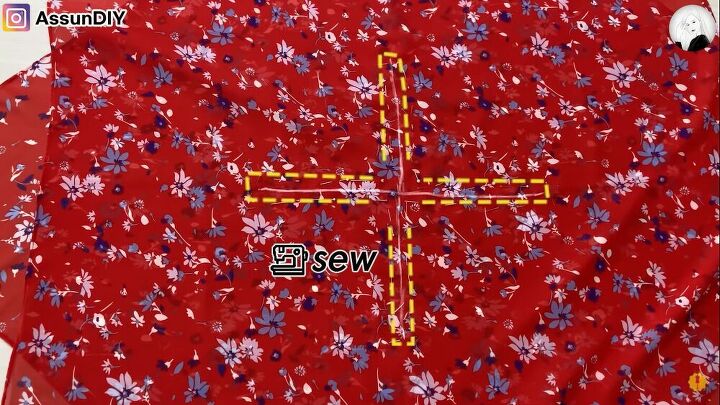
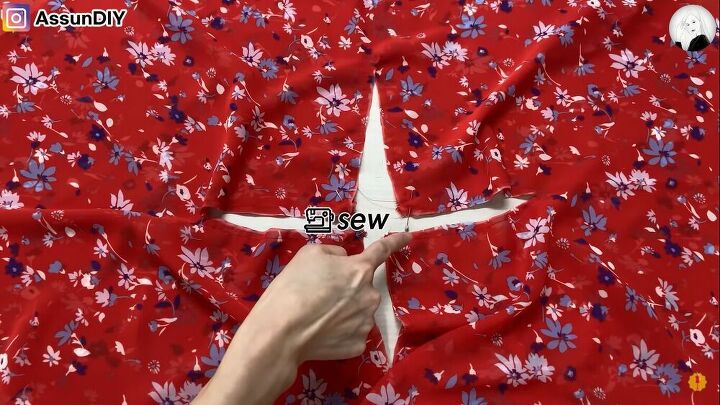
8. Sew around the cross
Next, sew around the cross marked on the fabric squares, but not exactly to the middle.
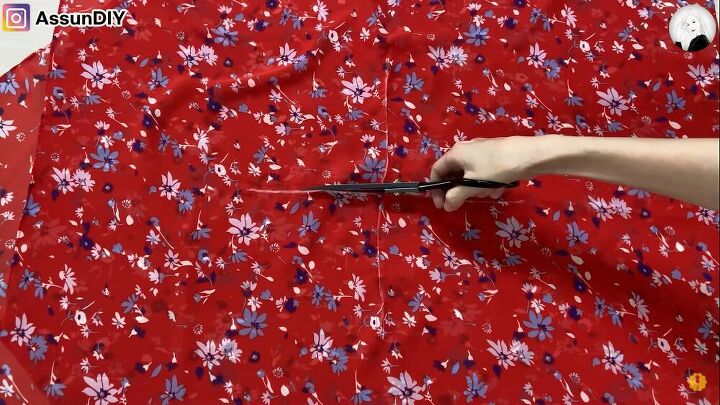
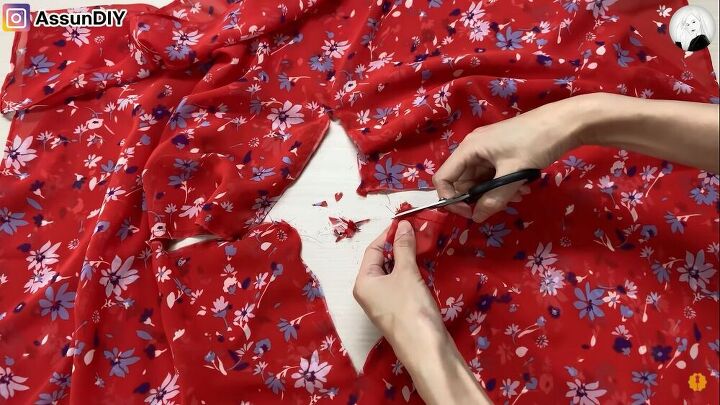
9. Cut along the lines
Cut along the lines on the cross, creating a cross-shaped hole in the middle of the fabric.
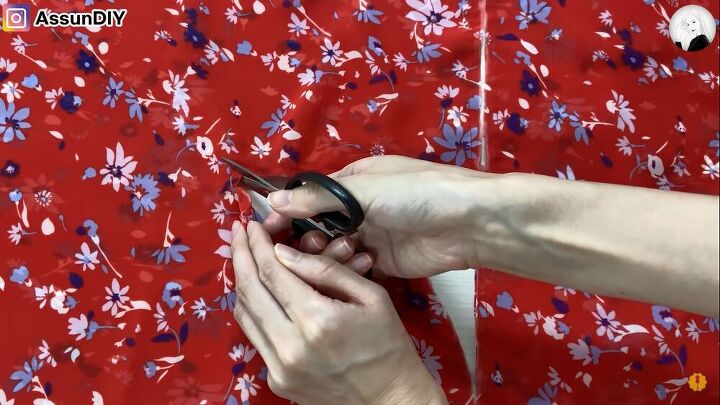
10. Cut snips
Cut diagonal snips into each sewn corner at the end of the cross.
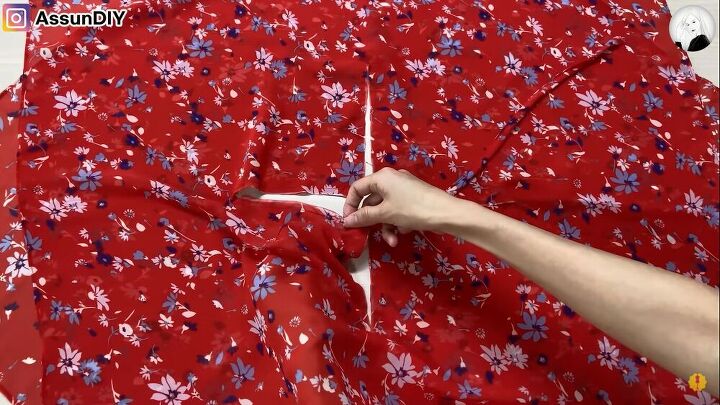
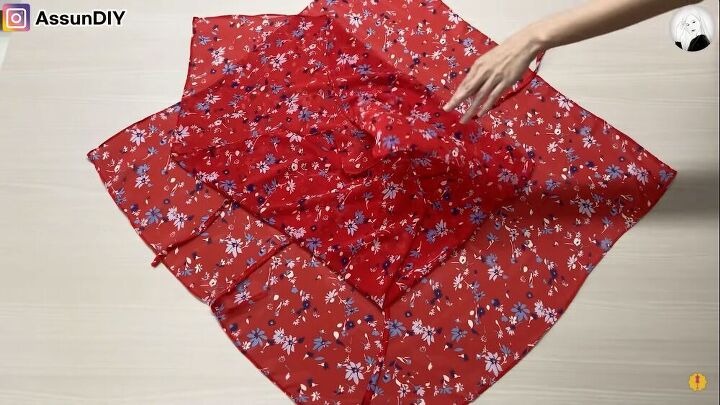
11. Attach the straps
Insert a strap into the gap on the corner between the two fabric pieces. Feed it through all the way. Pin at the corner. Repeat for all straps and corners.
Sew straight across the point of each corner to secure the straps in place.
Cut off the excess fabric at the ends.
12. Turn your top right sides out
Now for the magical part when the chiffon top reveals itself! Fold the top layer inwards.
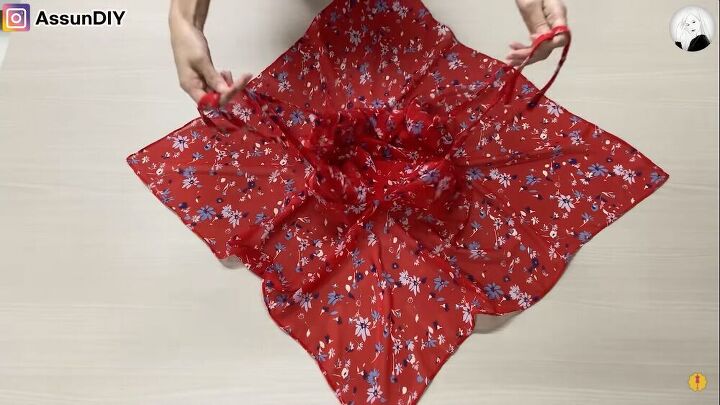
Grab two straps in each hand and lift!
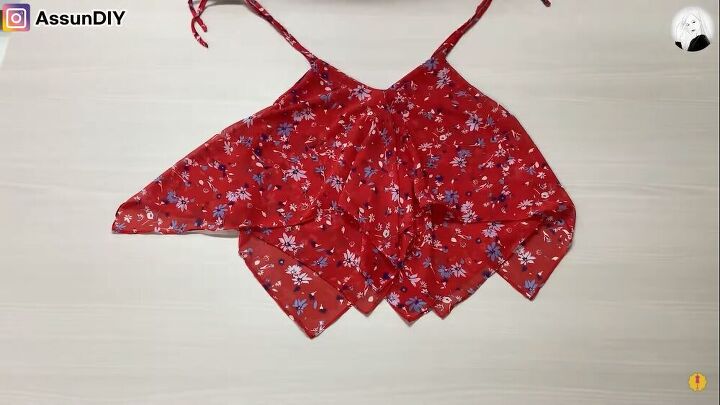
Your top should look like this!
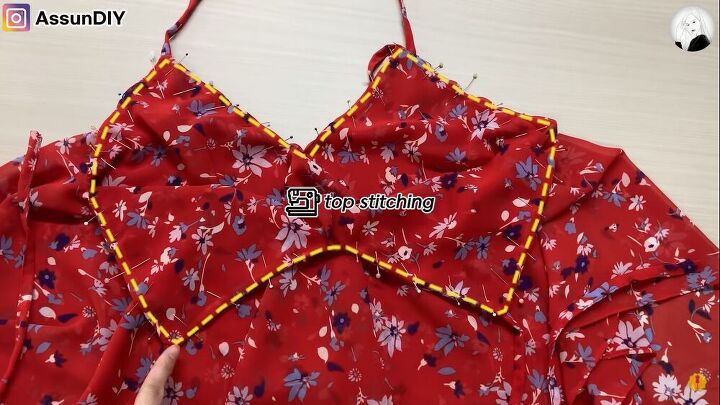
13. Finishing touches
Add a layer of topstitching along the neckline.
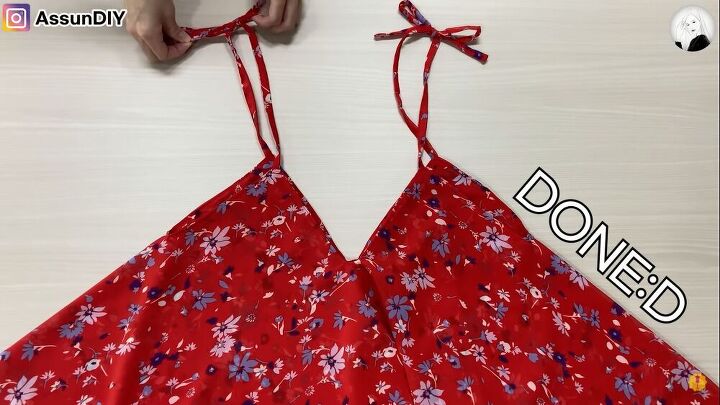
Tie the sleeves to finish.
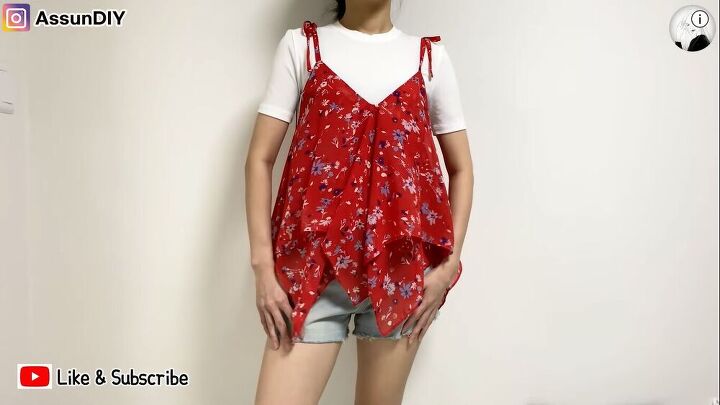
How to make floaty chiffon top tutorial
This is my finished chiffon top! The fabric is very sheer and the top is low cut, so I feel more comfortable wearing this over a t-shirt. You could also wear it over a bathing suit or a bandeau tube top.
Let me know what you think of this chiffon top sewing tutorial and the finished product in the comments.
The author may collect a small share of sales from the links on this page.


Comments
Join the conversation
What a fab idea 😃. Am just thinking this could be made with upcycled silk scarves - appreciating that the straps would need to be gleened from other fabric. Love it ❤️
I was thinking about cutting a scarf and make it like the old style poncho to go over a black dress thank you for giving me the courage to go forth😉