How to DIY a Super Easy Head Wrap

In this tutorial, I’m going to show you how to make a DIY head wrap. This head wrap has a unique design, and you might not have seen anything like it before. This DIY is very easy and perfect for beginners. Let’s get started!
Tools and materials:
- Tape measure
- Fabric
- Scissors
- Sewing machine
- Iron
- Elastic
- Pen
- Safety pin
- Pins
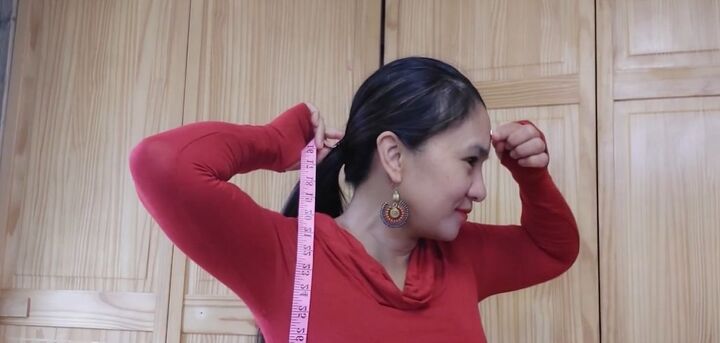
1. Take head measurement
To determine the width of your fabric, measure your head as shown. Take the tape measure from the center of your forehead to just above the bottom of your head.
For me, this measured 14 inches (35.6cm).
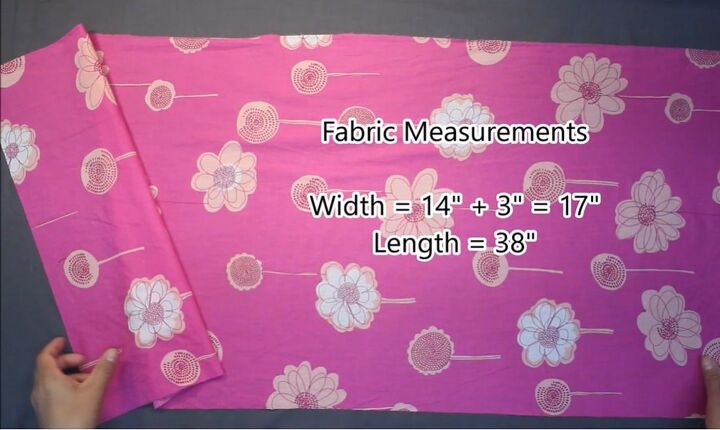
2. Cut the fabric
Now it’s time to cut the fabric. The width is your head measurement plus 3 inches (7.6cm), and the length is 38 inches (96.5cm).
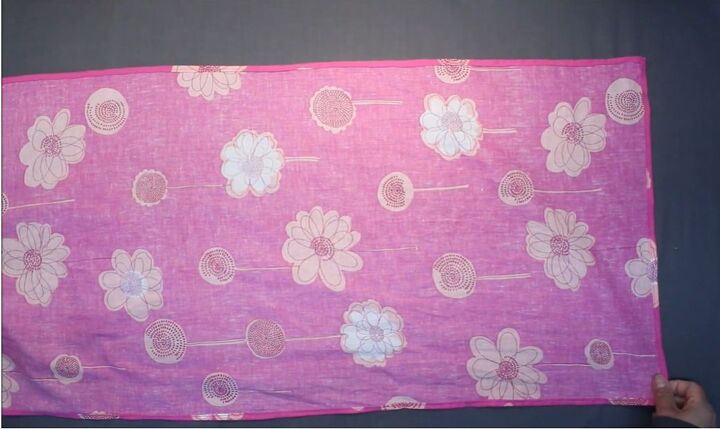
3. Hem the fabric
Place the fabric right side down. Then fold the fabric in by 0.25 inches (0.6cm) twice all the way around. Pin it all in place and sew the fabric down to hem it.
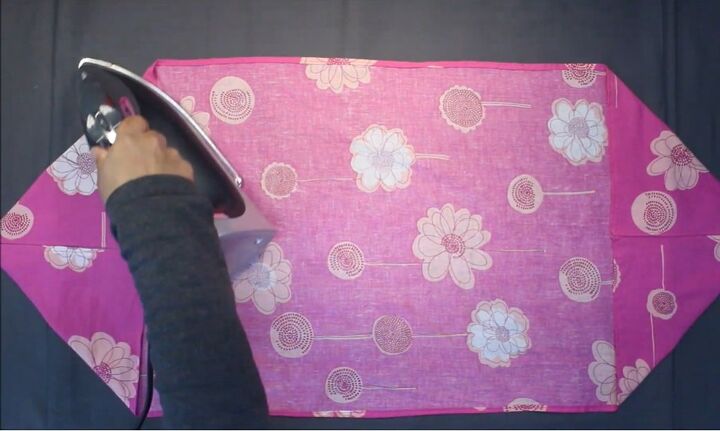
4. Fold and iron the corners
Fold the corners in on either side as shown and iron down.
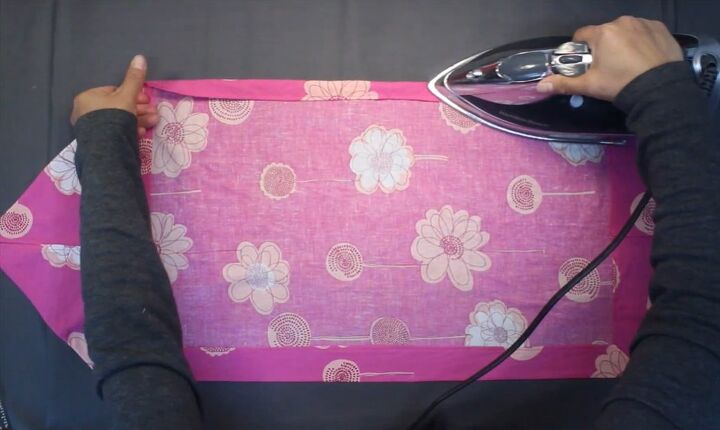
5. Fold and iron the sides
Fold the bottom side up by 1.5 inches (3.8cm) and iron down. Then fold the topside down by 1 inch (2.5cm) and iron down.
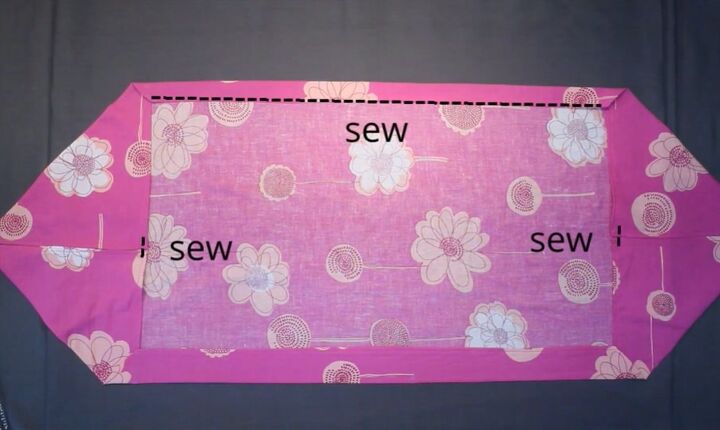
6. Sew
Sew the parts of the head wrap shown.
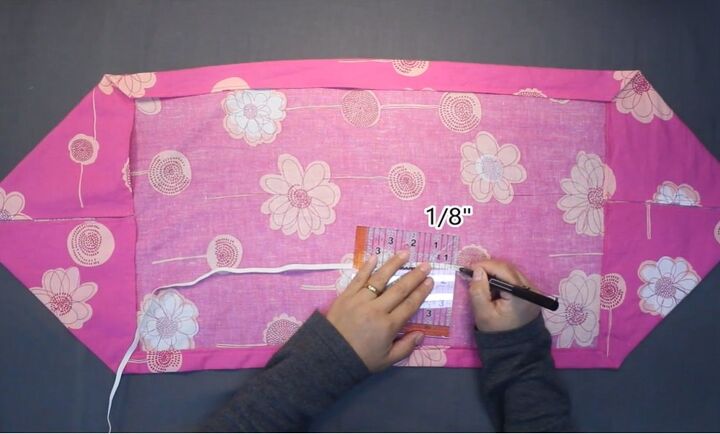
7. Mark the elastic
Take a piece of elastic and mark it ⅛ inch (0.3cm) from one of the ends and then at 3.5 inches (8.9cm) from there.
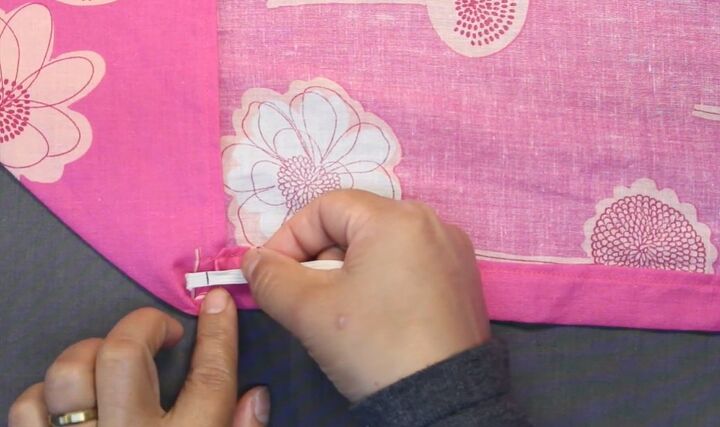
8. Sew the elastic
Sew the ⅛ inch (0.3cm) mark on the elastic just below the bottom fold on the fabric as shown.
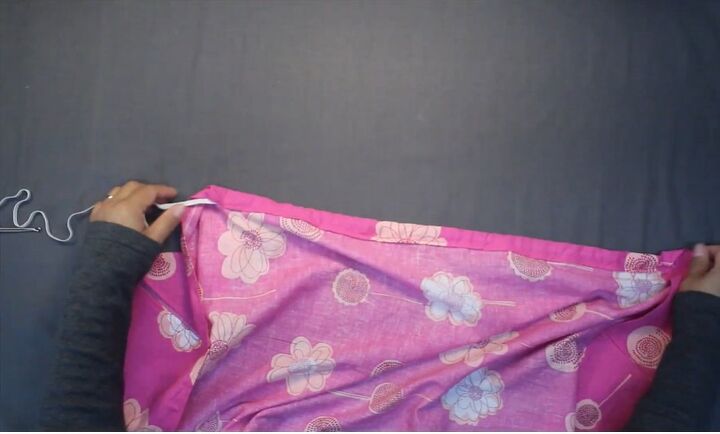
9. Pull the elastic through
Clip a safety pin to the other side of the elastic and pull it all through.
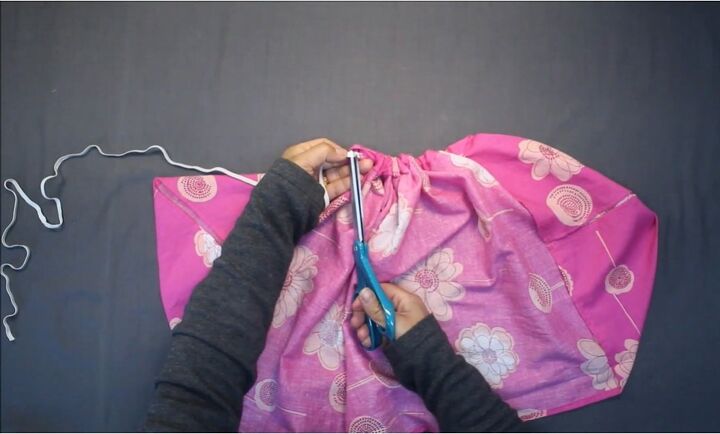
10. Sew and cut the elastic
Bunch the fabric along the elastic until you get to the 3.5 inches (8.9cm) mark. Then sew on that mark and cut off the excess elastic.
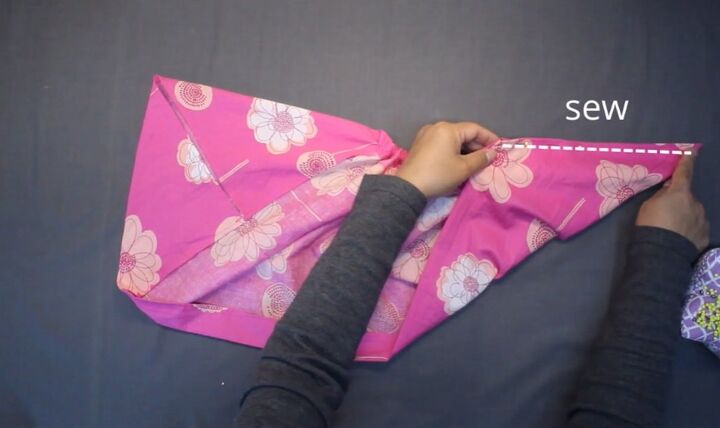
11. Fold and sew the corners
Fold the two corners on one side. Pin them together and sew along the top as shown.
Repeat the same on the other side.
DIY head wrap
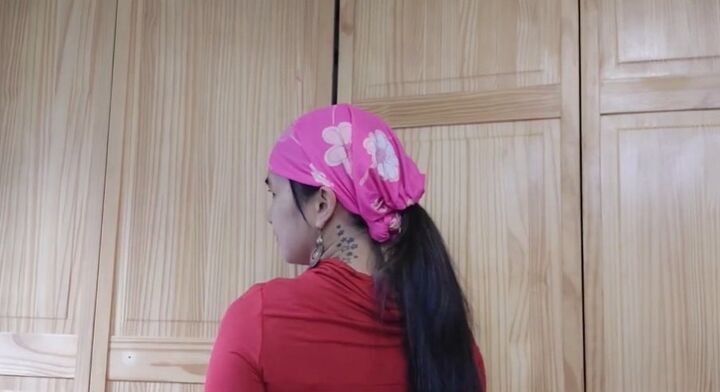
Here is the finished DIY head wrap!
It is kind of a mix between a beanie hat and a scarf, and I love the design. The wrap goes over my head, and then I can pull my ponytail out through the bag.
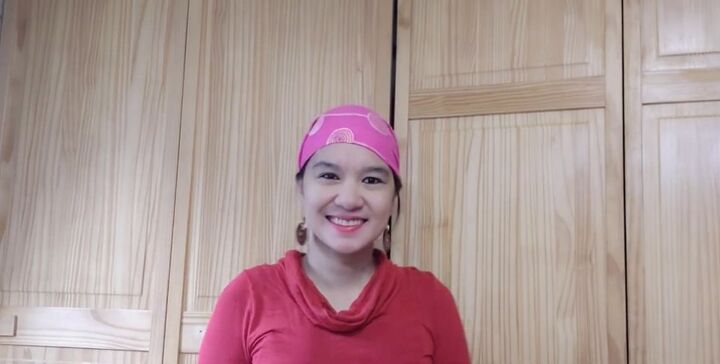
This is a really cute hair accessory, and I know I will get a lot of use out of it.
What did you think of this tutorial? Let me know in the comments down below.
The author may collect a small share of sales from the links on this page.


Comments
Join the conversation