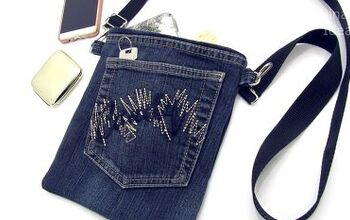
How to DIY a Super Easy Jean Bag

Everyone has old jeans lying around that are begging to be upcycled. Keep reading, because this cute Boho-style denim crossbody bag is made from old jeans.
In this tutorial, I’ll show you how to make a small DIY jean bag, complete with a handle and pocket. This denim purse is durable and will maintain its shape.
It’s perfect for makeup, school supplies, glasses, your cell phone and more.
Best of all, if you don’t like sewing, you can make the whole crossbody denim bag with glue!
Tools and materials:
- Old jeans
- Scissors
- Glue gun or super glue
- Velcro dot closure
- Clip-on strap
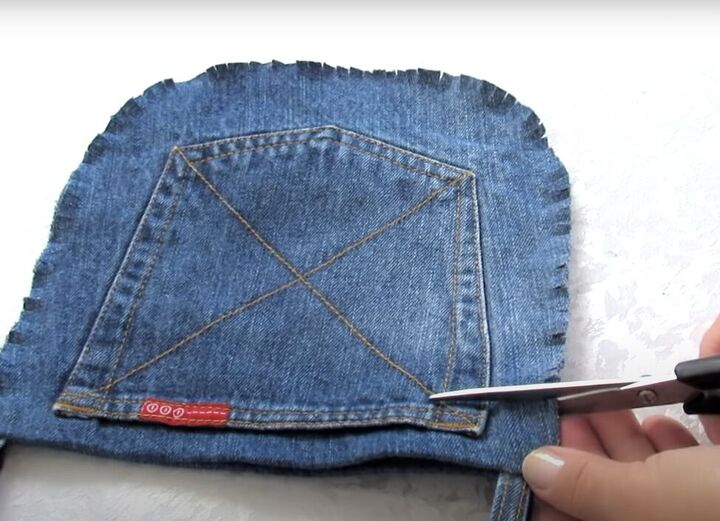
1. Cut your jeans
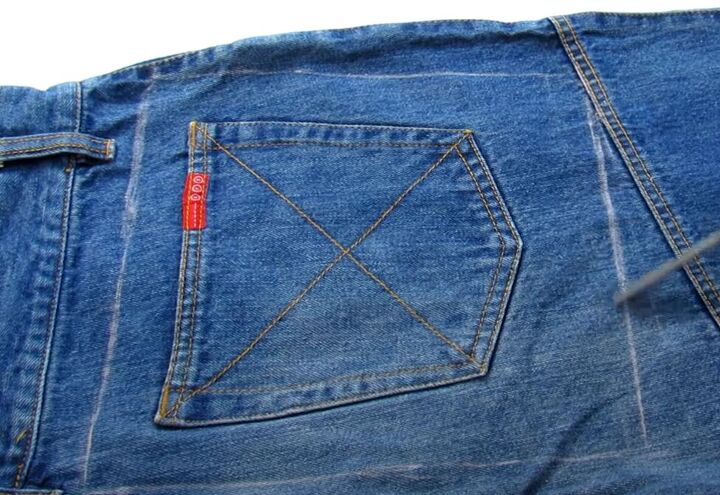
Mark a square around one of the back pockets on your jeans, and cut the square from one layer of denim.
Put some cardboard inside the leg of the jeans to keep the layers separate.
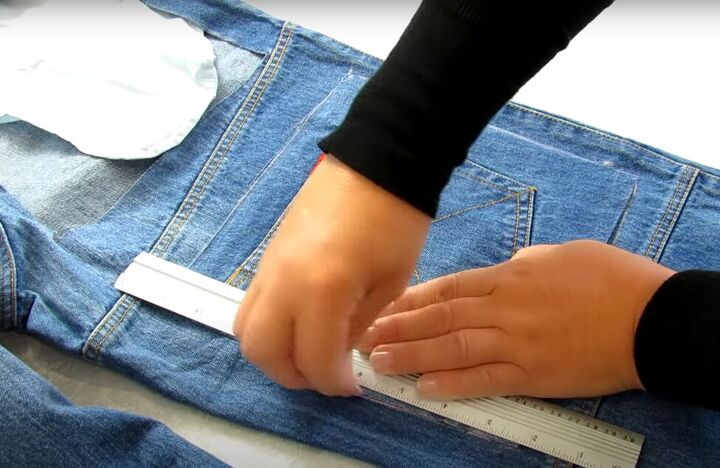
Lay the cut square lower down on the leg of the jeans, and use it as a template to cut another square from one layer of denim.
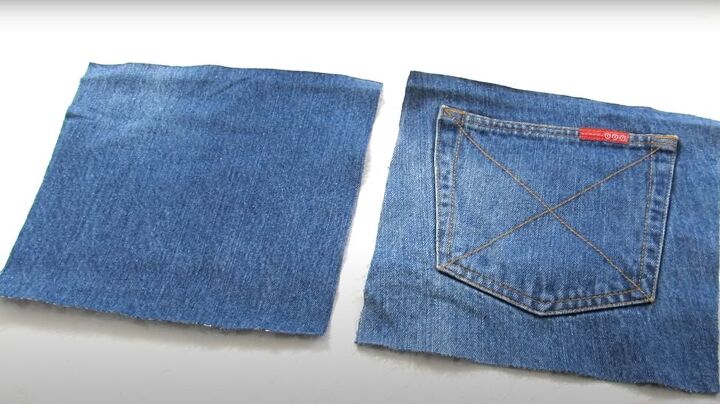
These are the two pieces you need for your DIY denim purse.

Now, use a plate to chalk in and cut rounded corners at the bottom of one piece.
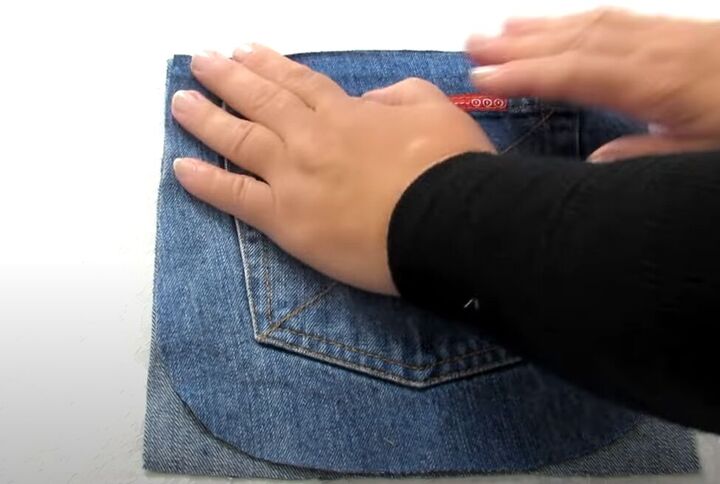
Use that as a template for the rounded corners on the other piece.
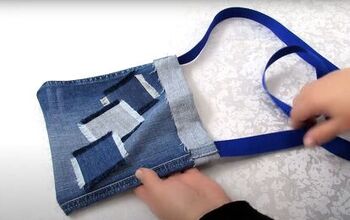
2. Assemble your DIY crossbody bag
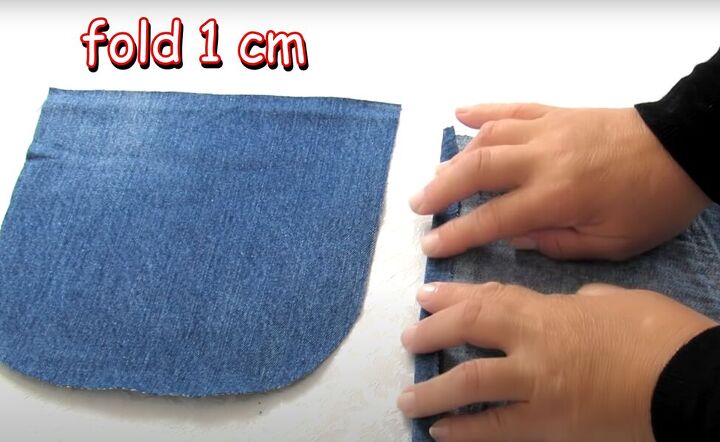
Fold in the top of each piece 1 centimeter (0.39 inches).
Use a glue gun or superglue to secure the fold in place.

Draw a perimeter around the inside of the back piece, 1 centimeter (0.39 inches) in from the outside edge, curving the bottom corners to match the cut.
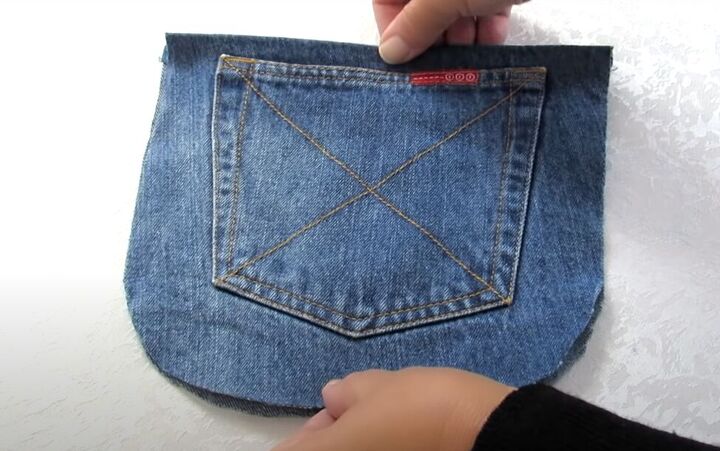
Place the front piece on top of the back, with right sides facing out.
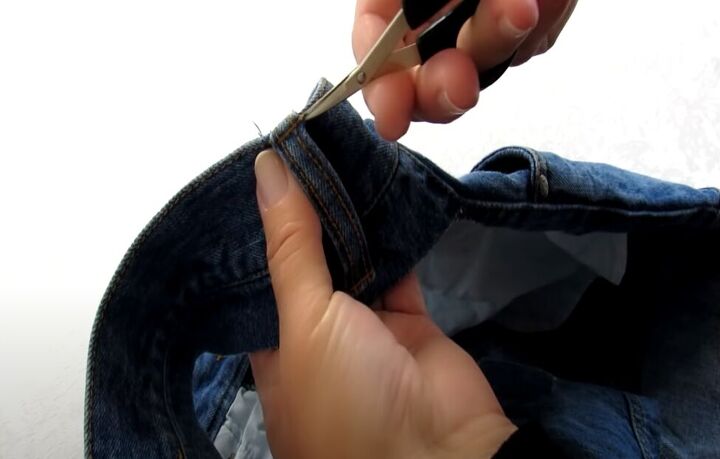
Remove two belt loops from your old jeans.
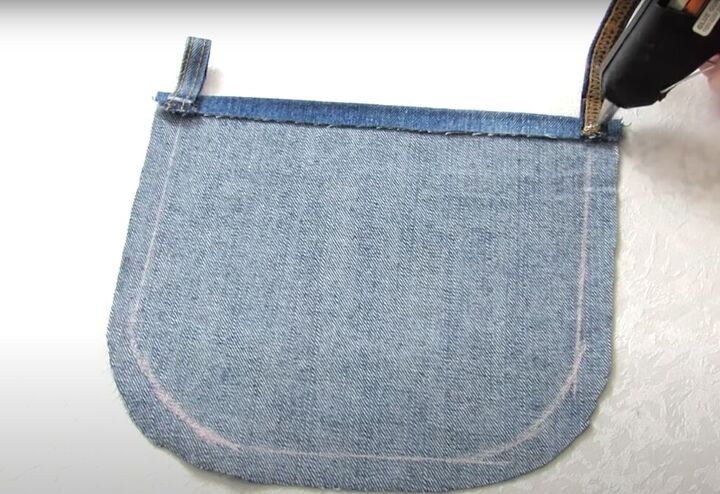
With the right side of the belt loop facing out, glue one end of the belt loops to the inside back piece, on the folded edge at the 1-centimeter (0.39-inch) mark.
Then glue the other end of the belt loop to the first end.
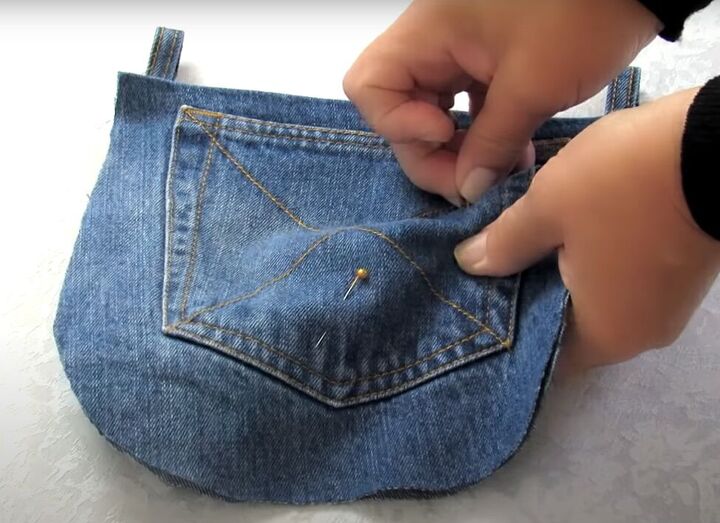
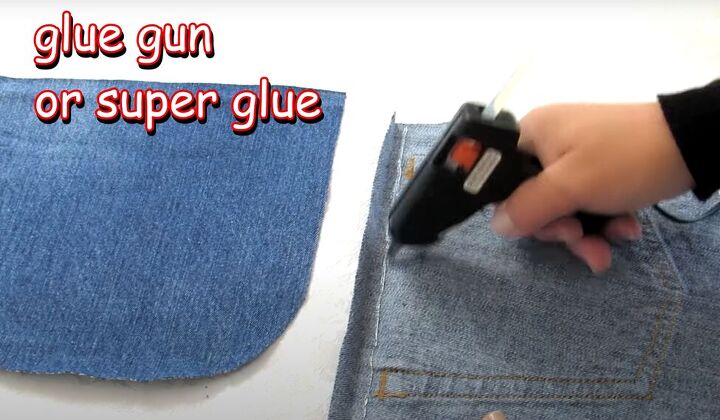
Place the front piece of the denim bag on top of the back piece, and put a few pins in the pocket area to hold it in place.
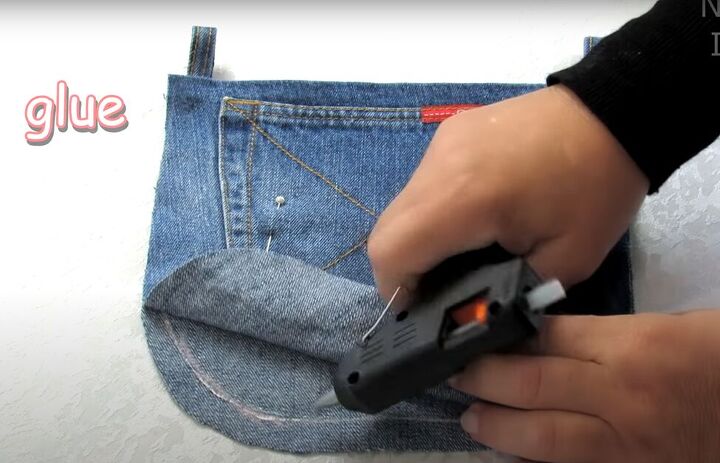
Glue the top piece to the bottom piece along the line, around the whole edge of the denim purse, including the belt loops.
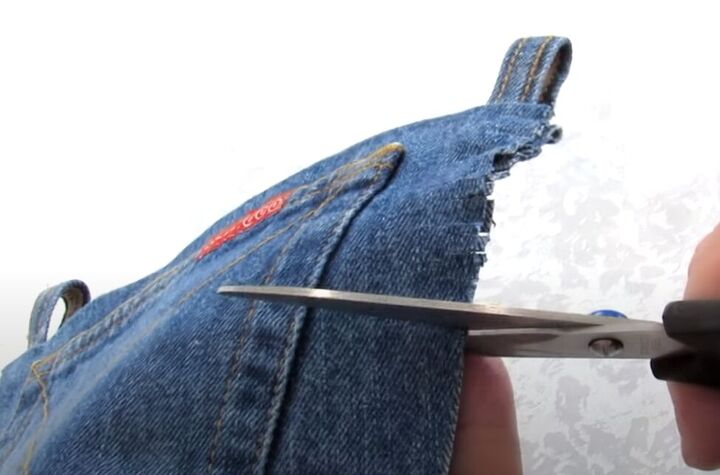
3. Fray the edges
Fray the edges of the denim bag by making small half-centimeter snips between the open edge and the glue.
Go around all three closed sides of the bag.
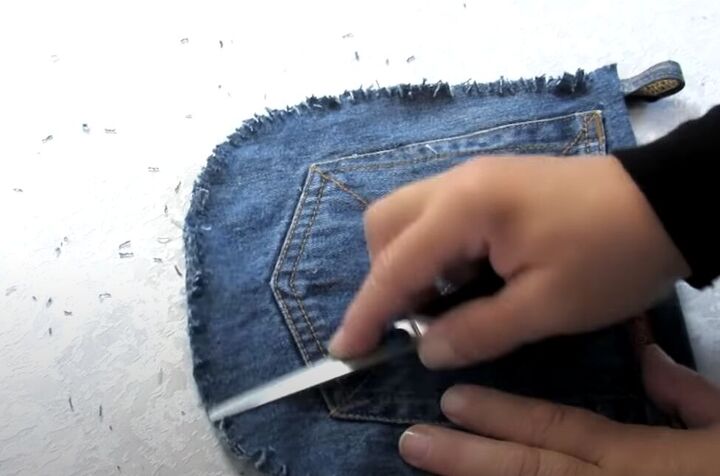
Rub the flat end of your scissors over the edges to make the fraying for feathery.
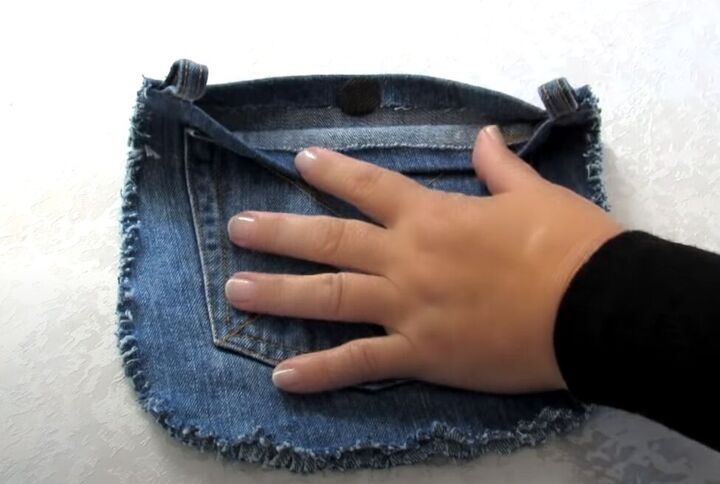
4. Add a closure
Glue a Velcro dot closure to the inside top of the bag on both sides.
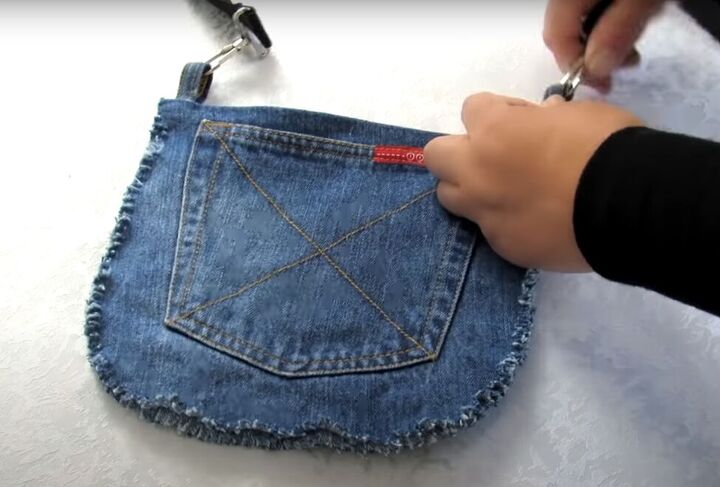
5. Attach a strap handle
Clip a strap handle onto the belt loops.

DIY jean bag
Fill your new DIY denim crossbody bag with your necessities and you’re ready to go!
Try this DIY denim purse yourself, and you will be amazed at how quickly it’s done! Then leave a comment to let me know what your new purse is holding.
For more DIY purses, check out my post on How to DIY 2 Cute Denim Pouches.
The author may collect a small share of sales from the links on this page.


Comments
Join the conversation
This is adorable! I can totally see the start of a new trend.
I would not trust gluing anything together with a glue gun or super glue showing is so much more secure. Has anyone had the problem of the blue coming undone, like carrying it