How to DIY a Cute and Easy Jean Bag

In this tutorial, I’m going to show you how to make a DIY jean bag.
We will be upcycling a pair of old jeans into a cute denim crossbody bag. This is a great way to repurpose jeans that you no longer wear and save them from being thrown away.
Grab your tools and let’s get started!
Best fabric scissors!
Tools and materials:
- Jeans
- Lining material
- Ruler
- Tailor’s chalk
- Scissors
- Glue gun
- Needle and thread
- Magnetic clasp
- Metal loops
- Velcro
- Bag handle

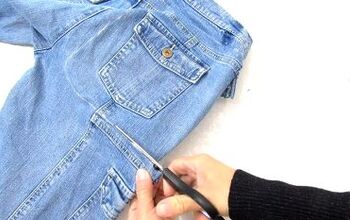
1. Cut the jeans
Start by drawing a rectangle on the back of the jeans around the back pocket.
The rectangle should measure 24x26cm (9.4x10.2 inches). Proceed to cut it out.

2. Cut a second rectangle
Place the cut-out shape onto another part of the jeans and trace around it. Then cut out that second rectangle.
You will then have two pieces of denim that are the same size.
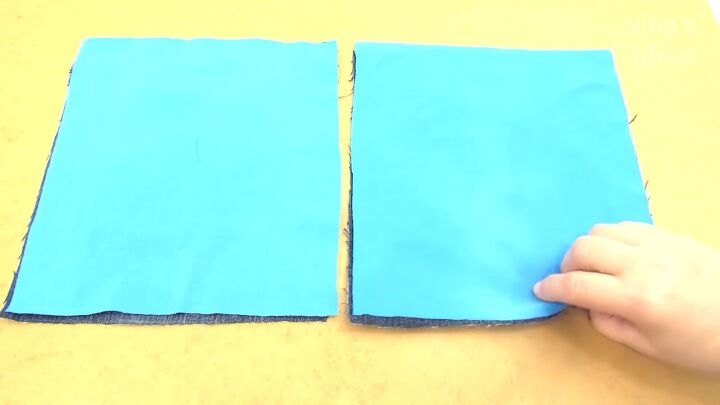
3. Cut out lining fabric
Take a pair of old pants to use as lining, or you could use felt or another fabric.
Trace around one of the denim pieces and cut out two pieces from the lining fabric to line each side of the bag.
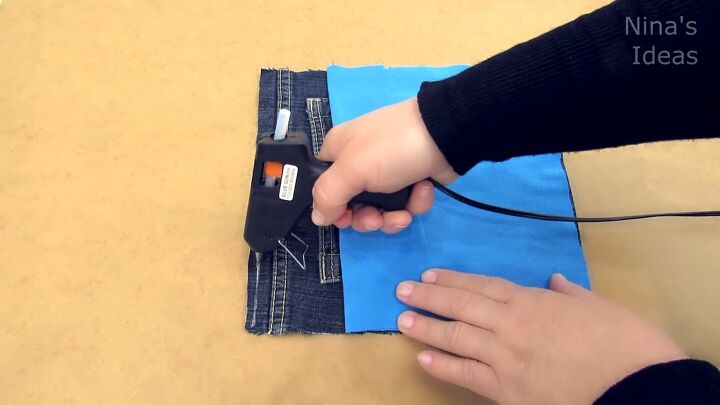
4. Attach the lining to the denim
Glue gun or super glue the two pieces of fabric together along one of the short sides with the right sides facing.
You can also sew instead of gluing. Do this to both the denim and lining pieces.
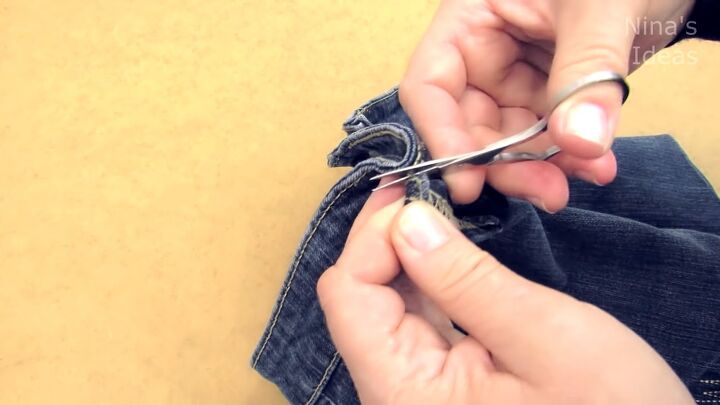
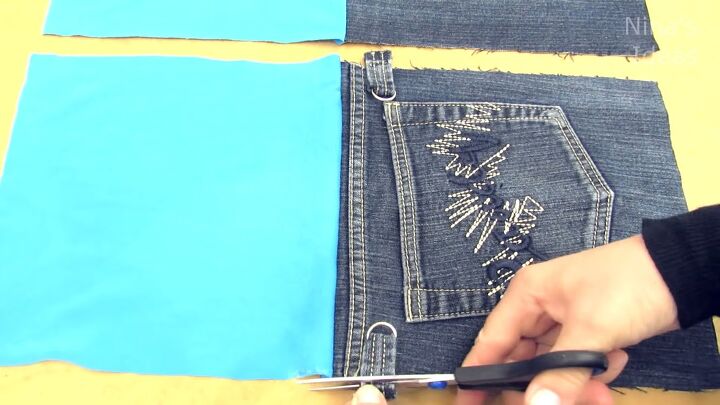
5. Cut off belt loops
Remove two of the belt loops from the jeans.
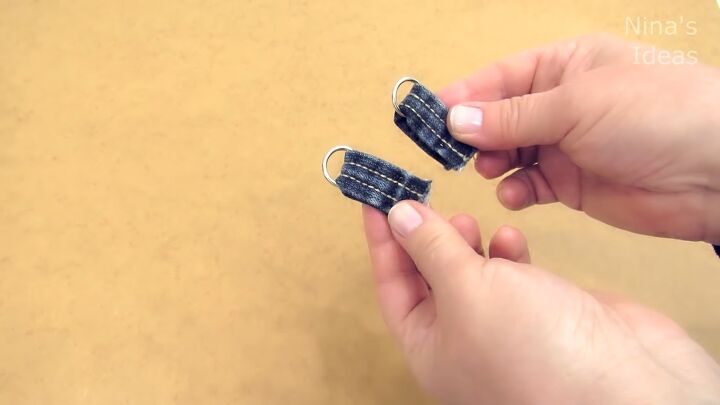
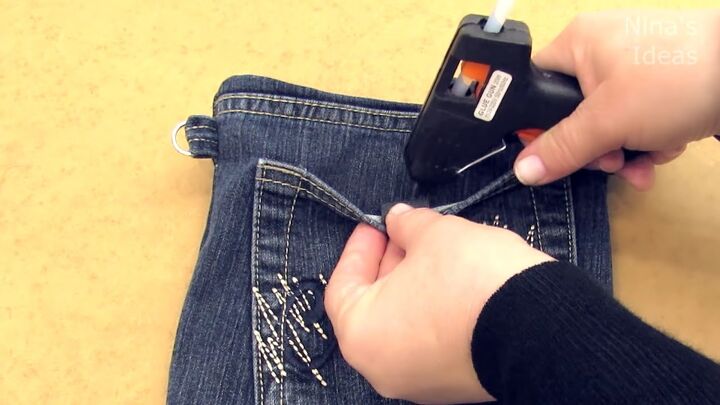
6. Put through metal loops
Take each belt loop and put it through a metal loop. Then fold them in half with the metal loops in the middle.
7. Glue to bag
Glue the folded belt loops to either side of the denim at the top and then trim off any excess.
8. Glue the bag
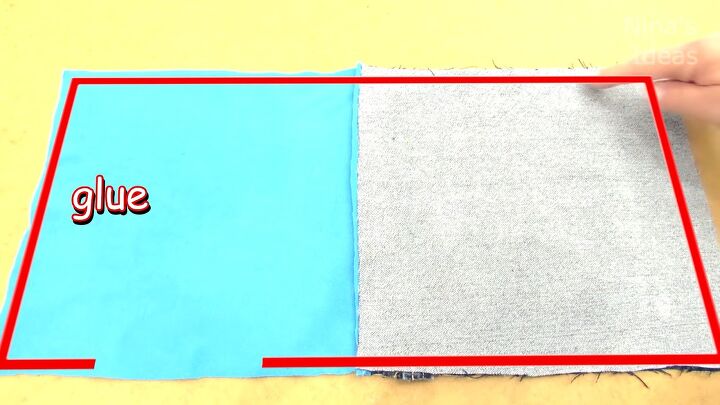
Open up both of the denim and lining pieces and place one on top of the other, with the right sides touching.
Glue the right sides of the denim and lining all around to join the two together, leaving a space in the lining as shown.
When done, turn the bag the right way out through the hole that you left out. Make sure to poke out of the corners that might be folded in.

9. Glue the hole
With the bag turned the right way out, glue up the open hole.
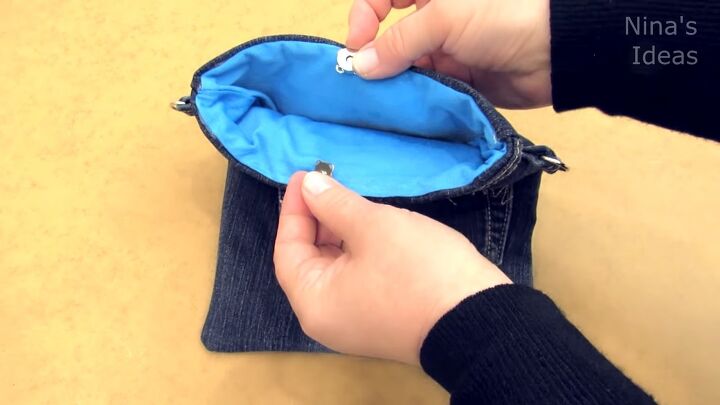
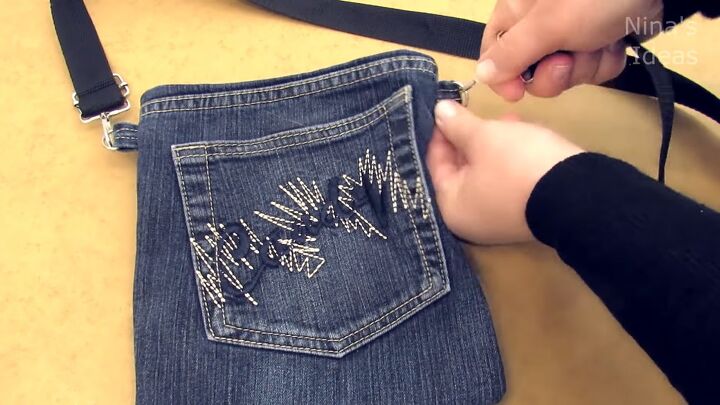
10. Attach bag clasp
Push the lining into the bag. Then attach a magnetic bag clasp to either side of the lining by sewing it in place.
11. Attach Velcro
Attach Velcro to the inside of the pocket and the outside of the bag.
12. Attach a bag handle
Finish off by attaching a bag handle to the metal loops.
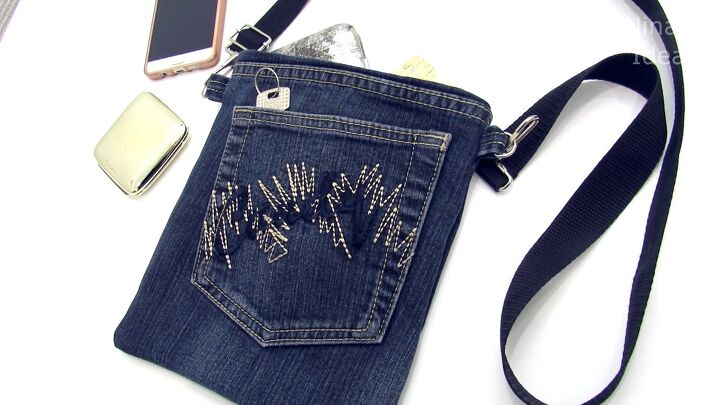
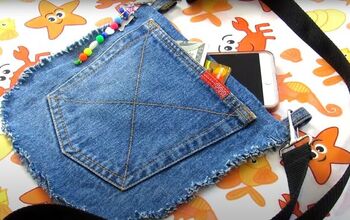
DIY jean bag
Here is the finished bag. It’s a really simple yet trendy design, and the bag is functional for your everyday needs.
The front pocket gives you extra storage space to put all of your essentials in and the lining of the bag gives it a professional looking finish. I hope you’ll give this a go!
The author may collect a small share of sales from the links on this page.


Comments
Join the conversation