Faux Fur DIY Scarf
This post may contain affiliate links for products I love and recommend.
How to make your own faux fur, pull-through, DIY scarf with this easy sew along video, printable sewing pattern, and step by step instructions. Learn how to make a scarf in about an hour with these helpful sewing tips and hacks!

I’ve loved faux fur for as long as I can remember. There’s something just so glam and timeless about well-made, soft fur. Thankfully, now we have access to furs in every color and texture under the sun without hurting more animals in the process.
In today’s tutorial, I’m going to walk you through how to make this luxe DIY scarf from your favorite faux fur along with some helpful tips on working with fur fabric
Faux Fur DIY Scarf Supplies
- Printable Sewing Pattern HERE
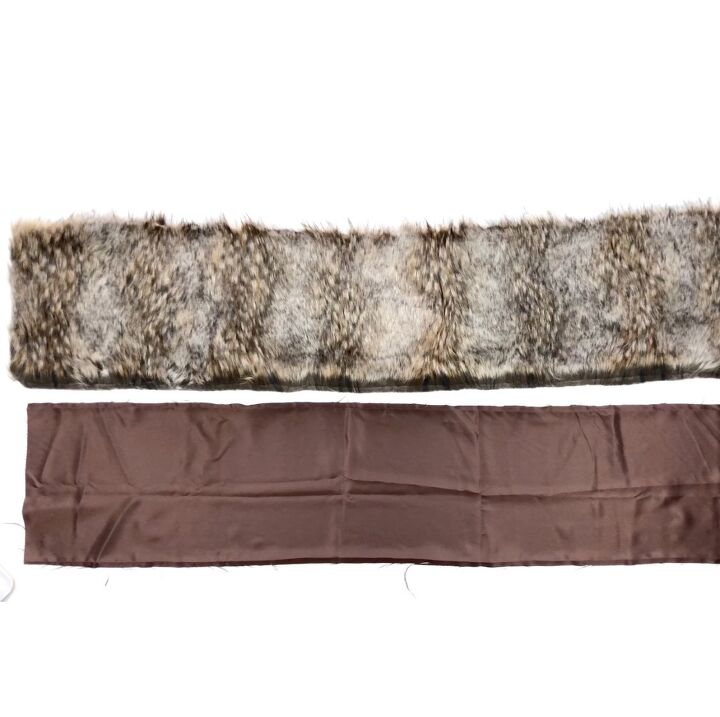
- 1 1/2 Yards Faux Fur (I got mine from Minerva.com here)
- 1 1/2 Yards Lining
- Sewing Clips
- X-Acto Knife
- Fabric Shears
DIY Scarf Video Sew Along
How To Make A Scarf
Start out by downloading the printable sewing pattern HERE. It prints on any at-home printer and can be assembled easily with tape. If you’d like more information on printable sewing patterns, click here.
For this DIY scarf tutorial, you’ll want to print out the Fur Scarf Sewing Pattern HERE. Once your multi-page pattern is printed, taped together and cut out, it’s time to cut your fabric.
Cut one faux fur piece and one lining piece and lay them out on a table or other flat surface.
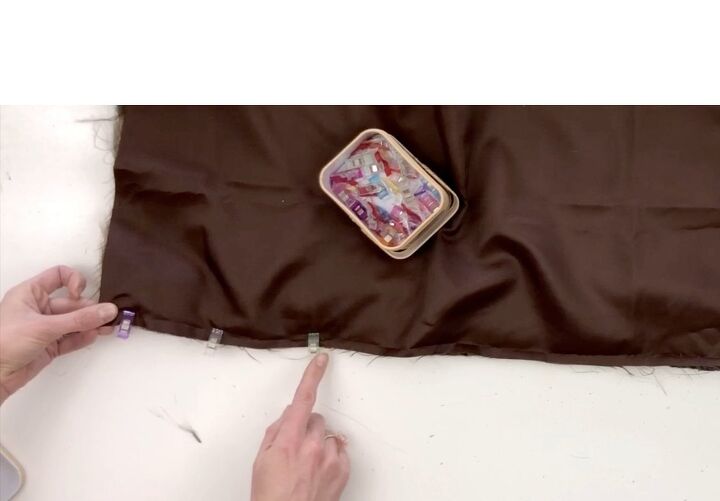
Lay your fabric pattern pieces on top of each other with the “right sides” facing each other. Since faux fur can slide around and be tricky to pin together with regular sewing pins, we’ll be using quilting clips to hold everything in place.
Use your fingers to push the loose fur hairs (or pile) inward to the inside of your seam allowance. Use the clips to hold in place.
Once everything is clipped together, it’s time to sew. Extend your stitch length to 3.0 – 3.5 and use a straight stitch with 1/2″ seam allowance around both long edges and one short edge of your DIY scarf.
Next, trim the corners of your scarf to create a sharper, more professional edge. Just be sure you avoid clipping through your threads.
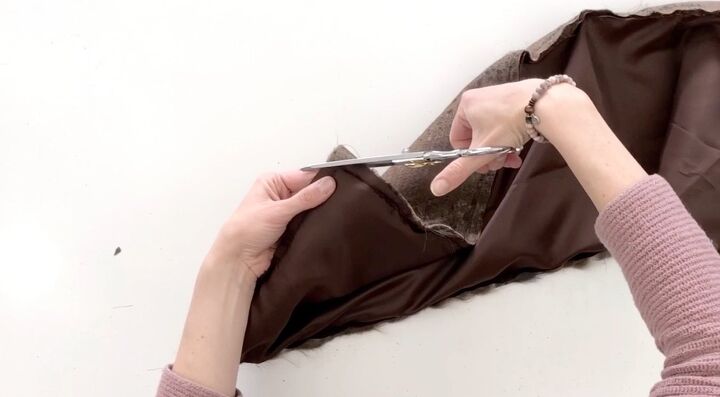
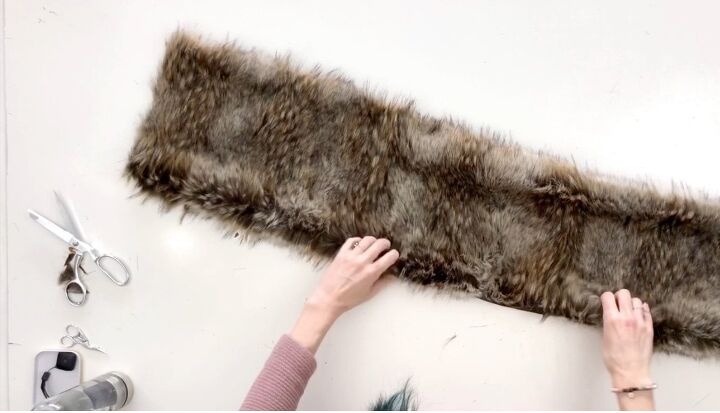
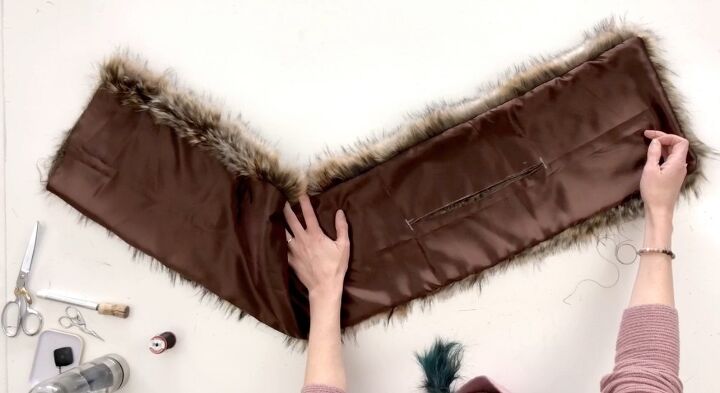
Now it’s time to flip your scarf right-side-out. Your project should look something like this:
Your DIY scarf is beginning to really take shape! Use sharp scissors to cut through the lining of your scarf along the pattern markings where your pull-through hole is.
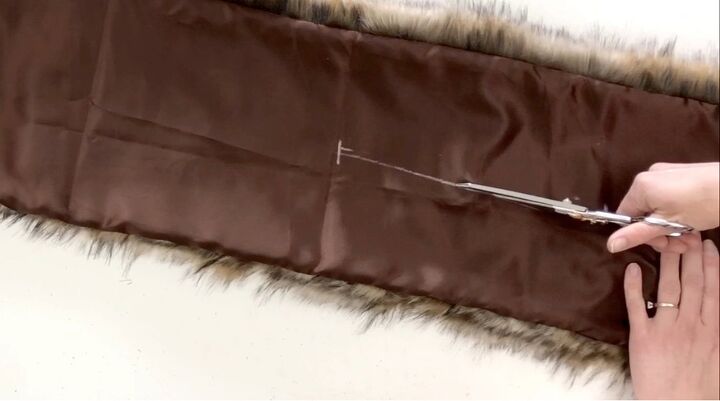
Since cutting into your faux fur with scissors can make a giant mess and damage the overall look of your fur, we’ll use a Xacto knife or razor to gently slice through the backside of your faux fur fabric.

Now you have a scarf with a pull-through hole on one side. We just need to polish it up!
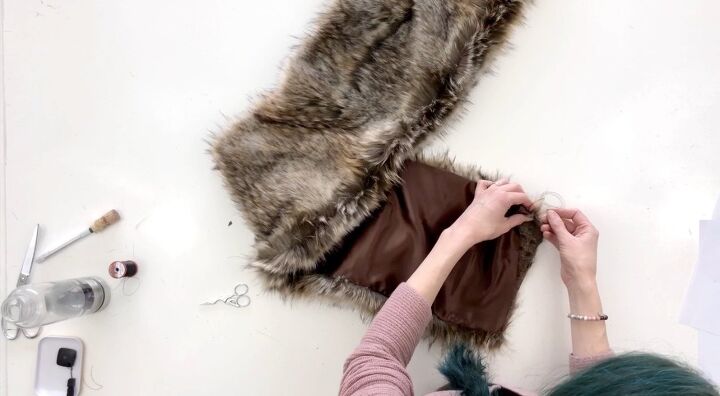
Use a hand sewing needle and thread around the perimeter of your hole to close everything up.

Finally, hand-sew the short edge of your DIY scarf shut. See how easy that was?!
Now comes the fun part where you get to try your handmade scarf on and see how it fits!
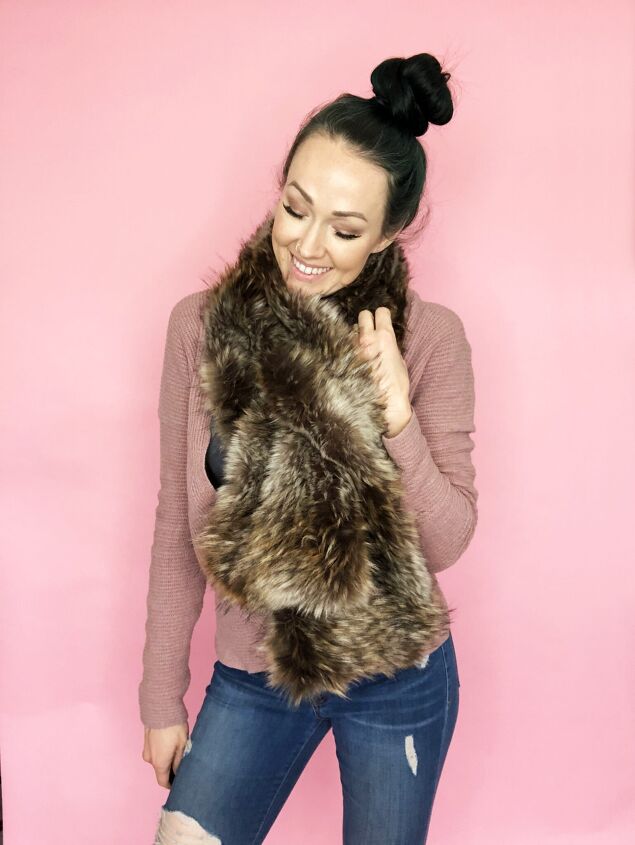
I loved how quick and easy this project came together and how luxe it feels on. It’s always rewarding to find beginner sewing projects that cost a small fortune if you bought them pre-made in a store.
Because making a handmade wardrobe yourself is super rewarding, but it’s also fun when it saves you money in the process!
Tips On Sewing Faux Fur At Home
Outline Each Pattern Piece With Tailors Chalk
Once your pattern pieces are laid out across the backside of your fabric, don’t just grab your scissors and start hacking away at your fur. Instead, grab your tailors chalk instead and begin outlining each piece. Be sure to include other pattern markings and notches.
Trim On The Inside Of Your Chalk Line
Since we traced our pattern pieces on the outside edge of your paper, be sure to cut out each piece from the inside edge to get the exact pattern size. Often, tailor’s chalk can leave a thicker line (up to 1/4″ thick) so cutting out your pattern pieces from the inside of the line makes sure you are still getting the correct pattern size.
Use Tiny Cuts In The Backing Of Your Fabric
If you cut through all the width of your faux fur, you’ll end up with a massive mess and some ugly, choppy pattern pieces. To avoid this, make tiny cuts into the backing of your fabric and be sure to avoid trimming the long hairs that make up the faux fur. Once your pattern pieces are cut out, gently pull the fur hairs apart to separate the pattern pieces without a big mess. You’ll also protect the length of your pile (the long hairs of your fur) and ensure that your pattern pieces have soft, natural-looking edges.
Or Use A Razor To Prevent Cutting Into Your Pile
If making small cuts into the back of your faux fur fabric makes you nervous, grab a razor or an Exacto knife to cut the backside of your fabric instead. The razer will automatically slice through the backing but avoid slicing the fur pile, leaving more faux fur attached to your finished piece.
Push Your Pile Into The Seam Allowance To Create Crisp Seams
When it’s time to put your pattern pieces together, use your hand to push the fur pile inward toward so it’s out of the way of your seam allowance. This will help your fur fall more beautifully on the outside and keep your seams small and more comfortable on the inside of your garment.
Use Quilting Clips To Hold Pattern Pieces In Place
Since faux fur can be bulky, use Quilting Clips to hold it all in place and keep it from slipping and sliding around. These clips are inexpensive and perfect for holding thicker projects together with multiple layers. They also come in handy working with leather, vinyl, or suede since they don’t leave permanent puncture holes.
Pick Up Loose Hairs w/ A Damp Rubber Glove
After your new faux fur project is complete, you likely have a bit of a mess in your sewing space. The steps above will help reduce the excess mess, but when sewing faux fur, some clean up will likely be involved. Use a damp rubber glove to quickly and easily pick up all the stray hairs that have fallen off the project while you are working on it.
The author may collect a small share of sales from the links on this page.


Comments
Join the conversation