How to Easily Do an At-Home Brow Tint in 6 Simple Steps

These days, you can pretty much do anything at home, even when it comes to beauty and cosmetics. There are so many good, salon-quality products that you can easily find. Today, I’ll show you this easy and inexpensive at-home brow tint.
If you’re tired of waiting for an appointment to get your eyebrows tinted, you can do them yourself with a DIY eyebrow tint at home. Let’s get tinting!
Tools and materials:
- Orange wood stick
- Bowl or dish
- Tint
- Developer 3% 10vol (oxidant)
- Earbuds
- Cotton pads
How to do a patch test beforehand
Always test the tint a couple of days before applying it to your eyebrows. This should be done either behind your ear or on the bend of your elbow.
If you don’t react between 48-72 hours, you’re good to use the at-home brow tint. If you have red blotches, it’s a sign that your skin is not reacting well to the tint.
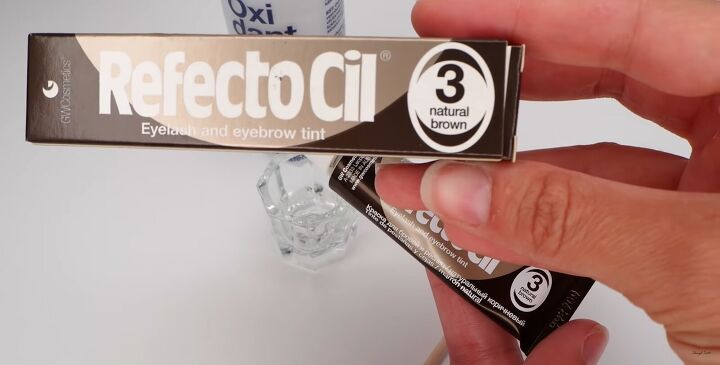
1. Choose the correct color
Choosing the correct tint is essential. If you’re fair or pale, a light brown color will do. A dark brown will work best if you've got darker hair. I'm using Refectocil Tint.
If you’re not sure about the tint, It's best to ask a professional before doing the DIY eyebrow tint at home.

2. Start mixing
Squeeze around 1.5 - 2cm (0.59 - 0.78 inches) of tint into a clean dish. Give it a good mix before you pour in the developer.
Tip: I’m using an orangewood stick for this, but a clean chopstick will also work just fine.
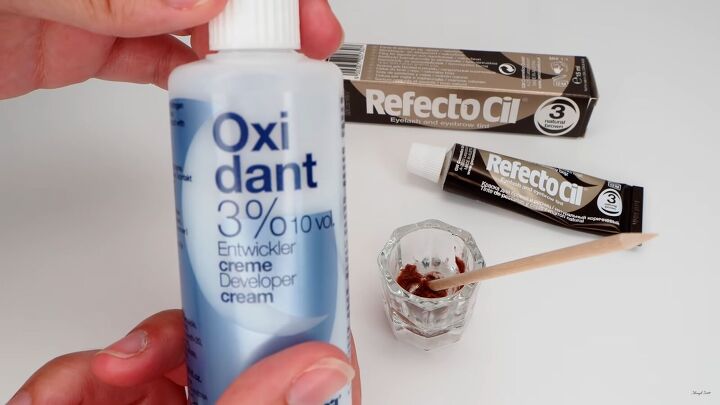
Now, pour in the developer (oxidant). You can find this anywhere or even online. I suggest using a developer that has 3% 10vol.
So, for 1cm (0.39 inches) of tint, you need around 8 drops of the oxidant.
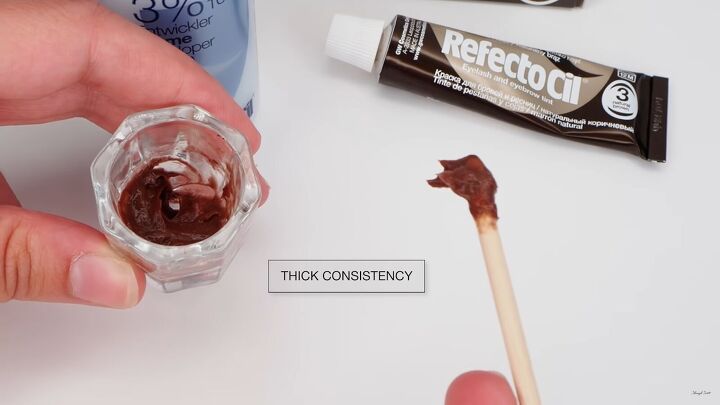
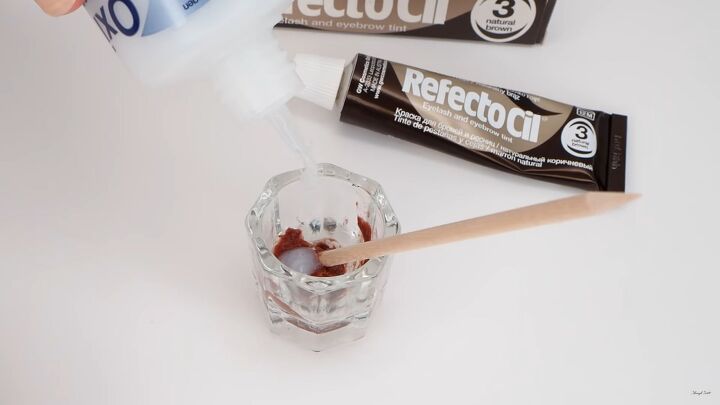
Next, mix the tint together with the developer really well. The aim is to get a nice even consistency. This is basically the consistency that you want; thick and creamy.
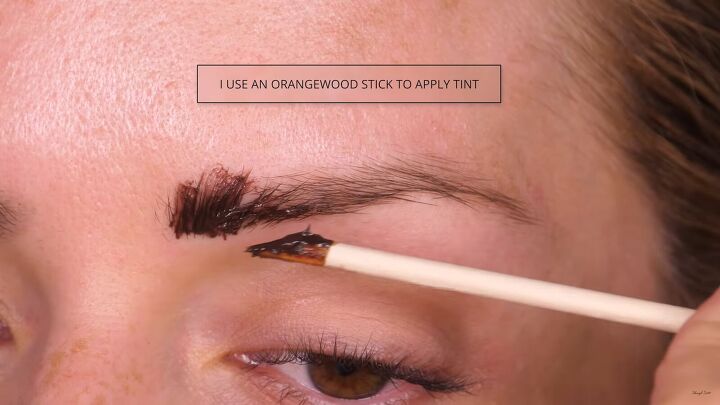
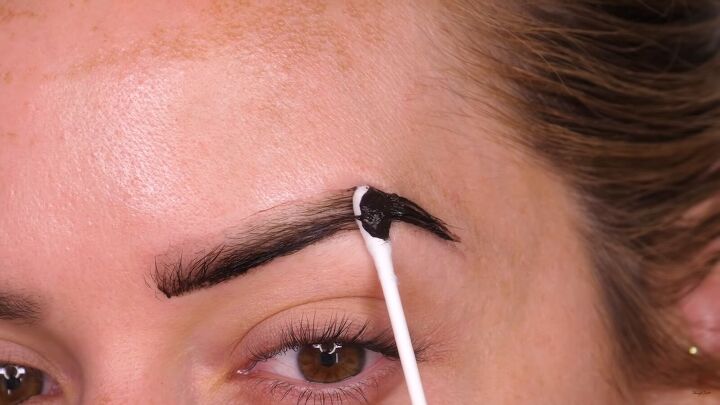
3. Apply the DIY eyebrow tint
Using an orange wood stick, apply the tint to your eyebrows. Push the stick into the hair so that the tint touches your skin.
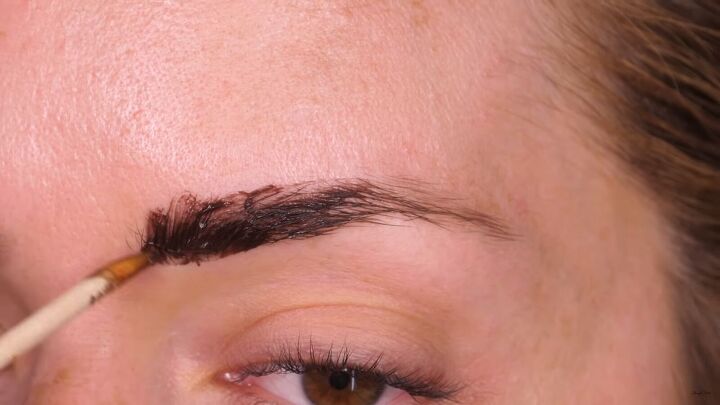
Also, make sure that it covers both sides of your hair for a well-rounded tint.
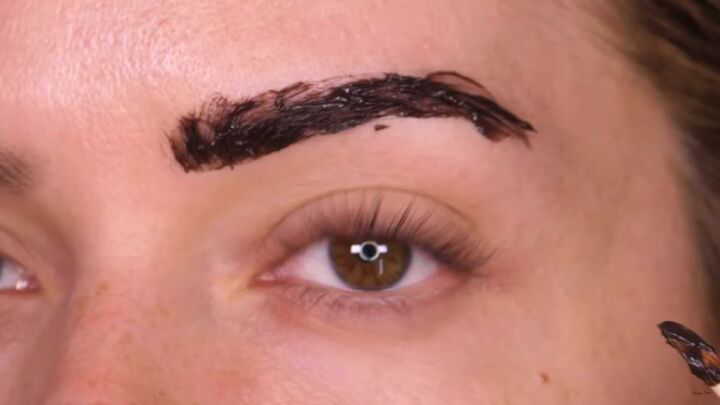
The great thing about brow tint is that it dyes all your hair, even the smaller and finer ones. Like this, your eyebrows will look fuller.
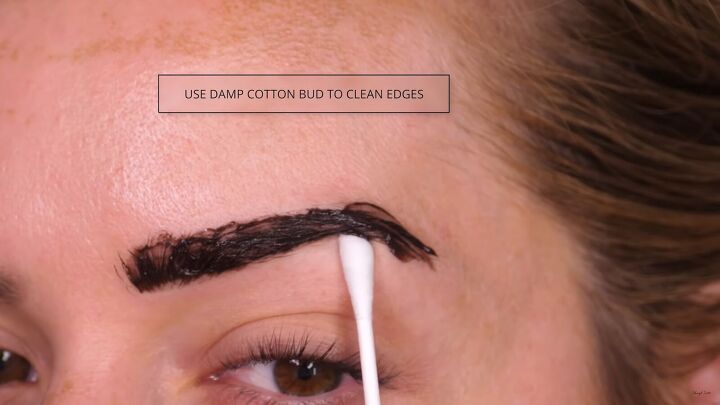
4. Clean up the edges
Now, it’s time to clean up the edges. To do this, take a damp earbud and clean around the eyebrow, as shown. Create nice, crisp lines to ensure the tint is only concentrated on your actual brow.
Tip: Always follow the directions on the box for timings. For me, normally, 1 minute will suffice, and if not, I reapply more to darken the tone if needed.
5. Remove tint
Use a clean earbud to wipe off the excess product.
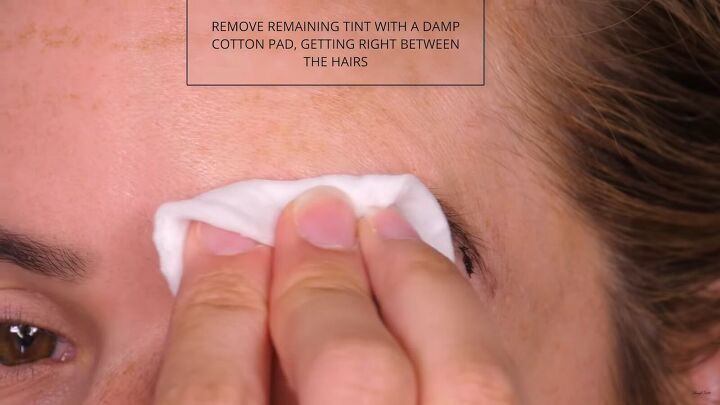
Then, go in with a damp cotton pad to remove the rest of the tint.
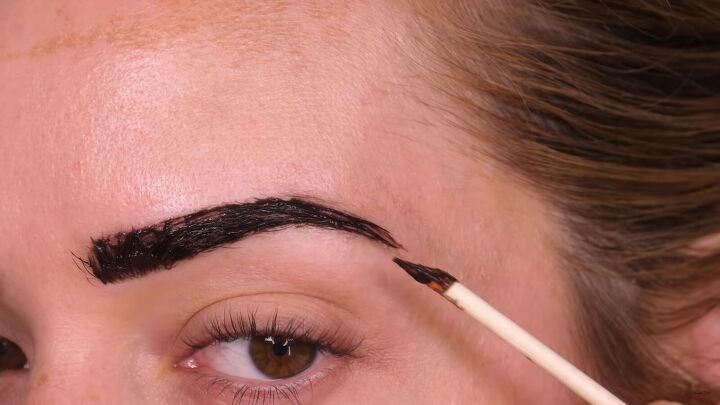
6. Repeat the process
I decided to reapply the tint for another minute as I wanted it to look a little darker and fuller.
Remember, the longer you leave the tint, the more intense the color. So, it’s better to work in increments and be safe than to leave it for 10 minutes, and it comes out too dark.
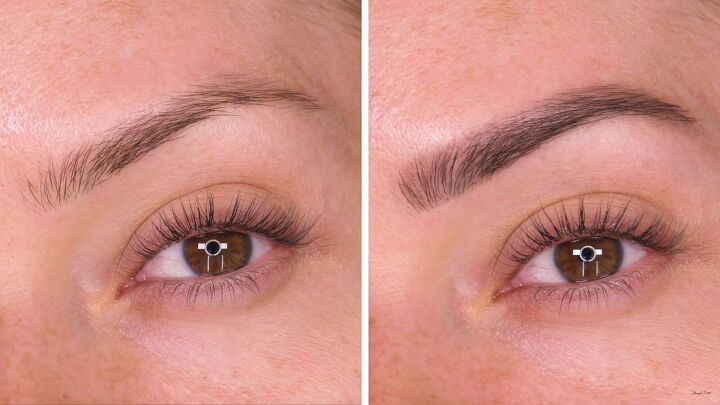
At-home brow tint tutorial
Here’s my before and after of the at-home brow tint. As you can see, I have a lovely, natural result. Of course, if you want a more dramatic look, then leave the tint on a bit longer.
How long does brow tint last?
My brow tint usually lasts between 2 - 4 weeks.
Thanks for joining me and I hope you now have the inspiration to try this yourself at home!
The author may collect a small share of sales from the links on this page.


Comments
Join the conversation