How to Make a DIY Choker Top & Pants Set From Scuba Fabric

In this sewing tutorial, I’m going to show you how to make a DIY choker top and pants set out of scuba fabric (neoprene).
I love sewing my own clothes, but I don’t like things that are fussy and overly complicated. This DIY is not like that; it is very straightforward and easy to do, so follow along with me and let’s get sewing!
Tools and materials:
- 2 yards of scuba fabric (neoprene)
- Pants
- Short-sleeved top
- Scissors
- Pins
- Fabric marker
- Sewing machine
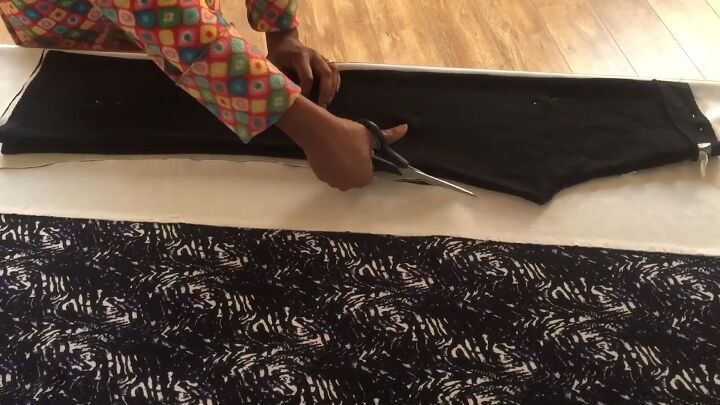
1. Cut around pants
Place your pants on the fold of the fabric you’re working with and cut around them. Leave the fold uncut.
Tip: You can also trace around them first and then cut if you find this easier.
2. Cut a second piece
Unfold the material you just cut out, place it on the fabric and cut out a second piece.
3. Pin the crotch
Place the two pieces, one on top of the other with the right sides facing, and proceed to pin the crotch area.
4. Sew
Sew only the pinned area.
5. Pin the legs
Turn the fabric around so that the sewn area runs down the center of the crotch. Start pinning at the crotch and pin all the way down.
6. Trace the top
Place your top on top of the fabric. Trace your top and adjust the design to your requirements.
Tip: Use a washable pen that is made for tracing on fabric.
7. Cut out the top
When you’ve finished tracing, proceed to cut out your design, leaving a seam allowance. Then, when you have cut out the piece, use it to cut a second piece. These pieces will be the front and back of your top.
Tip: When cutting out the second piece, you can pin the first piece to it to prevent it from sliding around.
8. Pin and make changes
Pin the two pieces together and modify anything that you would like to change; here, I’m making a curved bottom.
9. Sew and hem the top
Continue to sew the pinned areas and hem the curve.
10. Cut out the sleeves
Place the sleeve on the fold, trace it, and cut. Repeat for the other sleeve.
11. Hem the pants
Sew the pinned part of the pants as well as the sides of the sleeves opposite the fold. Once done, fold up the bottom of the pants to create a hem, pin it into place and sew.
Do the same thing with the waist at the top of the pants: fold the top part over, pin it into place, and sew.
12. Cut and hem the neckline
Now cut out the neckline, and when done, again make a fold and sew it to create a hem.
13. Cut and sew the choker
Cut out a strip of fabric (enough to go round your neck) and make sure it is the same width all the way down. Then fold it lengthwise with the right sides touching each other and pin together.
Proceed to sew, leaving an opening at one end.
14. Turn right side out
Pull the fabric through the opening to turn it right side out. This may take a while, but you will get the hang of it.
15. Join the ends
Sew both ends together to form a circle.
16. Sew the top together
Place all the pieces inside out, then pin them together and sew. Attach the neckband to the back of the neckline, pin it into place and sew it down there.
DIY choker top & pants set
Here is the finished look! I love matching sets, and this one here looks gorgeous. I particularly like the choker neck and the open neck area between it and the neckline.
This outfit was very easy to make, and it has a seamless finish. I hope you’ll give it a try!
Enjoyed the project?
Suggested materials:
- 2 yards of scuba fabric (neoprene)
- Pants
- Short-sleeved top
- Scissors
- Pins
- Fabric marker
- Sewing machine
The author may collect a small share of sales from the links on this page.


Comments
Join the conversation