Sew a Faux Snakeskin Shirt With a Gathered Front!!

You might take one look at Love Notions Juliet top and think, “That’s so cute but it looks like it might be difficult and I’m not doing pintucks.” At least that’s what I did. So guess what? You don’t have to sew pintucks. There’s a plain yoke view and I sewed it up in a little over an hour. It was super easy and I documented a little along the way to share with you all in case you wanted to make one too. The pattern comes with amazing instructions, but sometimes it’s encouraging to see someone else sew something together. Here’s what that looked like.
The Juliet Pattern…
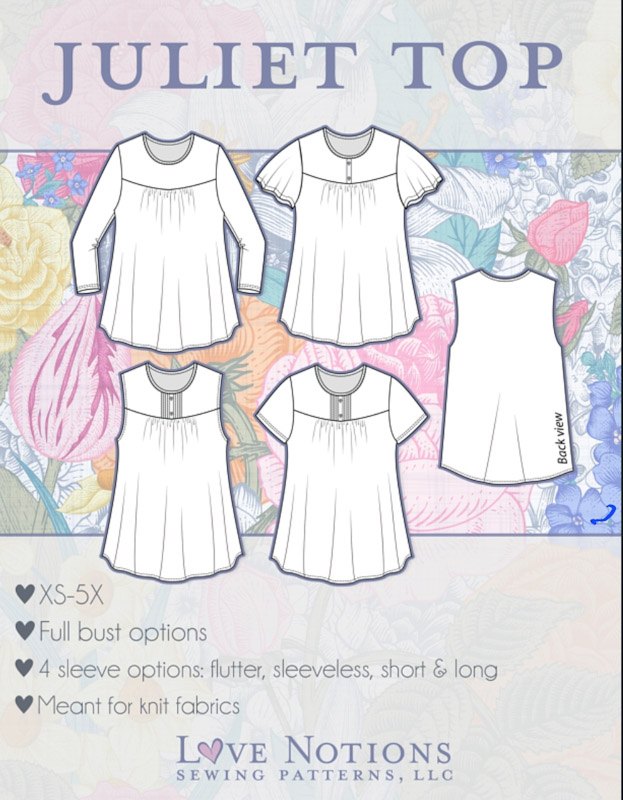
The Juliet Top is a casual type of top with comfort in mind. Sew it up
with four different sleeve options- flutter, sleeveless, short, and long.
The faux placket and pintuck yoke make this top standout. You’ll want
to make it over and over in your favorite knit fabrics.
This pattern comes in sizes XS-5X and includes an optional full bust
piece. The Juliet Top is meant for knit fabrics.
Decisions, decisions…

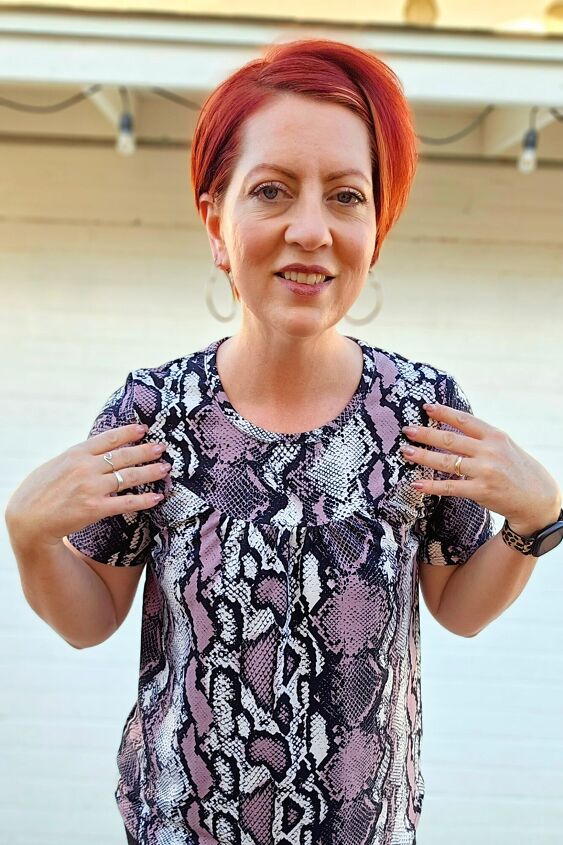
First things first. I decided on a sleeve length, and fabric. Then I cut out and marked all my fabric pieces. I chose to make the short sleeve, standard bust size and because I didn’t want to do pintucks I chose the plain yoke view. I had some leftover fabric from some Resolution leggings I made awhile back. So I used that to make my Juliet shirt. It’s some fun snakeskin print DBP I found in the clearance aisle at Joann. The color I used is all sold out but here is some DBP snake skin in an olive color.
Gathered front and Yoke…
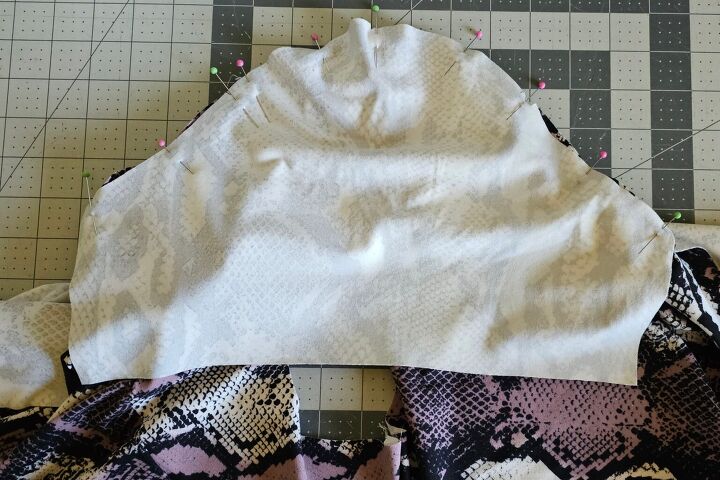
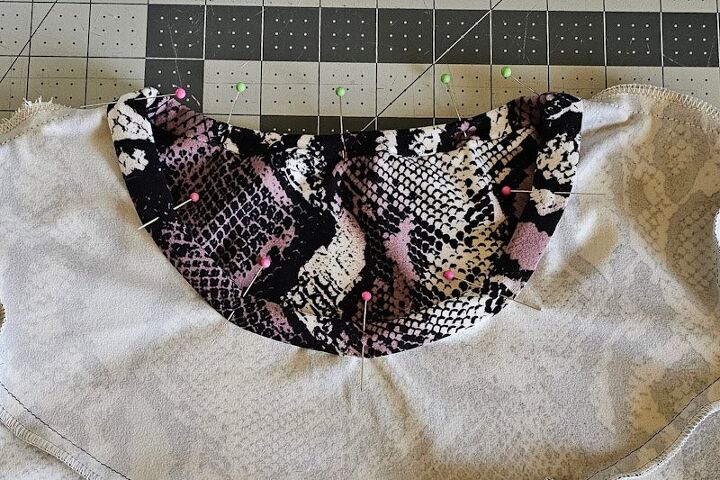
Once everything was cut out and marked the notches, I marked the middle front of the yoke and the middle front where the yoke attaches with pins. Then I ran a basting stitch along the front curved area between the markings so I could gather that small area… just enough so the yoke would fit.
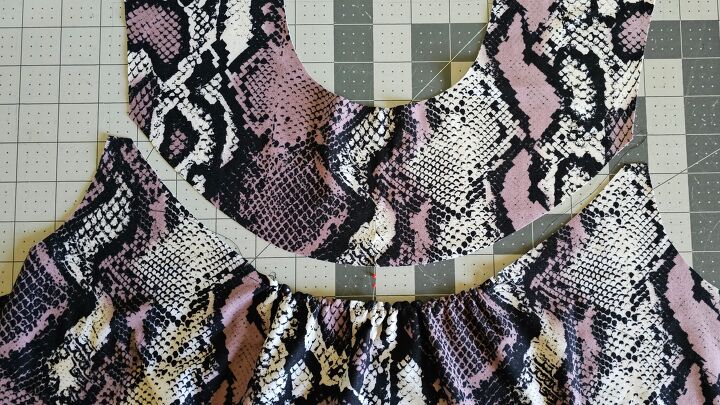
I sewed the two pieces together so that the front was now one piece.That was the hardest part of the whole thing and even that was super easy.
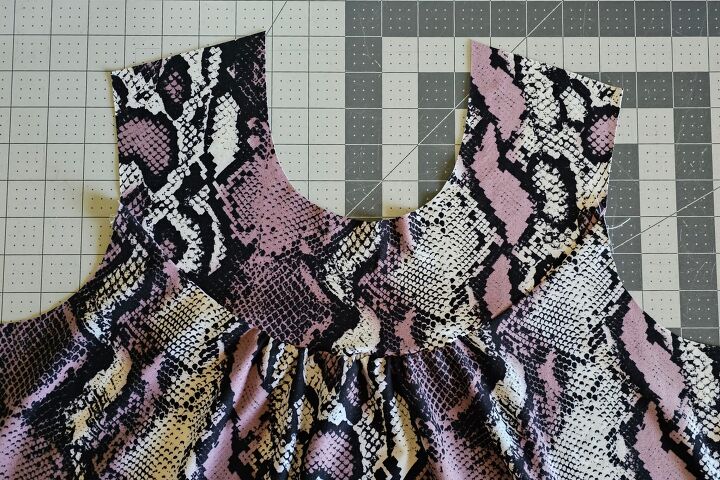
Sew it all together!!
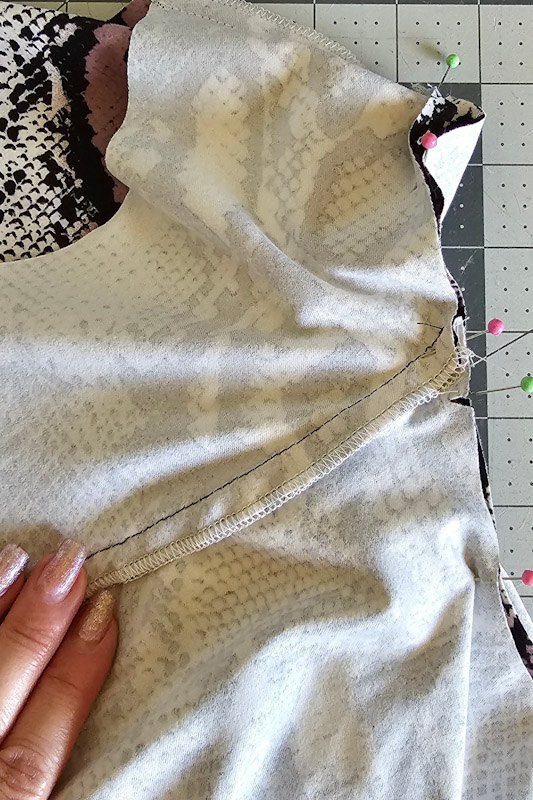
After the yoke was attached I could sew the top together like I would any other t-shirt. I did that by laying the front on the back, right sides together and sewing the shoulders. Then I laid the shirt flat and installed the sleeves.
When I was pinning the sleeves in, I made sure that the front yoke seam was pressed down where it met at the sleeve, rather than up.
Once the sleeves were installed I sewed down both sides of the shirt. Before I hemmed the shirt and sleeves I installed the neck binding. Then I finished everything off with a twin needle to make it look super professional.
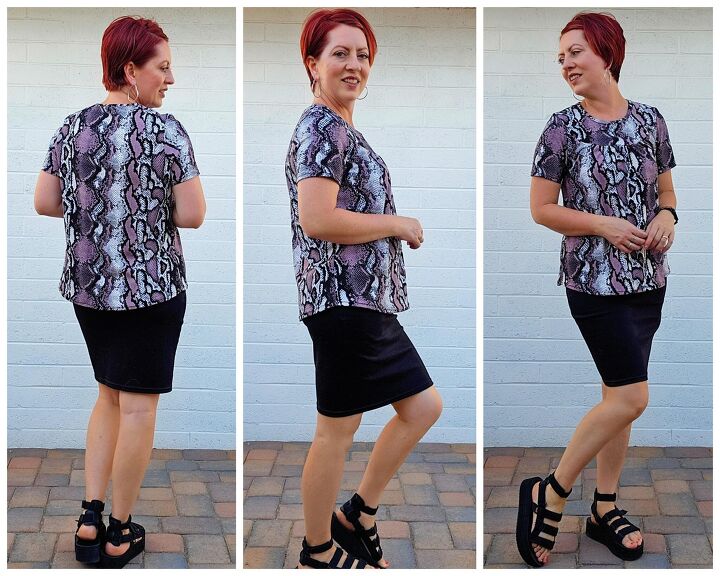
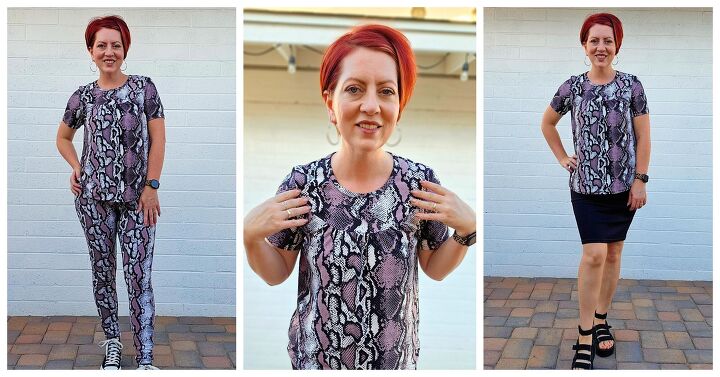
I threw it on with my favorite black pencil skirt and fell in love. It’s the most comfy and cute top! I like the extra room the gathered front provides. Plus the DBP fabric is so soft.
It also looks super cute with some matching Resolution leggings I made a while back. If I tuck the top in, it gives it a jumpsuit look. And I sure do love jumpsuits!

Haha, faux snake skin head to toe. Is it too much? Maybe but I’ll still wear it. Let me know if you plan on trying the Juliet pattern!
Let’s be friends!
If you are looking for a pattern suitable for more than one occasion, hopefully this post helps you figure out what will work best with your wardrobe needs. Let’s be friends on all the socials! Come follow along on Pinterest, Instagram and Facebook so we can chat about all our sewing projects!
The author may collect a small share of sales from the links on this page.


Comments
Join the conversation