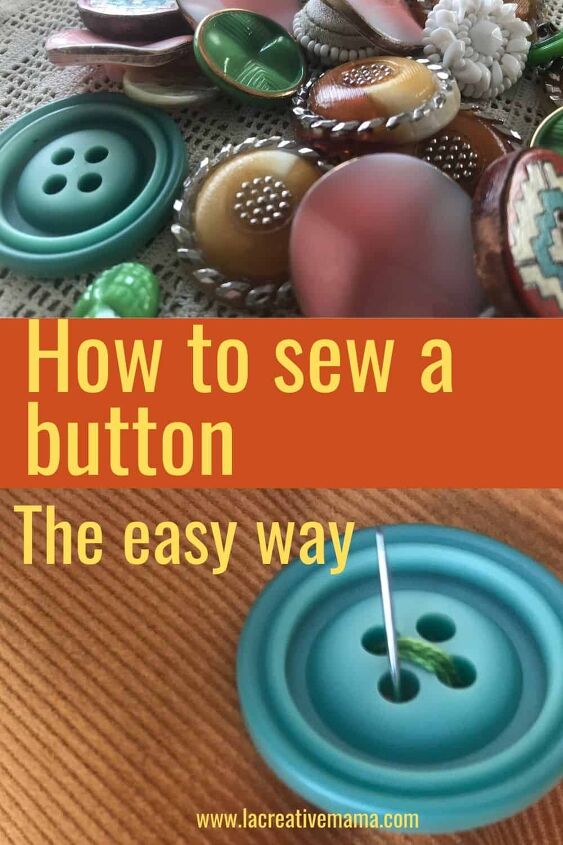
How to Sew a Button the Easy Way

Hi Creative Mamas! I am so excited to show you the easiest way to sew a button that will will not fall and will stay on your kids shirts and pants regardless of how hard they pull on it.
Buttons are great but when they fall its a nightmare. If you are anything like me you will not be happy to start loosing buttons on a shirt. You normally get one xtra button to replace any lost ones; but when you or the kids start loosing two at a time, then I get annoyed!
But not to worry, in this tutorial I will teach you step by step how to sew a button that will never fall. And it’s super easy too!
Sewing buttons can also be a great addition to any creative sewing project that you may think of including embroidery, applique, upcycling a garment, quilting, fabric collage and doll making.
I have used buttons to close my fabric books as well as my fabric journals.
- Don’t thread your needle with a single thread. Always make sure you use double thread as per tutorial below.
- Don’t sew your button too tightly to the fabric. This will be uncomfortable for the user and might cause the thread to snap if it’s constantly being pulled.
- Don’t leave the thread just hanging after application. Make sure that you secure the thread with a knot to the underside of the fabric.
- Don’t miss creating the shank step
There are two main button types:
- Shank buttons
- Sew through buttons (These can have 4 holes or 2 holes)
The sew through buttons are attached to the garment by sewing through the holes of the buttons so you will always see the thread.
On the other hand the shank buttons has a solid top with a shank underneath (a shank is a small metal loop at the back of the button) which means that you only see the button and never the thread.
For this tutorial I am going to sew a sew through button
Thread the needle. For sewing buttons we always use double thread because it’s stronger. You may want to use matching color thread to the fabric or not, it really depends on the effect that you want. For this tutorial I am using contrasting threads for more clarity
Starting from the wrong side of the fabric secure the thread with a couple of stitches. Make a little cross. The button will be place right on top of the cross.
Starting from the wrong side of the fabric again and holding the button in place bring the needle through one of the holes of the button. Pass the needle back through the next hole either in a diagonal or in a straight line. Repeat three times.
Repeat process on the other direction.
Hold the button tilted slightly against the fabric to produce a small gap. Now wind the thread around the button to form a shank and then bring the needle to the wrong side of the fabric. Fasten the thread to finish. Voila!
Ok, so now you know how to sew a button. But there is so much more to buttons than just a way to fasten a garment. I have been using buttons in my slow crafts forever.
I have used them in my quilting projects, I have used them to upcycle and embellish garments. But my favorite is to sew buttons to tell a story. Let me show you how to do this.
I made this tailored jacket myself as I was preparing to teach a tailoring class. I decided I would make something of value, something that I would treasure and want to keep for many years to come.
Of course as someone that earns a living teaching sustainable fashion and crafts its natural for me to always make long lasting garments. However, this tailoring project was the perfect opportunity for me to craft a garment with materials that were close to my heart.
One of my grandmas always used to wear very elegant tailored jackets and when she passed away I unpicked as many buttons I could from all her tailored garments before giving them away. I wish I would have kept her whole tailored wardrobe
Anyway, I always thought I would use those buttons for something special and this jacket was it. Because I pit some much time and energy into it i decided to sew my grandma’s buttons on it and it’s been the best thing ever.
This garment tells a story because of those buttons that I used. Every time I wear it I am reminded of her elegance, her style and her love for me. Best of all I am reminded of all the great times that we had together.
When I lived in Hong Kong a few years ago I was given this beautiful Anna Sui jacket. They have used buttons to embellish it and it looks amazing.
The best thing is that it’s a classic elegant look and it will forever be in style because of those pearl buttons.
PRO TIP: If you sew buttons to embellish a garment make sure that after you do the shank you take the needle under to the wrong side of the fabric and you start the whole process again. You don’t need to secure the thread and cut it every time you sew a different button, that would take forever!
This is part of a little quilting blanket that I made for my daughter. I spent a lot of time making it and I used lace from my unties and grandmas as well as scraps of fabrics that meant something to me.
I also used these beautiful 1940’s buttons that were made in a New York factory. My daughter and I found them together in an op shop and we fell in love with them.
This quilting project was very special to me because I made it with my daughter’s drawings so everything I used had to mean something in relation to her. Using these buttons made this quilt even more special!
Enjoyed the project?
The author may collect a small share of sales from the links on this page.



![How to Sew a Cowl Scarf [The Easy Way!]](https://cdn-fastly.upstyledaily.com/media/2020/11/20/6335627/how-to-sew-a-cowl-scarf-the-easy-way.jpg?size=350x220)



Comments
Join the conversation