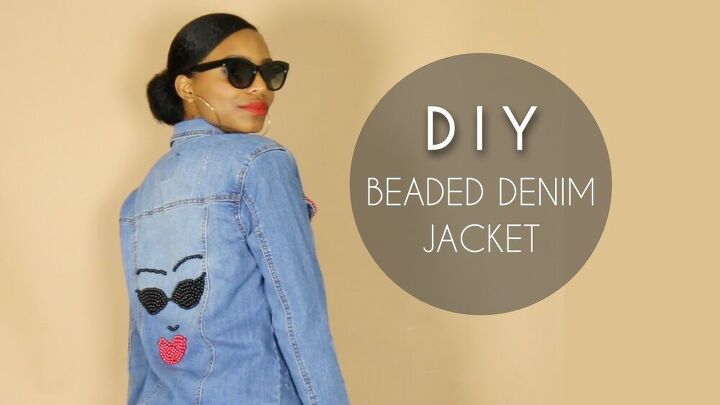
DIY Beaded Denim Jacket (NO SEWING)
Hand-beaded and embroidered denim jackets have been in style for a long time (and rightfully so!). They add personality to any outfit and make a basic jean jacket a lot more dynamic and "high-fashion". Many are sold for hundreds and even thousands of bucks, but with this simple tutorial, you'll get the same couture look on a budget. ;) It's a time-saving DIY way to create a hand-beaded look on a plain denim jacket for a major style upgrade!
Full video: https://www.youtube.com/watch?v=bjmBTSjX7p8&t=16s
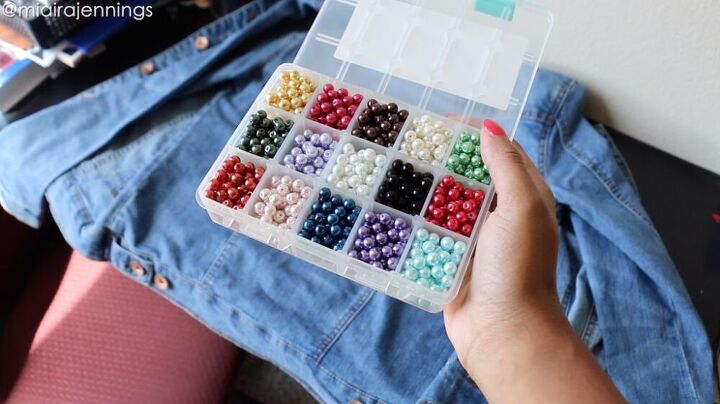
Materials
What you'll need:
- Plain denim jacket
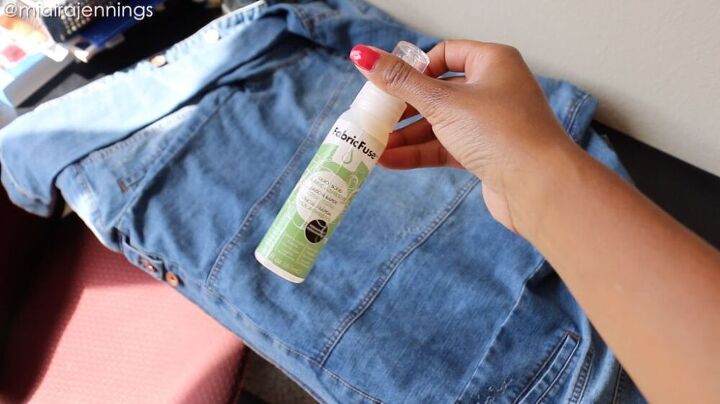
- Fabric glue: https://amzn.to/304nSJP
- 6mm Round Beads: https://amzn.to/2QjzaGH
- Colored Pencil
*Miaira is a participant in the Amazon Services LLC Associates Program, an affiliate advertising program designed to provide a means for sites to earn advertising fees by advertising and linking to Amazon.com.
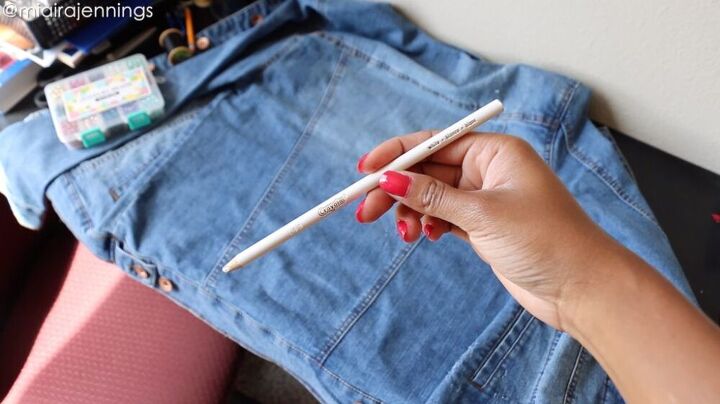
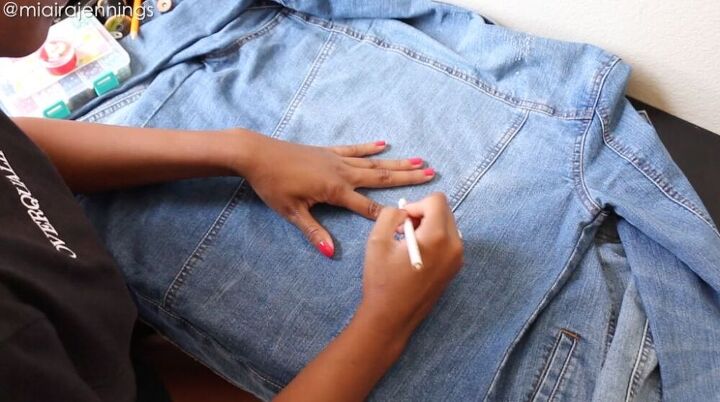
Step 1: Draw or Trace Image
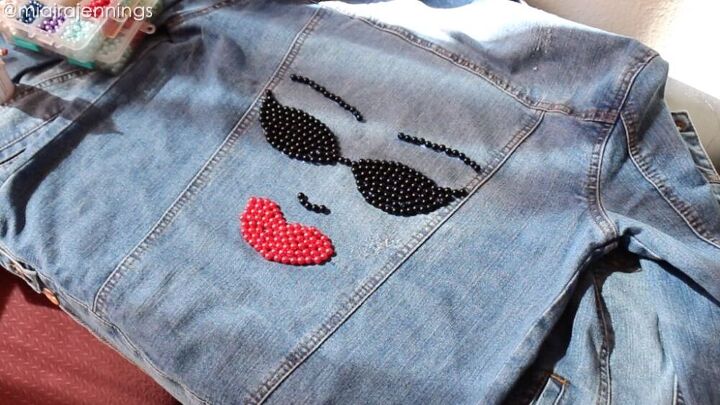
Decide on the design or image you want to create, and then use your colored pencil to draw the outline onto the back of the denim jacket. I freehanded an image of plump lips, cat-eye sunglasses, nose and eyebrows.
If you're not quite comfortable with freehand drawing, simply design or select an image on your computer, print it out, cut out the pieces and trace them onto your jacket!
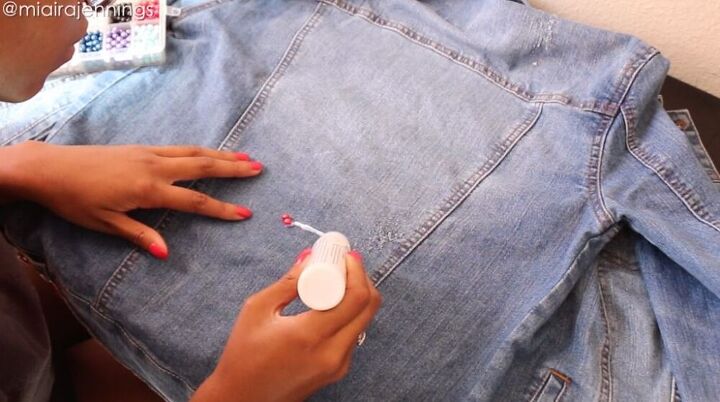
Step 2: Glue Beads
Here's the fun part! Trace over your drawn image with fabric glue and place the beads right on top. That's it! As you can see, I started off with the red lips.
Tip: Place the beads onto the glue so the holes are on the sides and not visible.
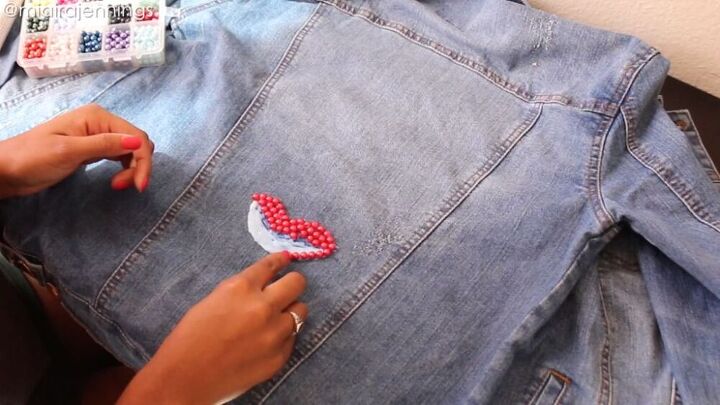
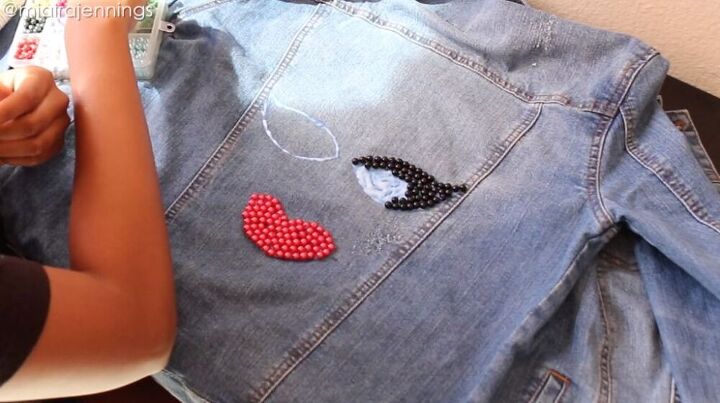
Step 4: Complete Back Design
Continue to outline the rest of your image with fabric glue and add the rest of your beads. I kept mine simple with an image of a face but feel free to go a little crazy with patterns or more intricate images!
Once all the beads are applied to your liking, leave to dry for 2-4 hours.
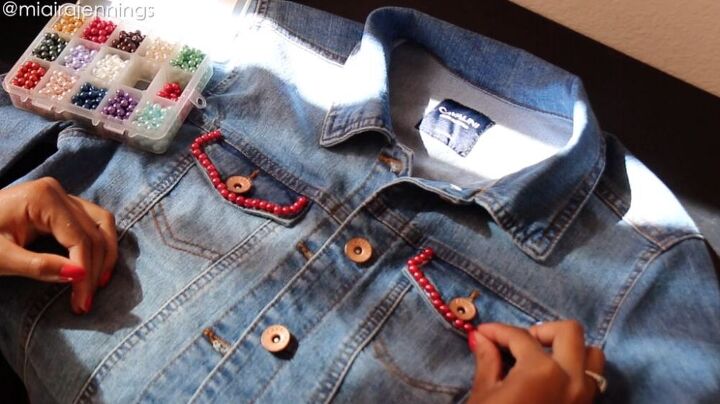
Step 4: Add Details to Front
Once the back is dry, flip the jacket over and add a few details to the pockets, collar, buttons, etc. Really make it your own! I wanted to keep it simple so I lined the pockets and collar corners with red and black beads to match my back design. Leave to dry for 2-4 hours.
All done!
And that's it! A few hours later, you've got yourself a very impressive and trendy beaded jacket that would have cost A LOT more from a designer boutique. Your friends won't believe you made it yourself. I hope you enjoyed this tutorial and please let me know if you try it out. I'd love to see what you make! :)
Instagram: https://www.instagram.com/miairajennings/
YouTube: https://www.youtube.com/miairajenningstv
Website: http://miairajennings.com
Pinterest: https://www.pinterest.com/miairajennings/
Business Inquiries: MGJmedia@gmail.com
Shop my Amazon store: https://www.amazon.com/shop/miairajenningstv
The author may collect a small share of sales from the links on this page.


Comments
Join the conversation
What a great idea! And fun too.
Hi, have you washed the jacket yet and how are the glued beads holding up? I think sewing them on would make them more secure and if you want to change the design all you have to do is clip the stitches. Thank you for sharing your project :)