How to Tie-Dye a Hoodie: Out-of-this-World DIY Galaxy Hoodie Tutorial

Today, I am going to show you how to tie-dye a hoodie to create a galaxy design. Galaxy hoodies are so gorgeous and creative that no one will even notice you are wearing just a hoodie! This DIY tie-dye look is perfect for cold winter days. Let's get started.
Tools and materials:
- White hoodie or other white garment
- Dye
- Regular tipped paintbrush
- Fine tipped paintbrush
- String
- Bucket
- Bleach
- Fabric paint
- Paper
- Iron
- Rubber gloves
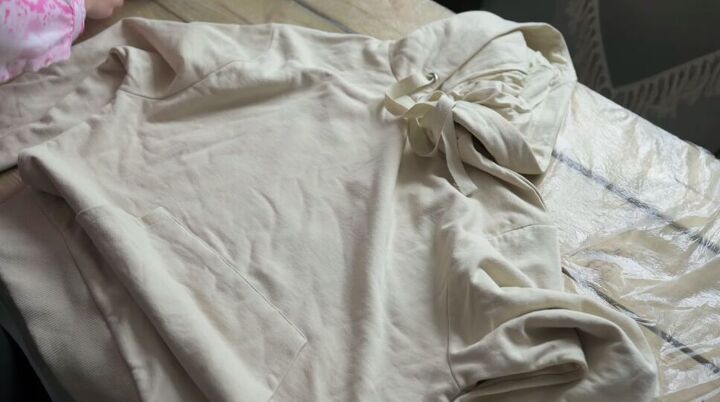
1. Grab your white hoodie
Pick out your garment of choice. For this tutorial, I will be using a comfy oversized hoodie.

2. Prep the dye
For the dye, I am using Dylon Peony fabric powder dye. Pour the packets into three separate cups by color. Fill the cups with water and some dye salt, then mix.
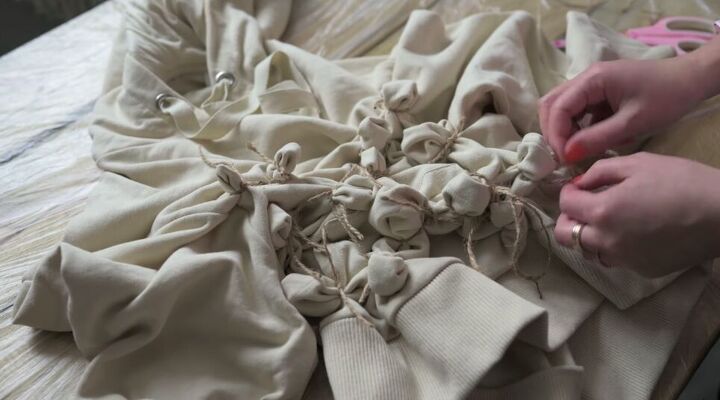
3. Prep the hoodie
Section the hoodie by tying parts of the material with string. This will help create the tie-dye effect. You can use rubber bands instead if you would like.
Remove the drawstring from the hood as well and dye separately.
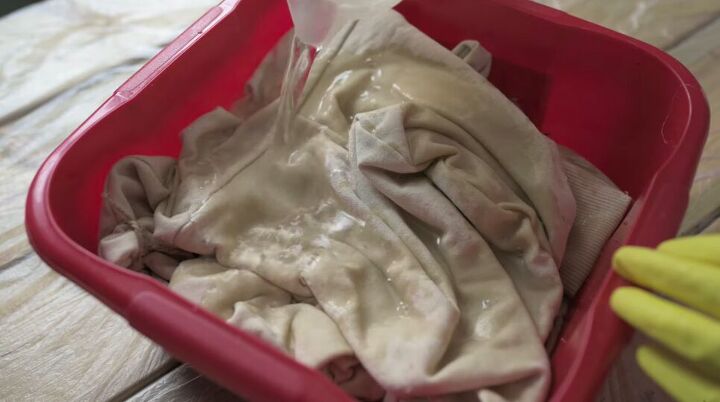
4. Soak your hoodie
Make sure to put on gloves and place your hoodie into a bucket and soak it in water. Squeeze out the hoodie and lay flat.
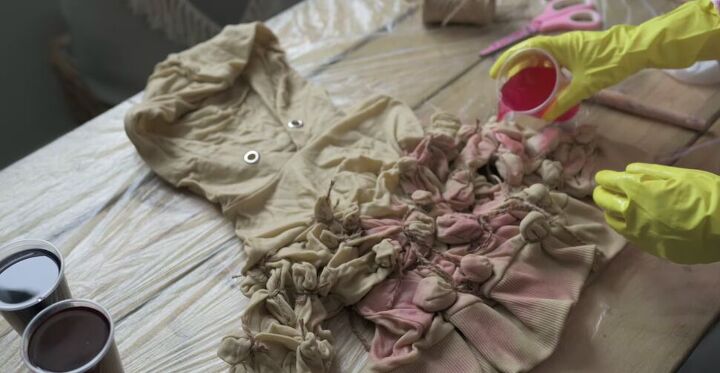
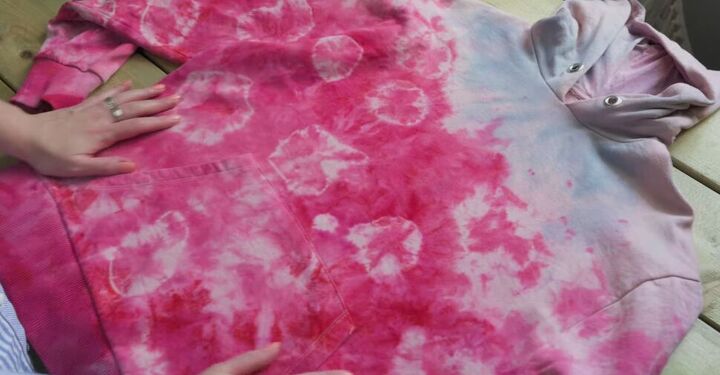
5. Time to tie-dye
Dip a paintbrush into the dyes and dab it on the hoodie where you see fit. You can also do this without a paintbrush by gently splashing the dye directly from the cup onto your hoodie. Put the hoodie back into your bucket and let it sit until the next day.
6. Wash and dry
Cut off all the string and wash and dry the hoodie using a machine. If you are happy with how it came out you can just stop here and enjoy your beautiful new creation! If you are like me however and do not like how it came out, keep reading for further instructions.
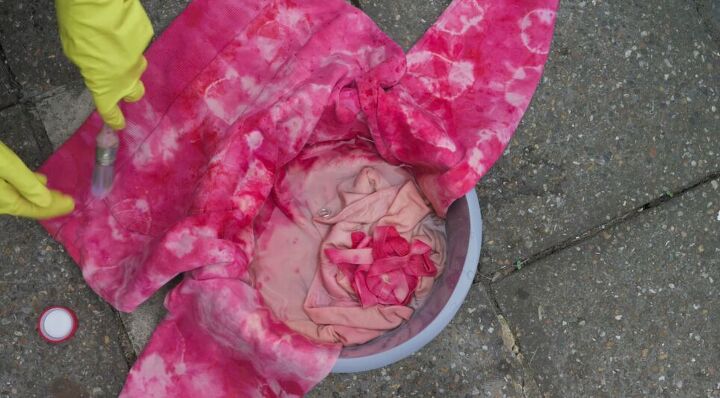
7. Bleach time
Be sure to put on gloves and go outside for this step. Using a paintbrush, dip your brush in bleach and splatter it onto the hoodie. This will help create the galaxy effect. Feel free to add more dye colors using this paint splatter technique.
When you are finished, wait three hours for it to dry and then wash and dry in the machine. Once it is out of the machine you can add the drawstring back into the hood.
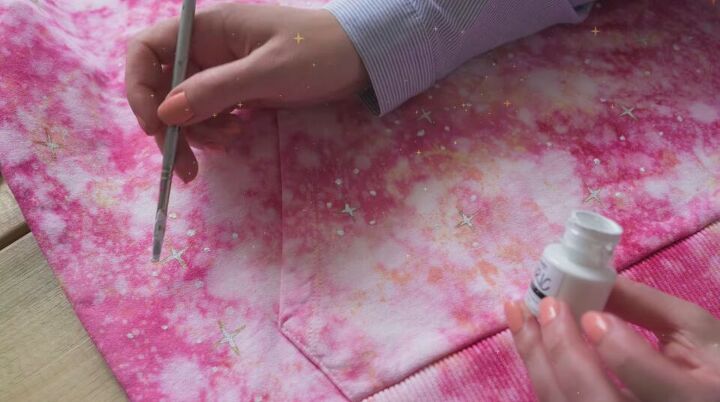
8. Paint the galaxy
To really complete the galaxy look, paint stars onto the hoodie in a plus-like figure with fabric paint. I'm using fabric paint by Dylon in gold and white. Make sure you are using a fine-tipped brush. I am adding dots as well.
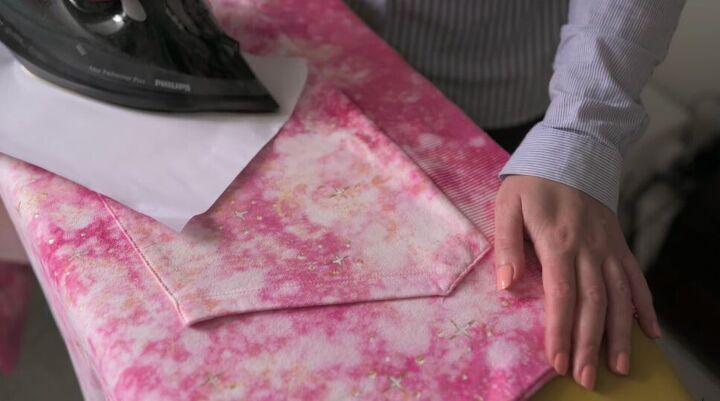
9. Iron your hoodie
To make sure that the paint doesn’t come out in the wash you’ll need to iron it. Just take a basic sheet of paper and place it on the hoodie. Using a clothing iron, run the iron on top of the sheet of paper.
Make sure you iron the entire hoodie so that the stars do not come out in the wash.
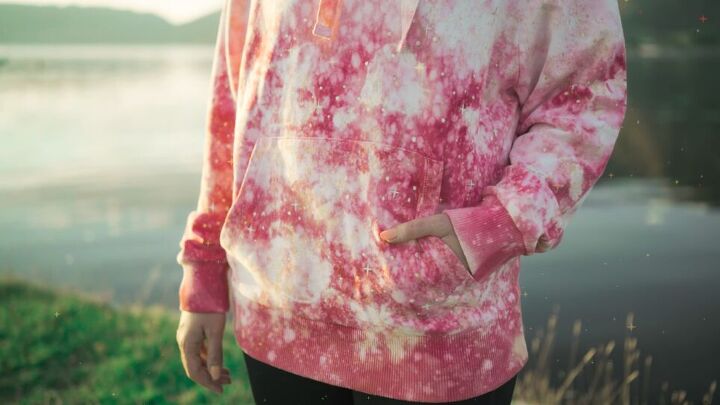
How to tie-dye a hoodie tutorial
There you have it, your very own DIY tie-dye galaxy hoodie! Wear it to bed, or wear it out and about! Either way, you’ll still be in style.
Share pictures of your very own tie-dye hoodie in the comments below!
The author may collect a small share of sales from the links on this page.


Comments
Join the conversation