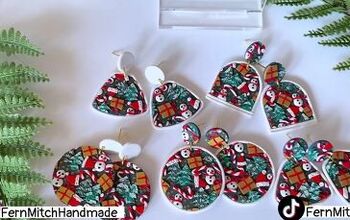
How to Make Charming DIY Christmas Earrings Out of Polymer Clay

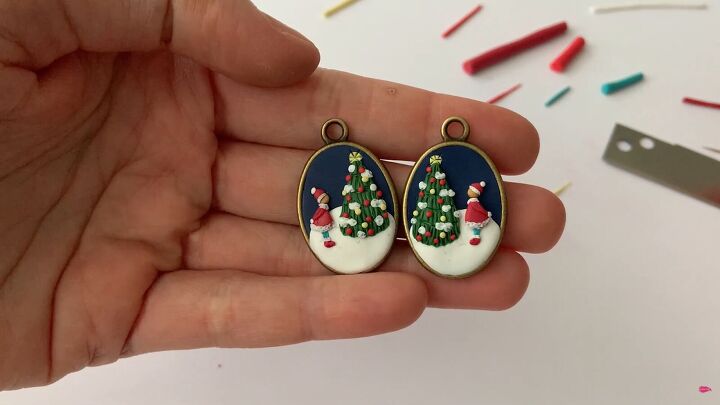
These DIY Christmas earrings with polymer clay embroidery showcase a super tiny holiday design. These Christmas polymer clay earrings are made with just polymer clay, crafty fingers, a sewing needle, and patience.
They are truly beautiful and embody the holiday spirit that you can wear or gift to a special someone. Let me show you how to make these polymer clay Christmas tree earrings today so they’ll be ready to wear in December!
Tools and materials:
- Oval earring backs
- Sewing needle
- Clay slicer or X-acto knife
- Polymer clay in various colors (green, red, white, yellow, navy, robin’s egg blue, gold)
Tip: Before you begin working with polymer clay, you’ll need to condition or knead the clay to soften it. Each piece of clay needs to be soft when applied to the earring so it doesn’t split, crack, or break.
1. Make the base
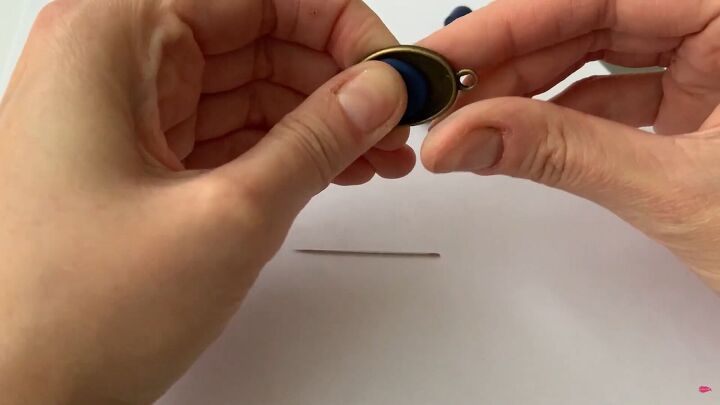
Condition the navy clay. Slice off two rounds and roll into two small balls. Place them into the earring backs, pressing gently so the clay goes right to the edge.
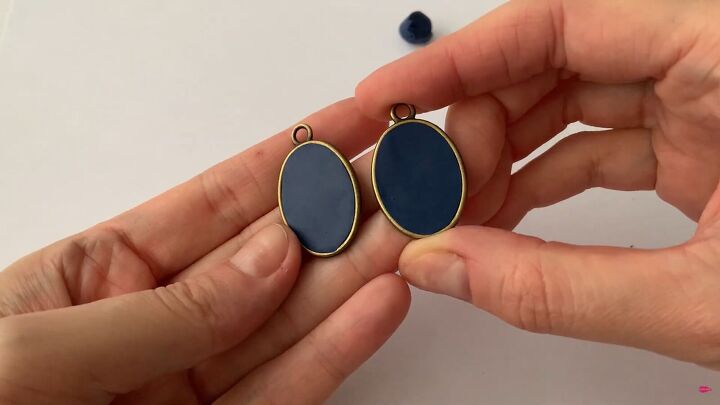
Smooth out the surface with your fingertips.
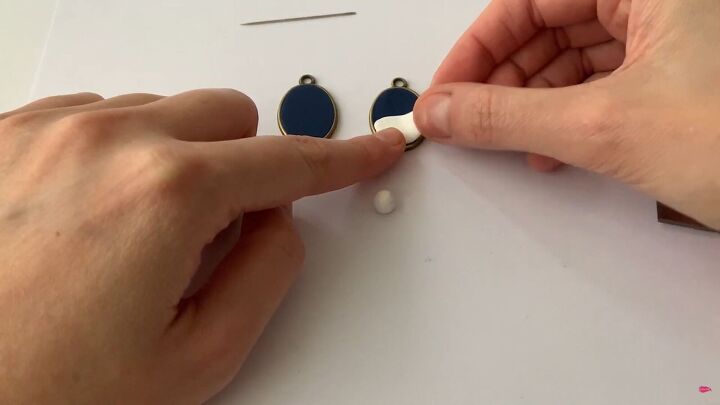
2. Make the fallen snow
Condition the white clay. Slice off two rounds and roll into balls. Then, flatten the balls and press them onto the bottom of each earring.
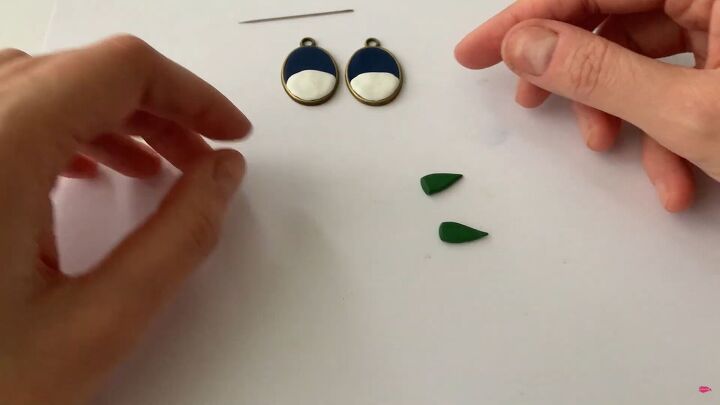
3. Make the Christmas tree
Condition the green clay. Slice off two small rounds. Roll them into a cone shape and slightly flatten them to look like a Christmas tree.
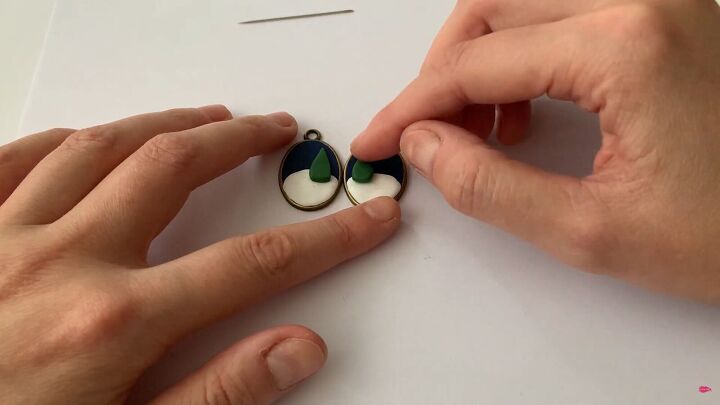
Apply each tree to one side of each earring.
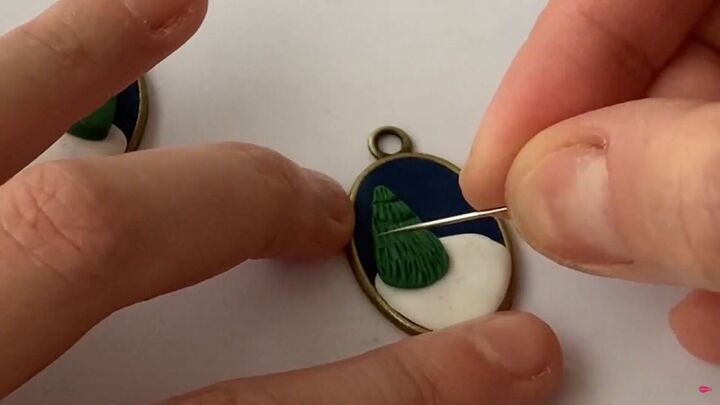
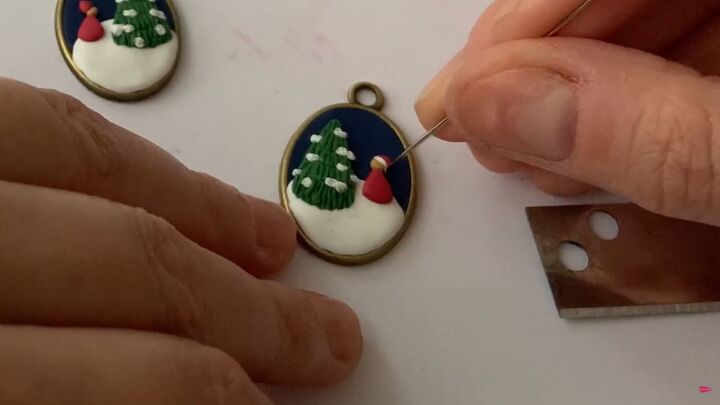
Press the needle with the pointy side about ⅓ of the way deep into the clay, staggering the pointed lines down the length of the tree.
Once those are done, run the needle’s point horizontally across the tree to create the branch levels of the Christmas tree.
4. Add snow to the tree
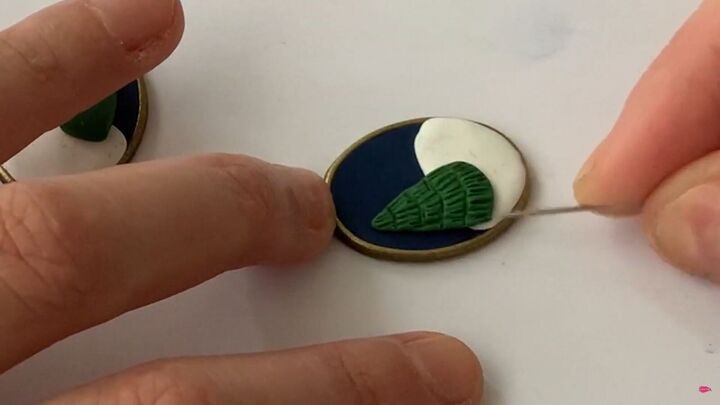
Condition the white clay. Roll the white clay into a thin log. Using the clay slicer, cut off at least 10 tiny balls.
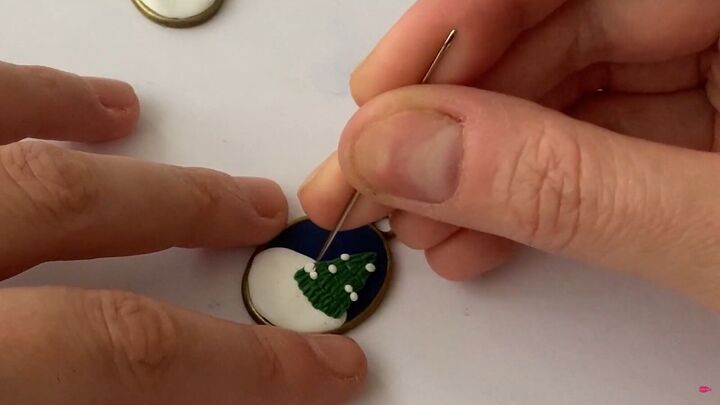
Roll them a bit and then apply them to each tree. Flatten them with the needle top where the eye is, rather than the pointy end. Press them to look like fallen snow.
5. Make the person
Condition and roll out the red clay. Cut two small pieces and roll them into balls. Then roll each ball into a cone shape and slightly flatten them.
Place them carefully with the pointed side up on each earring beside the tree.
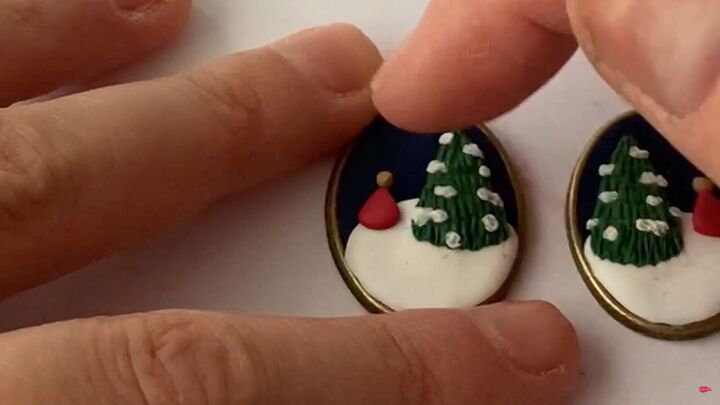
Condition and roll the gold clay into a thin log. Trim off two tiny balls. Roll to further round them and place each one on top of the red cone.
Trim off two tiny red balls from the clay and roll them into tiny cones. Place them pointed side up on each head.
To create the trim for the hat, roll some white clay into a very thin log. Cut a small piece off. Use the needle to apply to the base of the red triangular hat.
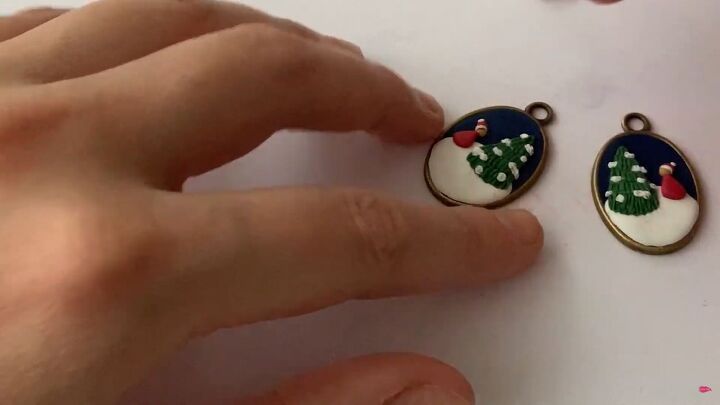
Then roll two tiny white balls and place them on top of the hats to serve as pompoms.
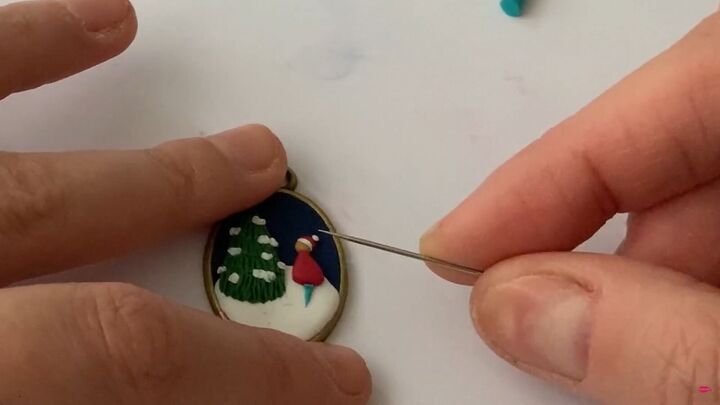
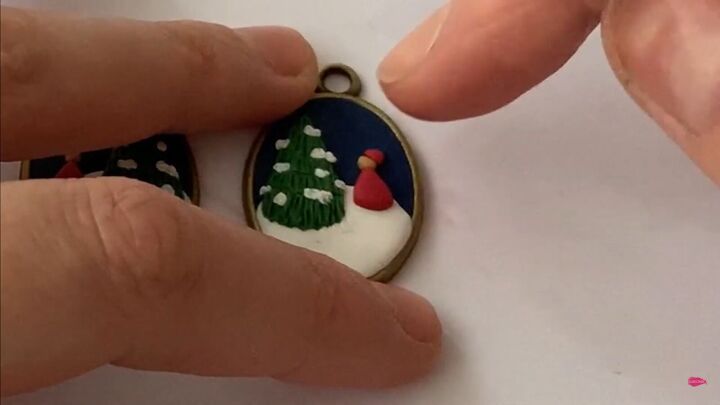
Condition the robin’s egg blue clay and roll into a thin log. Slice off two small pieces and make them into tiny cones. Apply each one with the point facing downward at the base of the red triangles.
Roll the red clay into small balls and then into a kidney bean shape. Place each one at the bottom of the blue legs. Use the needle to help you guide them to the right spot.
Roll the red clay into a very thin log. Cut into two tiny pieces. Roll them so one end is thicker than the other, Use your needle to apply them as arms.
Roll the white clay into a thin log. Cut off a few pieces. Slightly flatten each piece of log and apply to the bottom of the red triangle. Flatten the bottom trim even more once it’s on.

Then apply the white clay to the top of the shoes and the neck as white Christmas and Santa-like trim.
6. Decorate the tree
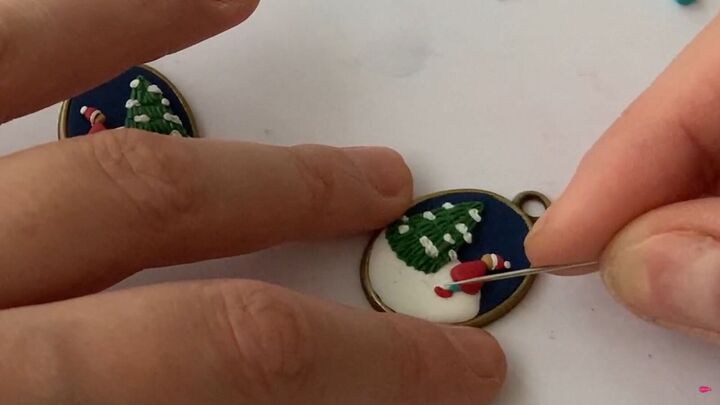
Condition and roll the bright yellow clay. Slice off two tiny rounds. Attach them to the top of the tree.
Slightly flatten them and then use the pointed end of the needle to create a star.
Press down firmly with the needle in a spoke-like pattern. Press hard so the blue is visible.
Roll the red and yellow clay into thin logs. Slice off tiny pieces and roll into balls. Apply to the tree as ornaments.
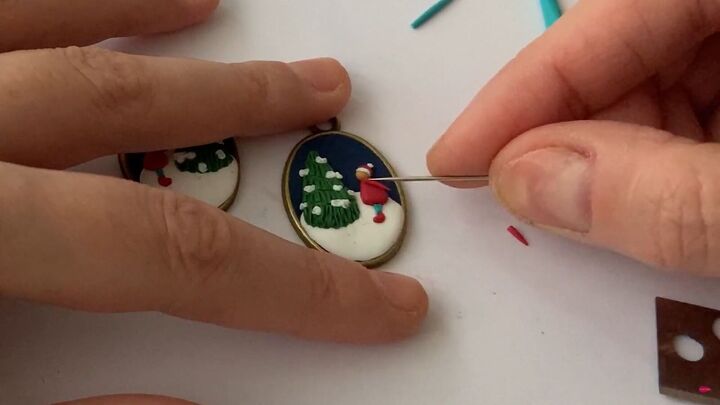
7. Falling snow
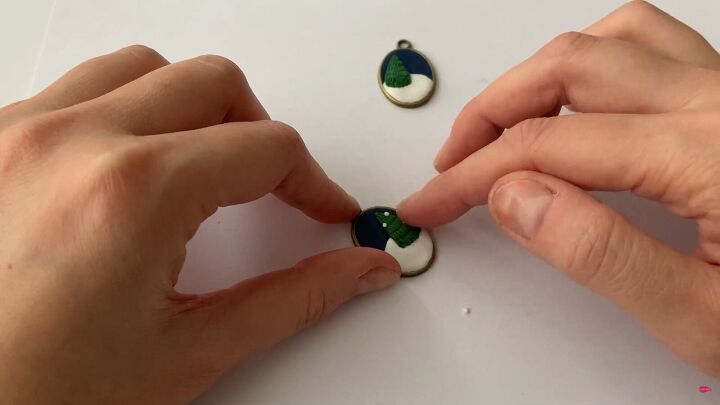
Roll the white clay into a thin log. Cut off several tiny balls to make stars. Affix them to the blue sky. Press the needle’s eye into the center of each star to spread them out a bit.
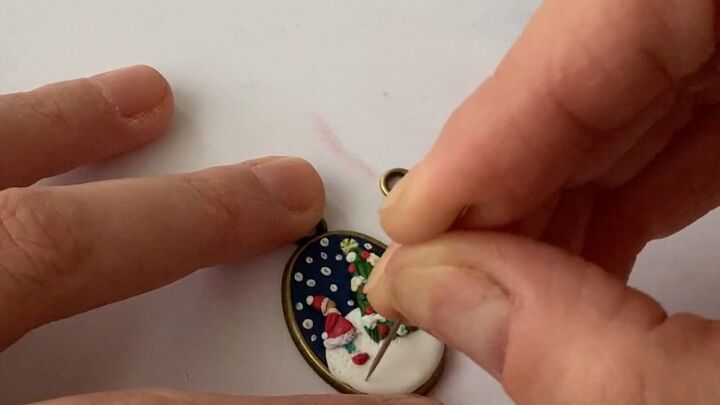
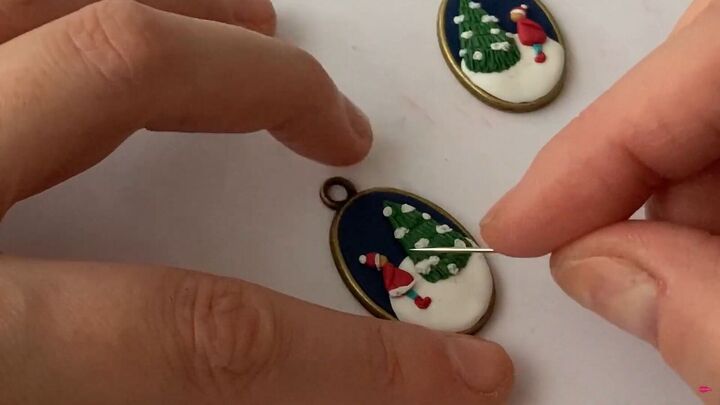
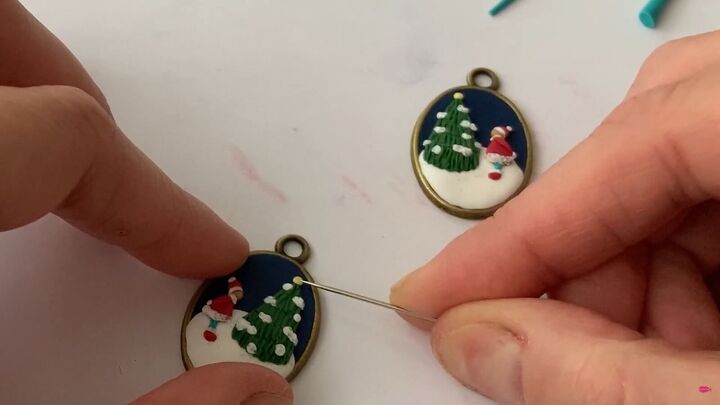
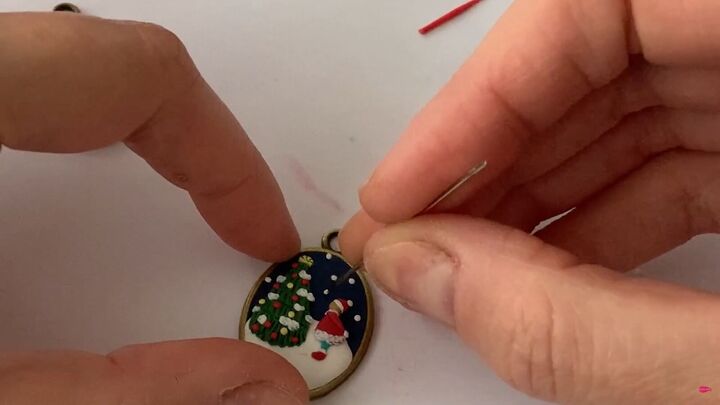
8. Finishing touches
Use the pointed end of the needle to create lines in the snow. Make lines at the base of the tree, the Santa figure, and throughout the snow.
9. Bake and glue
Polymer clay needs to be baked. Check the instructions on your polymer clay packaging for the recommended temperature and length of time for baking, as this can vary.
Pop the clay pieces out of the earring back and bake. Once cooled, add a blob of glue and secure the designs on the earring backs.
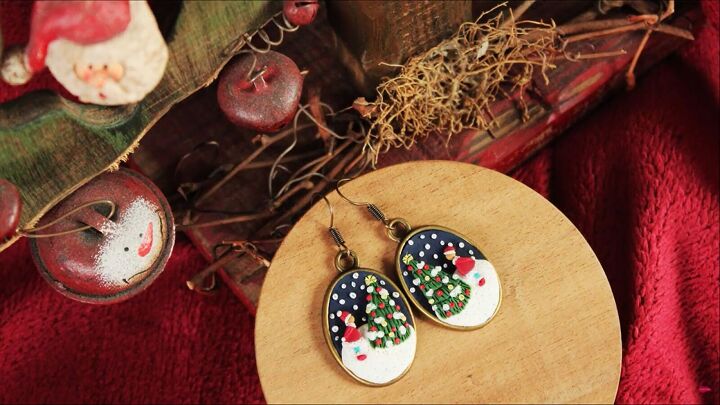
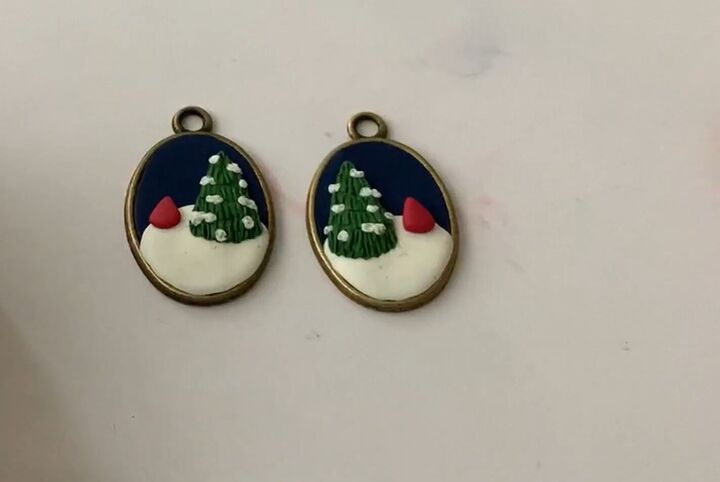
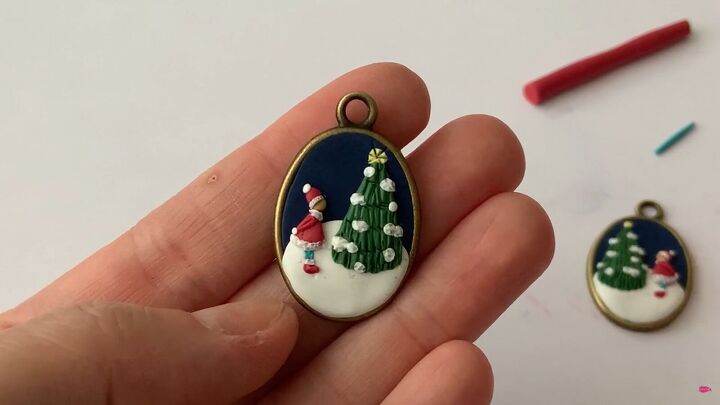
DIY Christmas earrings tutorial
These are such special DIY Christmas earrings, perfect to get you into the holiday spirit! Please let me know in the comments what you think of these earrings! Happy Holidays! Merry Christmas!
The author may collect a small share of sales from the links on this page.


Comments
Join the conversation