Super Easy DIY Neck Waxing Tutorial

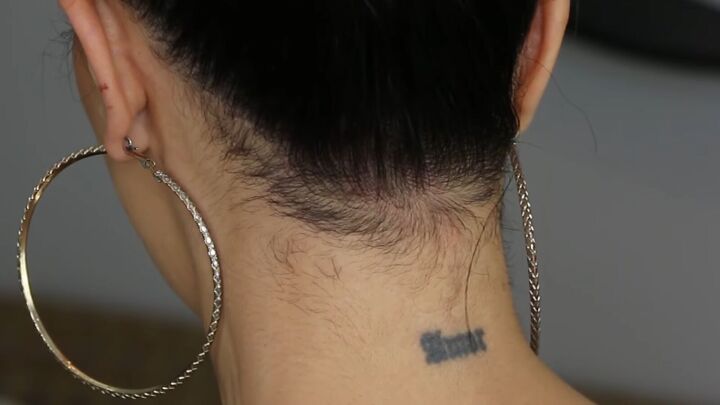
So, I used to have a Chewbacca hairline. But not anymore!
In this tutorial, you are going to learn how to get rid of hair on your neck, at home, by yourself. It’s much more affordable than going to the salon monthly. Let’s get started.
Tools and materials:
- At-home waxing kit including the machine, wax beads, popsicle stick and moisturizing wipe (I used Lifestance)
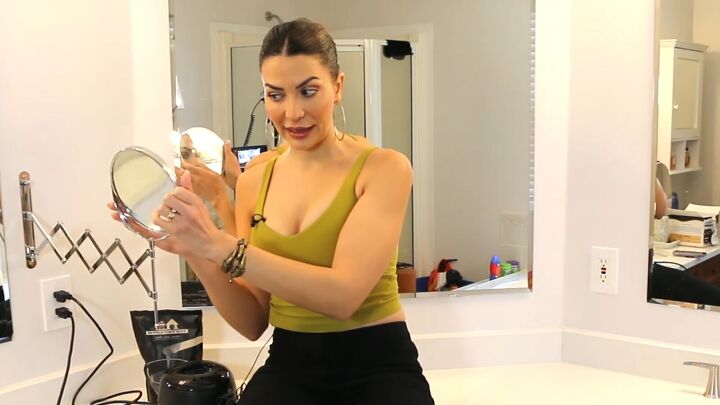
1. Arrange your setup
Since this is completely DIY, you need to have a good view of the back of your neck.
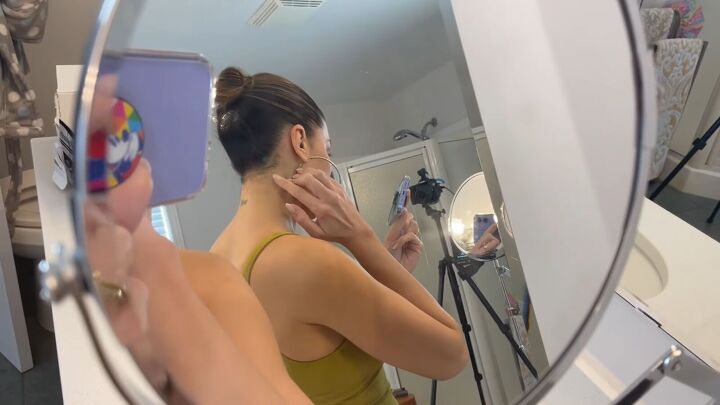
You’ll need two mirrors, so as you can see, I’m sitting on my counter, using the swivel mirror to see the reflection from my wall mirror.
This is the angle that I can see in the mirror:
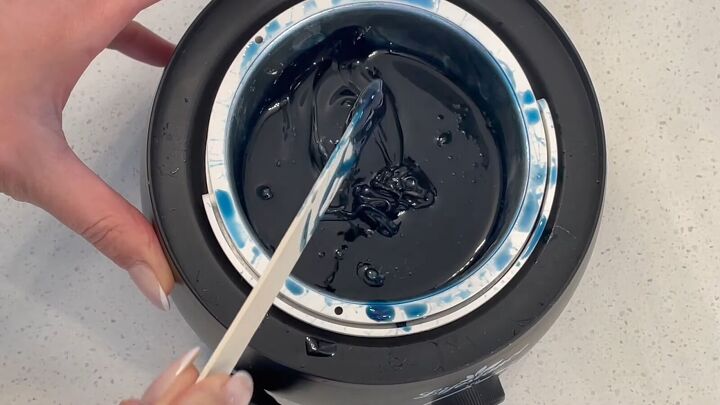
2. Prepare the wax
Follow the directions on your waxing kit and read any warnings carefully.
You want the consistency of the wax to be like honey. If it’s too runny, that means it’s too hot. If it’s too hard, it’s not going to work.
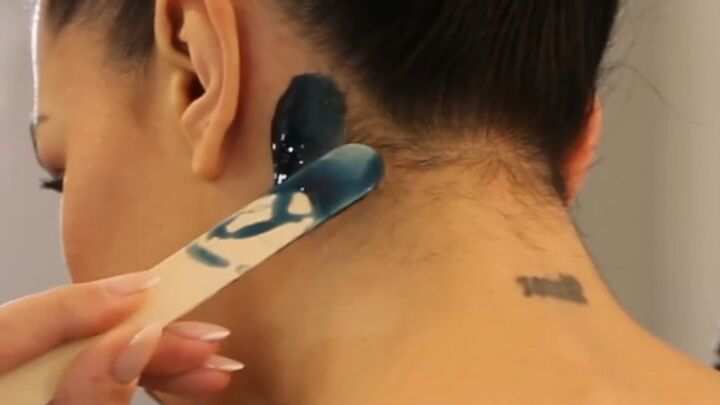
3. Apply a small section of wax
Before starting, tie your hair up well using an elastic and clips–whatever you need to get clear access to your neck.
Find your starting point and apply the wax in the direction of the hair growth.
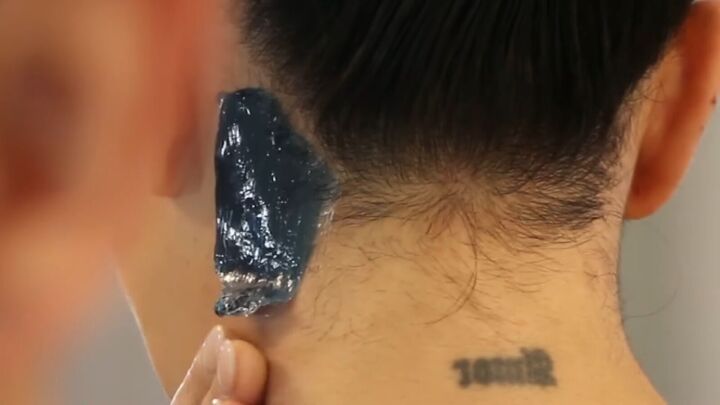
If you are a beginner, I suggest starting with small sections. Wait for the first portion of wax to dry.
When the wax feels hard and no longer sticky, it’s time to pull it off, in the opposite direction.
Start by grabbing the end and lifting it a little (honestly, that’s the part that hurts the most!).
Then hold the skin taught, grab the end of the wax and pull quickly upward.
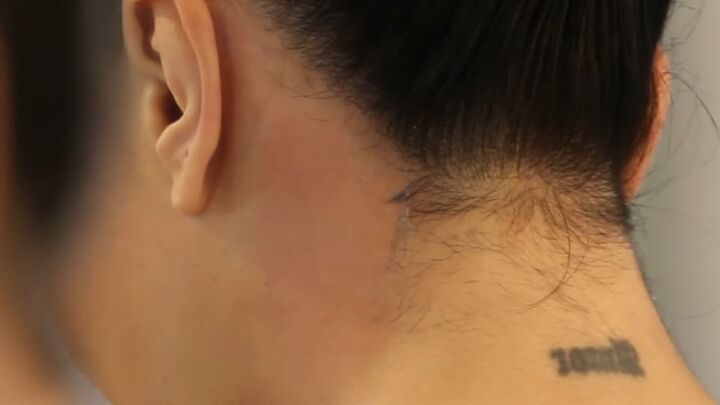
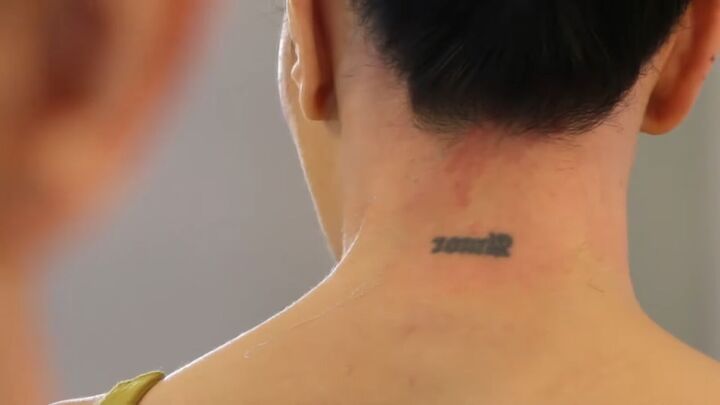
As you can see in the red area, all the hair is gone.
4. Continue all along the hairline
Now it’s time to continue along the hairline, doing the exact same thing.
Be very careful that the wax only touches hair that you wish to remove!
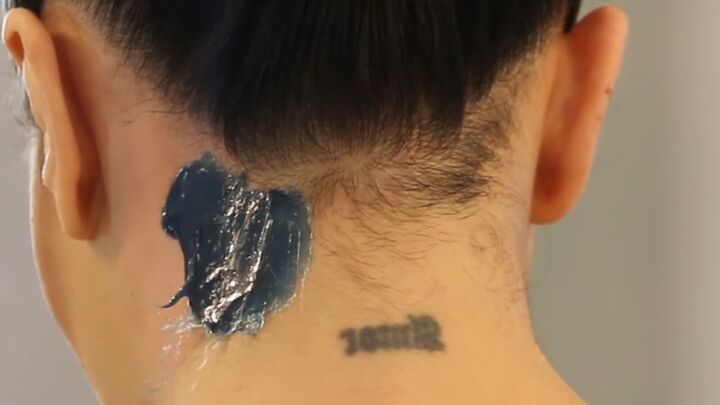
You can see how well the wax is working:

If you see any white buds, those are the roots of the hair. So, these physical wax strips are doing well at waxing the neck hair.
As you can see, it looks red at first, but this goes away quickly. I haven’t found it to cause any skin issues at all.
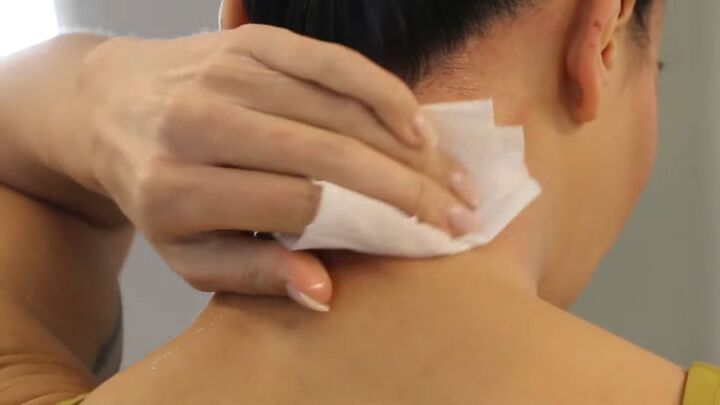
5. Soothe the skin
The kit comes with soothing wipes. Gently wipe the skin, which restores moisture to the area.
DIY neck waxing
Now that you’ve seen how easy it is to do your own neck waxing at home, I hope you'll give it a try. This will save you so much time and money in the long run!
For more beauty tips and tricks, check out my post on Hot Tips on How to Look Good Without Makeup.
The author may collect a small share of sales from the links on this page.


![DIY Tassel Earrings [Super Easy Tutorial]](https://cdn-fastly.upstyledaily.com/media/2021/04/22/6428579/diy-tassel-earrings-super-easy-tutorial.jpg?size=350x220)


Comments
Join the conversation