DIY Necklace Pendant Made From Upcycled Fabric Samples
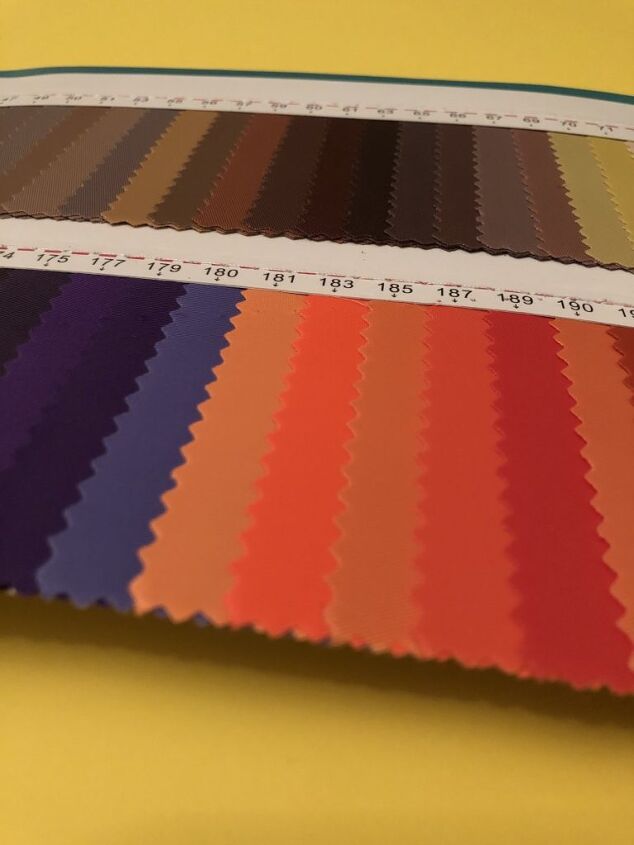
This tutorial is all about how you can make an easy DIY Necklace Pendant using fabric swatches or fabric samples. The ones I used are a thin laminated cotton type material but you could use any kind of fabric swatch – upholstery samples, curtain swatches or even dressmaking fabric samples.

Materials Needed – DIY Necklace Pendant
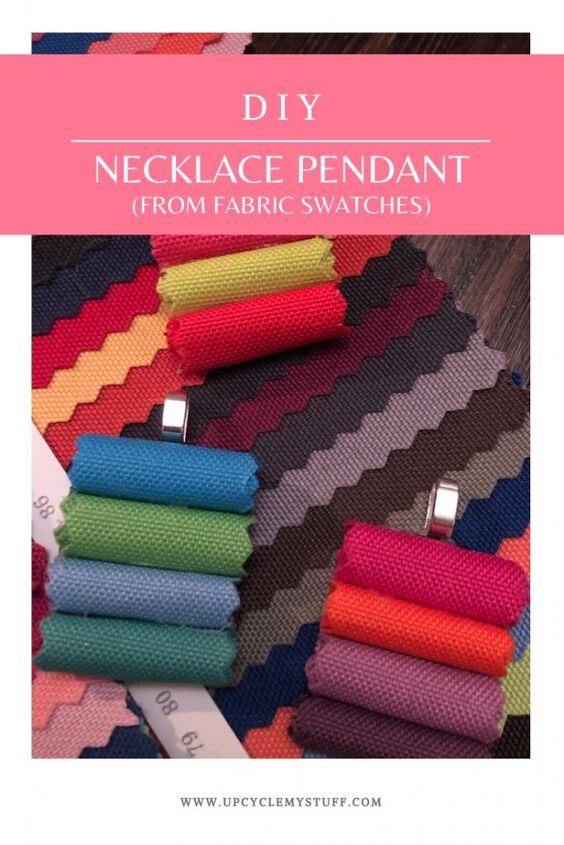
- Fabric Swatches or Samples (mine were 11cm x 3cm/4.3″ x 1.2″)
- Pinking Shears (optional – this is just if your samples are very large and you want to cut them down)
- Hot Glue Gun
- Necklace Pendant Base
- Needle & Thread (optional)
- Fabric Scissors
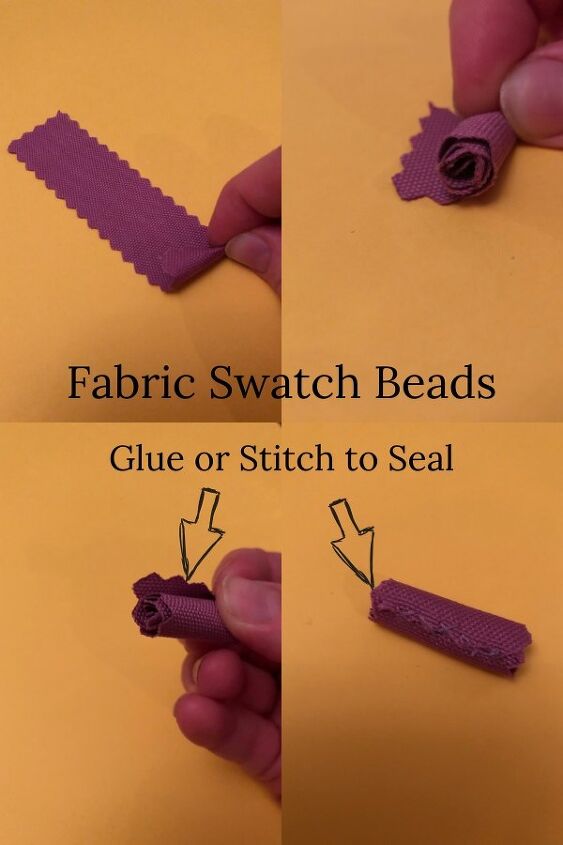
Step 1: Create Fabric Swatch Beads
The first step in this project is turning your fabric swatch samples into bead shapes.
Once you’ve done that you can go on to follow the rest of the steps to make the type of pendant I made or you can use the fabric beads to make something of your own creation.
Because they are rolled like beads you can string them just like any other bead.
My swatches were long and thin (11cm x 3cm/4.3″ x 1.2″) so I didn’t cut them down at all and I used one swatch for one bead. If you have bigger swatches you can cut them down to a better size.
If you want to keep the zig-zag edge of the swatch use pinking shears. If you don’t want that edge just trim all of that off using sharp fabric scissors.
I choose to leave the zig zag edge on mine as I thought it added a bit of interest and gave a nod to the fabric swatches I had used to make my DIY necklace pendant.
To make the beads, simply roll up the swatch as tightly as you can by tucking in one end and rolling along a flat surface or between your fingers.
To close the bead you can either hand sew it closed with a thread of a similar colour or use a dab from your glue gun to seal it.
If you are going to use these to string on to a bracelet or necklace hand stitching it is probably a better idea.
For this project, I experimented with both and actually, the glue gun method worked just as well and as I was then sticking the beads (seam down) on my backing it made sense to use glue for both.
NOTE: You can use the same method to create beads from scrap fabric – however – keep in mind that the swatches I was using are a stiff laminated cotton type fabric so they naturally hold their shape and will leave space in the middle for a string or chain. Thinner types of fabric won’t behave in the same way. You can still use them for this project but they won’t work as well if you are trying to string them.
Step 2: Glue your Fabric Beads to the Pendant Backing
The basic idea for this DIY necklace pendant is to take four of these fabric swatch beads and combine them to make the pendants. You don’t have to stick with four, that is just the shape and size that appealed to me, but you could equally do 2, 3, 5 or even 6!
For my backing, I used another fabric swatch. I choose black for the backing. I placed it down on a flat surface, dabbed some glue along the seam of my first fabric bead and pressed it down on to the backing.
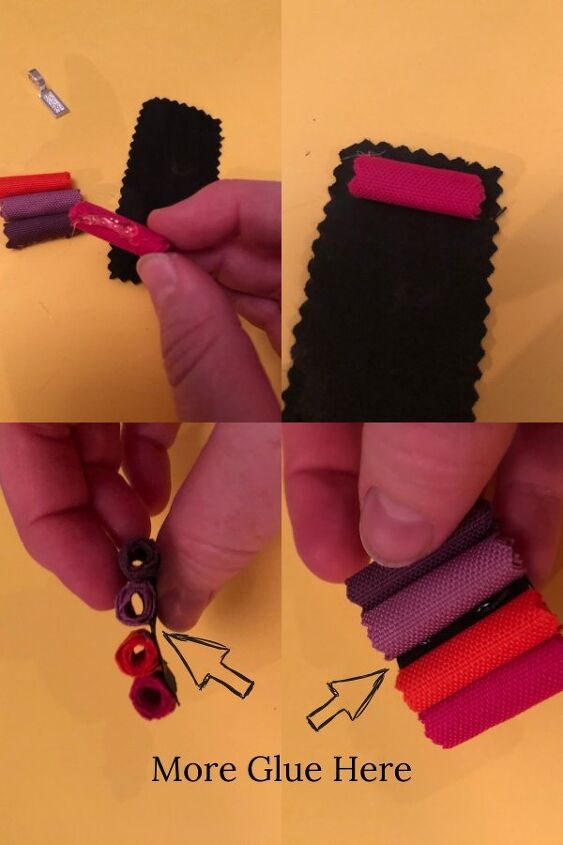
I then repeated this process for each of my next three beads.
When this is done you will probably see that your pendant is a bit ‘floppy’ for want of a better word. This is because there are gaps in between the beads. So at this point, you can dab another small bit of glue in between your fabric beads to seal them to each other (see image above).
[elementor-template id=”16665″]
Step 3: Trim your Pendant Backing
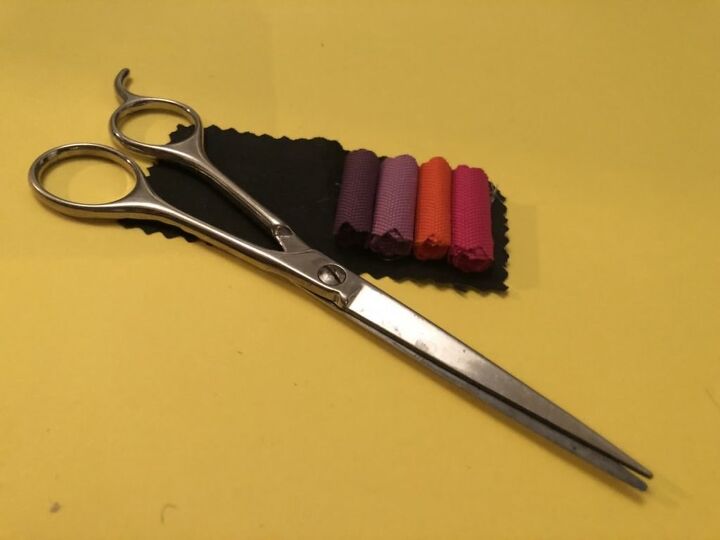
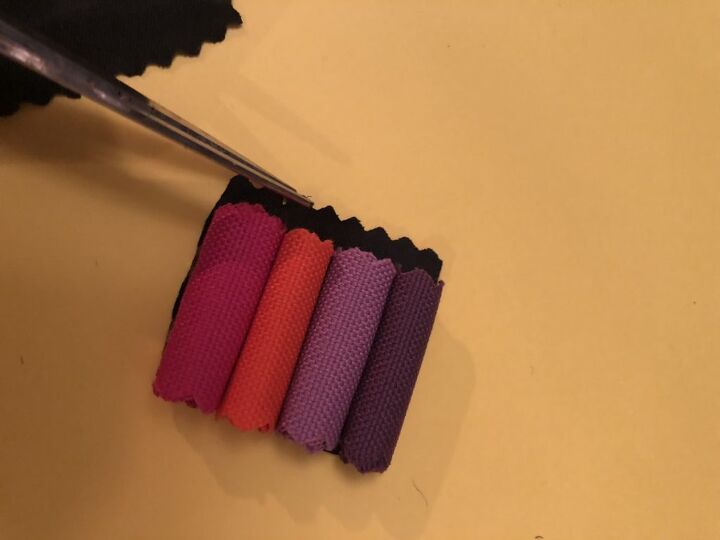
Once your beads feel secure it is time to start trimming your backing fabric so that you can’t see it from the front. Some nice sharp thin scissors are perfect for this. I didn’t wait until my glue was completely dry. I trimmed off both the excess fabric and any little strings of glue from the glue gun before they had completely hardened.
Step 4: Attach your Pendant Base
The last step is to attach your pendant base. You can get different varieties of these but this one that I used is great for lots of projects as it is solid and chunky and has a nice sized area for attaching adornments.
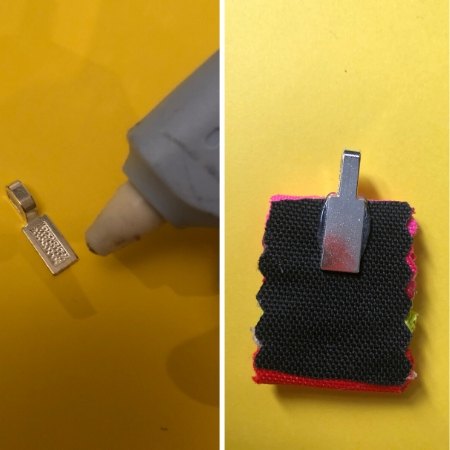
I simply put a dab of hot glue on the plate of the pendant base and pressed the back of my fabric swatch pendant down on top.
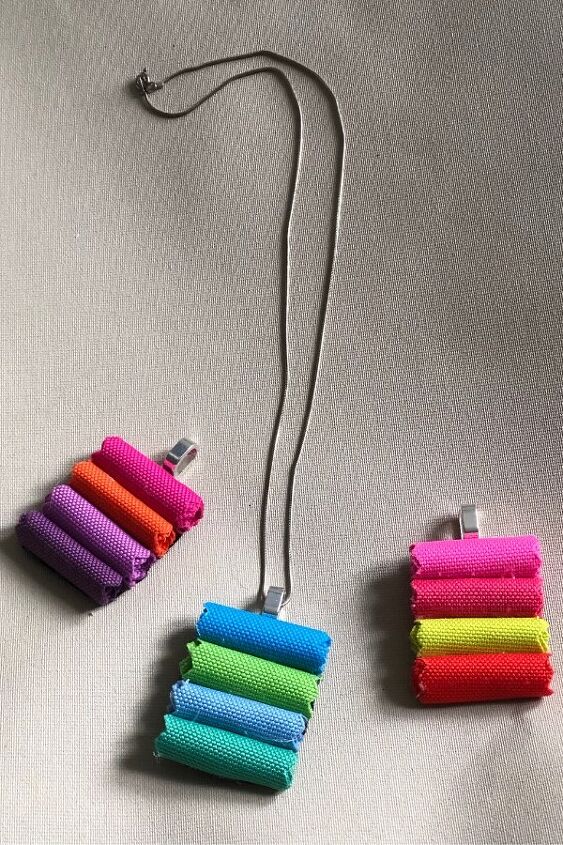
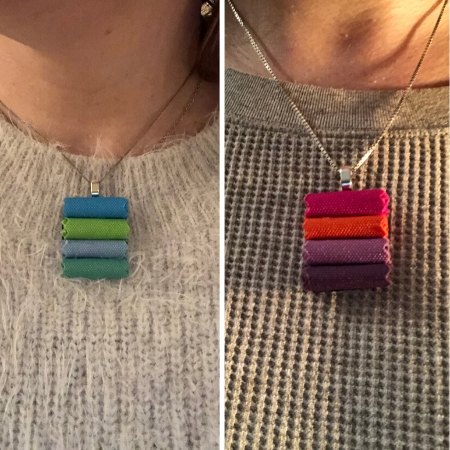
Hey, presto – you are done! I loved how the first one turned out so much that I did several more for friends and family. I went pretty bright with my colour choices but there is no reason you couldn’t use a more muted colour pallet to suit your style.
Each pendant took less than 15 minutes to make so this is also a super fast and simple project with very satisfying results! I think these would make great gifts for mother’s day, or birthdays and they’d be an especially great gift for a fellow crafter or dressmaker – they can carry their swatches around with them!
Materials
- Fabric Samples/Swatches
- Pendant Base
- Hot Glue
Tools
- Hot Glue Gun
- Pinking Shears (optional)
- Fabric Scissors
- Needle & Thread (optional)
Instructions
- Roll long thin fabric samples into fabric beads.
- Glue them onto another fabric swatch with a hot glue gun.
- Glue in between the beads to strengthen the pendant.
- Trim the backing fabric away.
- Use hot glue to attach the pendant to the pendant base.
If you liked this tutorial you might also enjoy these ones:
- 17 Brilliant Ideas for Upcycling your Scrap Fabric
- How to Upcycle Scrap Fabric into Wrapped Bangles
- 10 DIY Personalised Gifts you can make from your Upcycled Stuff
Want to try this project? Pin it for later to your Scrap Fabric or Crafts you can sell board!
The author may collect a small share of sales from the links on this page.


Comments
Join the conversation