DIY Pink and Gold Nails

Are you looking for an easy way to upgrade your at home manicure? These pink and gold nails are a simple way to impress, using this beginner-friendly, gold and glitter technique. Follow along with my step-by-step tutorial.

Copy the look!
1. Apply your base color
Start by applying 2 coats of your favorite, pink shade to all of your nails. Using 2 coats will ensure that the color is even and smooth.
2. Add glitter
Before your nails dry completely, pick up a bit of loose glitter on your finger.
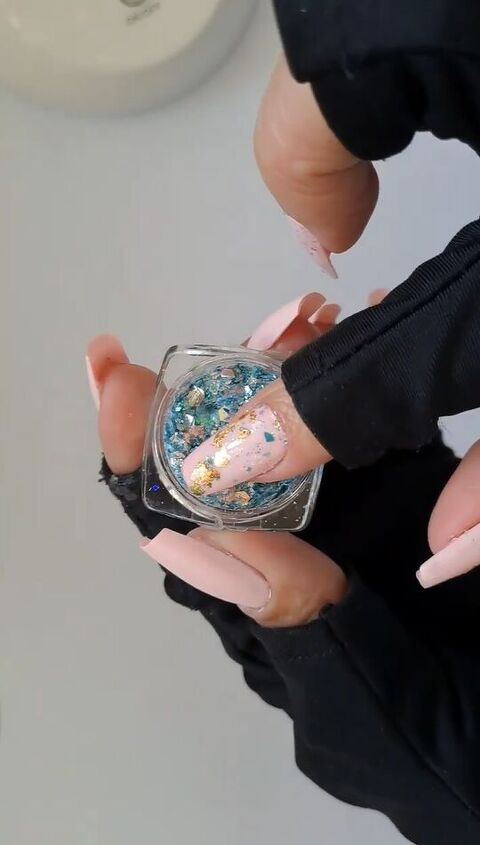
Then, transfer the glitter onto your nails by gently pressing the glitter in place.
Tap the glitter on about half of the nail, from the cuticle downward. Be sure not to slide the glitter on because that will move the polish.
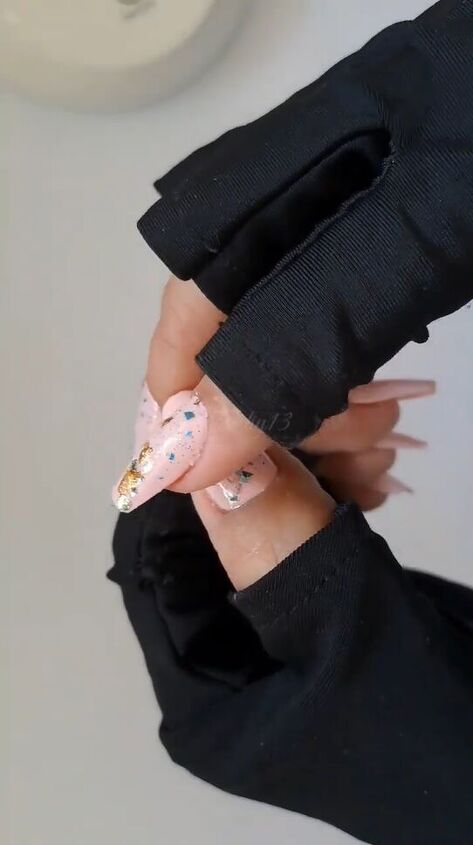
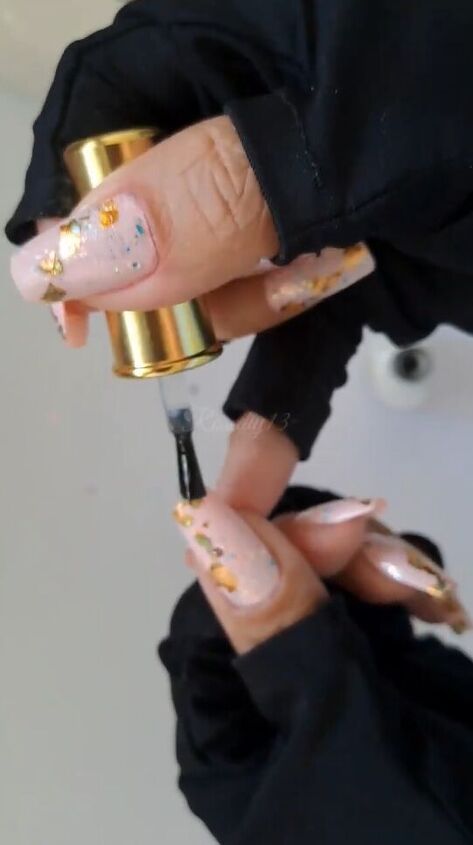
3. Apply gold foil
While the nail polish is still wet, add a few small pieces of gold foil on the plain parts of the nail that are mostly without the glitter.
You may need to rip some of the foil pieces to make them smaller, to fit on the nail.
4. Apply a top coat
Make sure your pink and gold nails last by applying a clear top coat.
Not only does this step add shine to your nails, but it will also ensure that the gold foil and glitter accents stay in place.
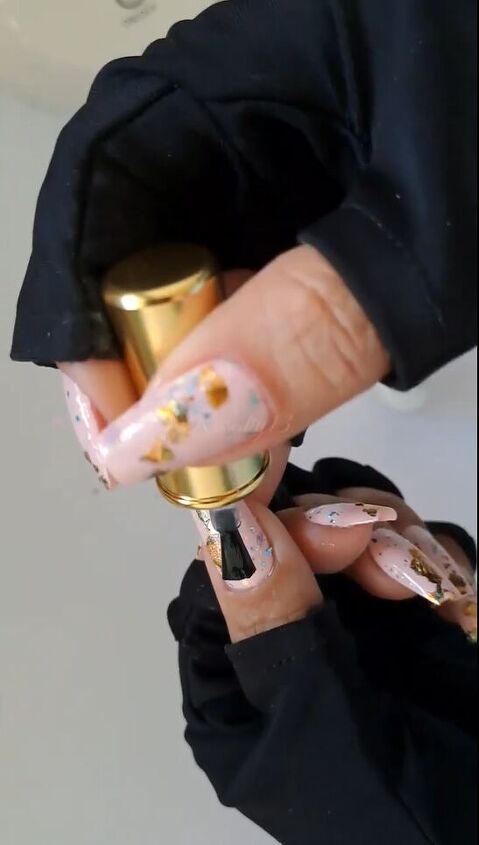
Don’t forget to cap the polish across the free edge of the nails to make it less likely to chip.
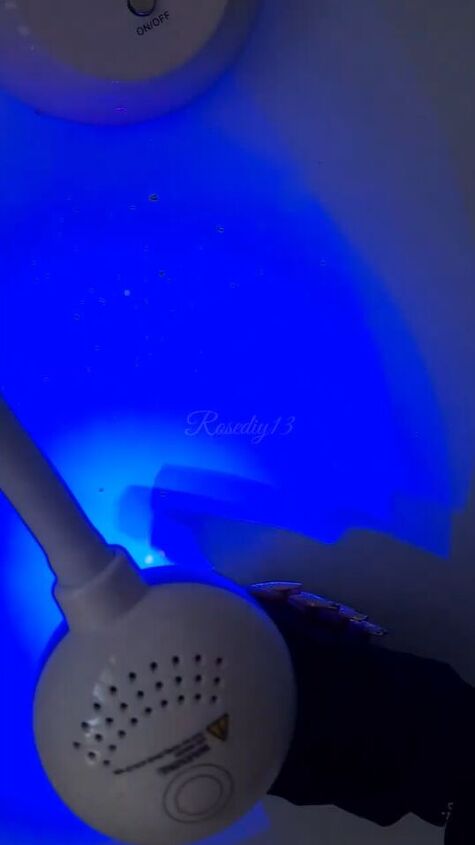
5. Set your nails
Finally, set and dry your pink and gold nails by using your UV lamp for 2 minutes, or with a LED lamp for just 30 seconds.
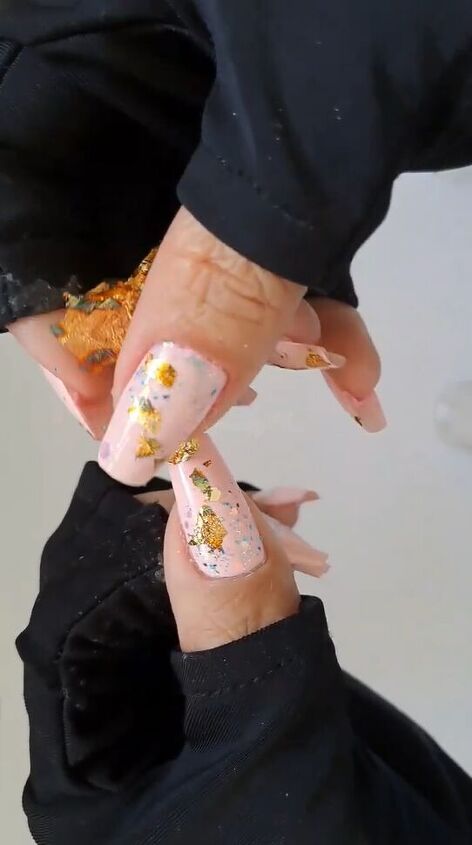
Here is the final result:
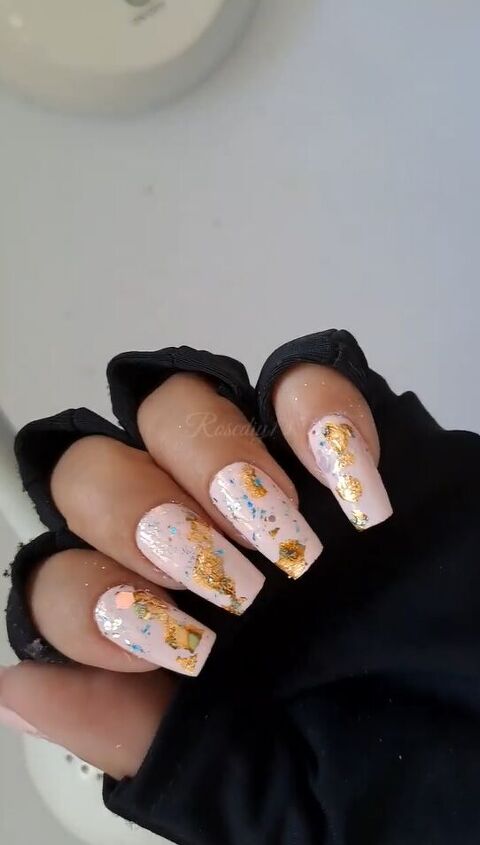
DIY pink and gold nails
I hope you enjoyed this easy, pink and gold nail tutorial. If you did, leave a comment down below!
For more nail inspiration, check out my post on how to Make Your Nails Grow Overnight With One Common Kitchen Ingredient.
Tools and materials:
- Pink gel nail polish
- Loose glitter
- Gold foil
- Clear gel top coat
- UV lamp
The author may collect a small share of sales from the links on this page.


Comments
Join the conversation