This Beautiful DIY Backless Maxi Dress is So Flowy & Romantic

If you’ve been looking for an elegant DIY backless maxi dress, then this tutorial is for you. Here’s how to make a backless maxi dress that will turn heads from the front and back! Let's get started.
Tools and materials:
- Loly Dress by Wissew sewing pattern
- 3 meters (3.28 yards) of fabric: linen, viscose, or crepe
- 20cm (8-inch) zipper
- 40cm (16-inch) lining
- 10cm (4-inch) iron adhesive
- Sewing machine
- Scissors
- Measuring tape
- Marking chalk
- Pins
- Needle and thread
Note: Download, print, and follow the pattern instructions to customize this dress to fit.
1. Cut the fabric
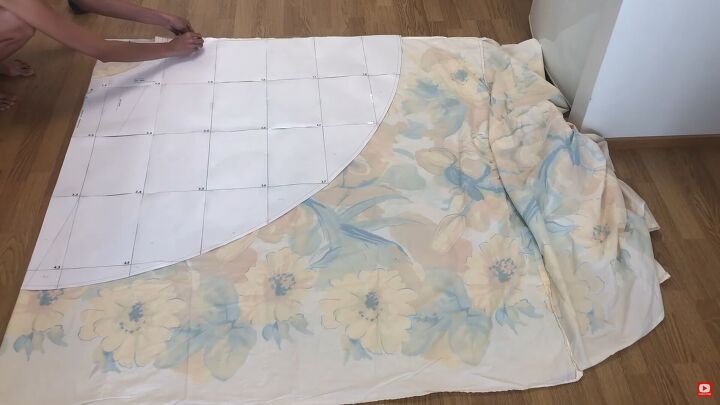
Lay the fabric on a flat surface. Adjust the pattern for a custom fit. Place the pattern on top, pin, then cut all the pieces.
2. Zigzag stitch
Zigzag stitch the middle back part of the skirt.
3. Make the darts
Make marks for the darts. The pattern will show where to place them. Align the two marks together and pin them in place. Sew with a straight stitch.
4. Sew the lining
Place the front and back lining right sides together and sew with a straight stitch.
5. Sew the front
The pattern will guide you where to make four marks on the front panel. Fold at the marks, pin, and sew the pleats in place.
Place the front and back pieces right sides together and sew with a straight stitch.
Place the linings right sides together and sew the middle front with a straight stitch.
Place the front pieces right sides together and sew the middle front with a straight stitch.
Now, place the linings and front pieces right sides together and sew the neckline with a straight stitch.
Snip the seam allowances to flatten the tension on the curves.
6. Sew the top
Using the front pattern, make two marks and align them together. Sew the shoulder, armhole, and back 1cm (⅖ inch) from the edge.
Make a dead seam on the neckline, armhole, and back sides, sewing the lining to the seam allowance to keep the lining in place.
Turn the top right side out. Use a skewer to help if needed.
Fold the top of the dress by the insertion points about 1.5cm (⅗ inch) to create a hole for the straps.
7. Attach the pieces
Place the first belt right side up. Then put the top right side up. Then place the second belt on the wrong side facing up.
Pin them all together and then sew with a straight stitch.
Connect the skirt to the top and belt. Place the skirt and top right side up facing together. Pin the skirt to the front belt. Sew 1cm (⅖ inch) from the edge.
8. Add the zipper
Place the dress right sides together and sew a straight stitch starting from the zipper notch to the bottom.
Pin the zipper and sew it into place.
Sew the inner belt to the zipper. Fold the end of the belt 1cm (⅖ inch). Fold the inner belt about 1cm (⅖ inch) and hand sew them closed.
9. Straps
Fold the strap edges inward to hide the raw edges. Sew them down with a straight stitch. Sew the straps at the top of the dress at the marked notches.
10. Hem the dress
To finish the dress, double fold the bottom edge and sew with a straight stitch.
DIY backless maxi dress tutorial
There you have it! A DIY backless maxi dress that is so pretty, you could even wear it as a bridal gown! Please let me know in the comments what you think of this tutorial and the final result.
Enjoyed the project?
Suggested materials:
- Loly Dress by Wissew sewing pattern
- 3 meters (3.28 yards) of fabric: linen, viscose, or crepe
- 20cm (8-inch) zipper
- 40cm (16-inch) lining
- 10cm (4-inch) iron adhesive
- Sewing machine
- Scissors
- Measuring tape
- Marking chalk
- Pins
- Needle and thread
The author may collect a small share of sales from the links on this page.


Comments
Join the conversation
Looks great on you! Beautiful dress!
Beautiful dress.