How to Make a Cute DIY Bodycon Dress With Shirring & Puffed Sleeves

Bodycon dresses are gorgeous; they show off every beautiful curve on your body and fit so well. Today, I’ll be sewing a DIY bodycon dress and showing you how to make a bodycon dress from scratch! It’s really a fun, easy process and perfect for beginners, too! Ready? Let’s start!
Tools and materials:
- Lightweight fabric
- 6mm elastic (0.2 inches)
- Elastic thread
- Thread
- Scissors
- Tape measure
- Sewing machine
- Pins
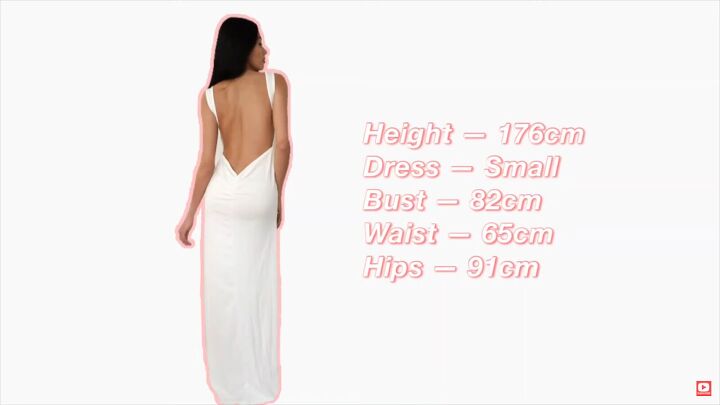
1. Take your measurements
First, take your measurements. Here are mine for reference.
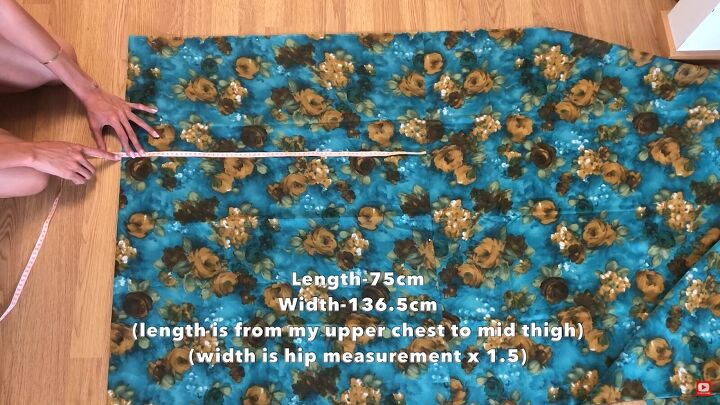
2. Make a DIY bodycon dress pattern
Fold your fabric in half, wrong sides facing. Measure the width, which is your hip multiplied by 1.5. The length is from your upper chest to mid-thigh. Measure only half of the total measurement, since the fabric is folded.
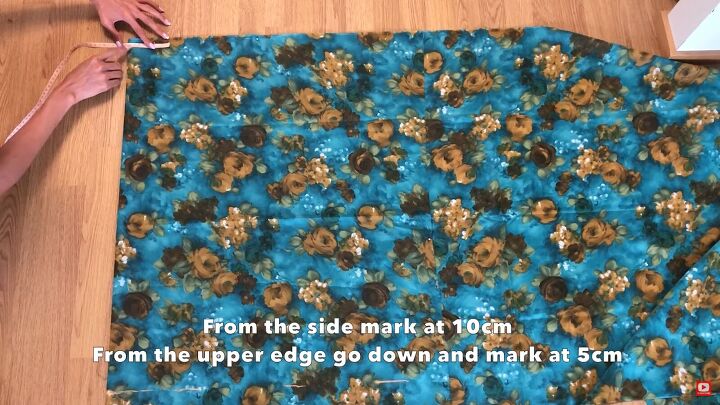
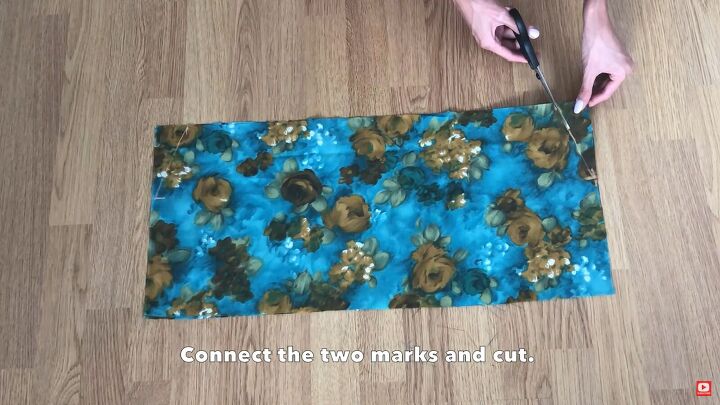
From the corner of the fold, make a 10cm (3.93 inches) mark and from the upper edge, go down 5cm (1.96 inches) and make another mark.
Connect the marks and cut. Repeat on the other side, too.
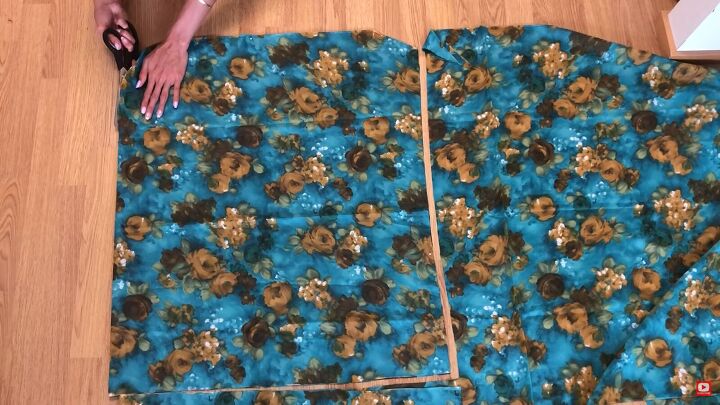
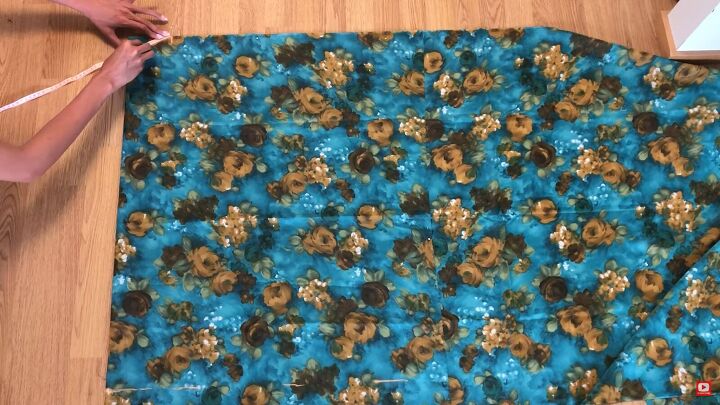
3. Cut the fabric
Then, cut the whole piece accordingly. Also, cut it along the fold to make two pieces.
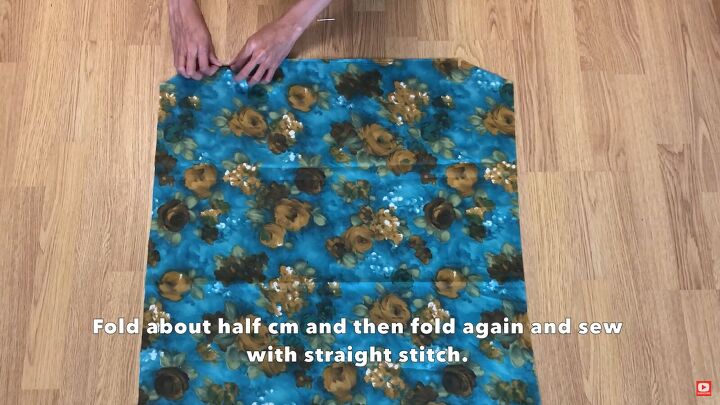
4. Hem the edges
Fold the upper and lower edge by ½ cm (0.19 inches). Pin and sew with a straight stitch.

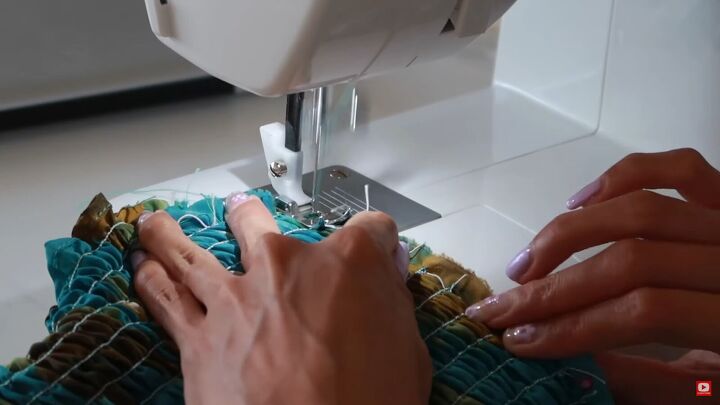
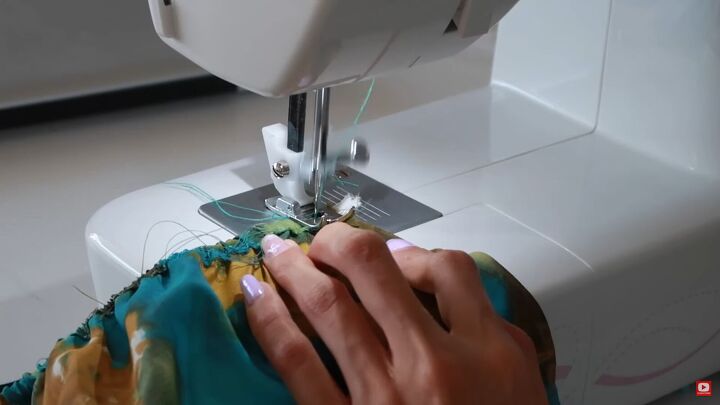
5. Do the shirring
Place the fabric with the right sides facing outward, and make a mark at every half inch. This will guide you for the shirring part.
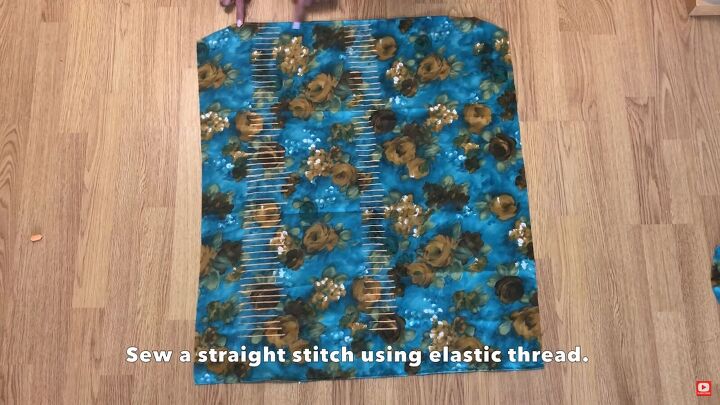
Wind your elastic thread to your bobbin, and sew straight stitch lines right across the fabric.
Remember to backstitch the beginning and the end of every line. Stretch the fabric when sewing.
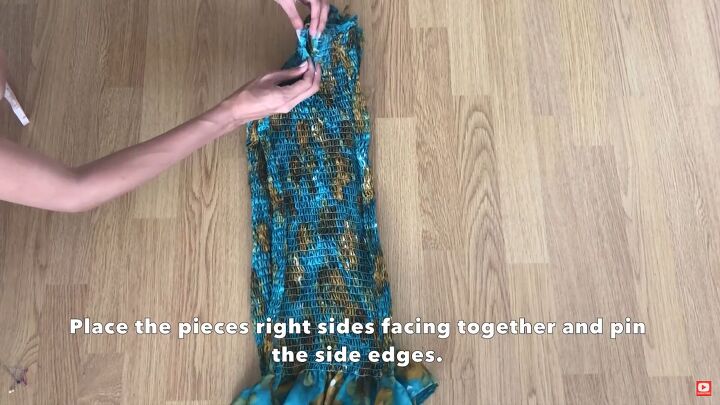
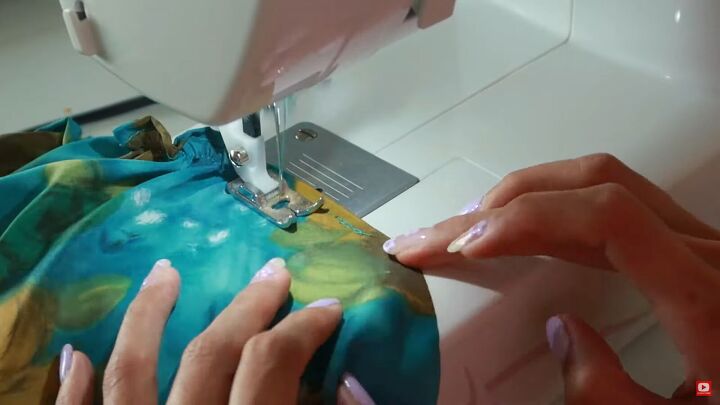
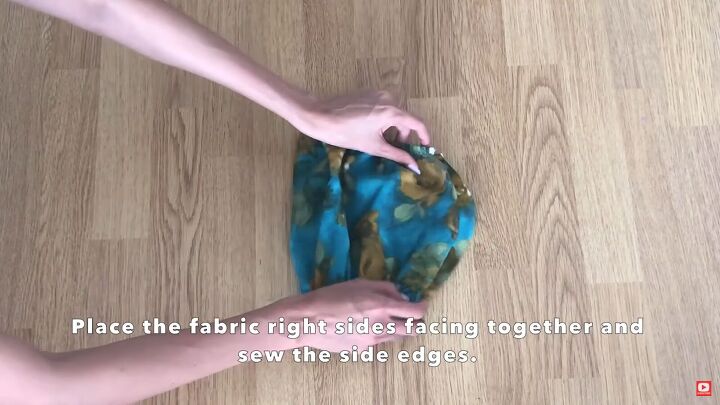
6. Assemble the DIY bodycon dress
With the pieces right sides facing and pin together at the side seams.
Then, sew from the armhole to the bottom of the dress.
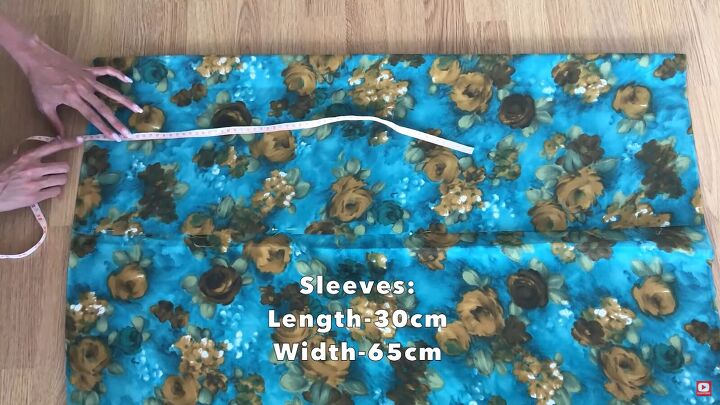
7. Make the sleeves
Measure, on the fold, 30cm (11.81 inches) in length and 65cm (25.59 inches) wide.
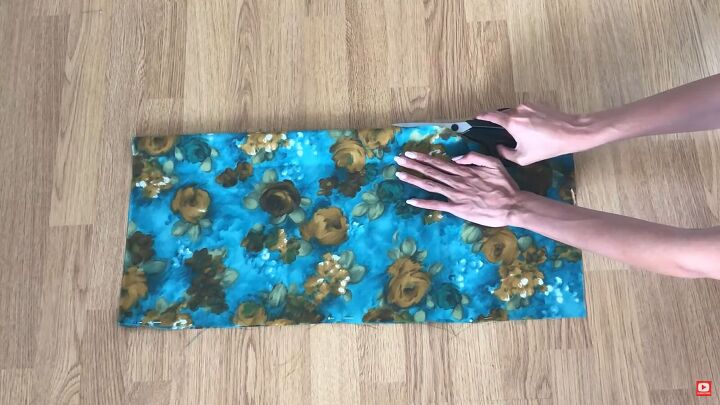
Then, cut the fabric piece along the fold so that you have two pieces.
From the upper edge, measure 12cm (4.72 inches) across and 5cm (1.96 inches) down. Connect the dots and cut accordingly.
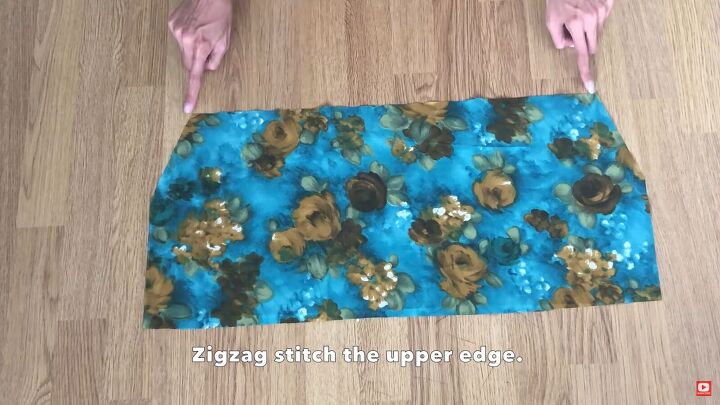
Zigzag stitch the upper edge.
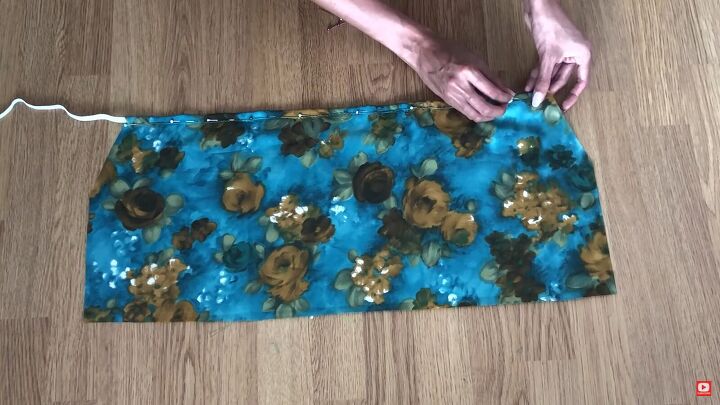
Fold the fabric over the 1cm (0.39 inches) wide elastic, and pin across. Then sew to secure. This will be for the tunnel.
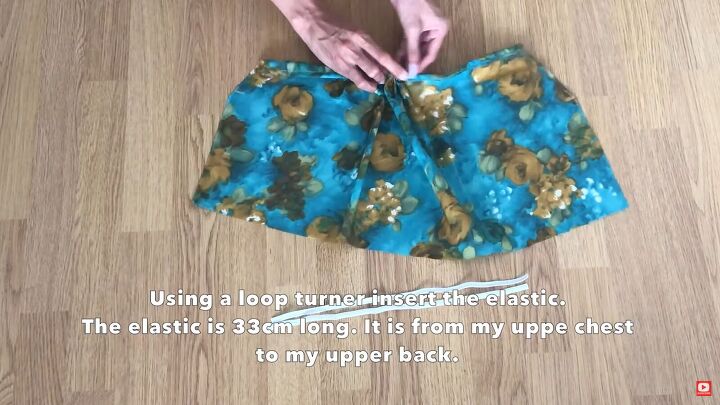
Now, insert the elastic using a loop turner. My elastic measured 33cm (12.99 inches) long; this is the measurement from your upper chest to your upper back.
Sew the sides to secure the elastic. Then, double fold the bottom edge and sew with a straight stitch.
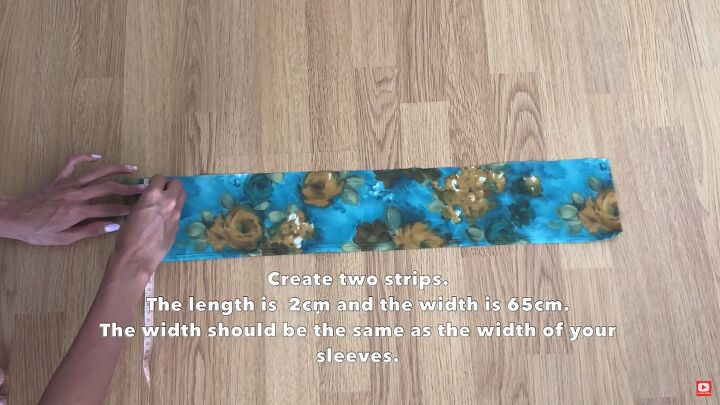
8. Make two strips
Measure a 2cm (0.78 inches) long and 65cm (25.59 inches) wide strip (similar to the width of your sleeves), and cut two pieces.
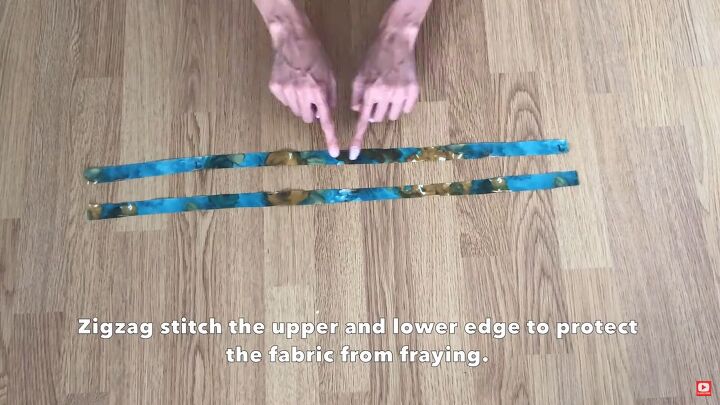
To protect the fabric from fraying, sew a zigzag stitch along both raw edges.
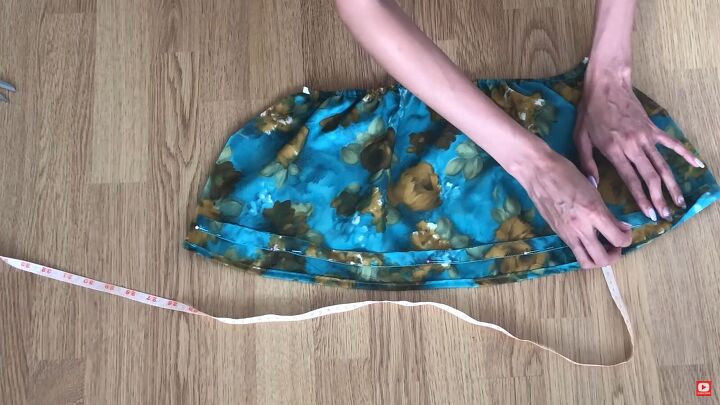
Now, place the strip 3cm (1.18 inches) from the lower edge, and pin.

Sew the upper and lower edge of the strip to secure it in place. This will be a tunnel to insert another elastic piece.
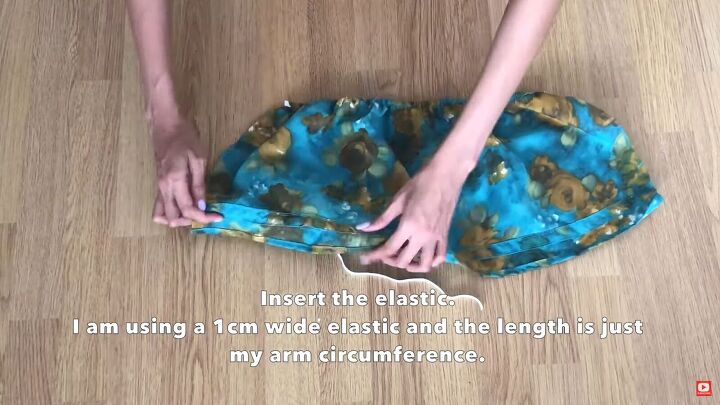
9. Insert the elastic
Feed the 1cm (0.39 inches) wide elastic through the tunnel. The length is your arm’s circumference. Sew the sides to secure the elastic.
10. Sew the sleeves
Now, fold the sleeves right sides facing and sew the bottom half side edges.
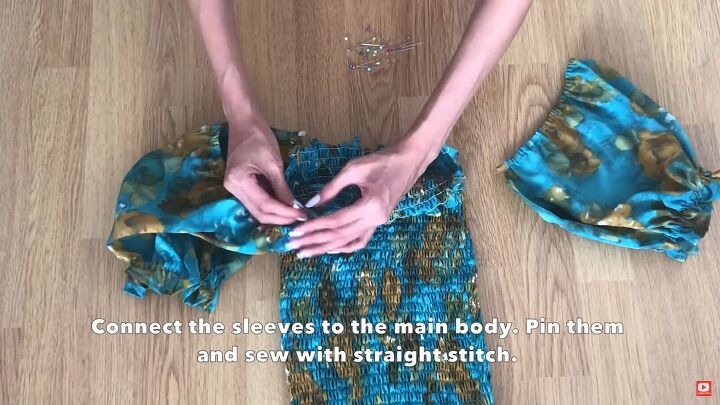
11. Sew the sleeves to the dress
Pin the pieces and sew with a straight stitch.
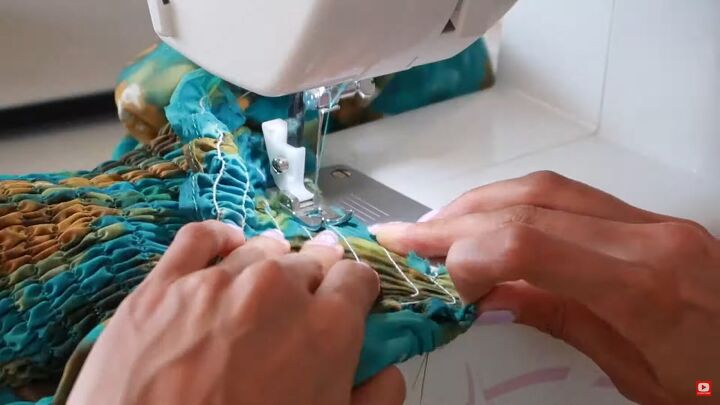
Then, finish it off with a zigzag stitch.

DIY bodycon dress tutorial
Here it is, your DIY bodycon dress! It’s so versatile and super trendy! I love the shirring effect, and the puffy sleeves give it a sophisticated look. I hope you found this tutorial helpful and that you now know how to cut and sew a bodycon dress!
The author may collect a small share of sales from the links on this page.


Comments
Join the conversation