DIY Retro Polka Dot Dress Using Butterick 6318
DIY Retro Polka Dot Dress Using Butterick 6318
Hi Guys! Can you feel it? Spring is in the air. I don’t know about you, but I’ve already started my spring sewing. I kicked off the spring season with a retro polka dot dress using Butterick 6318. This amazing dress has a full skirt and sash. I’ll be honest, this wasn’t my 1st attempt at a spring garment. This was actually my second attempt and I’m so much happier with this dress then my first.
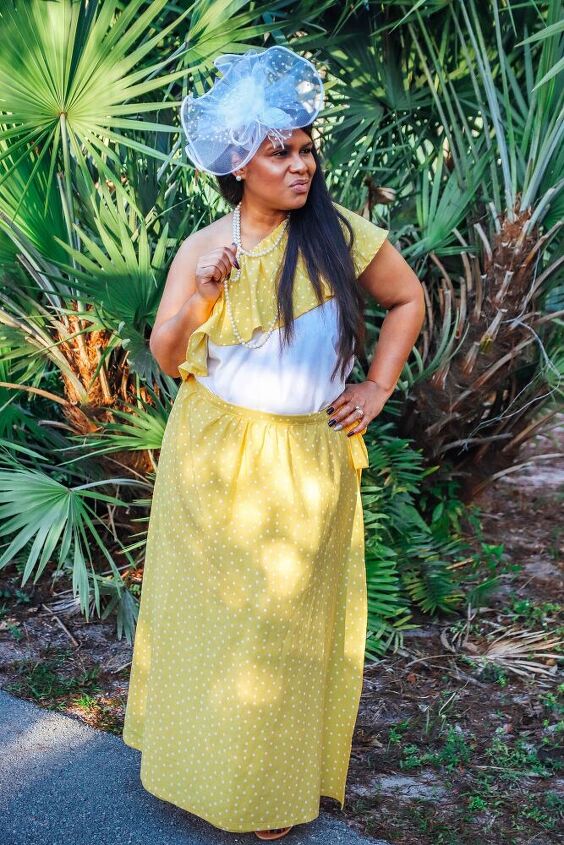
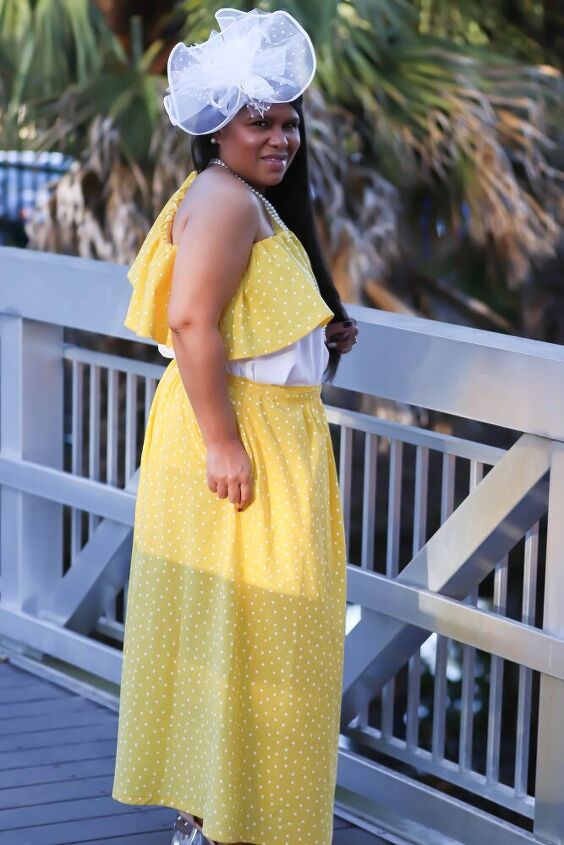
Sewn Magazine FeatureMichelle from Sewn Magazine hit me up asking if I wanted to be featured in the next issue of Sewn Magazine. Duh, of course I did! For this feature I needed to make a spring dress and it needed to be in polka dot fabric. I quickly started looking through all my patterns and decided on Vogue 9318. This pattern has a ruffled one shoulder top and a wrap skirt. Easy enough right?
I saw this very pretty Keepsake Calico Cotton Fabric -Polka Dots in yellow with white polka dots which I purchased at JOANN. For contrast I made the bodice of the top in white and the flounce was in the same yellow and white polka dot fabric. After I made the top, I thought it was a little large but figured it would be OK on once I tucked it in the skirt. This was made in a large. Well, it was not OK. The skirt was a tad too large also which I made in an XL. I should have sized down in both. I had a deadline to meet and proceeded to take my photos and I prayed for the best. My photos came out beautiful, but I did not feel beautiful. I felt like I was drowning in fabric and the silhouette was not flattering at all. I sent my photos to Michelle and explained the situation and she also agreed that the top and skirt were not flattering and also felt that the small polka dots were getting lost in the sauce and suggested larger polka dots.
Back to The Drawing Board
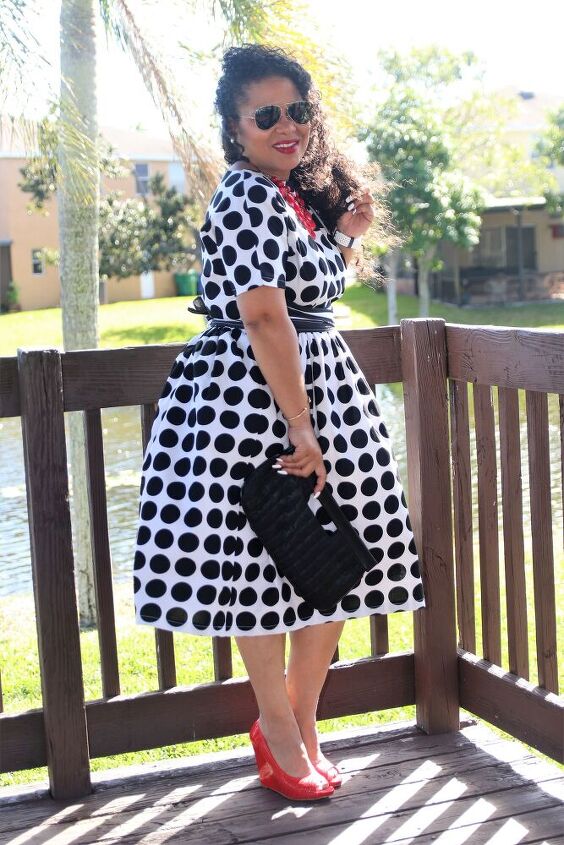
Although I was a week ahead of my original deadline, Michelle graciously extended my deadline. Back to the drawing board I went. I was explaining what happened to my sewfriend Marica from @overdriveafter30 and she suggested Butterick 6318. I thought it would be perfect! She had an extra pattern and even came to bring it to me. Marica also suggested a petticoat to add extra volume to the skirt which you can get HERE. Boy was she right! What a good friend I have.
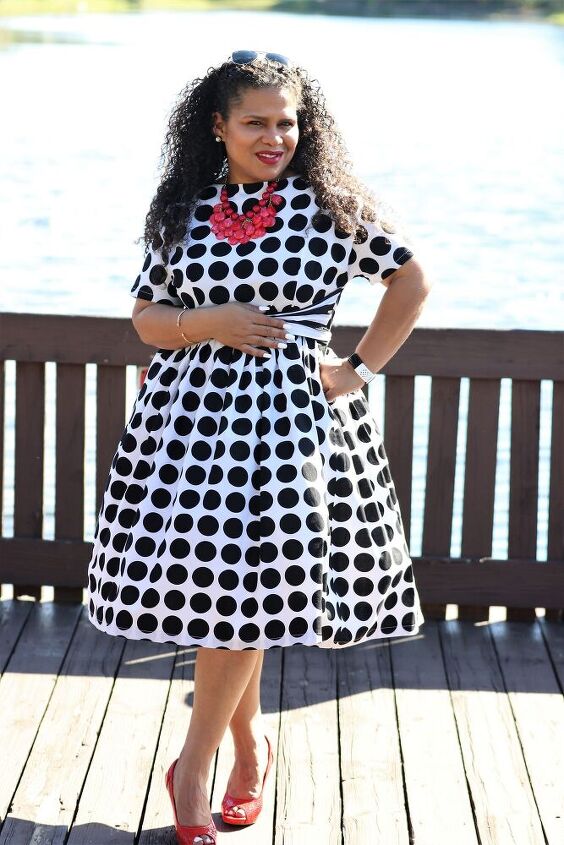
I then went on a hunt for the perfect fabric. I recalled this pretty white and black polka dot Ankara fabric making it’s rounds on Instagram. I started sending DMs to all the Ankara fabric vendors I knew on Instagram. No one had the fabric I wanted except House of Mamiwata. I sent her a DM at about 9 PM and she responded right away telling me that she did have the fabric and sent me the link to her Etsy shop so I could see the fabric. I saw it, I loved it, and I brought it! She had my fabric shipped the next day and I received it a few days later. I can’t say enough about the quality of this fabric and her customer service is second to none! This will definitely not be my last purchase.
How to Modify a Pattern Bodice
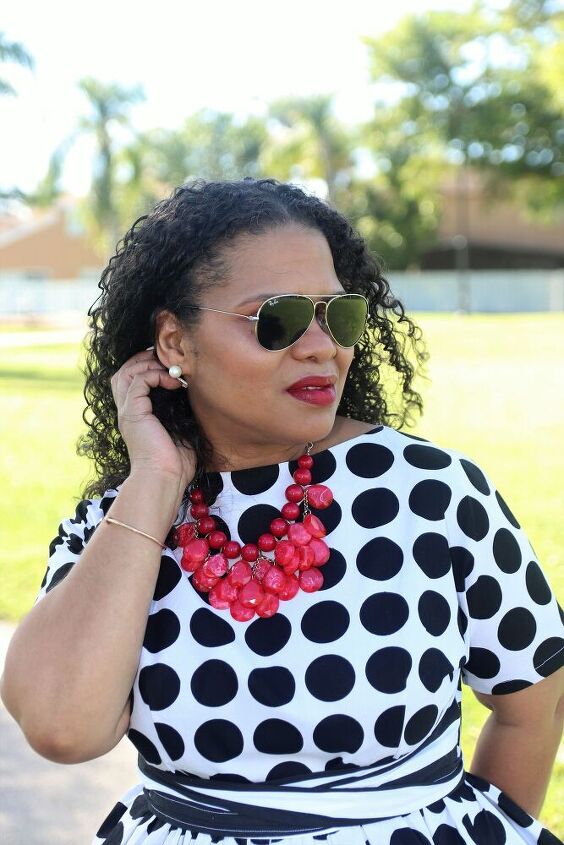
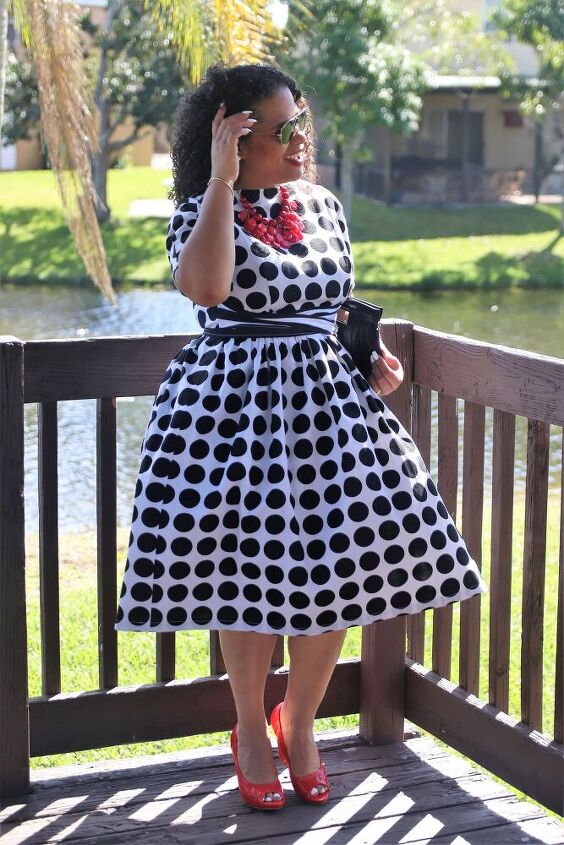
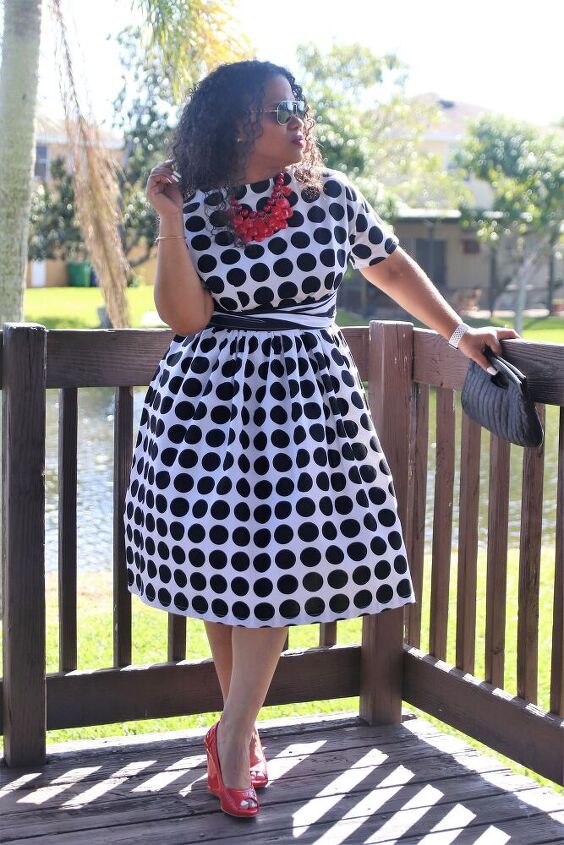
Based on my body measurements I cut a size 18 bodice and graded out to a size 20 at the waist. After I tried it on I felt it was a little too large so I went with a size 16 bodice graded to a size 18 at the waist. During my fitting, I also realized I had bunching in the back. I measured my neck to waist and then measured the pattern’s neck to waist and realized I had to remove 2″ from the pattern for a proper fit. Apparently, I have a short torso. See below how I modified the bodice at the waist. It’s not as hard as you think. Trust me.
How I Shortened the Pattern and Graded at the Waistline
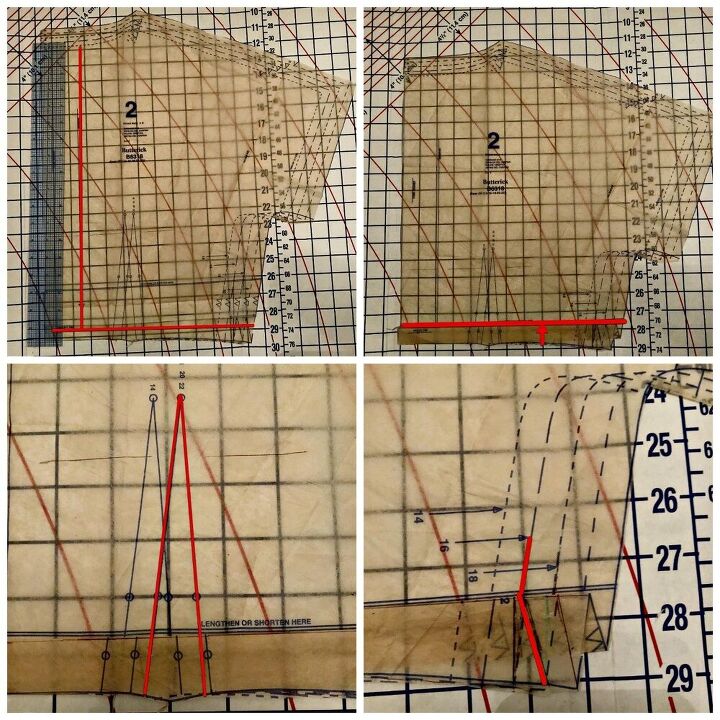
- Starting from the back of the nape of your neck measure to your waist line.
- Measure the pattern from the neckline of the size you’re going to cut to waist line indicated on the pattern.
- Subtract the difference and fold the pattern up by that measurement at the waist line indicated on the pattern.
- Using the waist measurement, you’re going to cut for your dart, finish connecting your dart lines.
- From the waist line, grade out to the size your need for your waist measurement.
- Mark your new dart on your fabric and cut out according to your new cut lines.
I’m so excited to have been featured in the MAR/APR issue of Sewn Magazine. It is always an honor to be featured with other amazing creatives. You can read about my other Sewn Magazine features HERE and HERE. I really enjoyed sharing my sewing journey about this project with all of you. I want to be transparent and let you all know that not all projects are going fabulous and amazing. Not everything you make will be a perfect fit, although that’s kind of the point of making your own clothes, right? There will always be bumps in the road, but as long as you learn how to maneuver around those bumps, then you’ll be just fine. Whenever you hit a wall, just dust yourself off and try again. Thanks Aaliyah. You get a gold star of you caught my reference. LOL
Let me know in the comments below if you found my instructions on how to modify a bodice helpful and I’ll be sure to include more of these sewing tips in the future.
The author may collect a small share of sales from the links on this page.


Comments
Join the conversation
Thank you so much for your kind comments. This was a make it work moment.
Gorgeous dress! Excellent sewing work.
It looks so doggoned good on you! Brava!