You’ll Adore This Stunning Halter Dress - No Pattern Needed

A halter dress is a classic addition to anyone's closet. In this tutorial, you will see how I make a stunning, flowy, and whimsical halter dress. What's more, it's not just an ordinary DIY halter dress as I am also adding a tiered ruffled part to the bottom. It's the perfect equation of sexy, chic, and feminine. If you want to know how to make a halter dress, then you've come to the right place. Keep on scrolling, and let's get this show on the road.
Tools and materials:
- Fabric
- Measuring tape
- Scissors
- Sewing Machine
- Pins
- Thread
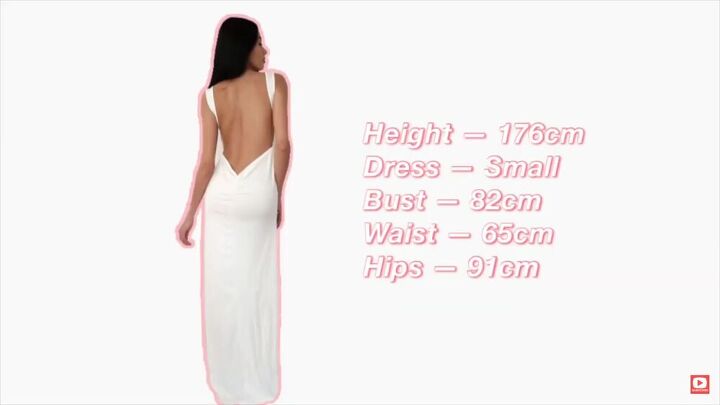
Take your measurements
As you can see from the image, I have shared my own measurements. But, use this as a guide for yourself. So, before doing anything else, grab a measuring tape and measure yourself. Make sure to jot everything down, so you don't forget.
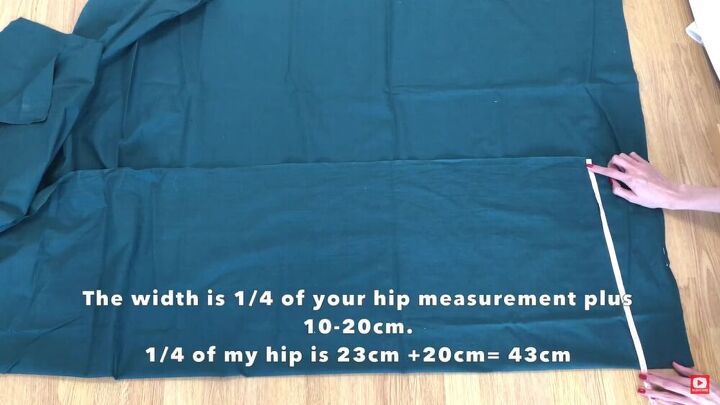
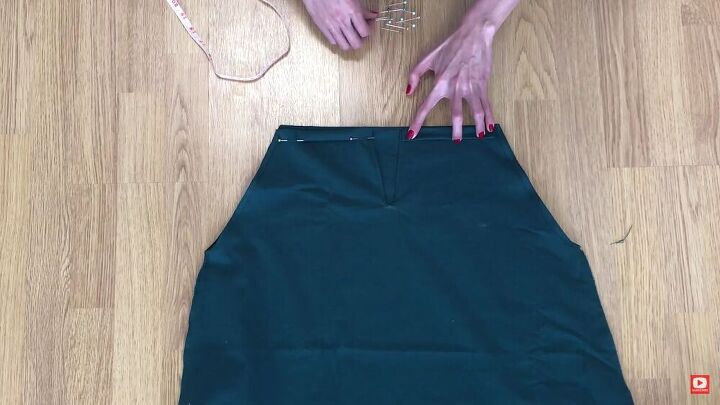
Cut the pattern
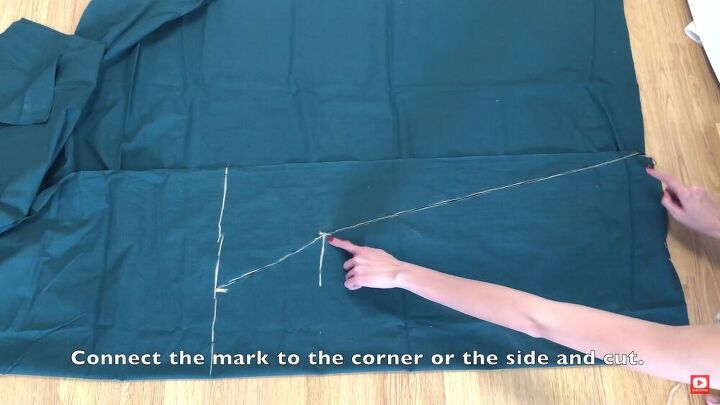
Take ¼ of your hip measurement and measure across. This will be for the front part. Add another 20-30cm to the equation and measure this on the fabric. Remember to do all the measurements on the fold.
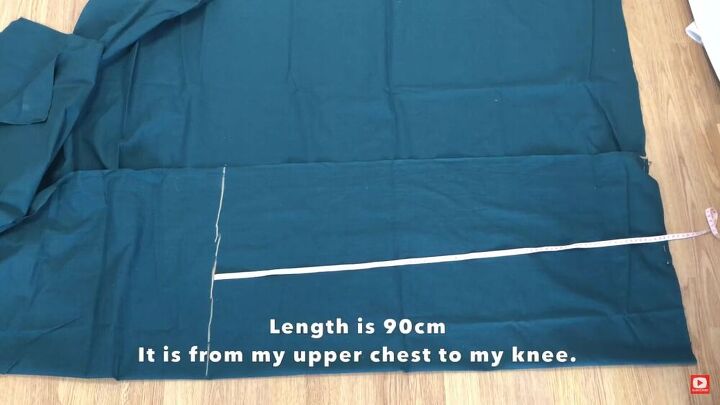
Next, I measured the length, from my upper chest to the bottom.
Now, it's time to add additional measurements for the neck and armhole area. To see exactly how I do this, check my video from 1:30 minutes.
TIP-
My measurements may be different from yours; if you'd like to convert the metrics, use this tool.
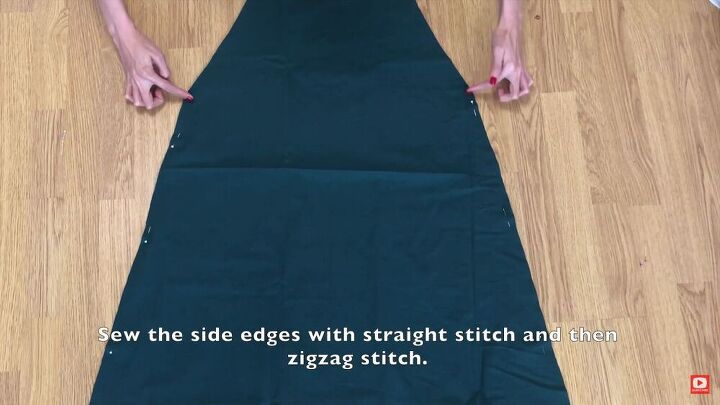
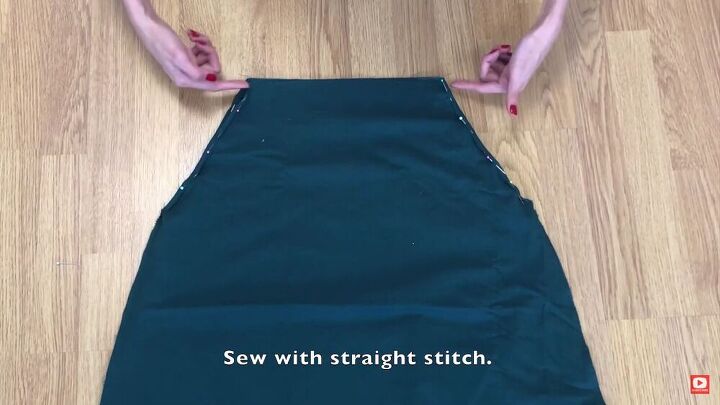
Sew the pieces
Once your pattern is ready, use the same to make the back piece. Then, place both pieces on top of each other, right sides facing, pin the sides, and stitch the side seams. First, stitch with a straight line, and then go over it with a zigzag stitch.
Hide the raw edges
Fold the raw edges of the armhole twice, pin, and stitch all around. This will ensure that the raw edges are hidden.

For the front part's neckline, make a double fold and pin all around. This will also be the encasing for the drawstring.
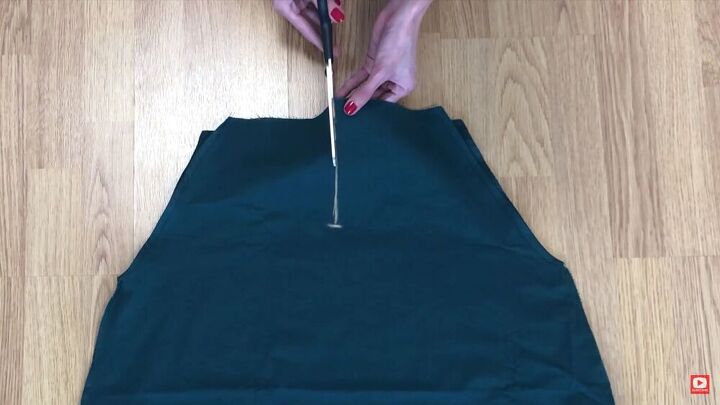
For the neckline at the back, mark the center and measure 15cm downwards. Cut along the line.
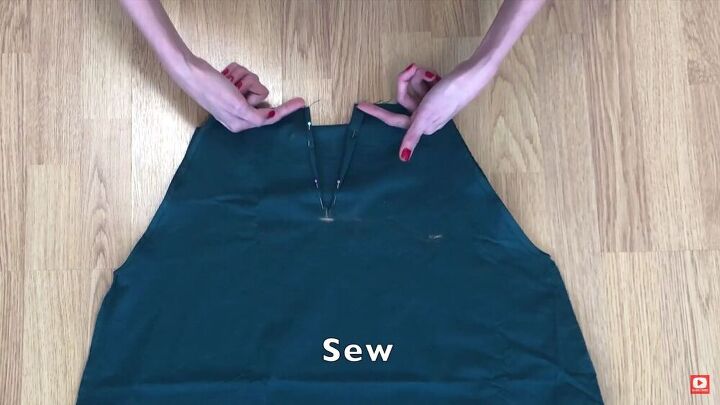
Fold the fabric on both the edges and pin. When everything is pinned down, sew along the fold.
Next, as with the front neckline, fold the top sections of the back neckline, pin, and sew in place.
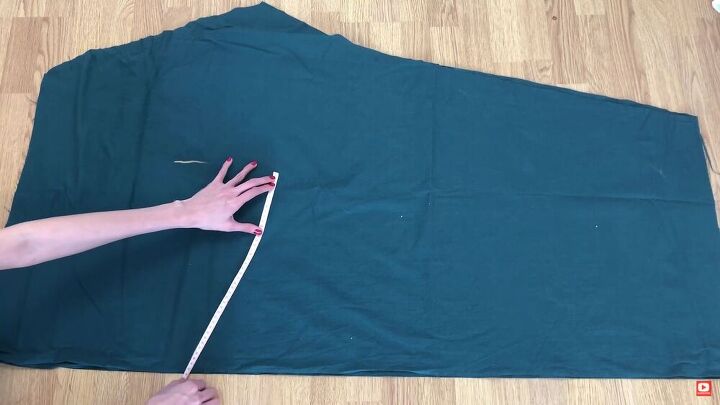
Make the tiers
To make the tiers, fold the fabric and measure 30cm sideways; you can decide how long you want your dress to be, so the length is really up to you.
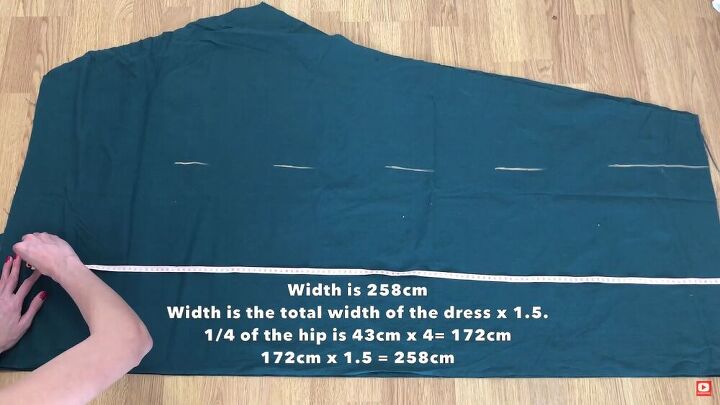
This is the calculation I made for the width.
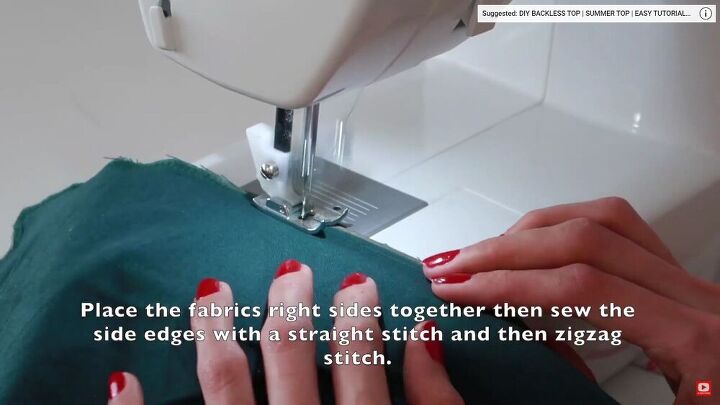
Place the fabrics right sides together and sew. First with a straight stitch and then a zigzag stitch.
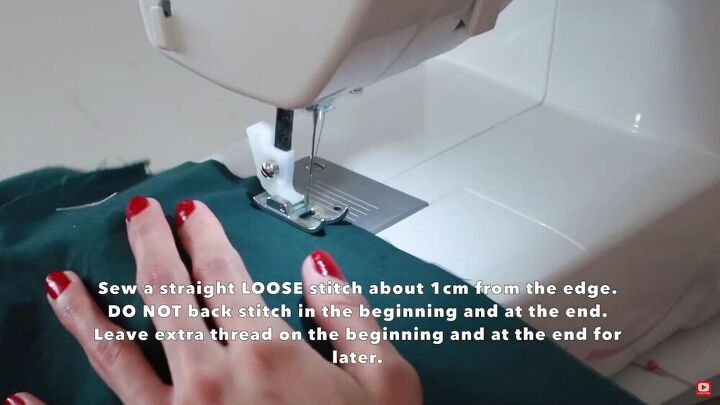
To make the ruffles, sew a straight stitch about 1cm from the edge. Make sure it's loose. Also, don't back stitch.
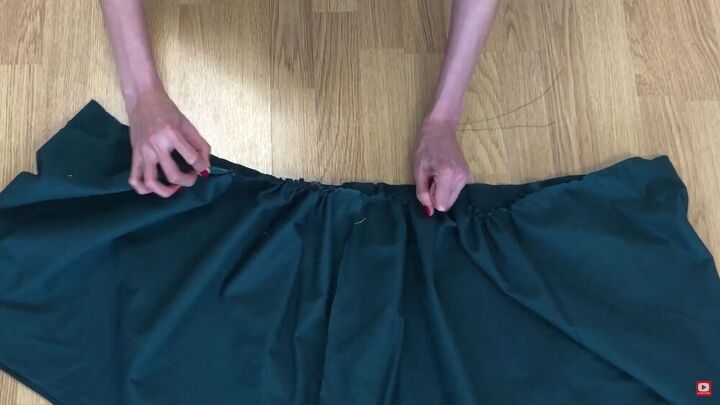
Then, create ruffles by pulling one of the threads at the ends. Do this carefully so that the thread won't break.
TIP-
The width of the tier should match the length of the bottom of the dress.
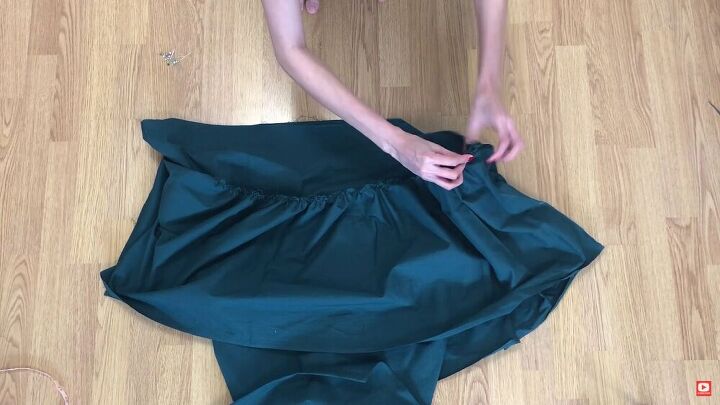
Assemble the dress
Place the dress inside the tier, with the tier's wrong side of the fabric facing out. Align the side seams, and pin all around. Make sure the ruffles are distributed evenly around the diameter of the dress.
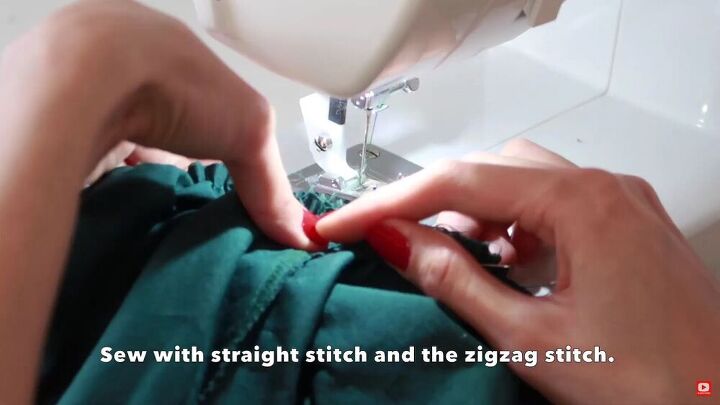
Then, sew the pieces together, first using a straight stitch and then a zigzag stitch.

Hem the bottom of the dress by creating a double fold.
Create and insert the drawstrings
For the drawstrings, cut out a strip of fabric that's 4cm width by 150cm in length.
TIP-
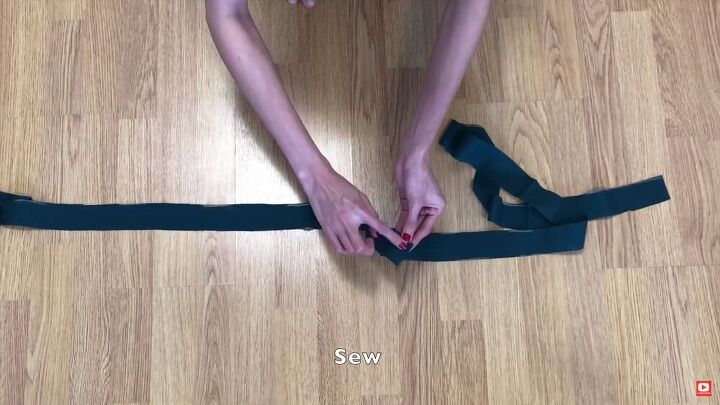
If your fabric isn't long enough, make two pieces and connect them after.
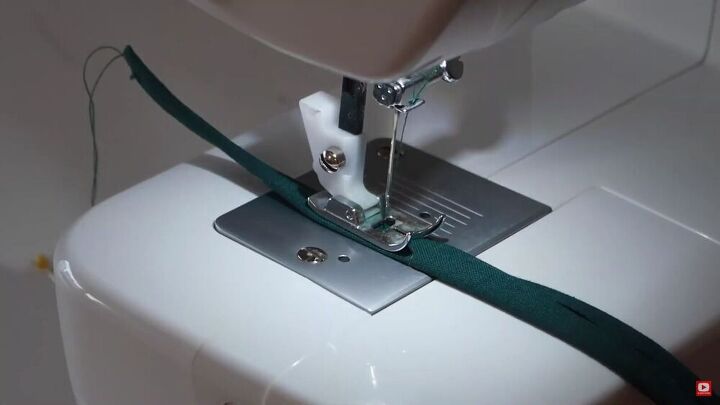
Fold the fabric towards the center, and then fold again to hide the raw edges. Then sew along the whole length with a straight stitch.
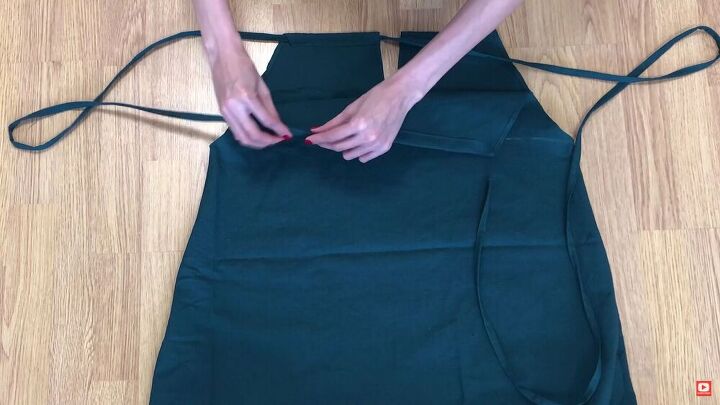
Using a safety pin, feed the drawstring through the casing of both the front and back necklines.

We're done! I think this has to be my new favorite look; it's so timeless and classic! I love the feel and look of this halter maxi dress. The color is also mesmerizing! I hope you enjoyed this halter tiered maxi dress tutorial! Thanks for reading, and if you're going to try this sewing project, have fun!
The author may collect a small share of sales from the links on this page.


Comments
Join the conversation
I love this dress! You did such a great job. I love how helpful all of your photos are too. Great guide!
Just brought some new fabrics - I am going to copy this!!!🌟. Thanks some much for taking the time to share and remind all sewer don’t for get to have some fun!!!