How to Sew a Dress With Princess Seams: Drafting the Pattern
This post contains affiliate links.
At this time of year, when the trees are waking up and there’s blossom and green shoots appearing, I realise that I am bored of winter.
I actually quite like winter. I like being tucked up in my funny old house with the fire going, the lamps on and my family around me. Even being outside isn’t that bad. Our English winters are mild, and as the Norwegians say, there’s no such thing as bad weather, just the wrong clothes. I’ve found that having a decent coat and a pair of waterproof boots makes all the difference.
But it gets to a point when the signs of spring are all around and I long for a change. I want the sun to feel warm. I want to be able to leave the house without bundling myself into a coat, scarf and gloves. I want to sit out in the garden and smell the smells of summer.
It’s also at this time of year that I realise I’m tired of my winter clothes. They seem drab and dreary, and I can hardly wait to wear pretty colours again.

Last spring it occurred to me that if I wanted to wear pastel colours but still be warm, there was a solution. All I needed to do was make warm clothes in pretty colours!
I made a skirt from some brushed cotton and bought some pink tights, which I also wore with my pink net skirt.
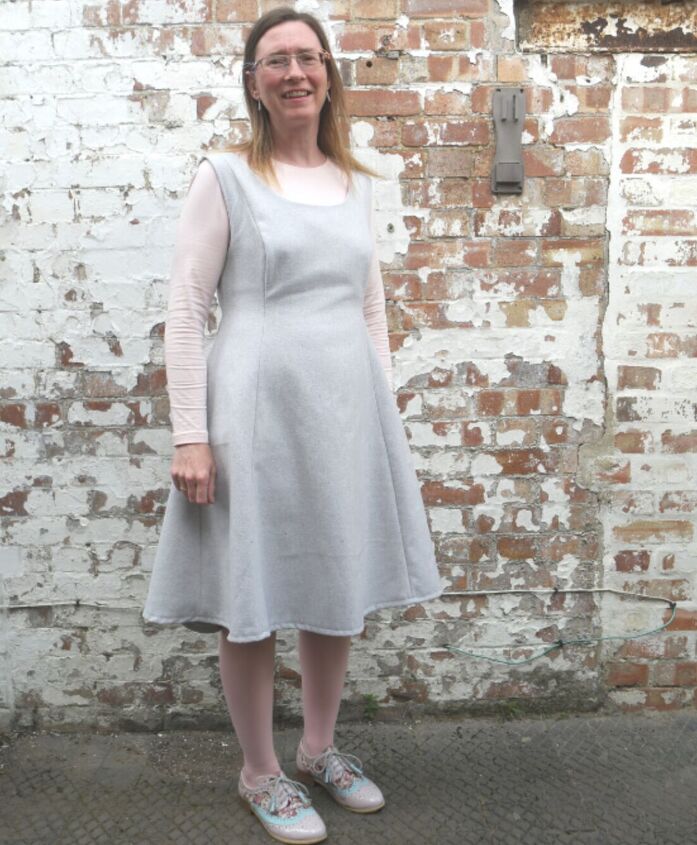
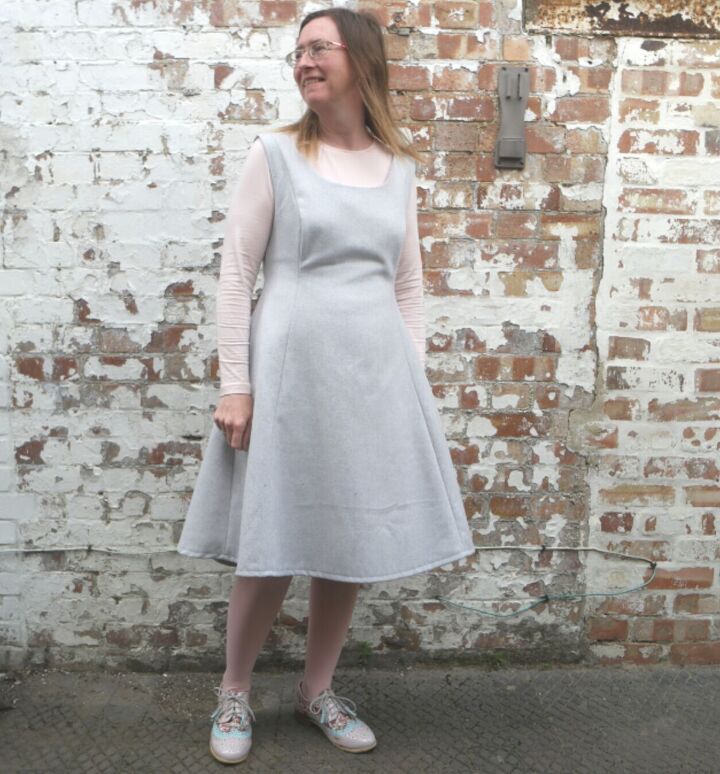
While I was tidying up the other week, I found some pale grey wool fabric that I bought to make a dress. I never got round to it, and the fabric was still there.
I plan to wear it with my pink tights and my pink shoes, and it will be just the thing until it’s warm enough to get my summery dresses out again!
It’s also a chance to try out something new. I’ve decided to make a dress with princess seams, so this post is the first of two showing how to draft the pattern.
Drafting a Dress With Princess Seams
You Will Need
Pattern paper ( I find the kind with a grid on easiest to use)
Pencil
Ruler
Bodice block ( there are instructions here for drafting a bodice block if you don’t have one already)
Skirt pattern ( there’s one here, but I’m going to show the easiest way to make one in a minute)
A French curve is useful, but any curved edge, like a dinner plate, will do if you don’t have one.
Getting Started
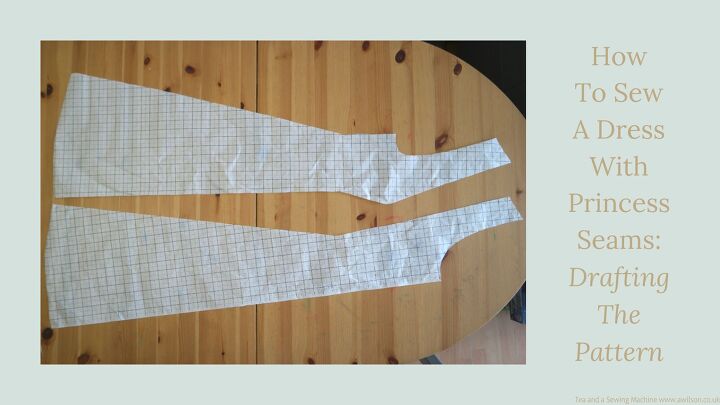
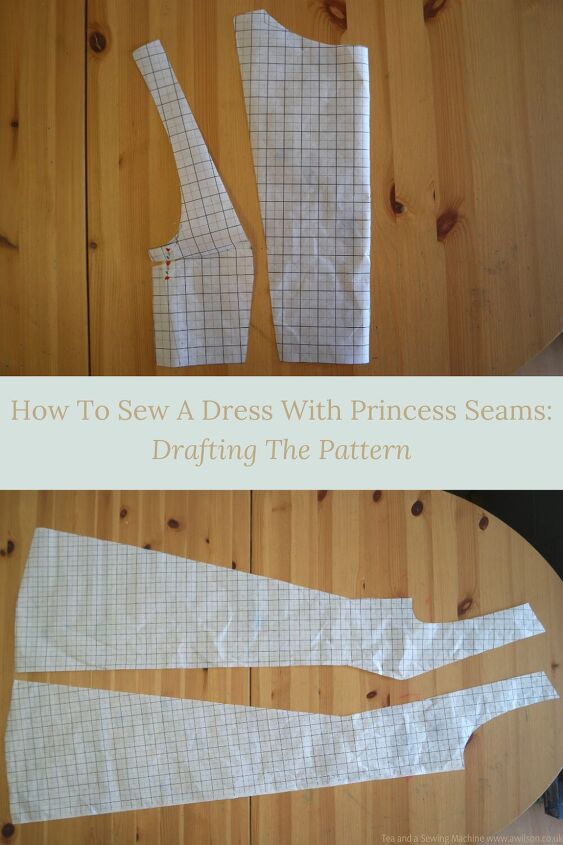
There are several stages to drafting a dress with princess seams, and I should say at this point that I have cheated a little bit. Often with dresses with princess seams, the back will match the front and be made from 4 pieces. To make things easier for myself, I’ve made the back from 2 pieces.
The first task is to adapt the bodice pattern.
The second is to modify the skirt pattern.
Task 3 is to put them together, and redraw the pattern pieces with seam allowances included.
Adapting the Bodice
The thing that makes pattern drafting tricky is that women are not cylinders.
On a standard bodice block, it’s the darts that ensure that the end results allow for lumps, bumps and curves.
With a dress with princess seams, darts are not needed. It’s the shape of the pieces and the fact that there are more of them that gives the dress its shape.
Drawing pieces that are the right shape might seem like a challenge, but by using a bodice block and changing things up with the darts, it’s possible to do this quite easily.
So grab your bodice pattern and lets get started!
Drafting the Top Part of the Dress
The back will be fine to use as it is, so you can put that to one side for the moment.
Take the bodice front piece and draw round it unless it’s a spare.
Cut out the darts.
Now draw a line continuing each of the darts. Mark the point where they cross.
Find the halfway point on the shoulder. Draw a line from this to the point you just marked.
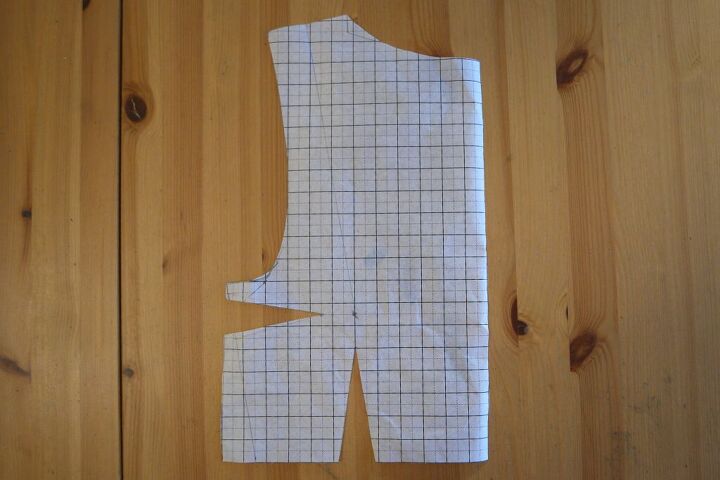
Cut along this line almost to that point.
Cut along the lines you drew from the darts almost to the same point.
If you end up with your pattern in several bits, it doesn’t matter. But it will be easier to do the next stage if you can keep it in one piece.
Now bring the edges of the side dart at the side and stick with a piece of tape. The long cut you made from the shoulder will open out.
Find where the pattern pieces are still joined and cut in a curve.
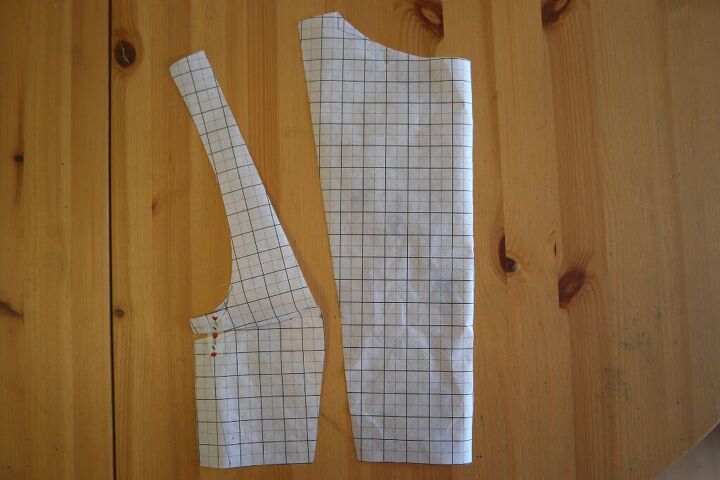
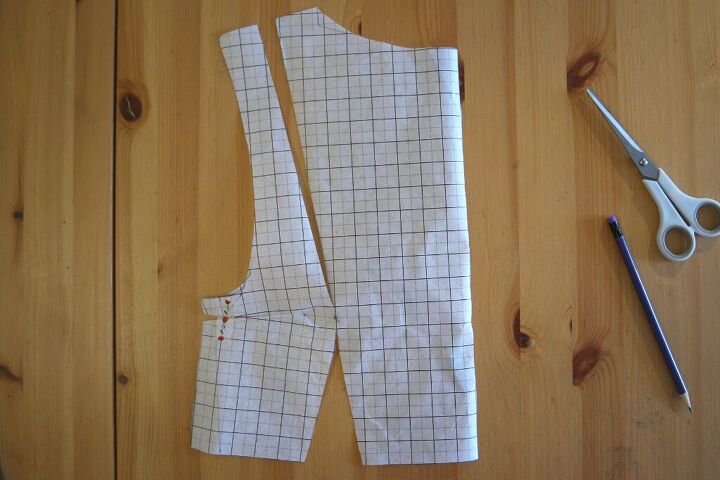
You now have the pieces you need for the top part of the pattern!
Drafting a the Skirt Pattern the Easy Way!
The tutorial I wrote for making a skirt pattern uses draping, but I’ve since figured out that there’s a much easier way.
Measure around your hips, your waist and from your waist to just below your knee.
Now take your waist measurement and your hip measurement and divide them both by 4.
On pattern paper, draw a rectangle that is your hip measurement divided by 4, by the length that you want the skirt to be.
If we were cuboids, this would be enough, but as we’re not, a dart needs to be added at the waist.
To work out how wide the dart needs to be at the top of the triangle, calculate the difference between your hip measurement divided by 4 and your waist measurement divided by 4.
So if your waist measurement is 80 cm, it becomes 20 cm, and if your hip measurement is 100 cm, it becomes 25 cm, and the difference between them is 5 cm.
To draw the dart, find the halfway point on the short edge of the rectangle and draw a line downwards 10 cm long.
Mark 2.5 cm on either side, then join these to the point at the end of the line to form a triangle.
If you were going to make this up into a straight fitting skirt, you would probably want to curve it a little bit on one side, but for our purposes it is fine to leave it as it is.
Adapting the Skirt Pattern
The skirt pattern will be modified in a similar way to the bodice in that the darts can be used to draw pieces that are the correct size and shape.
The first thing to do is to cut out the dart.
Now find the centre of the bottom hem and draw a line up to the bottom of the dart.
Cut along the line almost to the dart.
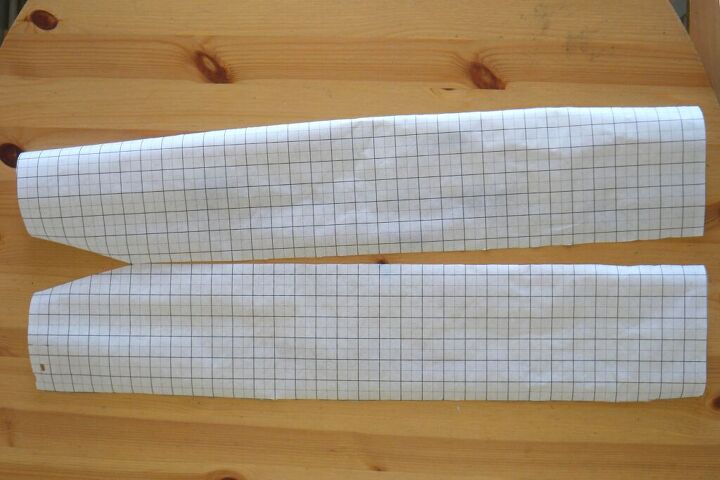
Bring the edges of the dart together and stick them with tape. The cut you made will open up. This could be used to make an A line skirt if you wanted to.
Draw round your skirt pattern onto pattern paper. You might want to add a bit of a curve to the hem.
Joining the Bodice and Skirt Pieces and Redrawing Them
At this stage, you should have 1 skirt piece and 3 bodice piece, 1 back and 2 front. The last job is to combine bodice pieces with skirt sections to make the pieces for the princess seam dress.
For this you’ll need your pattern pieces and some more pattern paper.
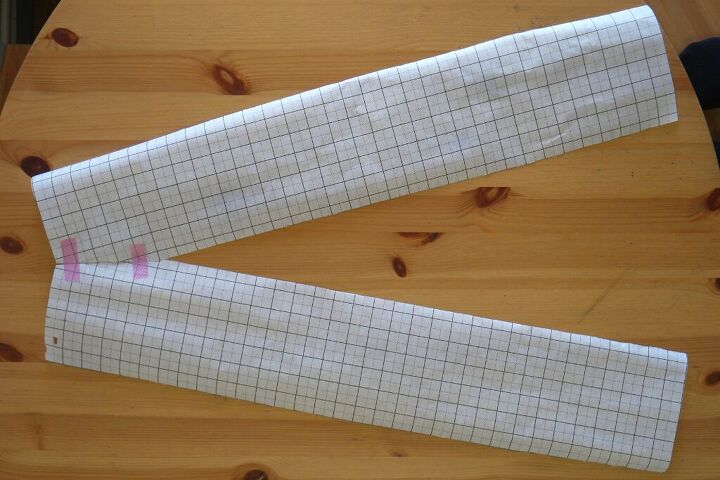
It will be easiest to start with the back as you’ll be cutting the skirt in half for the front sections.
Dress Back
On top of a piece of pattern paper, line up the bodice back and the skirt so that the bottom of the bodice matches up with the waist line of the skirt. You might need to overlap them a little bit. If that’s the case, then make sure that the centre line runs straight down from the bodice to the bottom of the skirt, then overlap the rest as needed.
For some mysterious reason, the bodice part of mine was a couple of cm wider, so when I drew round it, I added extra cm to the skirt.
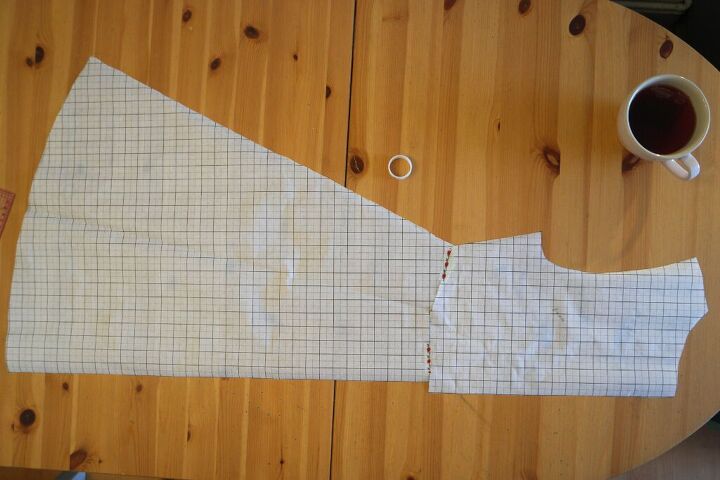
Once you’ve drawn round it, draw round it again adding a 2 cm (3/4 inch) seam allowance.
The back piece of your pattern for your dress with princess seams is ready!
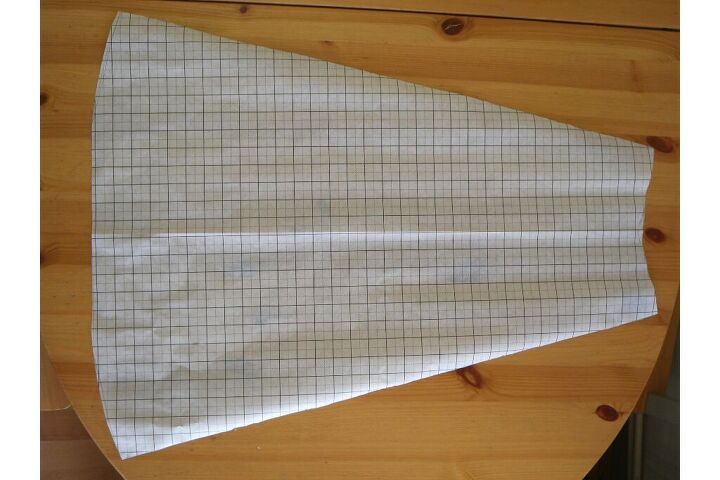
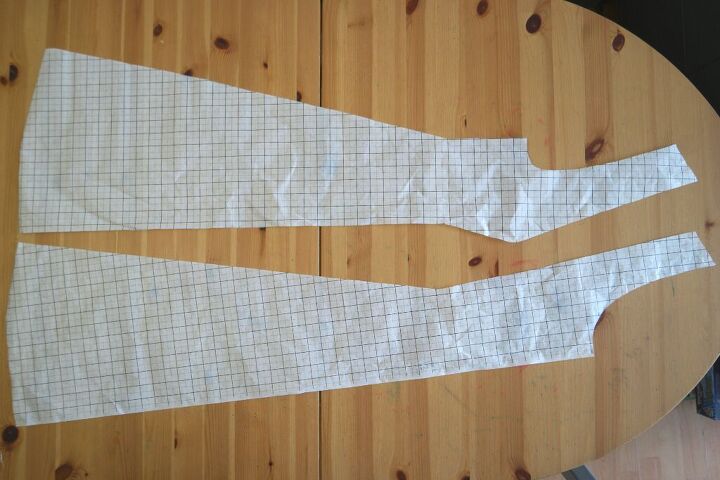
Joining the Bodice Front Pattern Pieces to the Skirt
The first thing to do is cut the skirt into 2 pieces. To do this, find the centre of the hem edge and fold from there to where the dart was. Cut along the fold. It’s a good idea to write on them which is the side piece and which is the centre to avoid getting into a muddle in a minute.
Now match the waistline of the bodice pieces to the waistline of the skirt. Check with your back section to make sure that the waist is in the same place and that the front and back are the same length. If you needed overlap the back pieces, overlap the front pieces in the same way.
Draw round them and add a 2 cm (3/4 inch) seam allowance.
Getting Ahead/ Making a Toile
I’ve discovered that there is a little bit of trial and error involved in drafting patterns yourself.
Checking the fit first is always a good idea, especially if the fabric you have chosen was expensive (this is a good idea with bought patterns too!).
One option is to pin the pattern pieces together and hold it up against yourself or pin it on to a dress form, but the safest thing to do is to make a toile. Traditionally a toile is made from muslin, but I normally use £3 a metre polycotton. If you have an old sheet or something similar, that will do nicely.
The instructions for sewing the dress with princess seams together will be in a future post, but if you want to make a head start on the cutting out, you will need:
2 back pieces, cut on folded fabric
2 front side pieces, also cut on folded fabric
1 centre front, cut on the fold
Happy pattern drafting and keep an eye out for the instructions!
You Will Need
Fabric for the dress. I used a wool suiting. How much you need will depend on your dimensions. I’m a UK size 14 ish and 2 metres was enough.
Lining fabric. The same amount of fabric as for the dress.
A zip. 40 cm zip (16 inches) will do, longer would also be fine.
Usual sewing supplies
Cutting Out
From your dress fabric, cut out:2 back pieces on folded fabric1 centre front on the fold2 side front pieces on folded fabricCut the lining out in the same way, but just make the bottom hem 10 cm (4 inches) shorter.
Sewing the Dress
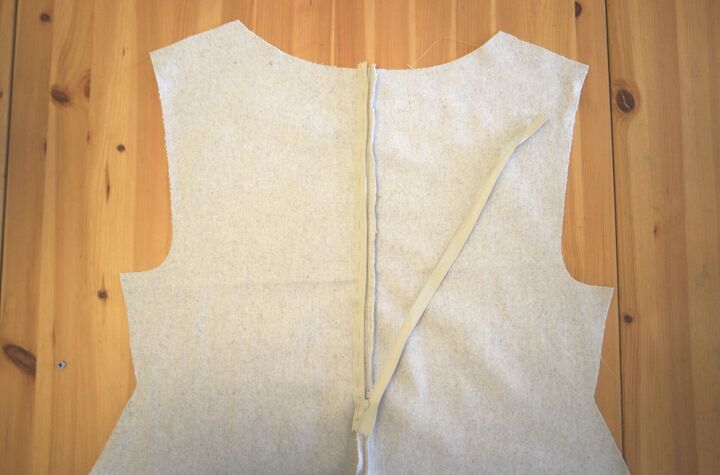
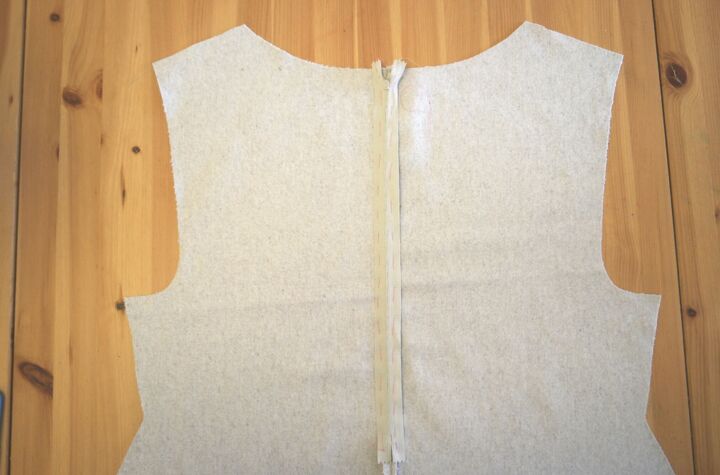
Take the 2 back pieces. Pin them with the right sides together and sew down the back seam from neckline to hem.
This might seem crazy and you might be asking yourself how on earth you’re supposed to get into it if you’ve sewn up the back, but we’ll come to that in a minute!
Trim the seam and press it open.
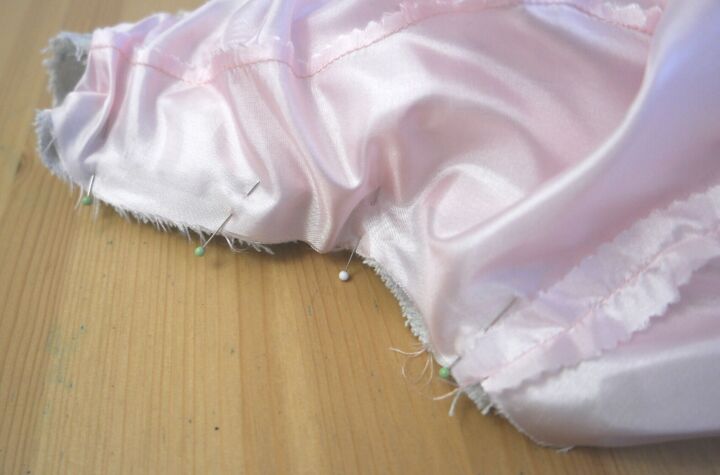
Take the front centre piece and one of the side pieces. Starting at the waist, pin the seam upwards towards the shoulder. As you’re pinning a curved edge to a straight edge, this might prove to be a bit tricky. Using plenty of pins will make it easier.
Now pin the rest of the seam from the waist to the hem.
Sew the seam. I’d do this in the same way, so start at the waist and sew upwards towards the shoulder, then go back to where you started and sew downwards towards the hem.
Do the same with the other front side section.
Trim the seams and clip them at the curves. Press the seams.
Sew the Zip
You might have your own way of sewing in a zip, and if you’d rather do that then please do!
This is the way I do them !
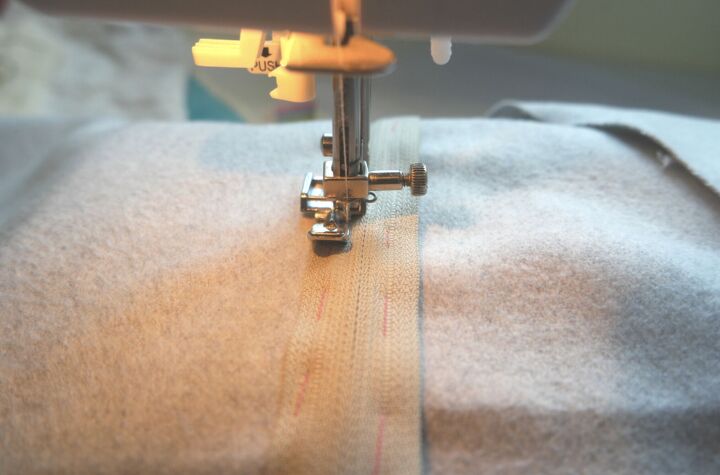
On the wrong side, place the zip face down over the seam. The end of the teeth needs to be at the edge of the seam allowance.
Pin the zip to the seam. One way to check that the teeth are lined up correctly is to open the zip.
Tack the zip in place.
Sew the zip to the dress. You’ll need to start a little way down from the top as the zip pull will get in the way!
Sew one side and then the other.
Using an unpicker, unpick the seam where it’s covering the zip. If you can leave the bit at the top where you haven’t sewn yet, it will make things easier in a minute.
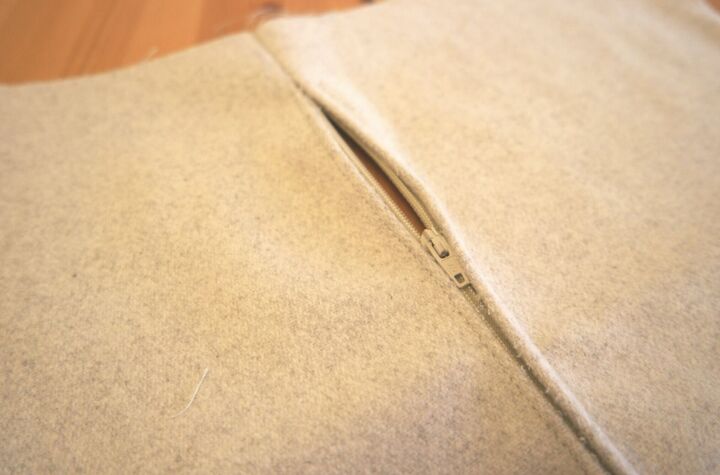
Pull the zip pull down to move it out of the way. Sew the rest of the zip.
Unpick the rest of the seam.
Check That it Fits
Pin the shoulders and the side seams.
If you’re concerned about getting jabbed with the pins, you could use safety pins instead. I wish I could claim this as my idea, but it’s not, it’s Julie’s from Sum of Their Stories’!
Pop the dress on and adjust the side seams and the shoulder seams as needed.
Sewing Up the Rest of the Dress
Sew the shoulder seams and press them open.
Sew the side seams. Start at the waist and sew upwards towards the armhole, then go back to the waist and sew downwards to the hem.
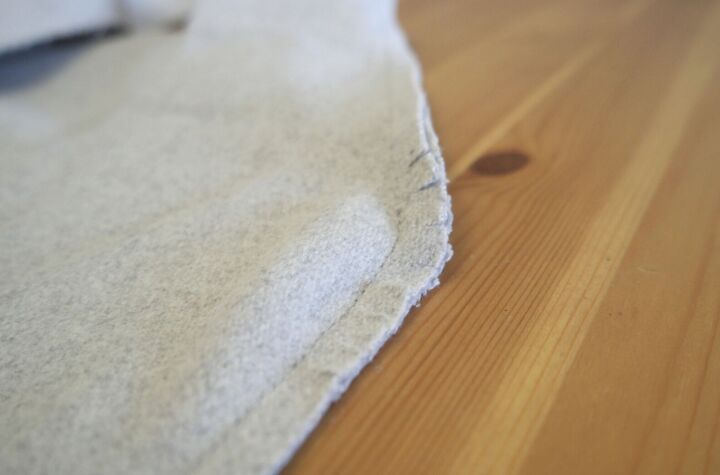
Trim the seams and press.
Pin and sew the hem.
Sewing the Lining
The lining for the princess seams dress is made in exactly the same way as the dress. If you needed to make adjustments to the dress, then make sure you make the same changes to the lining.
Sewing the Lining to the Dress
Neckline
With the right sides together, pin the lining to the dress at the neckline. Be careful to match the seams at the shoulders and check that the tails of the zip are doing what you want them to!
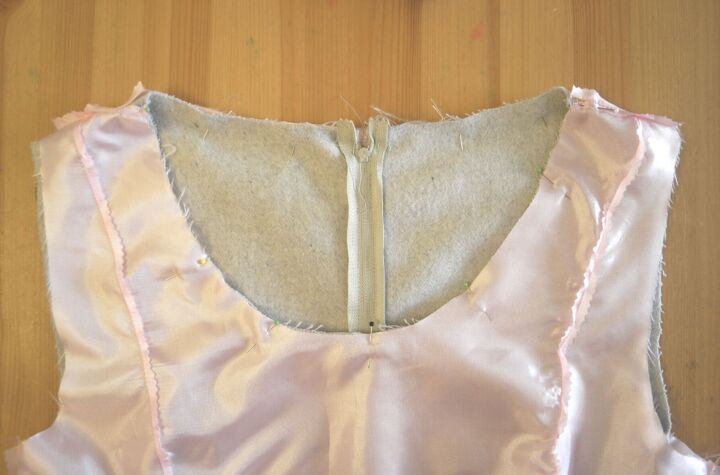
Sew around the neckline. To avoid the fabric pulling and it all ending up being a lumpy mess, I would sew from the centre of the front round to the zip, then back to the centre and round the zip on the other side.
Trim the seams and clip them. Press the seam so that the lining sits neatly inside the dress.

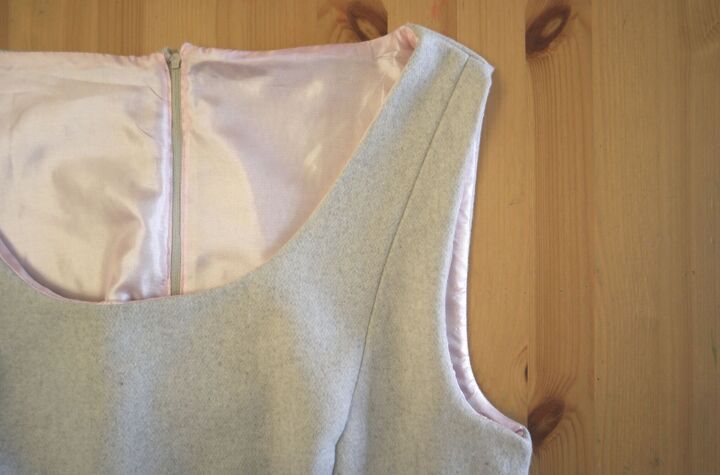
Armholes
Armholes can be fiddly. They would be much easier if they could be sewn the same way as the neckline, but that would result in the lining being permanently on the outside!
Thankfully there is a way, and there’s a video on Tilly and the Buttons which I used myself.
With the lining on the inside, fold the seam allowance of the dress and the lining inwards.
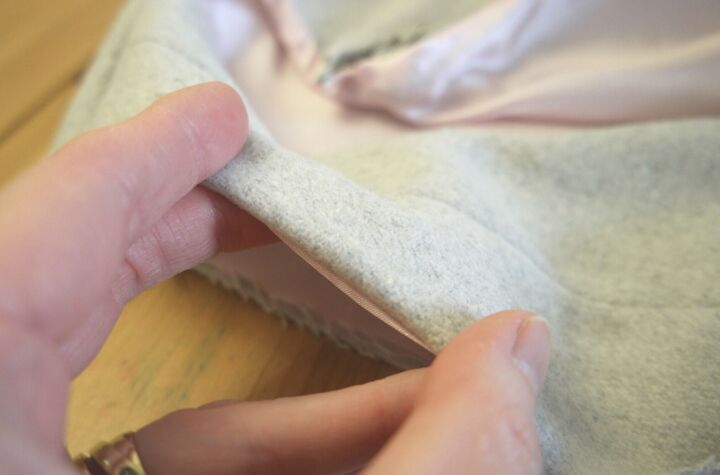
Hold it with one hand, then slip your other hand between the dress and the lining and grab the seam allowance. Pull it through and pin the shoulder to the armpit on one side.
Sew, just on that one side.
Do the same for the other half of the armhole.
Trim and clip the seams and turn it the correct way out.
Now repeat the whole thing with the second armhole.
Press the armhole
Zip
The tricky bit with the zip is all done. All you need to do is hand sew the lining so that it covers the sides of the zip and won’t get caught in the zipper. Sewing it this way rather than putting the zip in after the lining means that you won’t have the sides of the zip annoying you if you wear your princess seams dress without a top underneath.
Unpick the back seam of the lining. Pin the edges of the seam so they are clear of the zip’s teeth. You might need to fold the edges under a bit more.
Once you’ve done this, check the bit of the neckline near the zip as this might need some attention too.
Hand sew the lining to the sides of the zip. You could sew through to the dress if you wanted to. If you do this, try to keep the stitches tiny so that they don’t show too much.
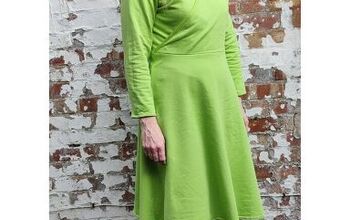
Run the iron over it one last time and your dress with princess seams is ready to wear!
The author may collect a small share of sales from the links on this page.


Comments
Join the conversation