A Warm Winter Dress: Drafting the Pattern & How to Sew
One of the negative things about winter is the clothes.
In summer, we wear pretty colours, pastels, bright colours and prints.
In winter, everything is drab. Sometimes we might be able to find something brighter for Christmas, but party dresses are not known for being warm. Much as I love my gold sequinned dress I wore on Christmas day, there is no way I’m going to stand and shiver at the bus stop or at forest school just so that I can wear something sparkly! Weighing it all up, I would rather be warm.
Feeling somewhat bored of my current winter outfits (apart from the grey dress I made last spring, they’re all quite old), plus the depressing fact that things are too tight again, I decided it was time to make something new.
My priorities were warmth, comfort and not drab! I wanted to make a warm winter dress!
I’ve chosen some sweatshirt fabric from Minerva Crafts. It’s normally associated with sportswear, or thinking about sports and wanting to feel like you’re wearing pyjamas!
I am not a sportswear kind of girl. I am however very much in favour of feeling comfy.
So I decided to make a warm winter dress from sweatshirt fabric that would fulfil all the above criteria and not look like pyjamas!
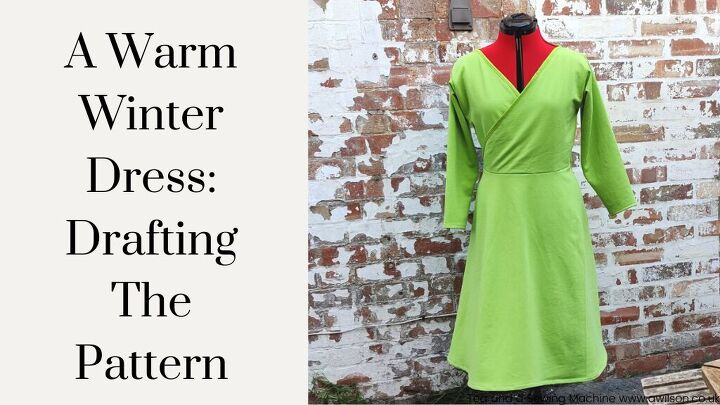
This is the end result. Happy :)!

I couldn’t decide between pink, which I love, and emerald green, which I know was a colour that suited me when I was younger. After much dithering, I decided to go for a chartruesey, new leaves kind of green instead.
I made the pattern from my own measurements. The dress is very simple with no zips, buttons or darts. The shape of the top plus the stretchy fabric means that it doesn’t need them.
In this post, I’m going to explain how to make the pattern for a warm winter dress from your measurements. Then I’ll walk through sewing it together in the next post.
Drafting the Pattern: You Will Need
Pattern paper (I find the kind with the grids easiest to use)
Ruler
Pencil
Tape measure
A French curve is useful, but you could use a plate if you don’t have one.
Taking Measurements
When it comes to taking measurements, it’s worth being careful! Use a decent tape measure, check that it is level and don’t be tempted to pull it too tight! You’re far more likely to think about the pounds you can’t shift if you are wearing something that squeezes you in where you would like to be thinner!
Where to Measure
Across your collarbone
Across your shoulders
Chest (under your arms)
Boob area
Waist
Around your hips
Top of your shoulder to your waist
Top of your shoulder to where you took your chest measurement
Top of your shoulder to where you measured your boob area
Top of your shoulder to your wrist
Around your wrist
Waist to just below your knee (or wherever you want the hem of the skirt to be)
Drafting the Pattern Pieces
The back piece is drafted first, then it can be used for drafting the front.
Using a knit fabric means not having to worry about darts as the stretchiness of the fabric will take care of that side of things.
The skirt is an a line skirt made from 2 pieces, so all you’ll need is your waist measurement and desired skirt length.
Sleeves can be tricky! To draft them, the front and back pieces will be joined at the shoulder and then traced to get the top bit the correct size and shape.
Comfy is the aim with this warm winter dress, so providing your measurements are accurate, you won’t need to spend masses of time getting an accurate fit.
Back
Usually when drafting a back piece, I would only make a half then cut it out on folded fabric, but as the front section will need to be drawn as a whole, the back needs to be whole as well.
Fold a piece of pattern paper in half. The fold is going to be the centre back.
On the fold, mark where the top will be. Then measure down and mark off your shoulder to chest measurement, shoulder to bust and shoulder to waist measurement.

Take your collarbone measurement and divide it by 2. Measure this distance out from the fold, where you marked the top, and make a mark.
Do the same with your shoulder measurement.
Now take your chest measurement and divide it by 4. Find where you marked your shoulder to chest measurement and measure out from there, and mark it on the paper.
Do the same with the bust and waist measurements, each time dividing by 4.
Now to join them up!
Waist to bust and waist to fold are easy because they are straight lines. The collarbone to the shoulder is also a straight line (this will need adjusting as most people’s shoulders slope at least a bit).
The collarbone to the fold will need to curve downwards. On my pattern piece the curve ends at the fold 5 cm down from the original top mark.
For the armhole, you’ll need to draw a curve from the shoulder to the bust, passing through the mark you made for your chest measurement. This where having a French curve comes in handy!


Once you’ve done this, add a 2 cm (3/4 inch) seam allowance to the all the edges except the neck.
Now cut out your pattern piece! This is the hardest and most important bit done!

Front
Pop a fresh piece of pattern paper over your back pattern piece.
Trace over the shoulder, armhole, side and waist, including the seam allowance.
Now draw a straight line from the collarbone to the waist.

The front is done! You don’t need a seam allowance on the diagonal line because the raw edge will be finished with bias binding.
When we get to the cutting out stage, you’ll need to cut two front pieces, so whether you want to use just one pattern piece, or cut out another for the other front section, is up to you.
Sleeves
This isn’t the official way to draft sleeves, but it’s the easiest way of getting a sleeve that fits in the armhole of the dress!
Take the front and back bodice pieces and pin them at the shoulder, taking into account the seam allowance.
It’s a good idea at this point to check whether you need to adjust the shoulders. So pin the sides as well and pop it on. Adjust the shoulders as necessary. Using a mirror will make things easier!
Now take another piece of pattern paper. Make sure that it is at least as long as your arm.
Trace around the armhole of your top.

From the shoulder seam, measure down the paper and mark off the length of your arm.
At the other end of that line, draw a perpendicular line the length of the distance round your wrist, plus a couple of extra cm for comfort.

Now join one end of this line to the end of the armhole. Do the same with the other side of the sleeve.

Add a couple of cm to the end for the hem of the sleeve. You shouldn’t need to add a seam allowance anywhere else as the front and back pieces already had the seam allowance included.
Skirt
Find your hip measurement and divide it by 4.
Draw a rectangle that is your hip measurement divided by 4 by your desired skirt length.
Along one of the short edges, find the half way point and draw a line 10 cm (4 inches) downwards.

Now you need to work out the difference between your hip measurement divided by 4, and your waist measurement divided by 4.
Divide that number by 2, then mark off that amount on either side of the line. SO the total distance between the 2 marks should be the difference between your waist measurement divided by 4, and your hip measurement divided by 4.
I know it sounds like a horrible amount of maths!
To make it clearer, this is what I did. My waist measurement was 84 cm, and my hip measurement was 104 cm. Divided my 4, my waist measurement became 21 cm and my hip measurement 26 cm. So the difference between my waist measurement and my hip measurement was 5 cm.
So after drawing the vertical line, I marked off 2.5 cm on either side.
Once you’ve done this, join the marks to the end of the line to make a triangle. Draw from the point of the triangle down to the hem.

Now cut out the rectangle. Then cut out the triangle.
Cut along the line almost to the triangle. If you go too far and it ends up in 2 bits, don’t worry!

Push the sides of the triangle together and stick it with tape.

Now redraw the skirt. You might want to make the waist and the hem curved. Add the seam allowance.

Last Things
I’ll talk about assembling the dress in the next post. If you want to get ahead with your warm winter dress, here is what you can do.
Check that all your pattern pieces have a seam allowance
Cut out your pattern pieces
Buy your fabric. 3 metres will be enough, although if you choose something with a directional print, you might need a bit more. It will need to have a bit of a stretch to it. I chose a sweatshirt fabric with a fleece back.
You will also need a couple of metres of jersey bias binding.
Hopefully you’ve made your pattern pieces and you’re all ready to sew a warm winter dress!
If you missed the previous post and you haven’t drafted the pattern yet, it’s here.
Once you’ve got your pieces cut out, you can start assembling the dress.
The order for sewing the dress is:Shoulder seamsBinding the neckline and the frontSleevesSkirt piecesSide and arm seamsHems
You might choose to go about things in a different order and that’s fine. Dresses take quite a lot of fabric, and sweatshirt fabric is bulky, so dealing with the bulk is going to be an issue however you choose to tackle it.
Your efforts will all be worth it in the end when you have a nice warm dress to wear!
Here’s how to sew a warm winter dress.

You Will Need
To sew a warm winter dress, you will need:
Your pattern pieces ( the post is here if you missed it)
About 3m of jersey fabric, depending on your dimensions and the width of the fabric. I used sweatshirt fabric with a fleece back.
2m jersey bias binding
Usual sewing supplies
Cutting Out
The grain will need to run vertically through the centre of the bodice, and through the centre front and back of the skirt.
With the sleeves, the grain will run from shoulder to wrist.
If you can’t remember what the grain is, it runs parallel to the selvedge.
Cut 1 back piece.
Cut 2 front pieces on folded fabric, so that you get a left side and a right side.
Cut 2 sleeves.
Cut 2 skirt pieces on the fold (Your skirt pattern piece is 1 half of the skirt front/back). When you fold the fabric, have the fold run parallel to the selvedge, then the grain will be in the right direction.
Sewing the Dress
With knits it is best to use a stretch stitch. If your sewing machine doesn’t have that option, you can use a zigzag instead. This allows the fabric to stretch even after you’ve sewn it.
Shoulder Seams
With the right sides together, pin the front pieces to the back at the shoulders. Check the fit (you might need to temporarily pin the side seams as well), then sew the seams.

Press the seams open. Use a warm iron, not a hot one!
Binding the Neckline
Starting at the centre back and with the right side down, pin the bias binding to the wrong side of the neckline.
Make sure that the edges are lined up.
Sew the bias binding to the bodice, keeping close to the folded edge.
I prefer to start in the centre, then sew outwards. It’s easier to keep it neat that way!

Fold the bias binding over the raw edge and pin.
Top stitch the bias binding.

Sleeves
The official way to attach sleeves to a bodice is to sew up the seams, then ease the sleeves into the armhole.
However, it’s often much easier to sew the sleeve into the armhole before sewing the side seams, and that is what we are going to do here.
At the top of the sleeve, find the centre. Match the centre of the sleeve with the shoulder seam of the bodice. Pin with the right sides together.
Again, I usually start from the centre and pin outwards, and the same with the sewing.
Sew the sleeve and trim the seam. Do the same with the other sleeve.
Sewing the Skirt Pieces to the Bodice
It’s a good idea to check the fit at this point, before sewing the skirt to the top.
With the bodice inside out, pin the side seams (don’t worry about the sleeves) and pop the top half on.
Pull the cross over bits across yourself and check where the corners are. Hopefully they will be where the sides are, but if not, don’t worry, just put them where they need to go and pop a pin in.
Take the bodice off. Unpin the sides.
Pin the cross over sections at the waist.

Pin one of the skirt pieces to the bodice front with the right sides together.
As the pins you used to pin the bodice sections together will be on the other side, you’ll be able to take them out now. It’s a good idea to do this so that you don’t end up with a broken needle!
Sew the skirt to the bodice front, then trim the seam.
Pin the other skirt piece to the back, sew, then trim the seam.
Sewing the Side Seams
Find the waist seams and pin them on one side, making sure that they are lined up. From there, pin up to the arm hole, then down to the hem.
Starting at the arm hole, sew the side seam. Trim.
Do the same on the other side.
Sewing the Under Arm Seams
Go back to the arm hole and from there, pin the under arm seam. Sew the seam, starting at the armhole.
Do the same with the other sleeve. Trim the seams.
Hemming
The last job is to hem the sleeves and the skirt.
The fabric I used showed no signs of fraying, so I just folded the hems over and sewed them with the stretchy stitch.
The kind of hem where you fold it twice so that the raw edges are enclosed might be a bit bulky, so if your fabric is fraying, it’s probably best to either use an overlocker or finish the edges with a zigzag before sewing the hems.
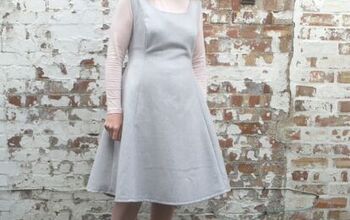
Having worn my dress a couple of times now, I can happily tell you that it is both warm and comfy, and I love the colour!
My photographer this week was my nine year old son. He did a very good job!


I like the pink scarf with the green because it makes me think of spring flowers.

The author may collect a small share of sales from the links on this page.


Comments
Join the conversation