How to Sew a Mini Dress With Long Sleeves in 8 Simple Steps

In this tutorial, I'll show you how to sew a mini dress using the Ruby dress pattern. This dress is flirty, fun, and flattering. It's perfect for spring and summer, but you could easily pair it with leggings or tights for winter.
This mini dress pattern also comes in a midi length, if you want a bit more coverage. Let me show you how to make a mini dress you can wear out tonight.
Tools and materials:
- Ruby dress pattern
- 1½ yards stretch fabric
- Sewing machine
- Machine needle for stretch fabrics: twin, stretch, jersey, or ballpoint
- Serger (optional but useful!)
- Scissors
- Glasshead pins
- Thread: contrasting or matching
- Ruler
- Measuring tape
- Iron
- Clapper
- Fabric weights
This dress comes in 2 lengths: mini or midi. Both are super comfortable, easy, and flattering to wear.
Fabric choice is important. You’ll want to use one that has a moderate stretch of 40 to 50% with at least 5% elastane. These fabrics include ponte knit, french terry, jersey, brushed poly, ITY, or ribbed knit.
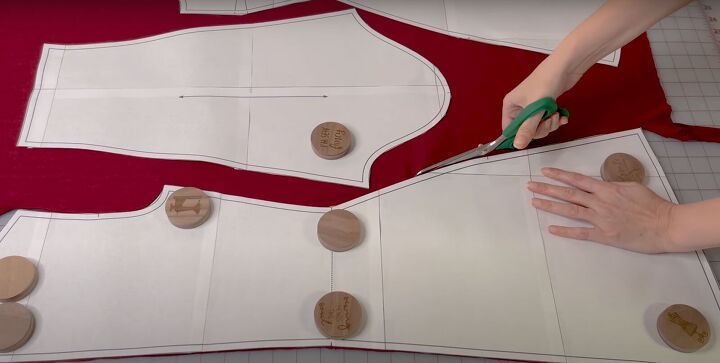
1. Make the pattern
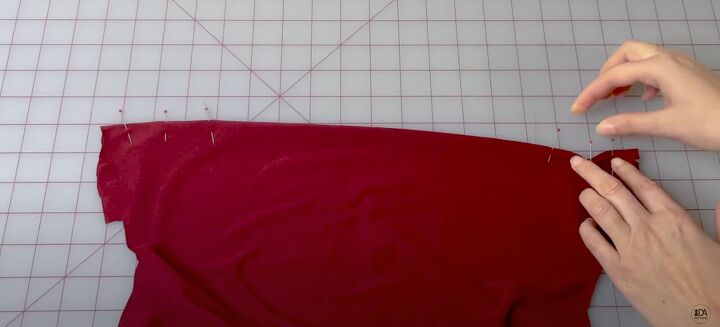
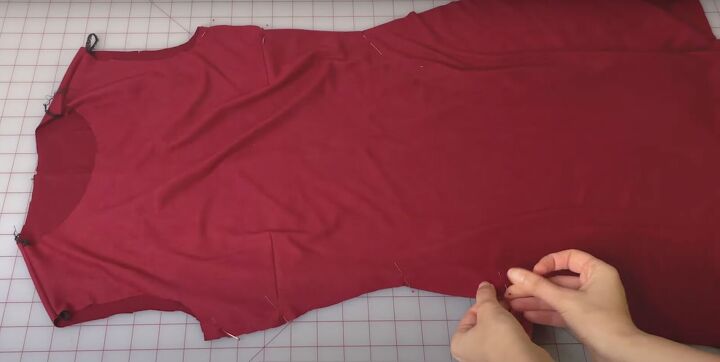
Lay the pattern pieces as directed on the fabric. Use fabric weights if needed. Your fabric layout will depend on the size of your pattern and if your fabric has a print or not. Don’t forget to cut the notches!
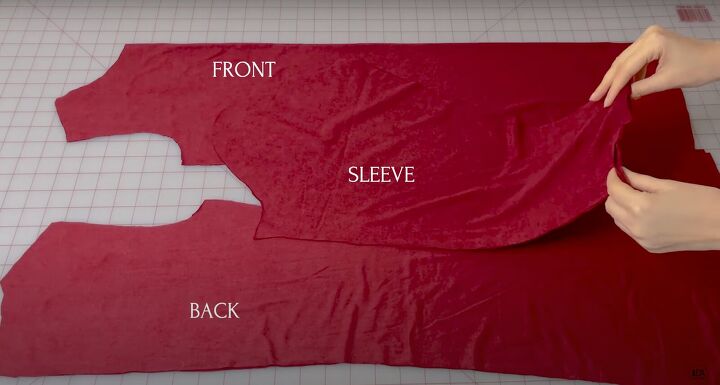
You should have the front, 2 back pieces, and 2 sleeves.
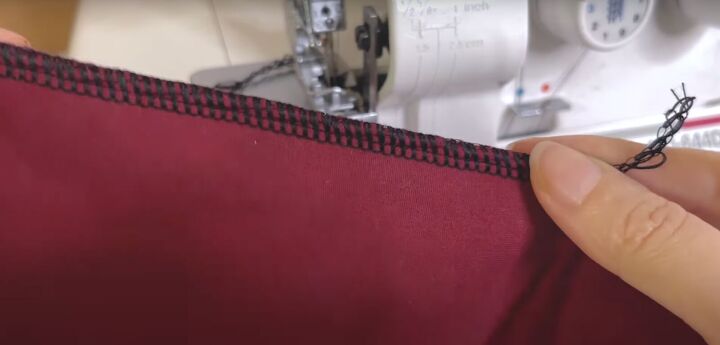
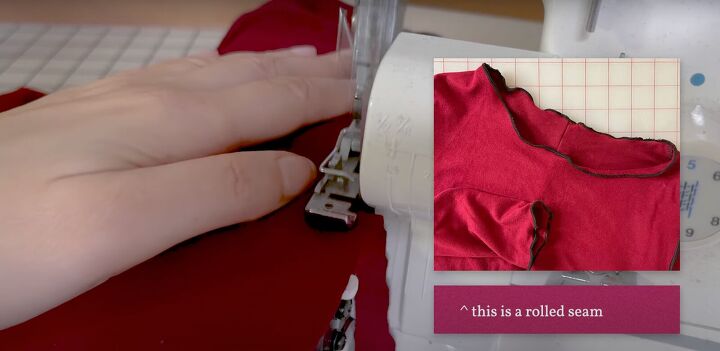
Before you start sewing the shoulder or the side seams, try your serger seams on a scrap of the fabric you’re using for the dress to see which seam looks and fits your fabric best.
You may want to use a contrasting thread (as shown in this tutorial) or a matching thread. You can choose a narrow serger seam or a rolled seam if you want the seams to be visible on the right side.
Check the tension and the thread coverage. I like to use a narrow serged seam; about 3-4 mm. If you don’t have a serger, use a zigzag stitch or another serger imitation seam.
Decide which seams you want to be visible on the outside of your dress. Here, the shoulder seams are on the inside (wrong side) and all the vertical seams - the center back seam, side, and sleeve seams - are all on the outside.
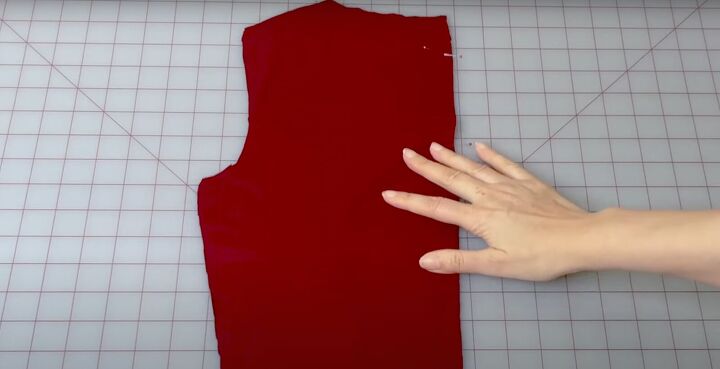
2. Sew the darts
Mark and pin the darts, then sew.
3. Sew the center back
Pin the center back either right or wrong sides together depending on your preference.

Once you’ve sewn this seam, press and cool with the clapper. Press and cool all the darts.
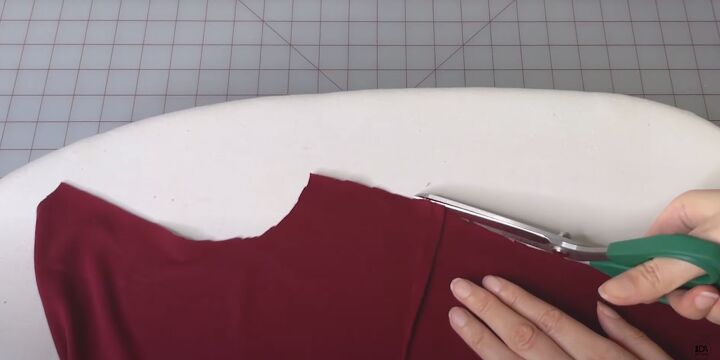
Trim any excess fabric from the darts that stick out.
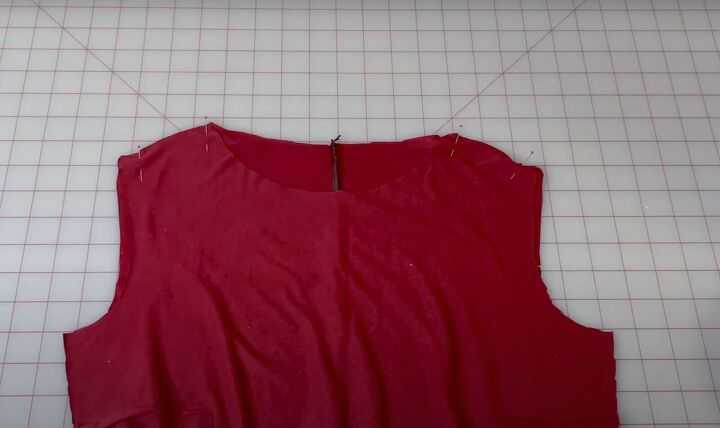
4. Sew the shoulder seams
Pin the shoulder seams and sew. Press the shoulder seams to the back. Cool them with a clapper.
5. Sew the side seams
Pin the side seams and sew. Press to get rid of the waviness. Then press again towards the back. Cool with the clapper.
Tip: Using the clapper helps give your garments a beautiful professional finish. It allows the stitches to hold the fabric better. Cooling takes away the heat, moisture, and any waviness away from the fabric. This leads to a smoother seam and makes sure the fabric has the right shape.
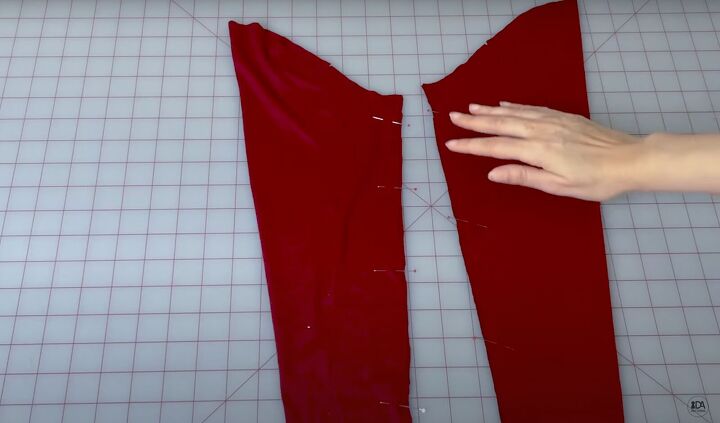
6. Sew the sleeves
Fold the sleeve either to the wrong or right side as per your design. Pin and sew the seam. Repeat for the second sleeve.
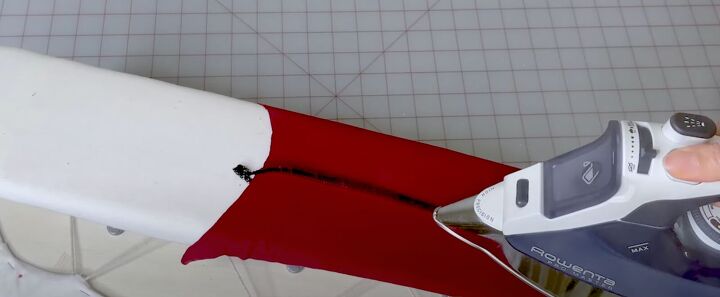
Press the seam going towards the back. Cool.

7. Attach the sleeves
Place the sleeve into the armhole. Pin around, matching the side seam, back notches on the sleeve and dress, and the center of the sleeve to the shoulder seam.
Distribute the fabric evenly around the armhole. Sew in place. Press the seam allowance towards the sleeve.
8. Finish the dress
There are several ways for you to finish the raw edges on the dress. If you’re using a fabric that doesn’t unravel like ITY, brushed poly, french terry, or jersey, you can leave the edges raw without hemming at all.
If you want a more finished edge, you can use the settings you’ve used to finish or you can use a rolled hem. Check your serger first for the rolled hem. Most require you to take out the left needle on your serger to make one.
Practice on a scrap piece of fabric so you can be sure the stitches are filled with thread. You can add more waviness or keep it settled down by playing with the settings.
If you don’t have a serger, you can fold in and stitch the edge with a twin needle, decorative zigzag stitch, or a cover stitch.
Give your dress a finishing press!

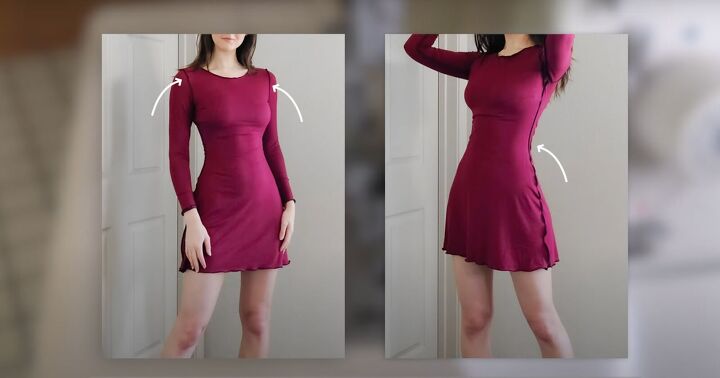
How to sew a mini dress
You just learned how to sew a mini dress!

You can also make this into a midi dress!
You can sew these with the seams on the outside, on the inside, with matching, or contrasting thread! There are so many ways you can make this dress. Please don’t forget to comment below if you’ve made this and let us know how many compliments you received!
The author may collect a small share of sales from the links on this page.


Comments
Join the conversation