Make a Bedsheet Dress By Copying Your Favorite Camisole

Sew a chic strappy dress from thrift store bedsheets! In this step-by-step tutorial, I'll show you how to transform a camisole into a custom dress pattern. Using thrifted bedsheets, we'll make a color-block dress that will be an essential staple in your closet.
Read on, or watch the video below.
Step 1: Draw the bodice pattern
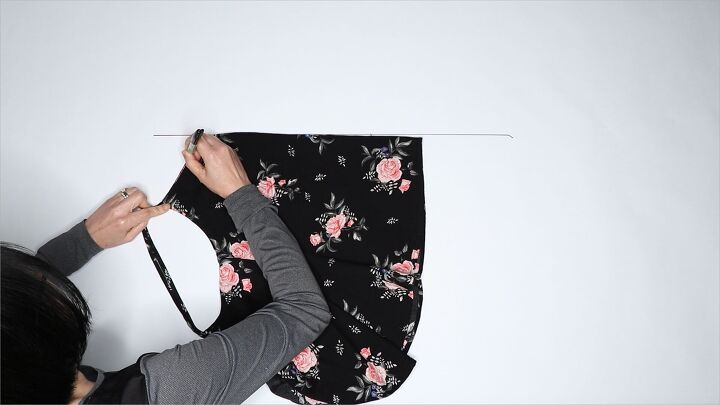
Fold the top of the camisole in half lengthwise and place the fold on the fold line. Trace the top front of the camisole.

Draw a straight side seam and hem. Add 2 slash lines on the v-neck. Add your desired seam allowance.
Cut the slash lines and spread 2 inches apart.
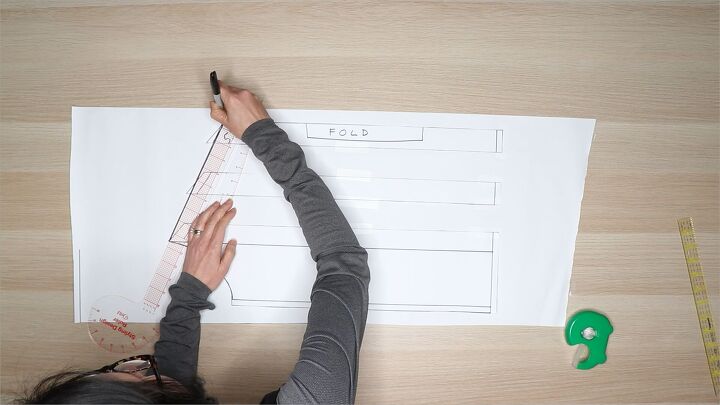
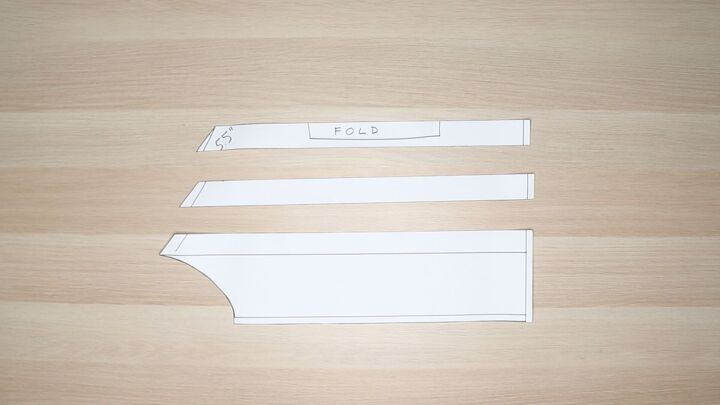
Fill in the gaps with paper and redraw the neck line.
Step 2: Cut and sew the bodice
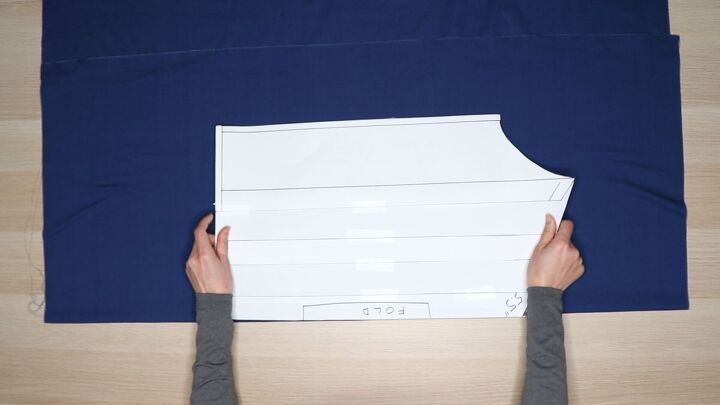
Place the pattern on the fold and cut two bodice pieces. Sew the side seams.
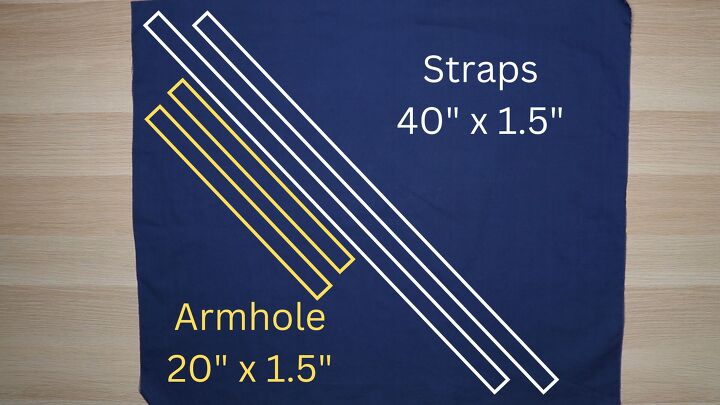
Step 3: Cut bias binding for the armhole and v-neck straps
Cut two strips of fabric 20" x 1.5" on the bias to finish the armhole. Cutting on the bias (45-degree angle against the grain of the fabric) allows the fabric to bend along curves smoothly). For the v-neck straps, cut two strips 40" x 1.5"
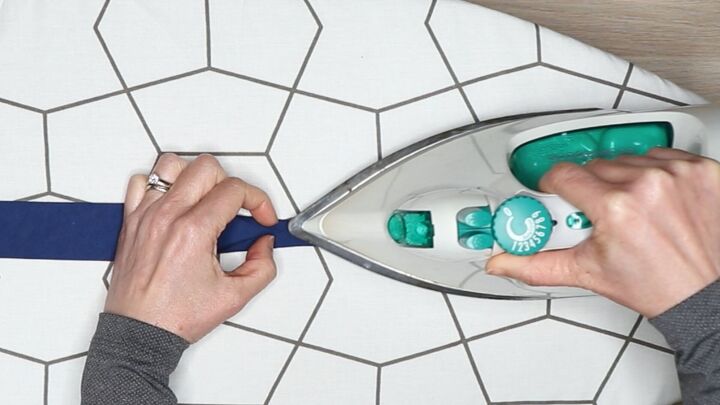
Step 4: Press the bindings for the armhole and v-neck straps
To press the armhole binding, fold the edges of the binding to the center lengthwise and press. Fold in half and press again. Pressing the v-neck straps is the same process, but fold in the ends 1/2" before pressing lengthwise for a finished end.

Step 5: Attach the armhole binding
Wrap the binding around the armhole and sew along the edge. Cut off the excess binding.
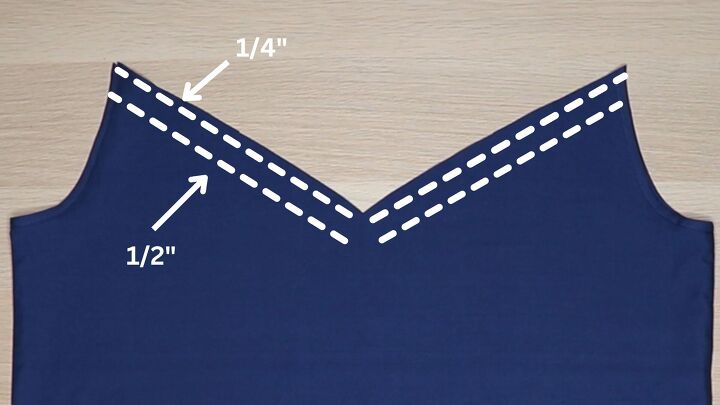
Step 6: Gather the v-neck
Set your machine to the longest stitch and sew two lines of gathering stitches 1/4" and 1/2" away from the edge. Gather the v-neck until it's the original length of your camisole.
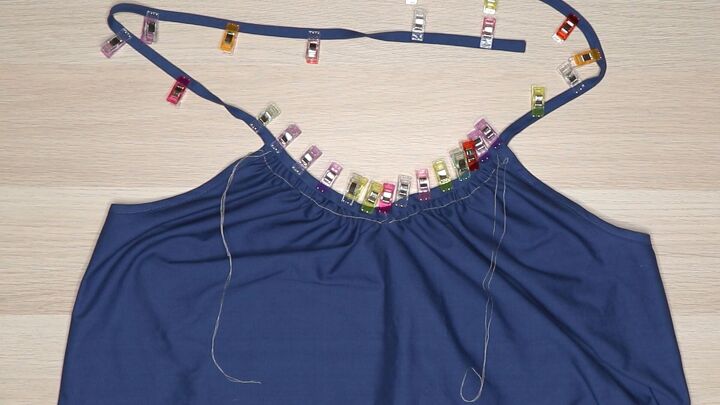
Step 7: Attach v-neck binding
Find the center of the v-neck binding straps by folding it in half, and align it to the center of the v-neck. Wrap the binding around the v-neck and sew along the entire straps.
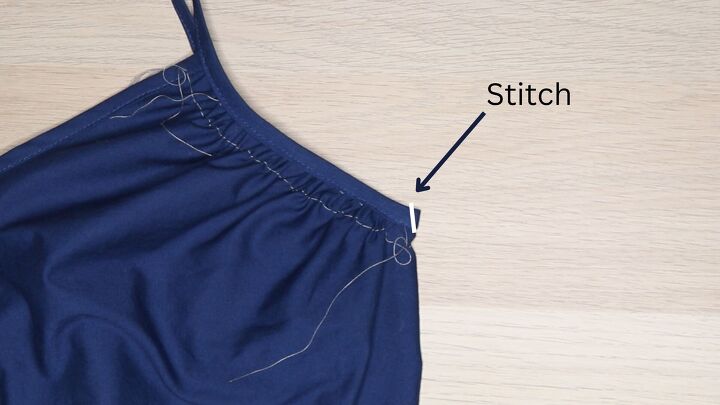
To get the sharp "V" in the v-neck, fold the bodice in half lengthwise and add a few vertical stitches to the v-neck.
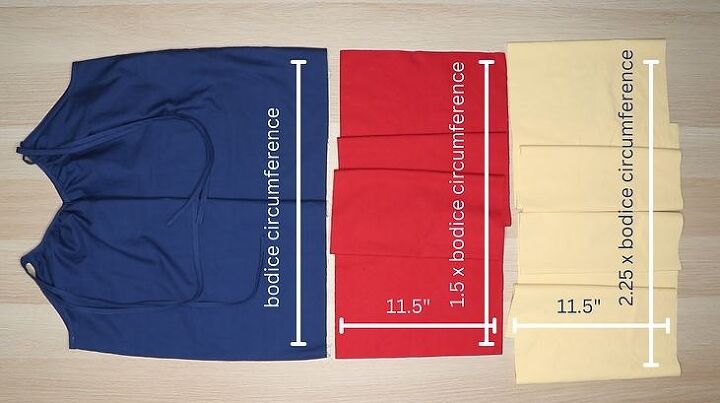
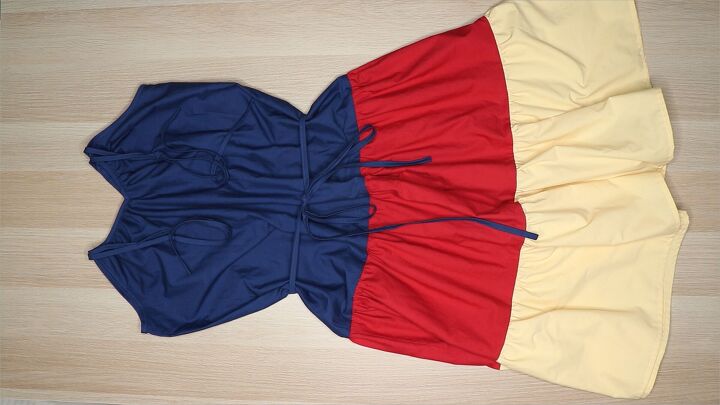
Step 8: Cut the ruffles
Cut two strips of fabric 11.5" long. The width of the first ruffle is 1.5 times the bodice circumference. The second ruffle is 2.25 times the bodice circumference. You may need to piece several rectangles together depending on your fabric width.
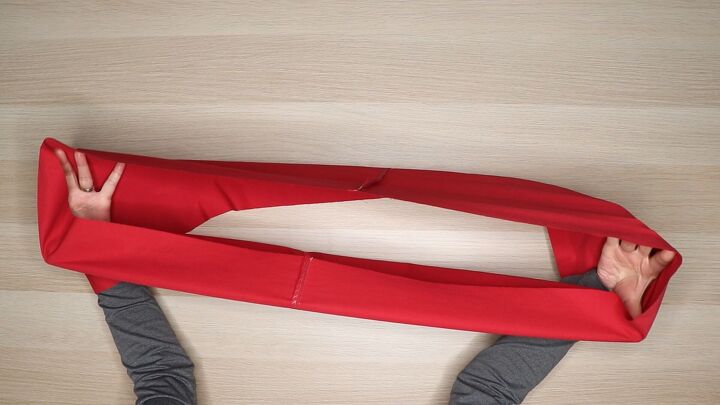
Step 9: Sew the ruffles into a circle
Sew the ruffle into a circle by sewing the short ends together.
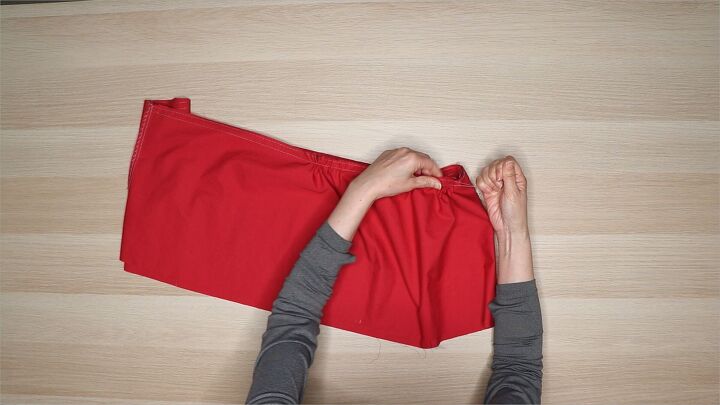
Step 10: Gather the ruffles
Sew two rows of gathering stitches along the top edge of the ruffle. Gather the ruffle until it is the same size as the bodice.
Repeat the same process for the second ruffle, and gather it until it's the same width as the first ruffle.
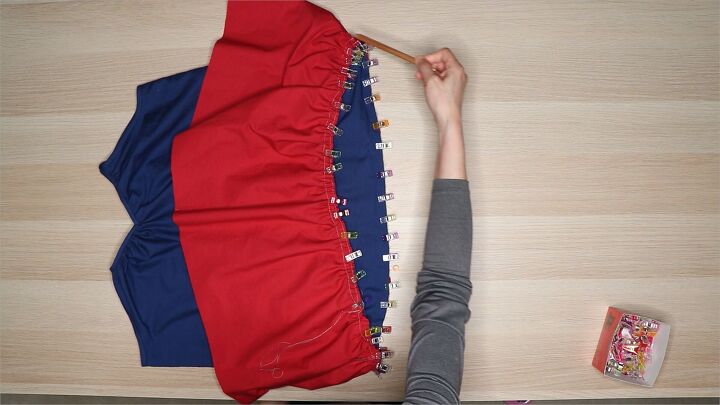
Step 11: Sew ruffles to the bodice
Mark the bodice into quarters. Match the quarter marks on the ruffle to the bodice. Sew and finish the seams.
Attach the second ruffle and hem the bottom.
Step 12: Sew the belt
Cut a strip of fabric 69" long and 1.5" wide. Fold the end in 1" and press. Fold the edges of the binding to the center lengthwise and press. Fold in half lengthwise and press again. Sew along the edge.
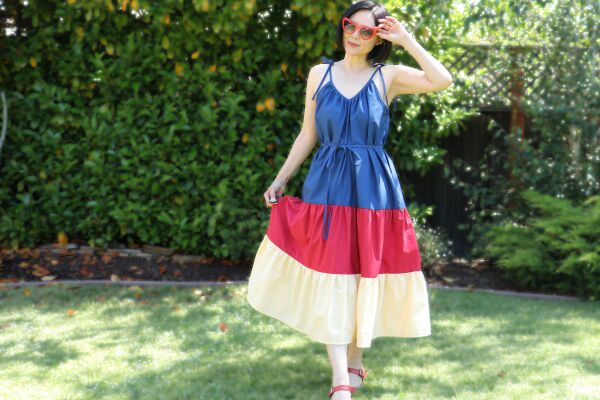
Step 13: Enjoy your dress
This fun, bright colorful dress is easy to wear thanks to the gathers along the neckline. The a-line fit is comfortable, and the belt pulls it all together for a flattering silhouette. The flowing lines of the dress allow for maximum airflow, keeping you cool and refreshed.
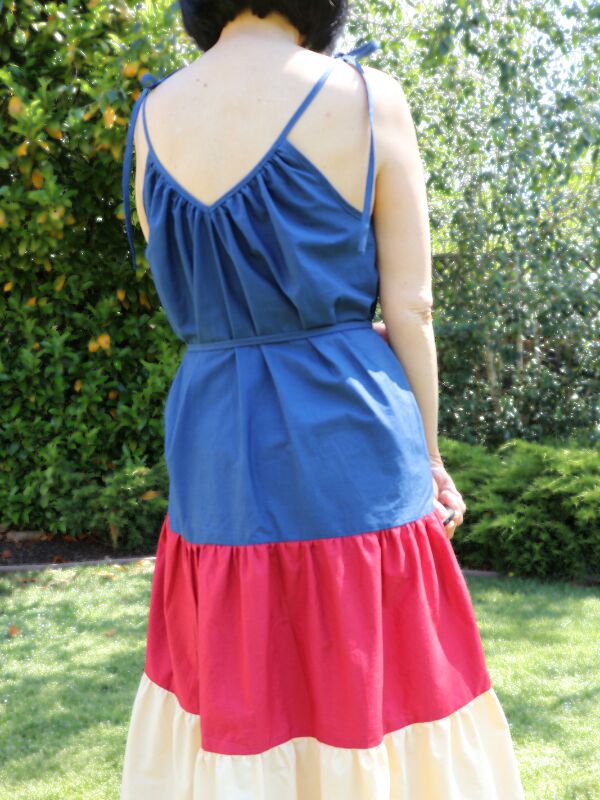
The front and back of the dress are exactly the same, so you'll never wear this dress backward.
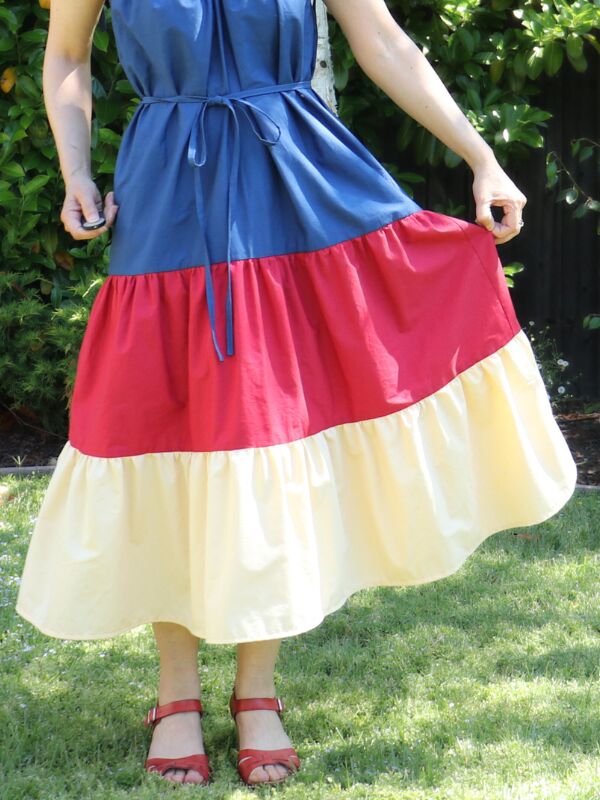
And how cute is this skirt? The gathered ruffles are perfect for twirl-filled moments. And the bright color blocking adds a vibrant burst of energy.
I hope you enjoyed this upcycled bedsheet dress tutorial. For more sewing inspiration, visit my blog www.pivotpointpatterns.com
The author may collect a small share of sales from the links on this page.


Comments
Join the conversation