How to Sew a T-Shirt Dress With a Cutout in the Back

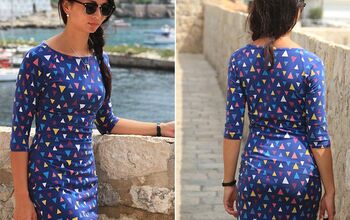
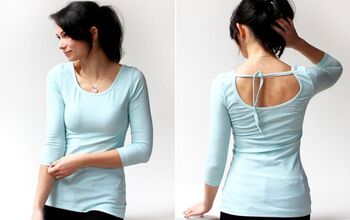
Today I’m going to show you how to make this cropped elastic-back dress. They’re so simple to make, I made two in one day. I love the design of this dress because it’s extremely comfortable, but it’s also very unique because of the cut. I think it’s a great option for casual wear in the spring or summer.
Tools and materials:
- T-shirt (to trace for the pattern)
- Yard and a half of jersey fabric
- Twill tape or selvage from a woven fabric
- Fabric chalk
- Scissors
- Pins
- Elastic
- Sewing machine
Trace a shirt for the pattern
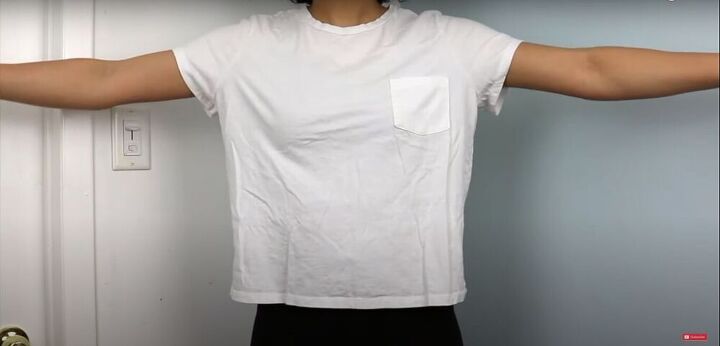
All you need to make a pattern for this dress is a t-shirt that fits you a bit loosely. If you don’t have a shirt like this, you can use a more fitted shirt, just make sure when you’re copying it, you make the side seams wide enough to accommodate your hips.
Lay the shirt on the fabric
Fold your fabric in half, and fold your t-shirt lengthwise with the front facing out. Align the fold on your t-shirt with the fold on the fabric.
Mark the width and length of the dress
Using the shirt as your guide, mark the width of your dress all the way down, and measure the length.
Trace around the top of the shirt
Trace the front armhole, shoulder, and neckline.
Cut the fabric
Cut out your front piece from the fabric.
Lay the front piece on top of the fabric that will be used for the back pieces
Fold up the front piece to where you want it cropped and mark that point with a shallow snip. I recommend making this measurement about an inch higher than you want it since the weight of the elasticated skirt will pull it down a bit. Lay the folded front piece at a slight angle over the doubled fabric that will be used for the back pieces. This will help reduce sagging in the back. I placed my front piece so the edge of the neckline aligned with the fold, and the bottom edge of my front piece about one and a half inches past the fold.
Trace out the back top piece
Trace around the folded front piece to create the pattern for the back piece, with a hem allowance of about three-quarters of an inch. Also, make the back armhole a bit wider, and the back neckline a bit higher.
Cut the fabric
Cut out the back top piece.
Cut the back bottom piece
Fold the top piece at the spot where it is notched. Mark a two-inch guideline for the elastic casing at the top edge of the skirt piece, then place the fold of the top piece along the bottom line of the two-inch guideline. Cut around the top piece, which will give you a rectangular piece of fabric for the back bottom of the dress.
Trace the sleeves
For the sleeve, fold the fabric with the right sides together, and draw a line down the center. Fold the t-shirt at the shoulder seam and line up the fold of the sleeve with the center line. Then trace around the sleeve, adding three-quarters of an inch hem allowance.
Flip the shirt over, and trace the second side of the sleeve on the other side of the center line.
Cut out the sleeves
Mark which side is the front of the sleeve and which side is the back, and notch the center where it will line up with the shoulder seam. Then cut out your sleeves.
Cut a neckband
These are all the pieces, including a neckband measuring two inches wide, and at least as long as your neck circumference.
Hem the back top piece
Fold the bottom edge of the back top piece up about half an inch, and sew it down.
Create tunnels for the elastic
Create the casing for the elastic by folding down three inches along the top edge of the skirt piece, and creating two rows of stitching--one along the edge of the folded fabric, and one in the middle of the folded fabric, creating two tunnels.
Cut pieces of elastic
Cut two pieces of elastic long enough to stretch comfortably across your back. Cut one inch off the piece of elastic that will be closer to the top of the skirt section of the dress. This will help to stop the opening in the back of the dress from gaping too much.
Pull the elastic through the tunnels
Use a safety pin to feed the elastic through the casings you’ve created in the bottom piece. Make sure the shorter piece of elastic is on top.
Sew the elastic in place
Pin the ends in place and sew them down at the edges of the fabric.
Sew the shoulder seams together
Next, with the right sides together, sew the shoulder seams.
Because this fabric is very heavy, adding twill tape will help to keep the shoulder seams from stretching out over time. If you don’t have twill tape, you can cut the selvage edge off a bolt of fabric, and use that instead.
Pin and sew the sleeves
Pin the sleeves in place, making sure you are pinning the front to the front and the back to the back, and then sew them in place.
Pin and sew the side seams
After the sleeves are sewn in, you will sew the side seams. Line up the top back with the notches on the front body piece, and pin them in place.
Next, pin the sides of the gathered skirt piece in place, with the top edge of it overlapping the bottom edge of the top back piece.
Add twill tape to the seam from the underarm until the bottom of the elastic casing to add support, since the fabric is heavy.
Sew up the side seams, making sure all the layers of thickness are being sewn together in the seam.
Prepare the neckband
Next, take your neckband, fold it lengthwise and iron it flat.
Walk it around one half of the front neckline, stretching as you go, then create a notch in the neckband at the point it meets the halfway point of the neckline.
Fold the neckband in half at the notch, and make a second notch.
From the second notch, walk the neckband around one half of the back neckline, make a notch at that point.
Copy that length with an added quarter-inch seam allowance, and cut any excess fabric.
Sew the ends of the neckband
Sew the ends of the neckband together to create a circle.
Pin and sew the neckband
Match the notches with the seams along the neckline, pin it down and sew it in place.
Top-stitch around the neckline
At this point, you can top-stitch around the neckline with a contrasting thread to add detail, but it’s not necessary for the construction of the dress.
Hem the sleeves
Next, iron the sleeve hems up, and sew them down.
Hem the bottom edge
Iron the hem of the skirt and sew it down.
Iron everything flat
Iron the seams and any wrinkled fabric to finish.
If you use this tutorial to make your own t-shirt dress, I’d love to see the result; especially if you try it with a woven fabric instead of jersey fabric.
Enjoyed the project?
Suggested materials:
- T-shirt
- Jersey fabric
- Twill tape
- Fbric chalk
- Scissors
- Pins
- Elastic
- Sewing machine
The author may collect a small share of sales from the links on this page.


Comments
Join the conversation
Very cute! Good instructions on how to use an exiting t-shirt as a pattern. Nice work!
Fantastic idea this look's very comfortable and great on you! Thank you for sharing!