Light and Summery Strappy Dress

This strappy dress sewing tutorial is right in time for summer. Light, airy and pretty, this dress is the perfect answer to warm beach nights and hot summer days!
Tools and materials:
- Fabric
- Pins
- Sewing machine
- Scissors
- Thread
- Rolled hem foot
Make the cami
Fold your fabric in half and then use a ruler to mark a quarter of your bust measurement plus two inches. Draw a line across the whole length of the cami. The length should be measured from the start of the straps to right under the waist. Remember to add a half-inch seam allowance. Draw in a four by four square for the armholes in the top corner and then make a curve to follow when cutting it out. Mark your neckline depth and cut out your cami.
Measure an inch from the fold and mark it off. Then grab another piece of folded fabric and align your markings with the edge of the fold. Trace around the cami for the back piece (it’s smaller). Cut out the back of the cami. Place the front and back pieces right sides together and sew the sides. First, sew normally and then add a zigzag stitch or overlock. Next, stitch around the top of the cami (remember to leave a seam allowance so that you don’t need to remove the thread later).
Gather the bottom
For a good fit, gather the front of the cami. Pull out the bottom and top thread and start about an inch from the edge. Sew two lines, one with half an inch and one with three quarters inch seam allowance with the stitch length set to maximum. Next, pull the two threads to gather the fabric on the front piece until the widths match. Tie knots on both sides. sew a line down the middle of the two lines to secure it and pull out the gathering thread.
Step: Ass the bias tape
Use a ruler to measure out your bias tape. I cut out a half-inch bias tape for a 2.5-inch hem. Fold both ends towards the middle, iron it down, and then fold it in half and iron it down again. Place your bias tape on the edges of your shirt, and sew it down, right sides together. Repeat this with all the raw edges (you will need multiple pieces of bias tape). Cut off any excess edges.
Make your armholes
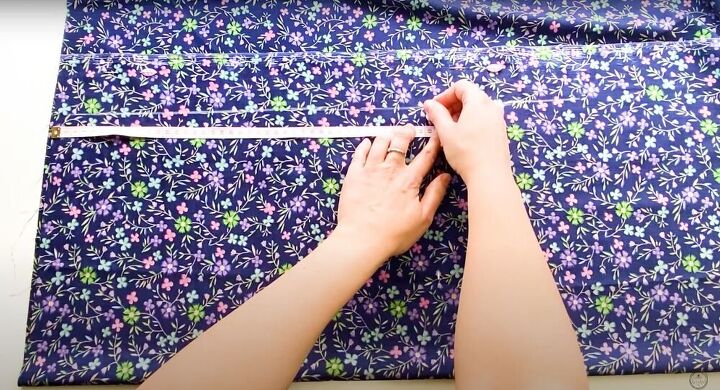
Add bias tape to the edges of your armholes and measure it out. Find your measurement and mark that off (pictured above). Once you find your measurements, unpin the tape from the armhole and sew it together, right sides touching, forming a loop. Next, pin the loop to the raw edge of your armhole (right sides together) and sew. Refold the strap so there are no raw edges (like you would bias tape), pin, and sew around the entire strap.
Connect the cami and skirt
For the skirt, cut out two rectangles of fabric that are 34 inches by 20 inches. Sew two lines for gathering through the tops (the same way you did with the cami) and gather until the size of the skirt matches the bottom of the cami. Place the two skirt pieces together (right sides together) and sew the sides. Next, turn the cami inside out and place the skirt inside of it so the right sides are touching. Align the seams, pin all around and sew.
Finish the dress
Fold the hem down and understitch to close the seam. Next, using a narrow rolled hem foot, sew your hem. Fold the bottom twice on the seam and put it under the foot. Feed the foot the fabric and it will roll it and sew it in place. Be careful not to stretch the fabric. (Or if it’s easier, simply double fold your hem and sew to secure.)
This DIY strappy dress is perfect for the summer. It’s light, airy and the flowers make for the perfect warm-weather style. Make a strappy dress of your own with this pattern and have fun!
Enjoyed the project?
The author may collect a small share of sales from the links on this page.


Comments
Join the conversation
It’s adorable and everything, but, you want me to do what to or with the bias tape?