Easy Soap Decoration | How to Decoupage Soap Bars
I’m so excited to share this easy soap decoration with you! Plus, I’m sharing simple tips to show you how to decoupage your own soap bars using mod podge and napkins.
This blog post contains affiliate links. The opinions are wholly my own from my own experience. I may earn a small commission from clicks through to the websites that end in a purchase.
If you haven’t tried decorating your own soaps yet, get ready to have a new favorite craft! These look like they belong in a store!
Supplies needed for Easy Soap Decoration
- Jergens Soap (I got this 3 pack collection of white, light scent bathroom soap bars from the Dollar Tree)
- Mod Podge
- Decorative Napkins
- Sanding Block from Dollar Tree
- Small Paintbrush
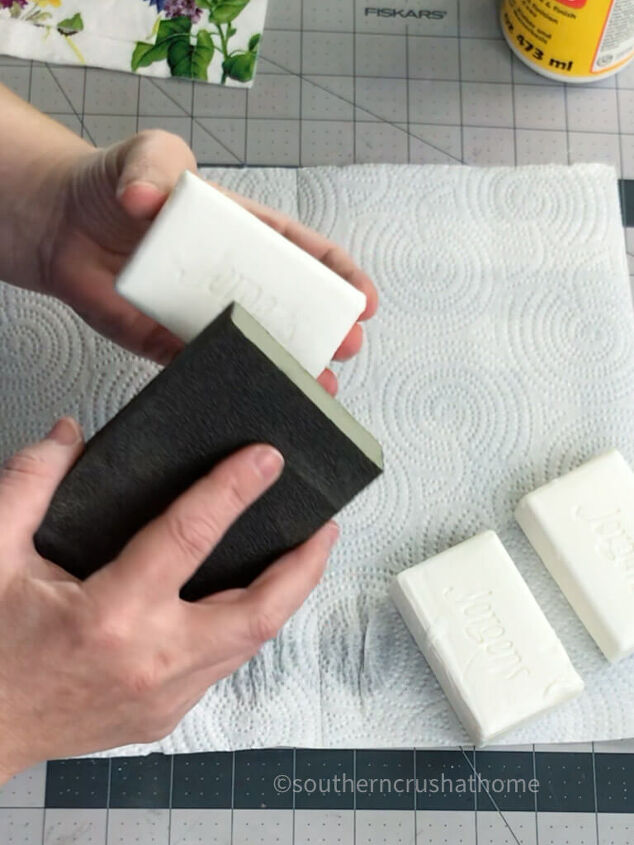
Step 1. First Sand the Raised Letters
Start by sanding the raised letters on the soap. I’m not sure if all soaps have their logo carved into the top and bottom, but I know several of them do this.
Take a sanding block to remove the raised lettering and don’t be afraid to be aggressive. It does leave a messy residue on the sanding block, so be prepared to toss it when finished.
I used Jergens, but you can also use Ivory or whatever your favorite brand of white color bathroom soap is.
Step 2. Choose the Napkin Designs for Decorating
Now you want to choose your decorative napkins to be used to decorate the top of the soap. This is my favorite part!
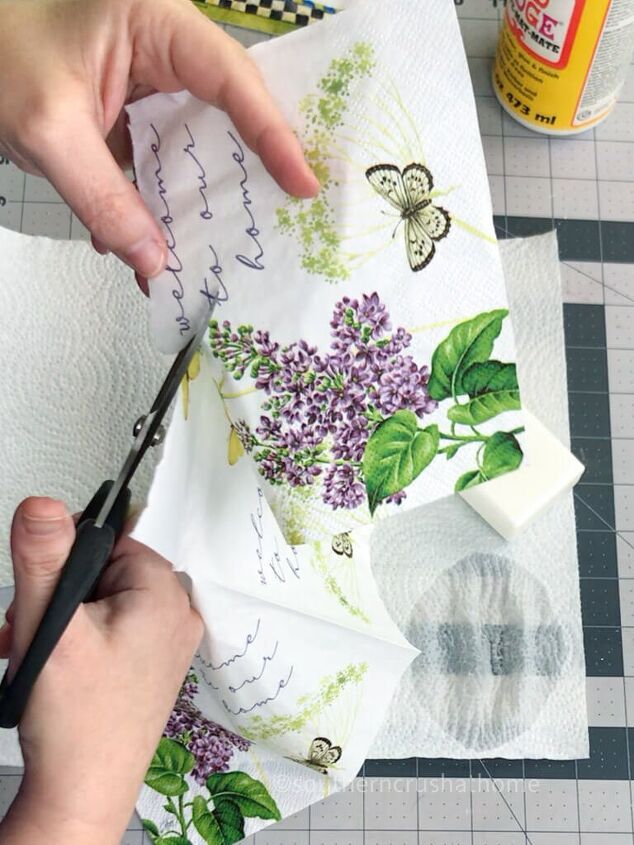
Step 3. Trim your Napkin Design
Cut out the napkin section you want to use. Then cut around the actual image portion of the napkin you want to apply to the soap bar.
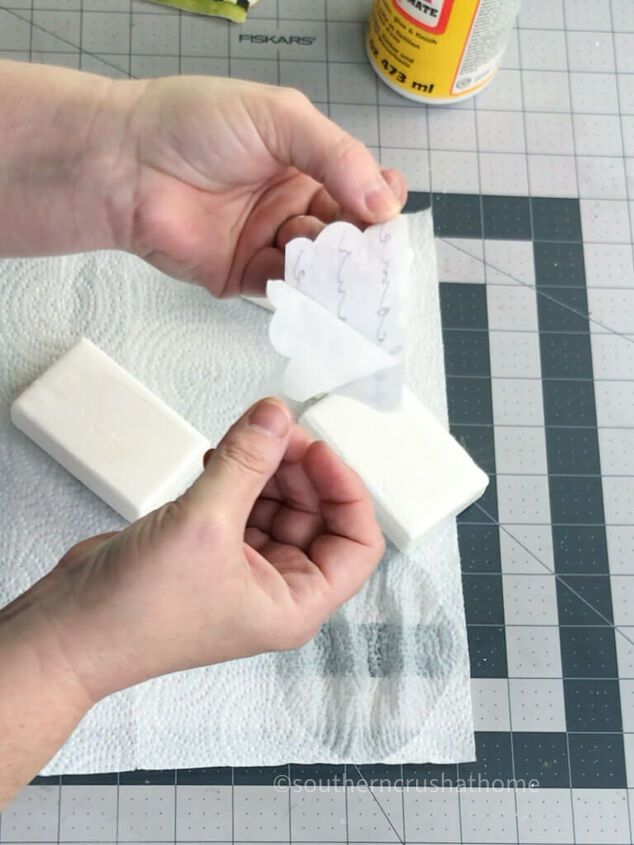
Step 4. Separate the Napkin Layers
This is crucial in the decoupage process and not to be skipped. In order for the decoupage to look seamless and not have bubbles, it’s important to only use a single layer of the napkin.
Separate the napkin layers until you are left with a single layer of the napkin.
Step 5. Apply Mod Podge to your Soap Bars
Use a small artist paintbrush to apply a generous layer of mod podge directly to the top of the soap bar.
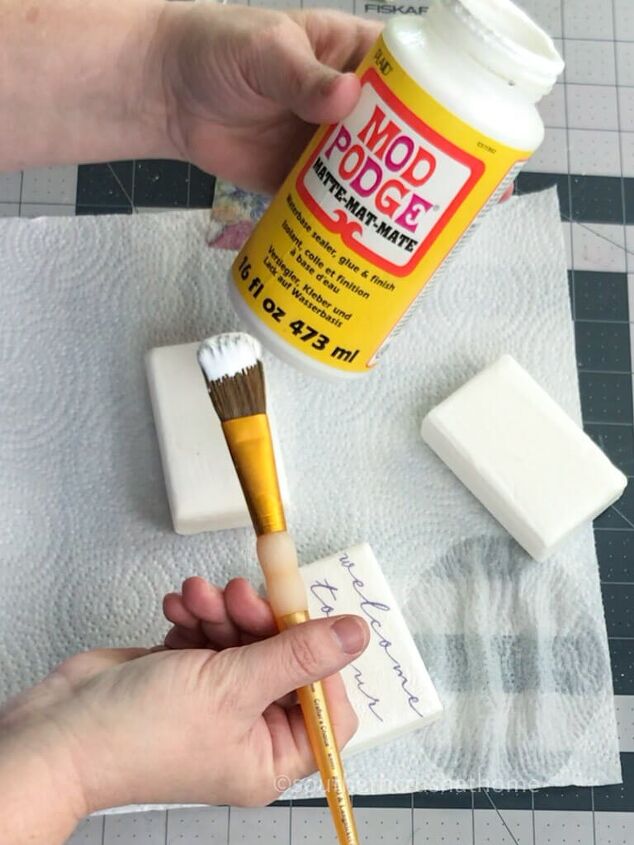
Apply a nice, even layer to the top of the bar only so the image will be smooth.
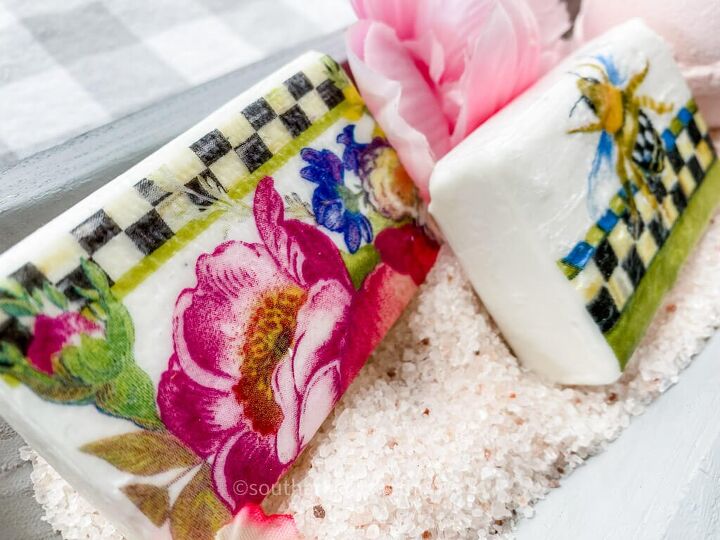
Step 6. Seal the Soap Decoration
Lightly press the napkin onto the mod podge and gently smooth it over with either plastic wrap or a Ziploc baggie as a barrier between the napkin and your fingers.
Let it dry.
Once dry, brush a generous top coat of mod podge onto the decoupaged decorative soap.

You will need to add 2-3 coats to the top of the bar. Add mod podge to the sides of the soap if any of your napkin design hangs over the edges. Let dry.

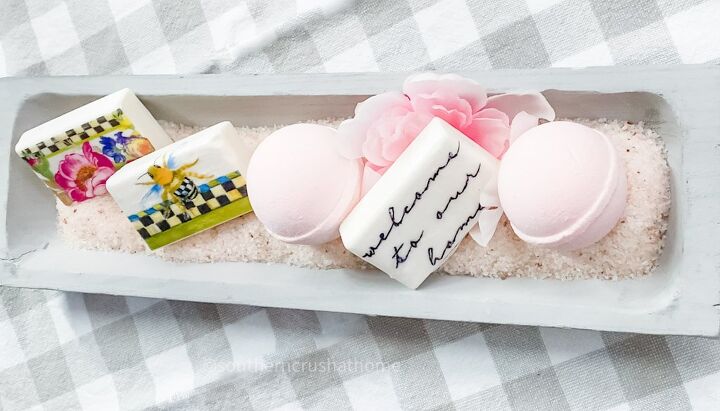
Step 5. Display your SoapDecoration
After you create your great bathroom soaps, it’s time for the extra fun part-decorating with your decoupage soap! There are so many easy ways to display your new decorative soaps.
What do you think of these decorative soap ideas? I just love them!
The author may collect a small share of sales from the links on this page.


Comments
Join the conversation
Very cute. Love the idea.
Does the Mod Podge affect the soap’s latherabilty?