How to Do an Easy Wedding Guest Hairstyle

Create a beautiful and easy wedding guest hairstyle with me that’s perfect for beginners.
It would also look great for prom or other formal events. Just follow along with my step-by-step tutorial.
Tools and materials:
- Wet hair brush
- Conditioner
- Hair tie
- Bobby pins
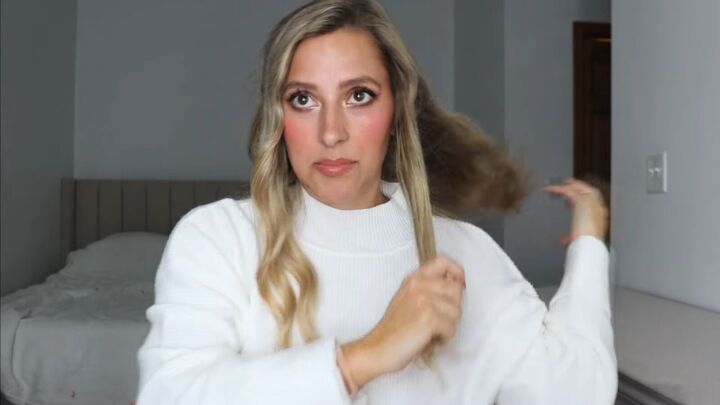
1. Prep your hair
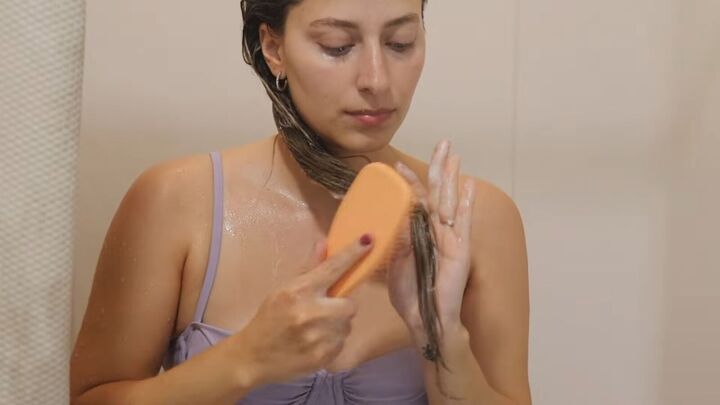
My pre-updo regimen includes detangling with conditioner and using a plant-based wet brush, starting from the ends and working my way up.
After rinsing in the shower, I put my hair in a microfiber towel to partially dry.
Then, use the wet brush and again work to detangle from the bottom, working my way up.
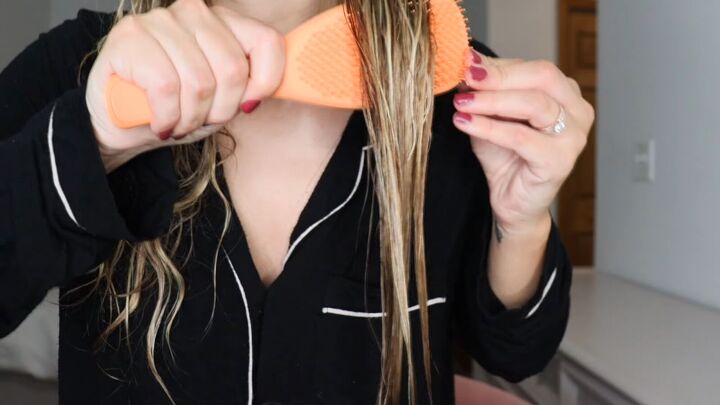
Without any products, this brush gets out all the tangles from my especially knotty hair.
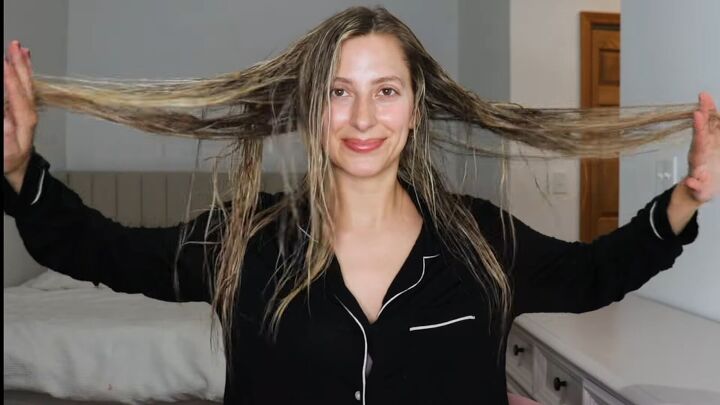
Here’s how it looks after drying and styling:
2. Section off your hair and part it
Leave out a section of hair in the front on either side of your face. Go with whatever type of part you prefer.
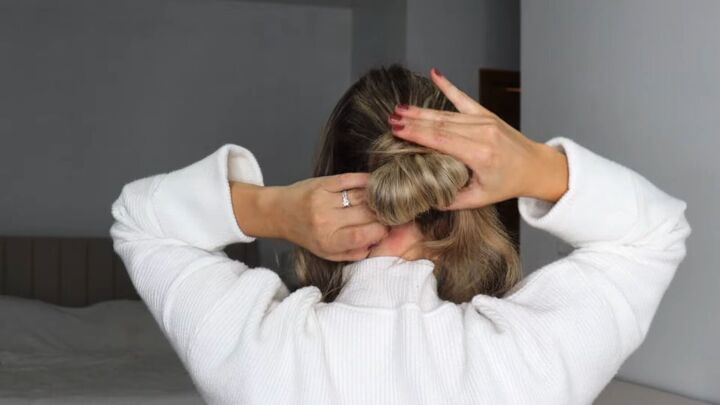
3. Make a small bun
Run the brush through the hair in the back and pull your hair through a stretchy hair tie a few times.
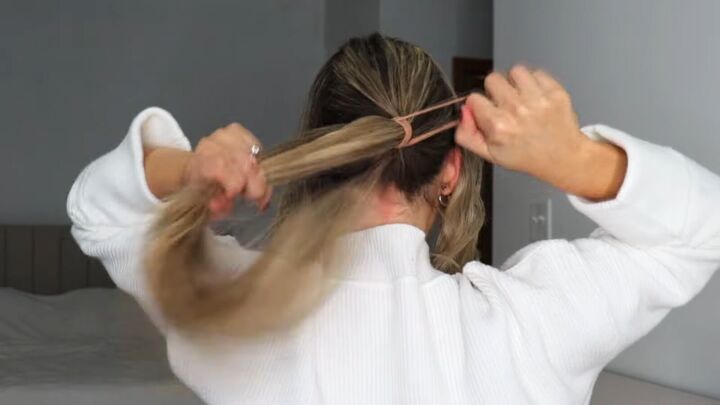
Then, on the last twist left on the hair tie, pull your hair through to make a small and neat loop bun.
It should be tight, not floppy, and the long ends should still be hanging out.
Then pinch and pull it to give it some fullness.
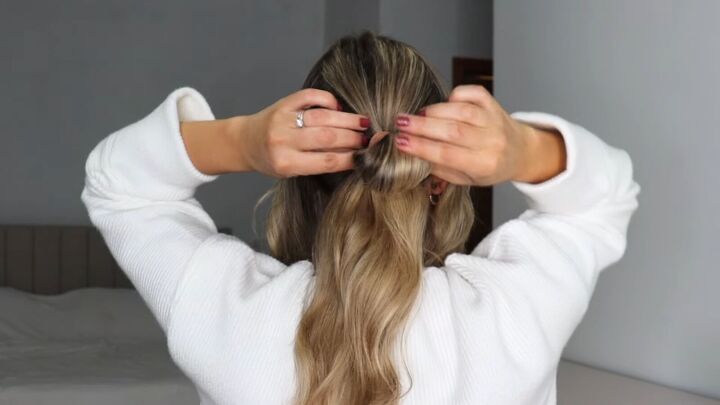
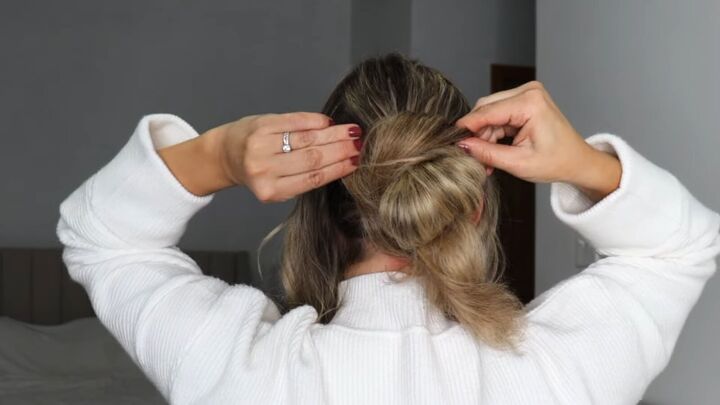
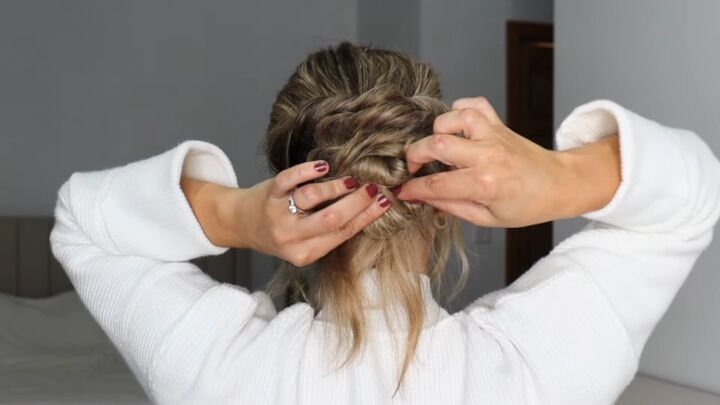
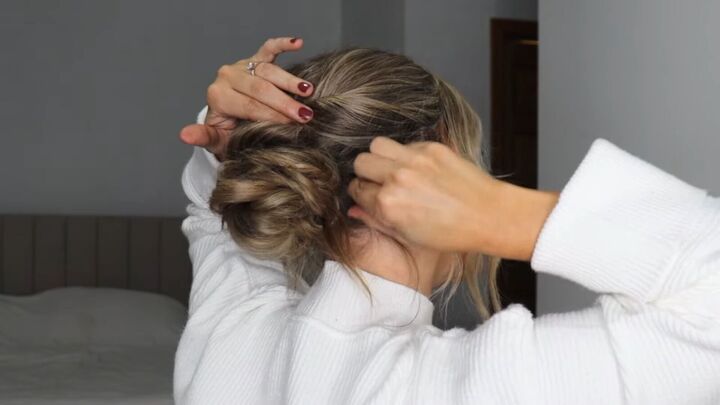
4. Wrap the tail and secure it
Brush through the tail, then wrap it over the bun, securing it in place with a bobby pin on the top.
Continue to wrap around the bun while inserting bobby pins into the bun with the grooves facing down.
Pull gently at the wrapped tail to add volume and straighten the bun slightly if it’s crooked.
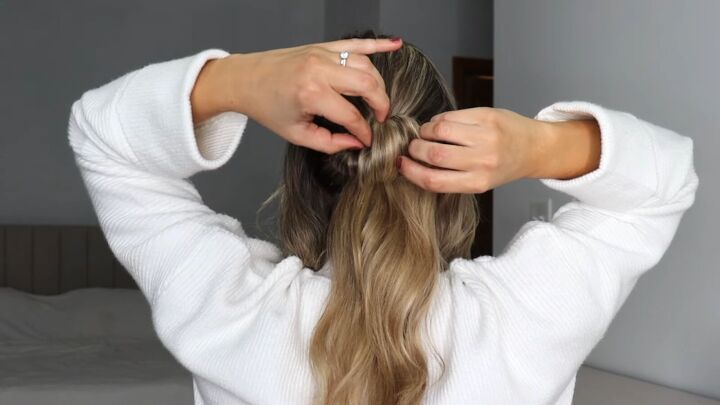
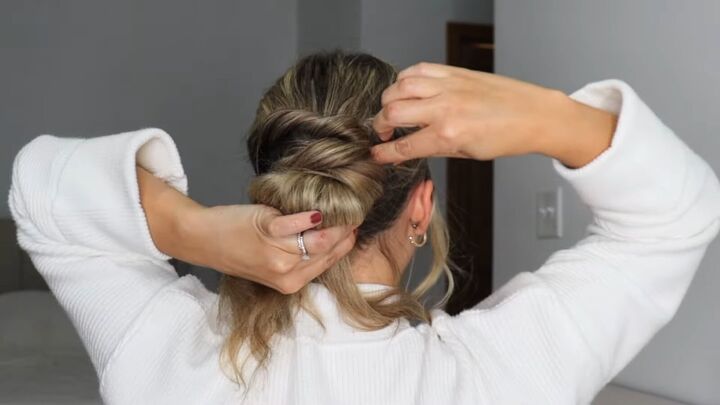
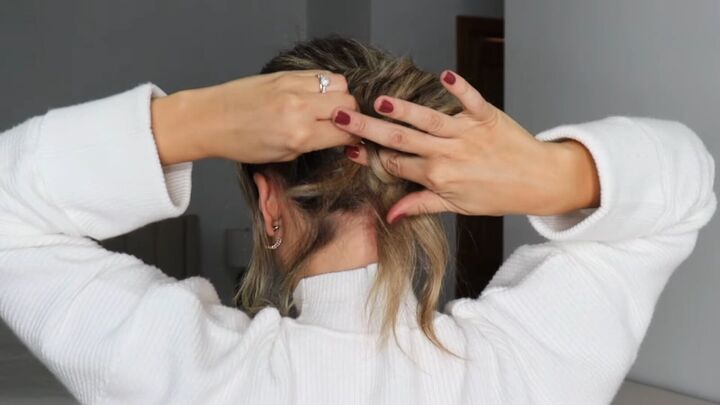
5. Twist the loose hair and wrap the bun
From the reserved sections of hair at your temples, twist one of the sections of hair around your finger, toward the bun.
You can leave some hair loose for a bangs detail if you like that look.
Pinch and pull the twist for texture.
Then drape it around the top of the bun, securing it in place with another bobby pin.
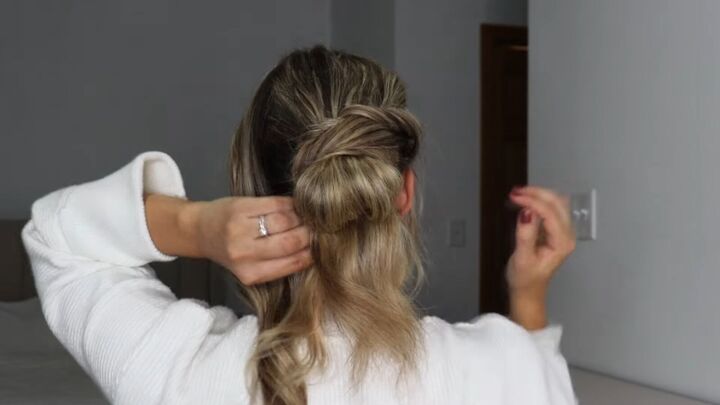
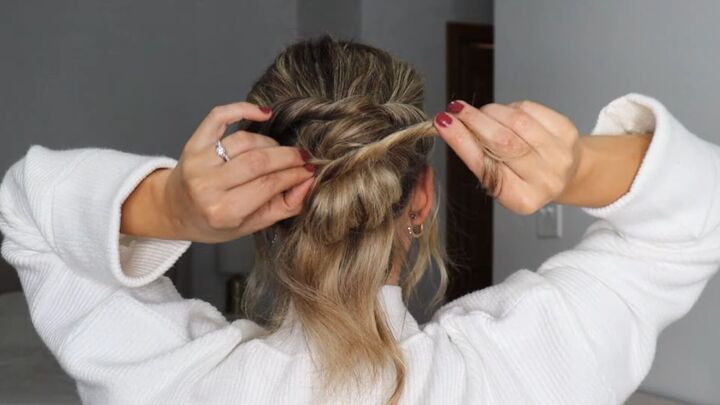
Now do the same thing with the opposite section of hair.
Bring this second twist across and over the first twist and secure it next to the bun on the other side.
If you have longer hair like mine, continue to the next step.
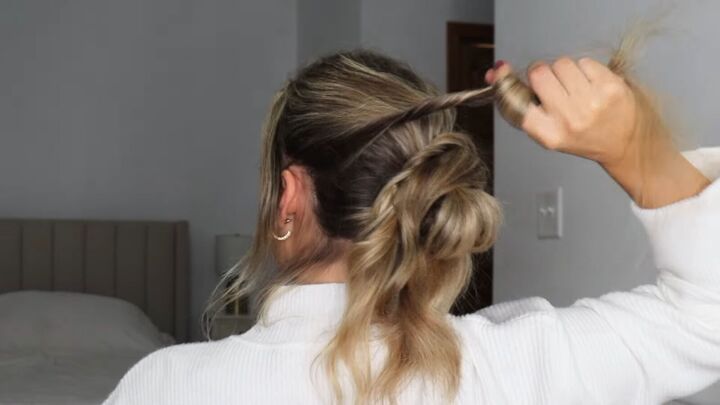
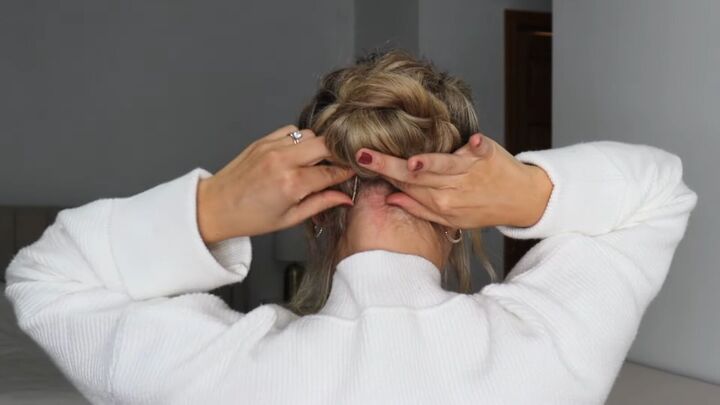
6. Make 2 small twists
Grab a small section of hair from whatever is left hanging and twist it around your finger, pinch and pull it and then drape it across the bun.
Secure this with a bobby pin.
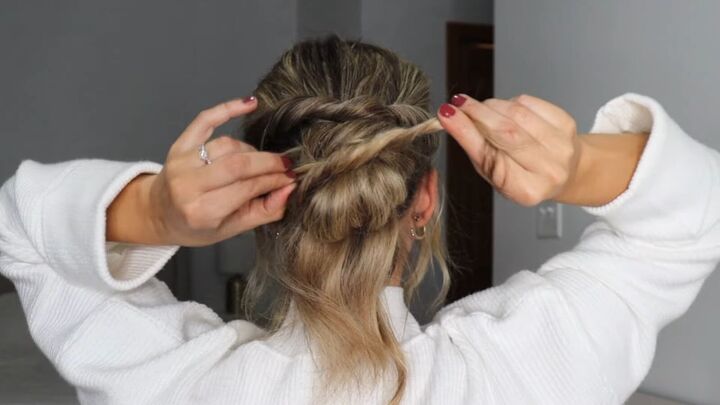
Repeat in the other direction with another small section of hair. Then pinch and pull for volume.
Add a bobby pin in the center for extra hold.
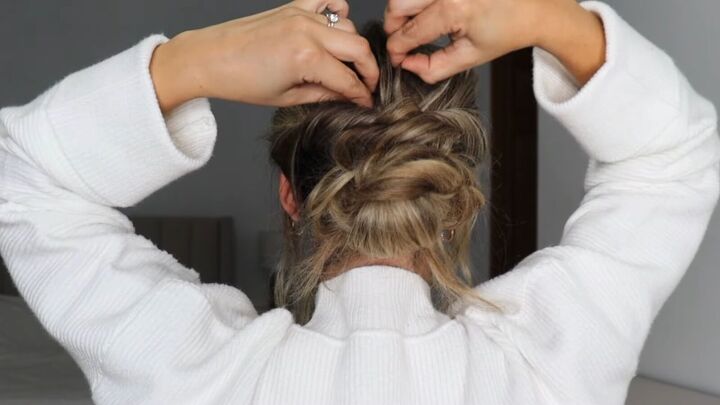
7. Twist and loop
Now all that’s left is some hair directly under the bun.
Take small sections, wrap them around your finger and secure the loop in place with a bobby pin before removing your finger.
Repeat this until there is no more loose hair.
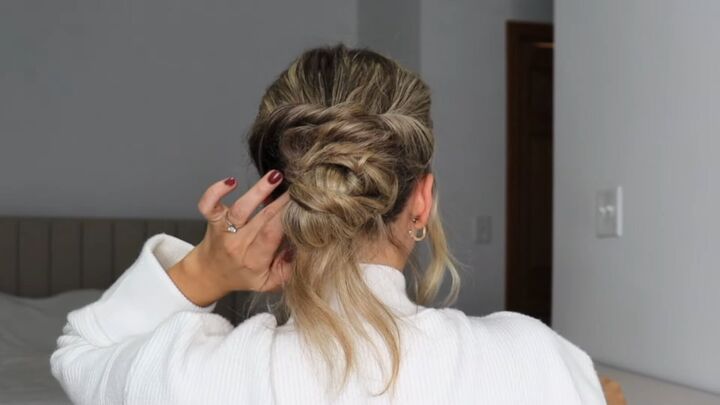
8. Final pinch and pull
To make this easy updo really come together, pinch and pull the top part as well as the twists for added texture and volume and hide any gaps.
Add more bobby pins if needed to make sure everything is seamless.
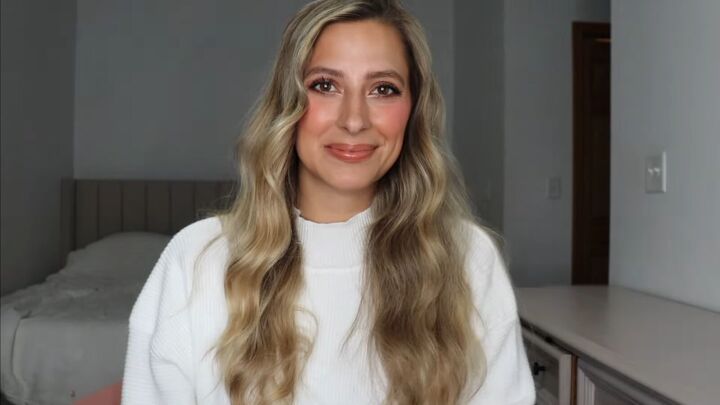
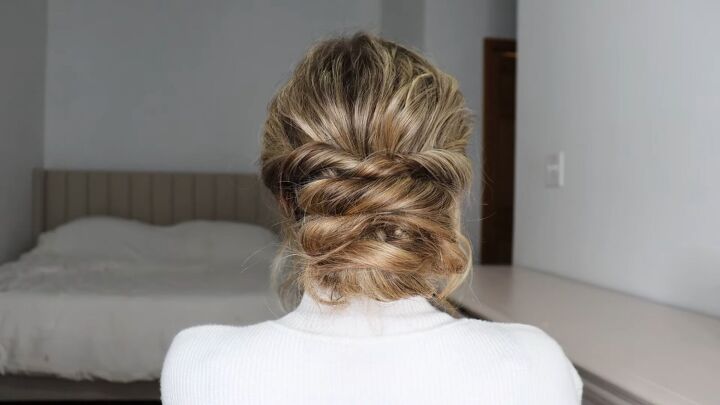
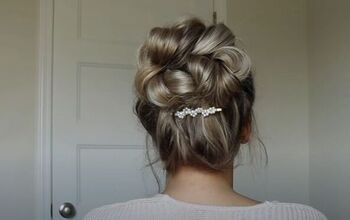
Here’s the final look of this easy, formal hairstyle:

Easy wedding guest hairstyle
It looks like it was created by a professional but it’s a forgiving updo that’s easy to do yourself!
Let me know in the comments below if you’re going to try out this easy hairstyle as a wedding guest or to another formal event.
Next up, check out these 5 Super Cute Hairstyles for Special Occasions.
The author may collect a small share of sales from the links on this page.


Comments
Join the conversation