How to Master Your Eyeshadow Placement Every Time

In this makeup tutorial, we’re going to be focusing on eyeshadow placement.
If you find it difficult to get your eyeshadow in exactly the right place and end up with a sloppy finish, this tutorial will change all that.
I show you everything you need to know to get eyeshadow in the right position.
Tools and materials:
- Cream contour
- Makeup brushes
- Eyeshadow primer
- Setting powder
- Eyeshadow
- Post-it note
1. Fill in brows
The first thing is to start with your eyebrows. Fill in your brows with some cream contour and a fine brush.
Doing your brows will frame your eyes and also give you a bit of an eye lift.
2. Prime eyelids
Prime your eyelids with an eyeshadow primer or a cream eyeshadow.
You can also dust some translucent setting powder over the top as well.
3. Stick on Post-it note
I’m going to show you a great way to apply eyeshadow without pulling your eye down and instead give you a lifted look.
Grab a Post-it note and stick it between the bottom of your eye and the bottom of your brow.
This will ensure that you don’t get too overzealous when applying the eyeshadow and bring it out too far at the side.
If you don’t have a Post-it note at hand, you can also draw a line with a light highlighter shade from the bottom of your eye to the bottom of your brow.
When applying your eyeshadow, make sure you stay within the line.
4. Apply eyeshadow
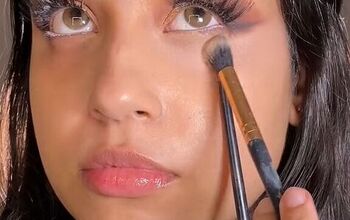
Dip into a tangerine color, then pull it across from the post-it note (or the line you’ve drawn), up in the crease, across to the center, and over to the inside.
Don’t add any more eyeshadow because we want it to be a little bit lighter here towards the inner part of our eye. Proceed to build up the color in the outer corner.
I recommend blending with circular motions as this gives you more control than doing the windshield-wiper motion.
Now tap your brush into a chocolate brown shade with a red undertone and apply that shade along your lashes like a soft eyeliner, and then bring it up to the outer crease in a V shape.
This helps to define the outer edge of your eye.
5. Apply eyeshadow under eyes
Apply the brown eyeshadow underneath your eyes to create a soft, smudgy eyeliner effect
6. Cleaning up highlighter
On the side where I drew the line with the highlighter, I’m just cleaning off any excess.
7. Apply shimmer
Grab a rusty pink shimmer shade and apply some to the inner corners of your eyes, keep it close to the bottom of the lid.
8. Blend eyeshadow
Finish off by doing one final blend, using little circular motions.
Eyeshadow placement: Easy eyeshadow look
Here is the finished look. I love the combination of the warm eyeshadow colors.
Placing the post-it note on the side of my eye, as well as drawing a line with highlighter means that I haven’t pulled the shadow down past the outer side of my eyebrow.
Instead, I have a lovely lifted look. I hope you enjoyed this makeup tutorial and found it helpful!
Next, learn 2 Super Easy Blush Hacks for a Thinner Face.
Enjoyed the project?
Suggested materials:
- Cream contour
- Makeup brushes
- Eyeshadow primer
- Setting powder
- Eyeshadow
- Post-it note
The author may collect a small share of sales from the links on this page.


Comments
Join the conversation