How to Do a Cute Gel Pedicure Easily at Home

I'm heading to the beach next week, and I've been itching to get my toes and feet into shape.
Today, I’m going to be showing you a full-blown gel pedicure at home. Follow along with this step-by-step tutorial.
Tools and materials:
- Acetone
- Cotton pad
- Nail clippers
- Nail file
- Cuticle remover gel
- Cuticle nipper
- Buffing cube
- Foot grater
- Foot file
- Moisturizer
- Toe separators
- Nail dehydrator
- Base coat
- Nail polish
- Top coat
- UV light
- Isopropanol
- Cuticle oil

1. Remove nail polish
Remove any polish that’s on your nails with 100% acetone and a cotton pad.
Especially if you’ve been wearing a darker color, make sure you get all the polish off without the color seeping into the cuticles or onto the skin.

2. Trim nails
Carefully trim each toenail.
Don't worry about cutting them perfectly because afterward, we're going to go in with a file to even them out and shape them up.

3. File nails
Proceed to file your nails into a rounded square shape.

4. Apply cuticle gel
Next, apply some cuticle remover gel to each toenail and rub it in.

5. Push cuticles back
Now push your cuticles back with a cuticle pusher and scrape off any excess skin.

6. Nip cuticles
Once they're all pushed back, use the cuticle nipper to clip off any excess.

7. Clean under nails
Take the sharp end of the cuticle pusher to clean up under the nails and scrape off any stubborn skin.

8. Smooth the toes
Now, we’re going to smooth the toes out and get them prepped for polish.
Using the edge of the same medium grit file, rough up the surface of each nail before following it up with a buffing cube.

9. Use foot grater
The next step is to tend to your heels and any dry skin on your feet.
Use a foot grater to give you super smooth heels and feet. This is a safe tool, but don’t go too overboard with it.

10. File feet
Use a heel and toe file to smooth everything over.

11. Apply moisturizer
Apply some moisturizer all over the feet, and then all of the prep work is done.

12. Rub nails with acetone
Next, pop on some toe separators.
Then, take a cotton pad, soak it in acetone, and rub it over each nail to remove any lotion or oil that is still sitting on the nail bed.

13. Apply nail dehydrator
Now, apply a nail dehydrator, which will prep the nails for polish.

14. Apply base coat
Proceed to apply a base coat. Be sure not to use too much product, and also make sure to paint as close to the cuticles as possible.
Once done, pop each foot under a UV light to cure.

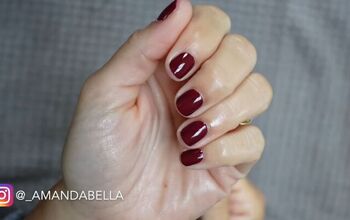
15. Paint nails
Now it's time to paint the nails. I went for a creamy, off-white, shimmery polish.
Apply a thin layer, as close to the edges of your nails as possible, without getting any polish onto the skin (though if you do, you can just clear it up before you cure your nails).
Proceed to cure your nails.

16. Apply second coat
Go ahead and apply a second coat, and then cure your nails.

17. Apply top coat
Now, apply a top coat that will serve as the protective layer and provide a glossy look. Then cure your nails.

18. Spritz with alcohol
Spritz your pedicure with some isopropanol. Then, rub each nail really well with a cotton pad to remove that sticky top layer.

19. Apply cuticle oil
Remove the toe separators, grab some cuticle oil, add a drop of it to each nail, and then massage it in.

Gel pedicure at home
And that’s a wrap! My feet look and feel gorgeous, and I feel ready for the beach and beyond because this pedicure will last me weeks.
If you've been hesitant to DIY your own gel pedicure, don't be. I'm not a professional, but I've been doing my own for years, and if I can do it, you can too - it's totally easy to do on your own.
The author may collect a small share of sales from the links on this page.


Comments
Join the conversation
Excellent procedure!