DIY: Mini Macrame Accessories
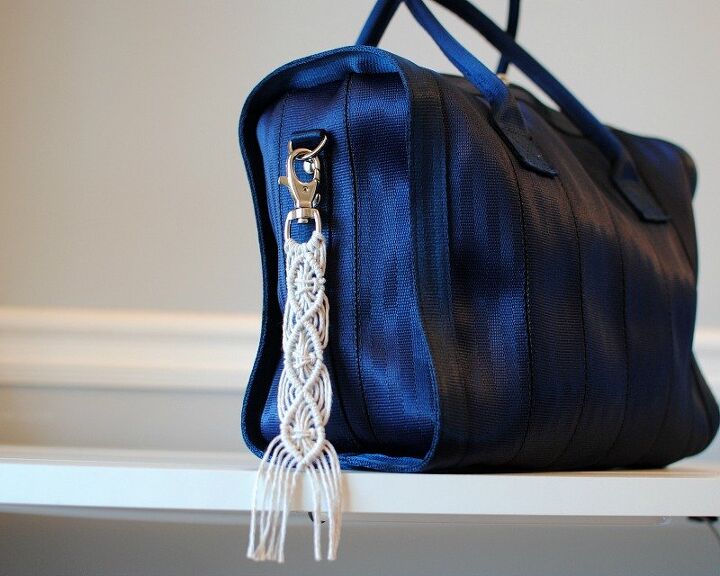
Aside from sewing, my other crafting obsession is Macramé. With its recent rise in popularity it may seem like a new craft, but Macramé is a knotting art that dates back to the 13th century. Sailors needed to know these techniques as well. This was also a popular decorative art in the Victorian era. I was taught by my mom who learned Macramé in high school. Its peak popularity was in the 1970s. My mom made wall hangings, plant hangers, and belts similar to what you see today. I'm known for using this detail on some of my garment designs. It's also a great project to add to swivel hooks, rings, and rods as decorative accessories.
These DIY Mini Macramé projects were easy to create with the many Dritz decorative hardware products. With just a few supplies you can make different versions of these and get the kids involved too. Check out the steps below to make your own.
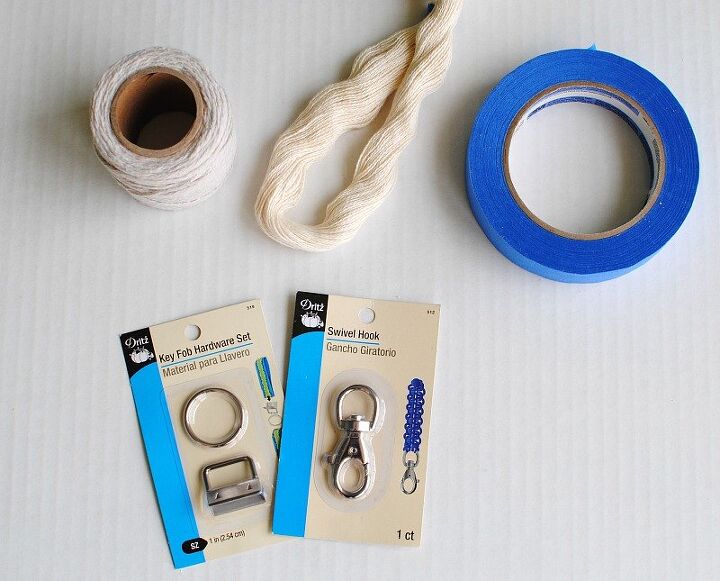
Supplies:
- Swivel hook
- Clip Rings or D-Rings
- Carabiner
- cording: you can use traditional macramé cording, I even use old t-shirt strips to create string like I did here.
- beads
- painters tape/dressform/ clipboard
- scissors
Before beginning it's important to see the knots in action. Here is a video tutorial of each knot we will be using. Once you get these down you can create any design you'd like.
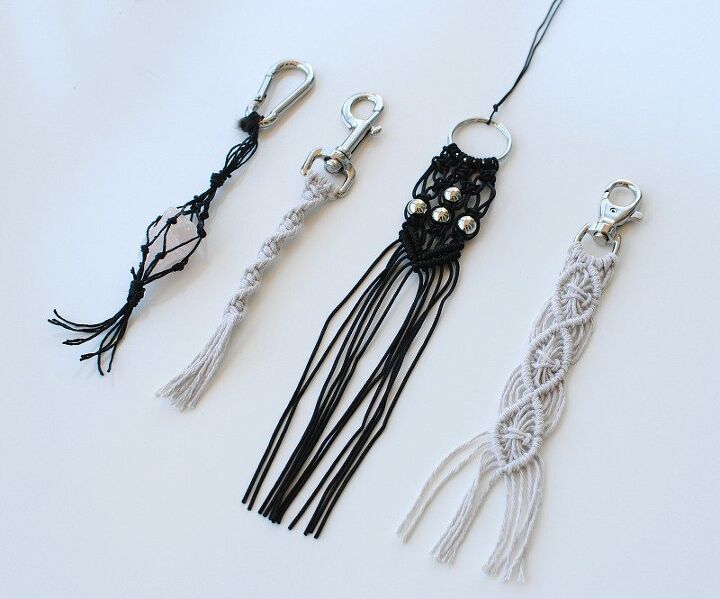
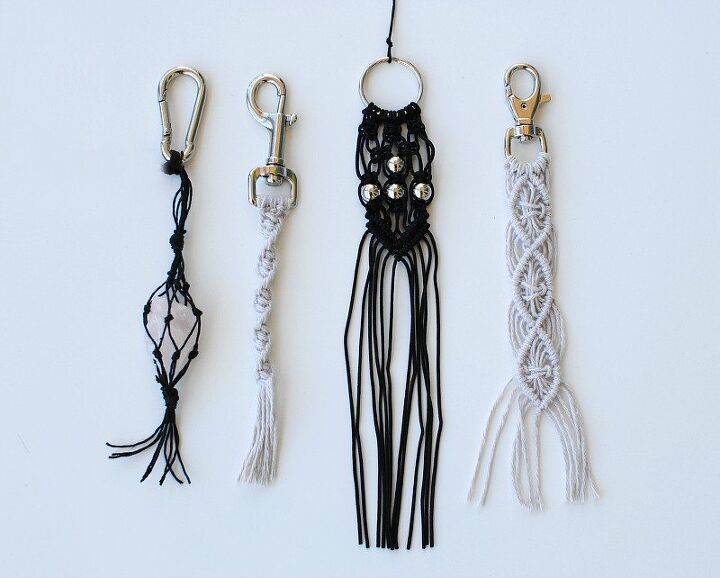
Swivel Hook Accessory
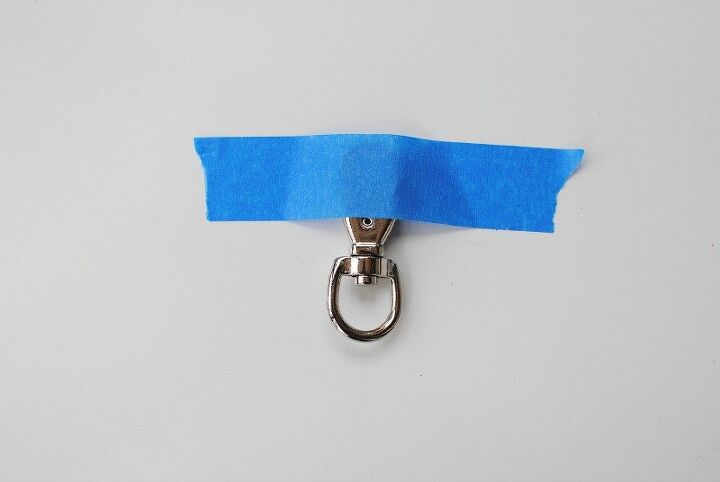
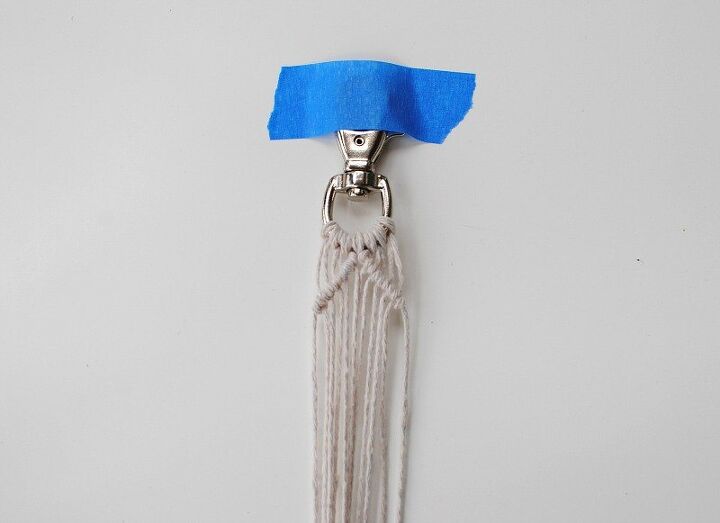
Begin by taping the swivel hook down with painters tape on a stable surface. You can also use a clip board, although I find that moves as well so it's easier to tape it on a stable surface.
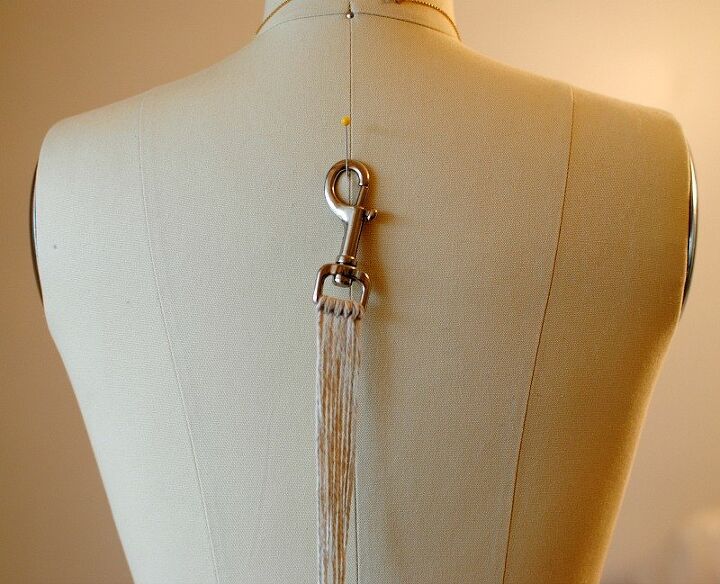
Another option I prefer is to use my dress form and pin it into place so that it can hang while I knot.
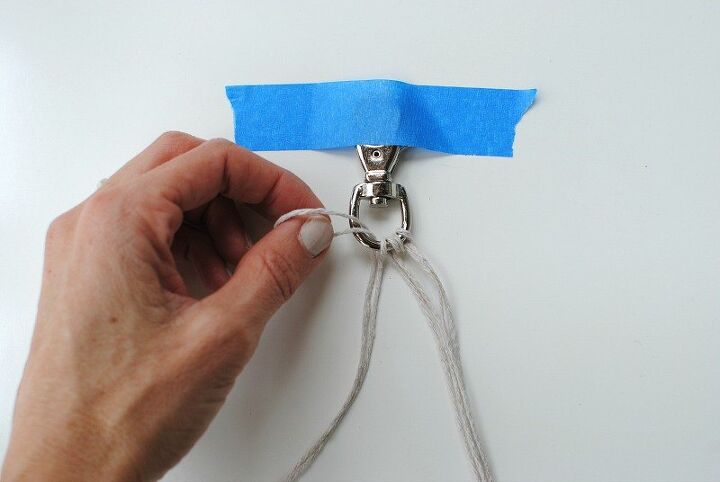
Cut 6 cords that measure 40" in length (+ for longer projects). Fold them in half and use the mounting knot to secure them on the swivel hook.
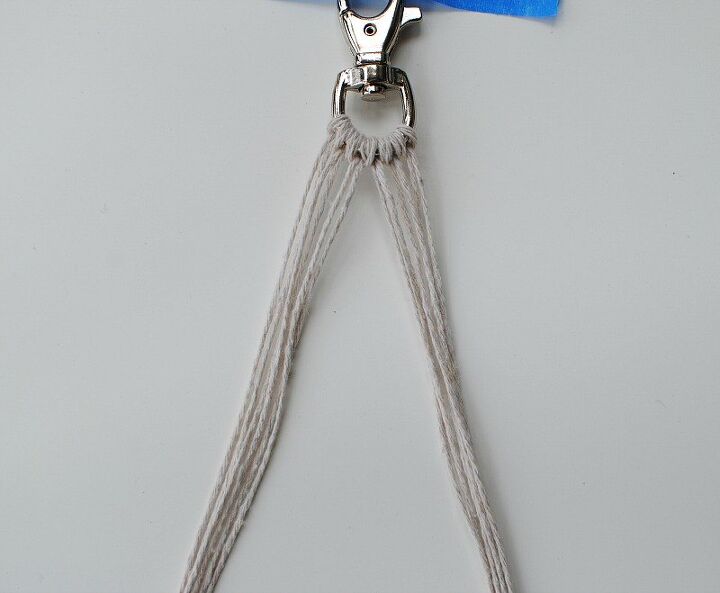
Divide the cords evenly in half.
Use the double diagonal half hitch knot to go from one side down to the other. I start in the middle and go down each side.
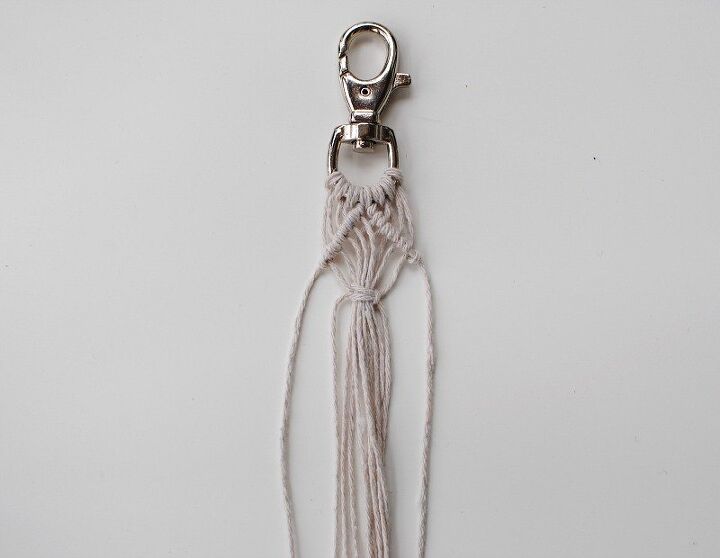
Use a square knot to wrap the interior cords. Make sure to leave the 2 outer cords as holding cords to continue the design.

Repeat a double diagonal half hitch know for the right and left sides to finish off the diamond.
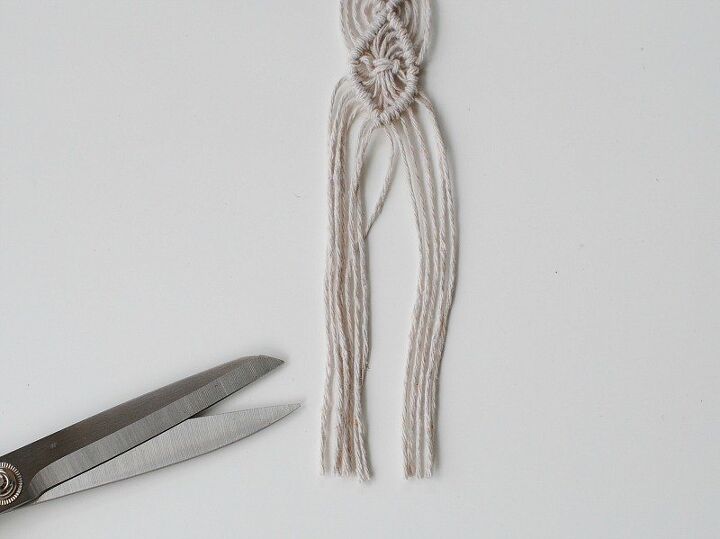
Continue the pattern to get the length and result you'd like. Cut any excess fringe.
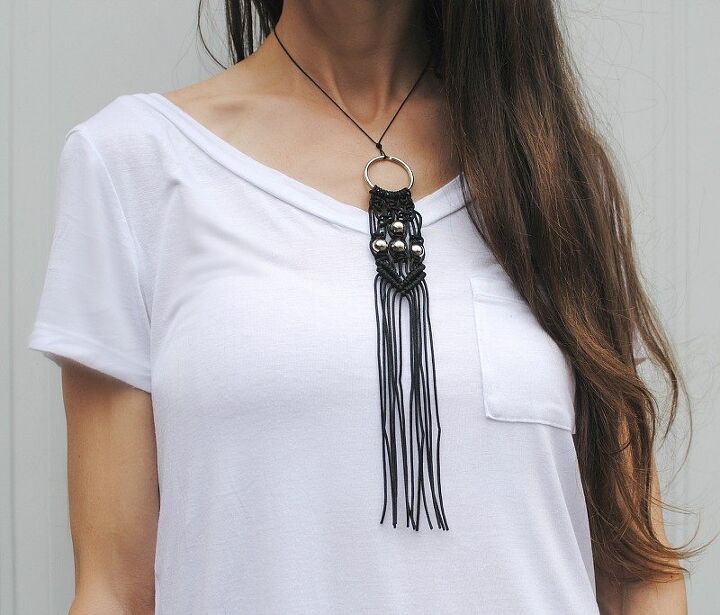
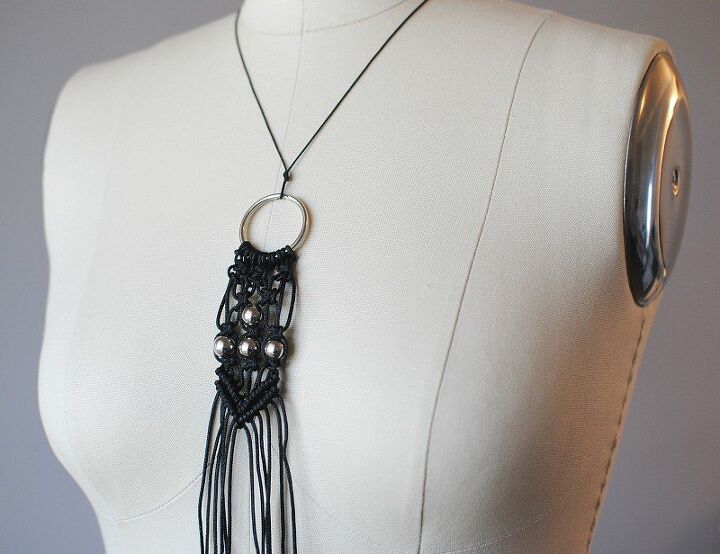
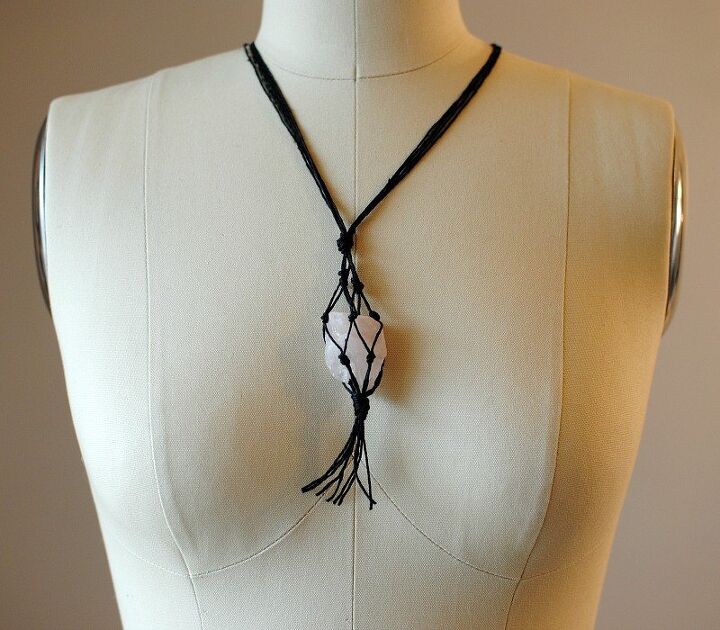
Mini-Macramé Necklace

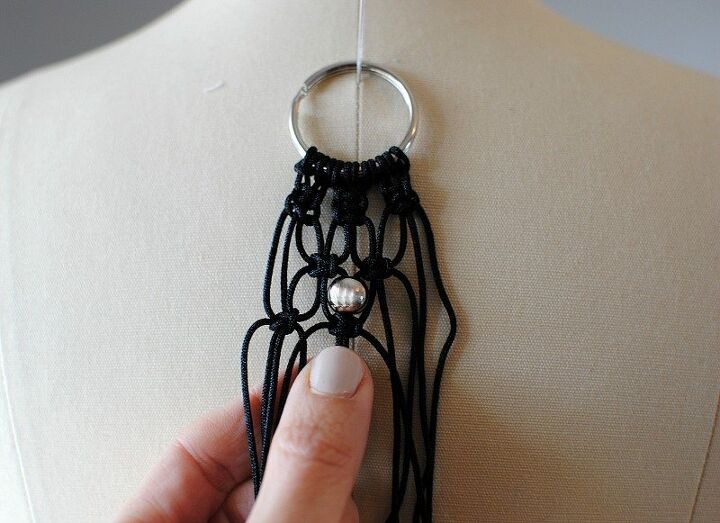
For this one I will show you on a dress form using the clip rings. You can use this as a necklace or any type of accessory.
Use the mounting knot to secure 6 strings (30" in length).
Square knot x 2 in sections of 4.

Continue creating a pattern using the square knot.
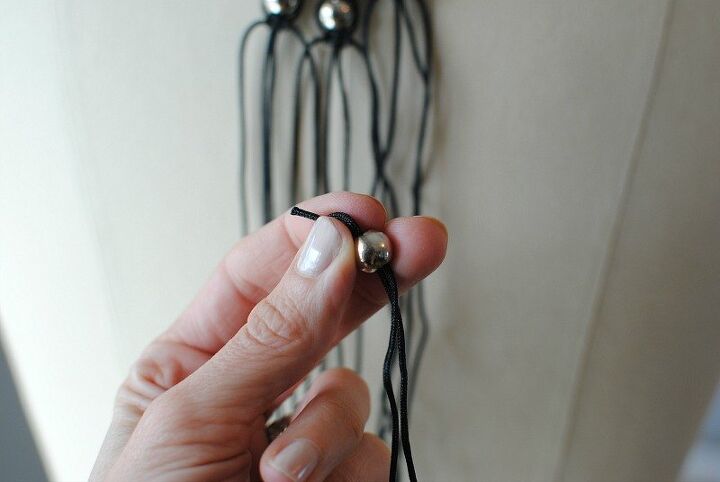
To add a bead and secure it: Place a bead through the 2 interior cords following a square knot, secure it with another square knot.
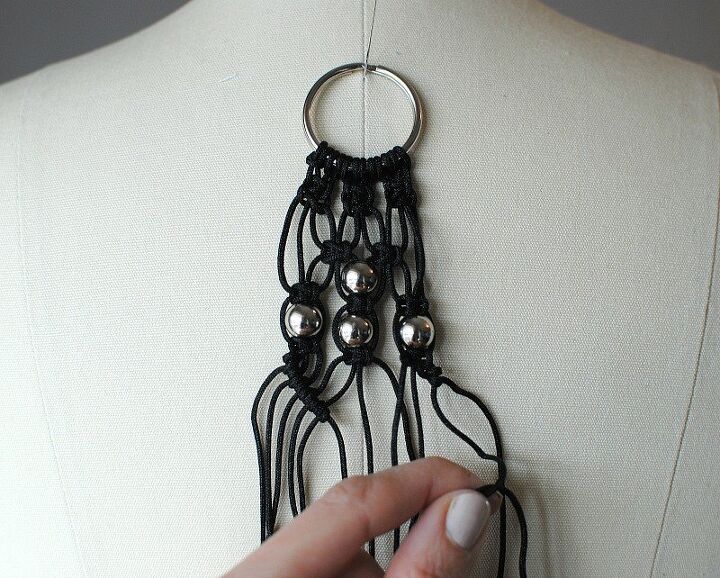
Finish the design using a series of double diagonal half hitch knots. Knot an additional string on the other end to tie around the neck.
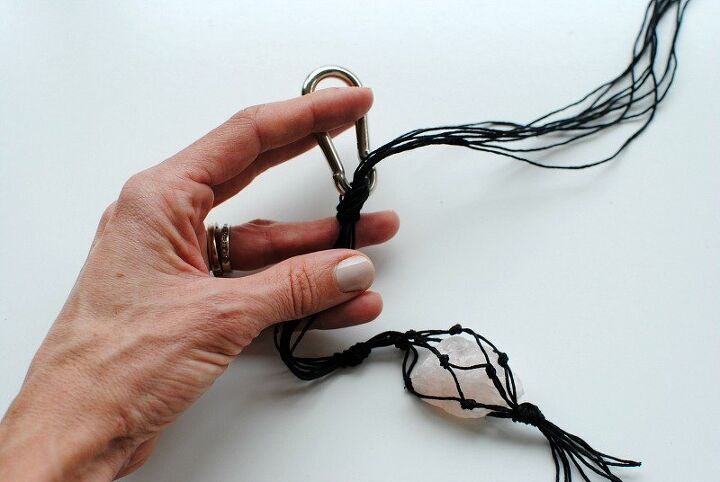
Other fun projects to try using the Carabiner: My son collects pretty rocks so we knotted the cording into netting around the rock and tied it around the carabiner.
He then decided he wanted me to have it as a necklace...:)!
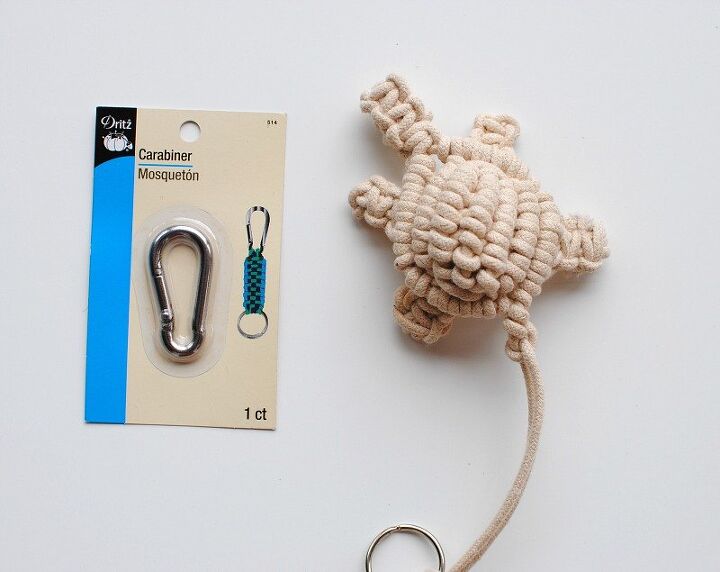
Another cute idea: Create a fun pattern and secure it around a clip ring and/or carabiner to create a key chain. We made a turtle (pattern from a 70's book my mom gave me) for my son's backpack.
There is so much ideas that can be done using Dritz decorative hardware and Macramé. I hope we inspired you to try some fresh ideas that can be done with this ancient knotting art.
*In collaboration with Dritz.
I received compensation from Dritz®, and some of the materials featured here or used in this project were provided free of charge by Dritz®. All opinions are my own
The author may collect a small share of sales from the links on this page.


Comments
Join the conversation
Very useful artice and creativity
Awesome!! Maybe I can revive my macrame skills from the late 60's!!