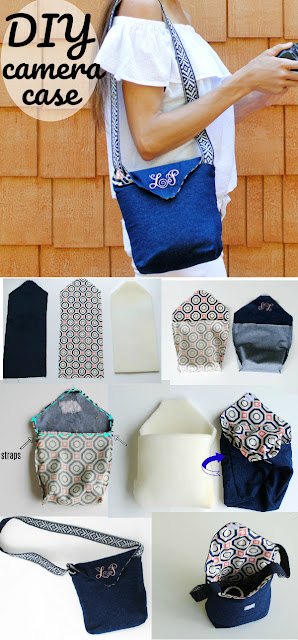
DIY Camera Case
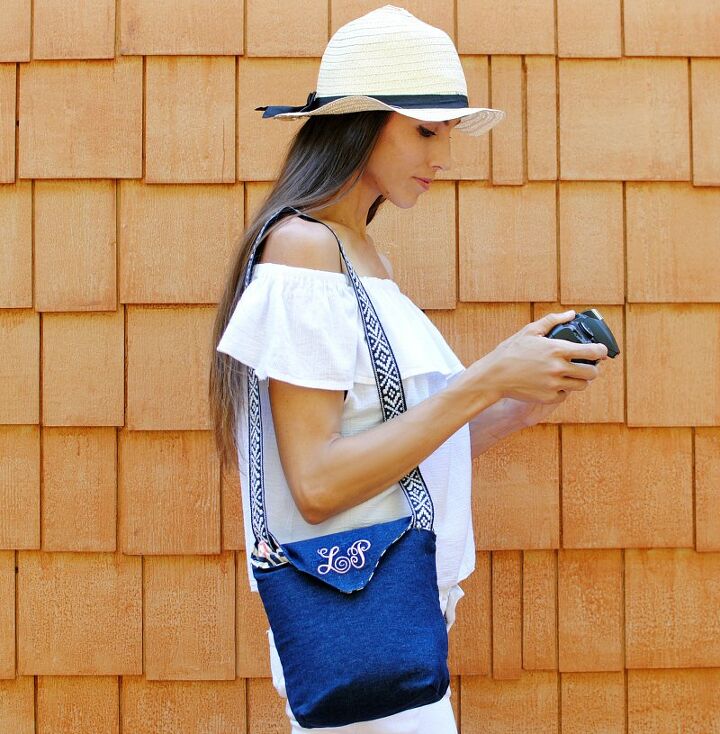
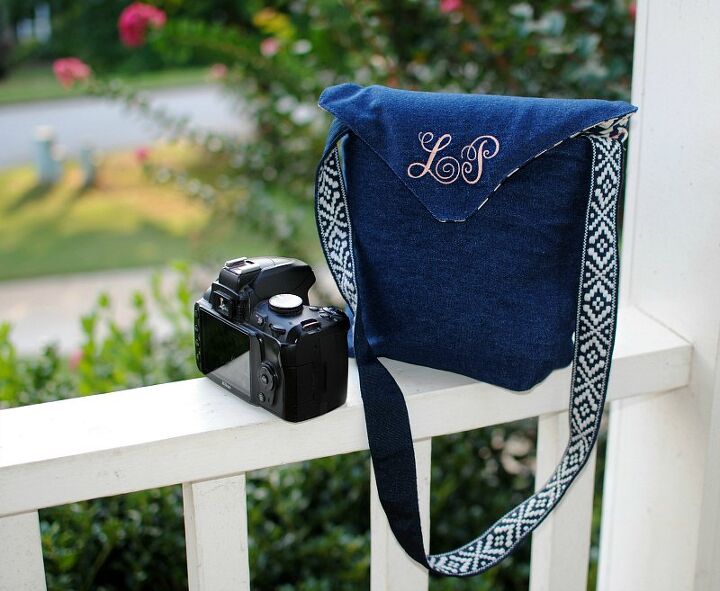
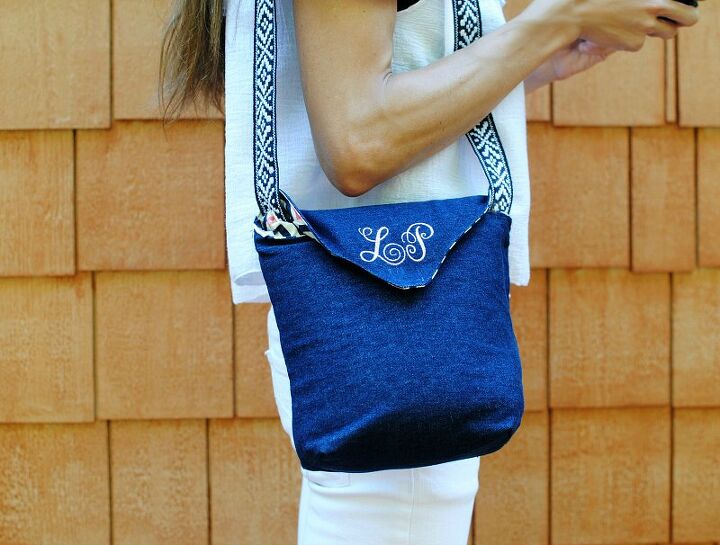
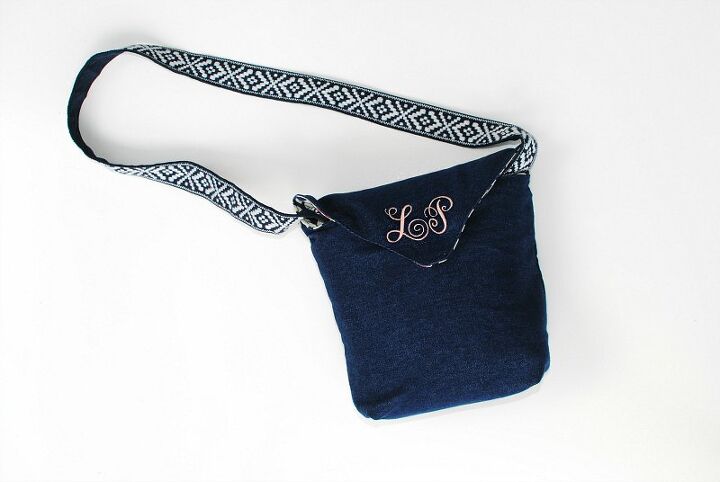
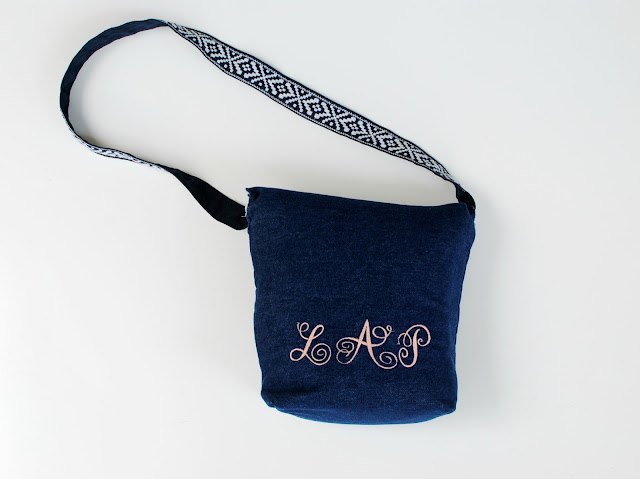
I was putting together my September content and on the list was a bag tutorial. I was thinking a bit too hard about this project because I didn't want to make another bag tutorial. Then I had an "aha" moment as I was taking photos for a post. What DIY project do I use everyday that's a bag? My camera case! I've been using an up-cycled case (from a coat sleeve) I designed and it's protected my camera for years through all the travel, kids, photoshoots, etc. So I partnered Sulky Threads to design this pattern and tutorial to share with you and of course add some embroidery into the mix. It's not southern after all if it isn't monogrammed. :)
If you take photos and own a nice camera you will want one of these. If you're like me, I don't want to be carrying some huge case around but also need some sort of protective cover that I can use on the go. I even made an army print one for my husband as he usually takes my finished photos. I travel with this in my carry-on and just love how well it protects my camera and lens. Which as a blogger a camera is one of the most important things you need.
Follow the step-by-step tutorial below and sew your own camera case.
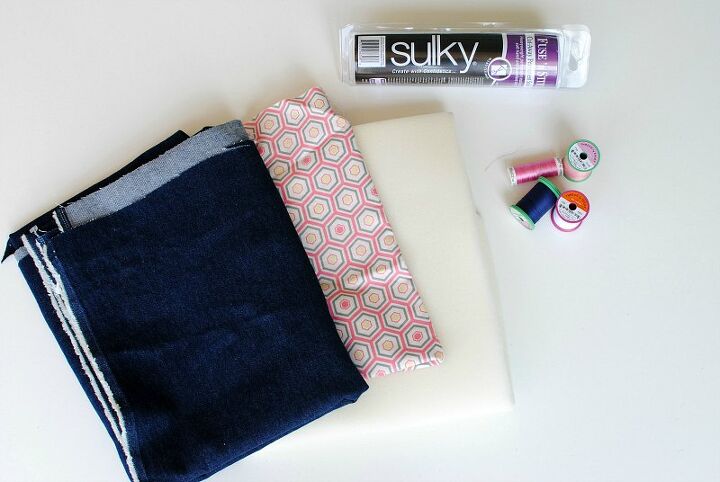
Supplies:
- Sulky Fuse 'n Stitch
- Sulky Cotton+Steel 50 Wt. Cotton Thread
- Medium Peach
- Deep Arctic Sky
- SE1800 Brother Sewing and Embroidery machine
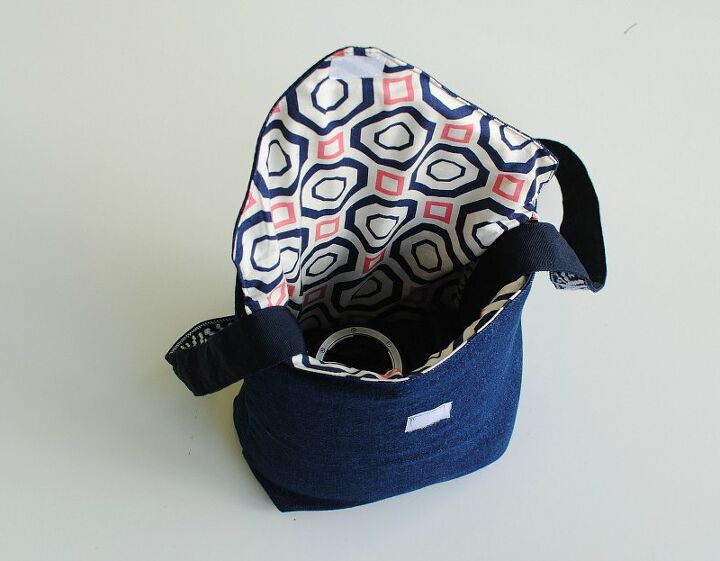
- 1/2 yd. exterior ( heavy weight denim from Télio)
- 1/2 yd. liner (medium weight Woven Prints from Organic Cotton Plus)
- 1/2 yd. 1/2" padding (You can find this at any local fabric store in the stuffing section)
- Velcro attachment or Sew-On Snaps
- optional straps (I didn't sew straps into this case because I use my camera straps. I prefer not to have both).
- Luxurious Monograms by Lyn Dillin
DIY Tutorial:
Cutting: ***This is made for to fit a Nikon D3000 and a 50mm lens. I made enough room so that the camera and lens attached would fit perfectly. You will want to measure your specific camera and adjust accordingly.***
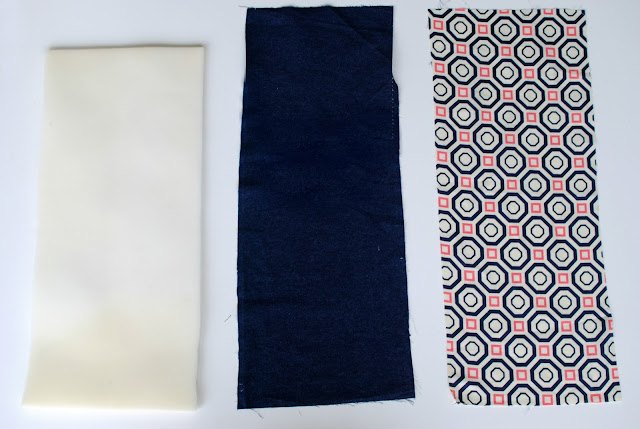
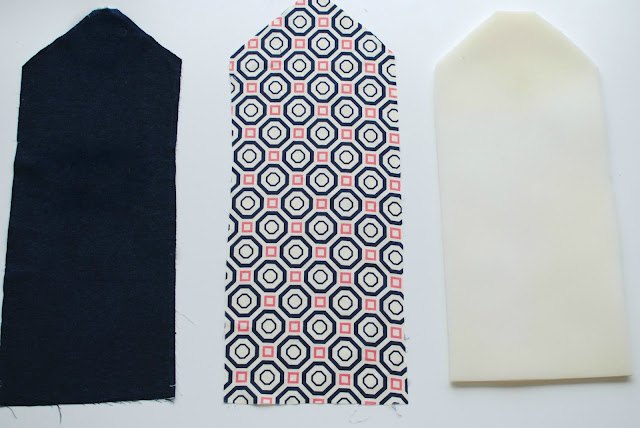
- 1 exterior piece 11" x 27"
- 1 liner piece 11" x 27"
- 1 padded piece 10.5" x 26"" (It should be slightly smaller to fit inside the case once sewn.)
*Hem allowance is 5/8" unless stated other wise.
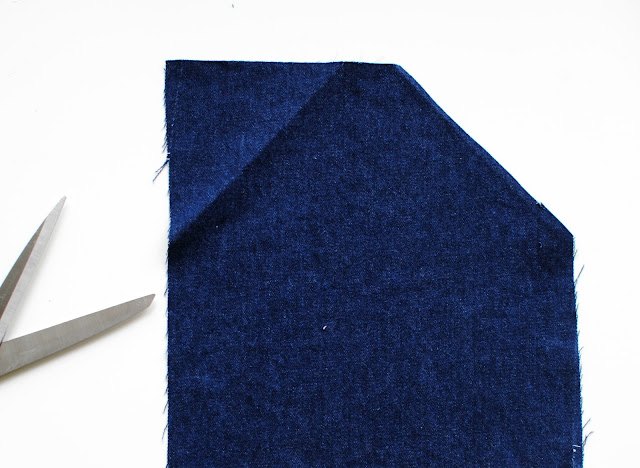
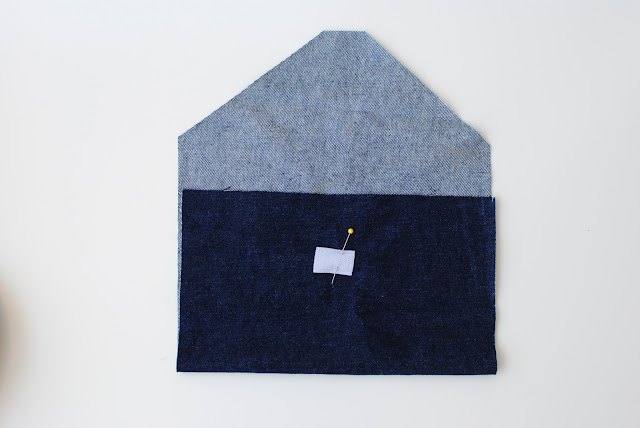
Fold over each flap so that there is a 1" gap on the top raw edge. Press and cut. Then use this as your template for the liner and padding.
The padding will not go all the way to the top because you will be sewing your velcro attachment on. So just cut a wider, lower top then the exterior and liner pieces.
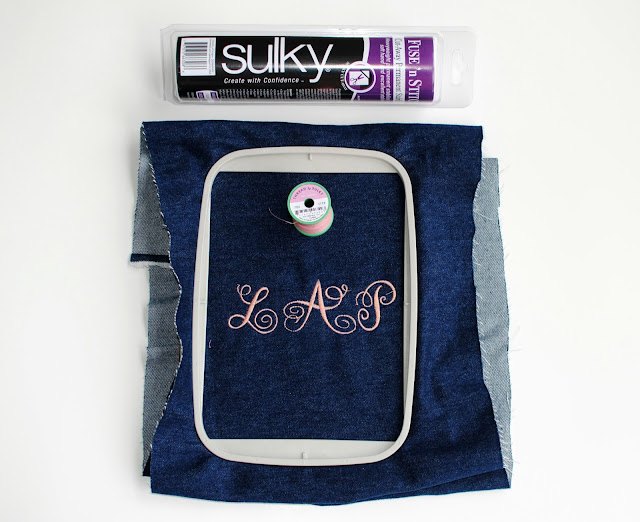
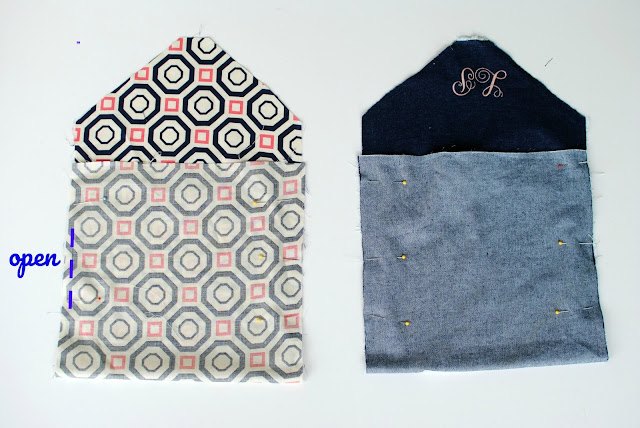
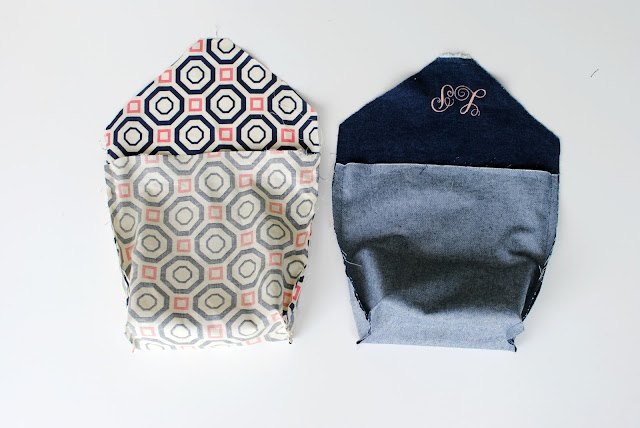
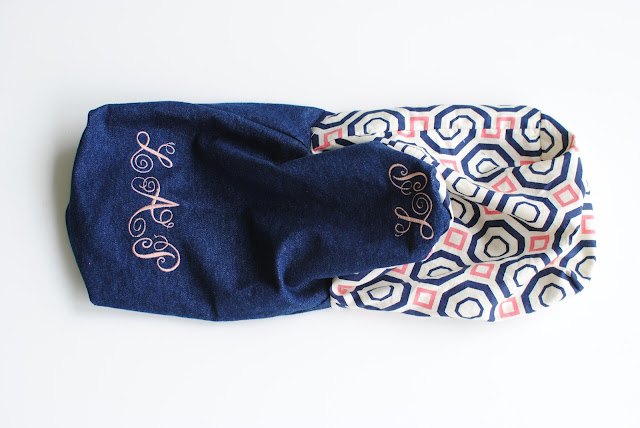
If you want to embroider you will want to do this prior to sewing the bag together. Decide where you want the monogramming and mark using your templates. I chose to do my monogram in the back and a smaller version on the front flap.
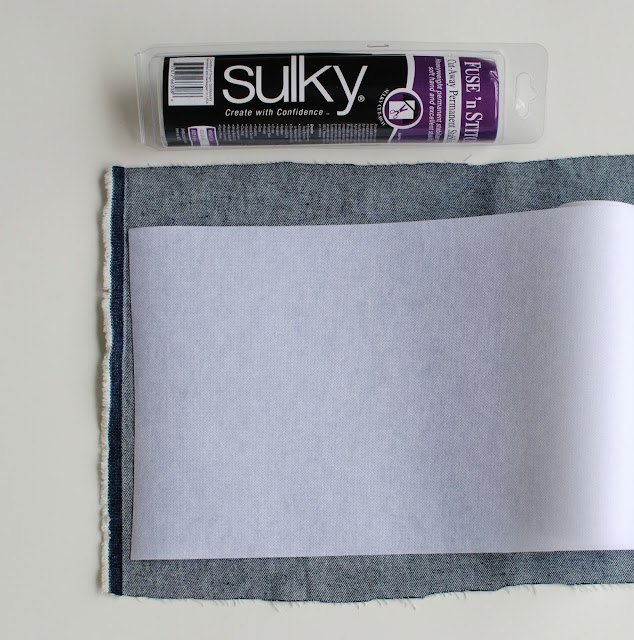
Stabilize using Sulky's Fuse 'n Stitch which is a firm, iron on stabilizer that is perfect for a project like this that needs some extra stiffness and support.
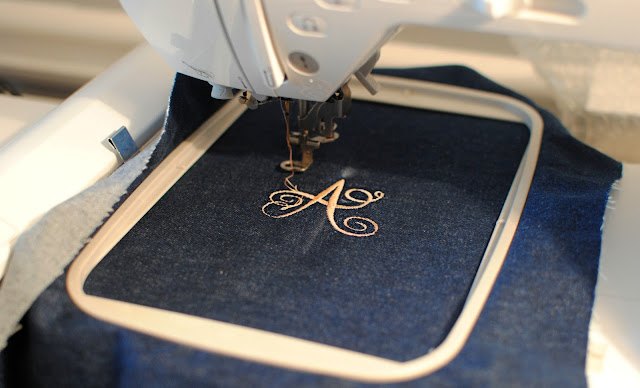
The embroidery was done using Sulky's Cotton+Steel 50 Wt. Cotton in Medium Peach and my SE1800 Brother Sewing and Embroidery machine. For the monogram in the back, I did the A first because it's traditional to have that larger then the first and last initials. Then I added the L and P after that way I could adjust the size accordingly.
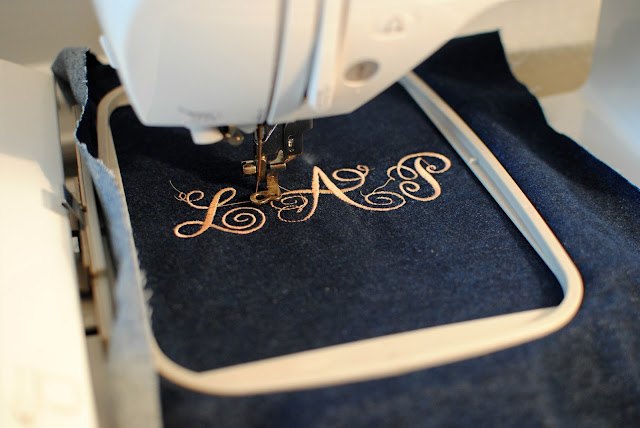
Once done you can repeat the embroidery in the front. Just make sure you position the letters correctly so they're not upside down.
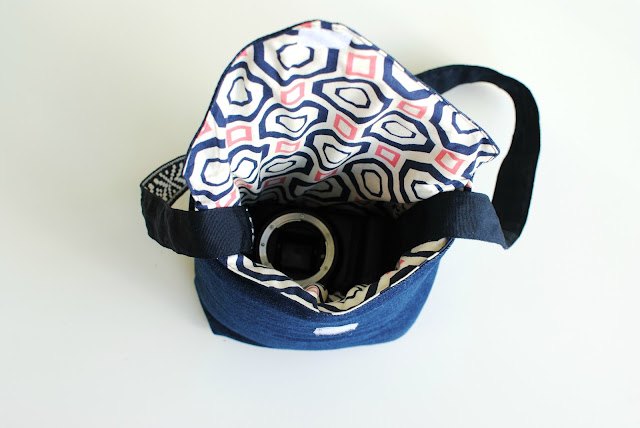
Add your (soft side) velcro attachment or Sew On Snap at midpoint and 2.5" down from the raw edge.
Now to the sewing. Fold your exterior and liner pieces 1.5" from where the slant starts. Sew right sides together for the exterior piece (where the pins are). For the liner you will need to leave a 3.5" opening on the side. I'd make sure it's 2" up from the bottom since we will be sewing a fold right there.
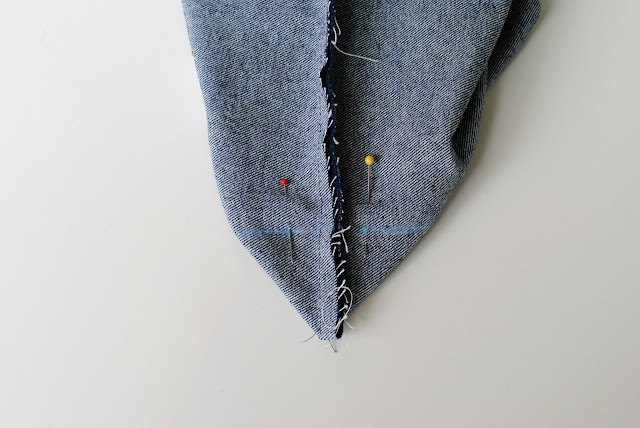
Fold each corner so the seams lay flat in the middle. Press the seam allowance over to one side and mark about 1 1/4" up a straight line across. Pin into place.
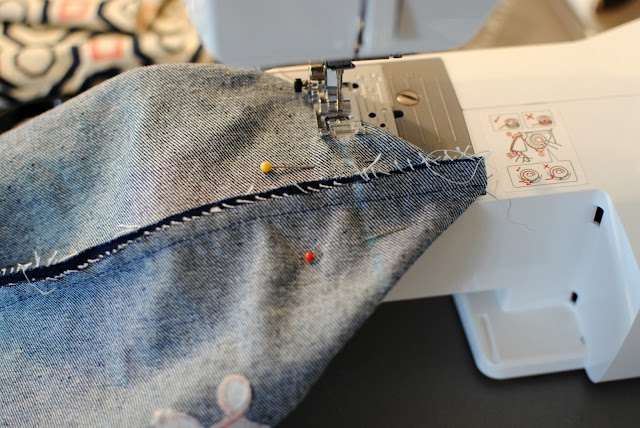
Sew along the line.
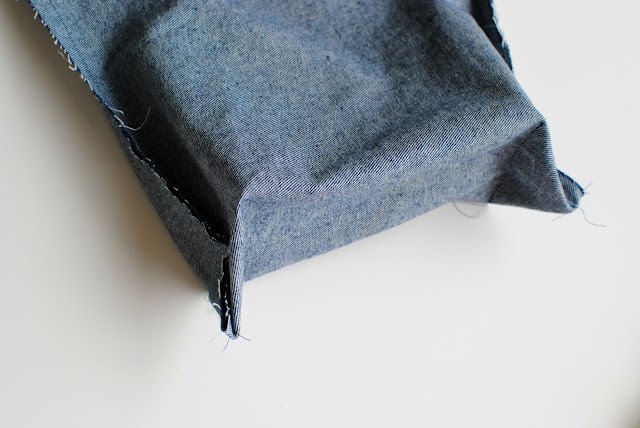
Repeat this step for each side including the liner.
Then cut the remaining triangle so it looks like this.
Repeat for the liner as well...
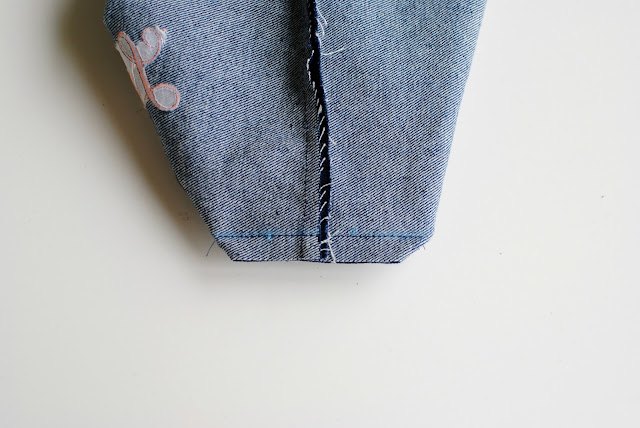
You should now have 2 pieces that look like this.
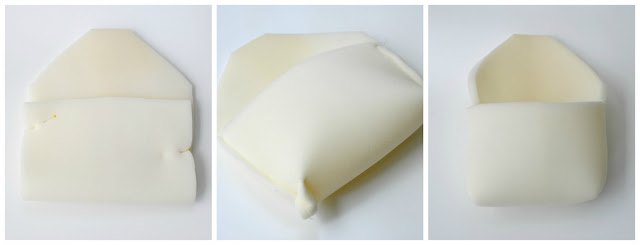
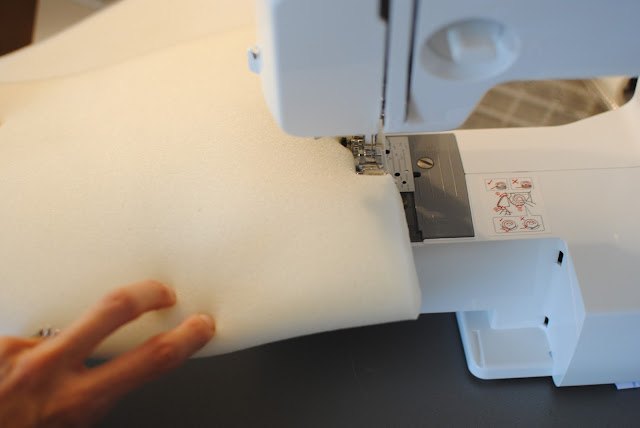
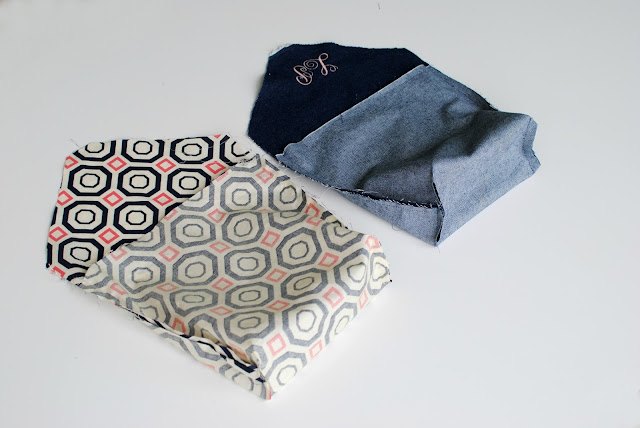
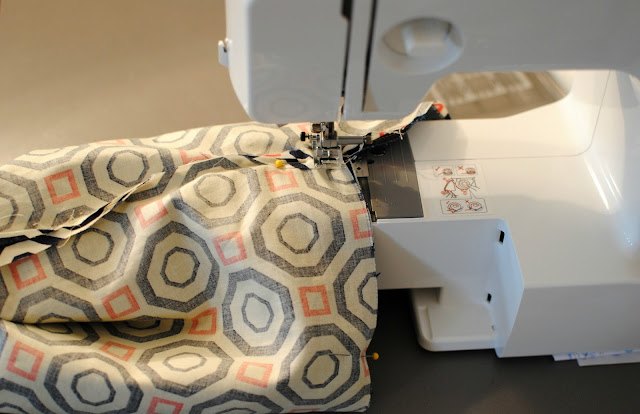
Repeat for the padded interior. Sewing with this material can be tricky but it worked for me using my Brother XR3774. I did have to keep putting the presser foot up and down to maneuver it because of thickness. You can always sew this part by hand if your sewing machine is having problems.
Place the exterior piece right side out into the liner so the right sides are together.
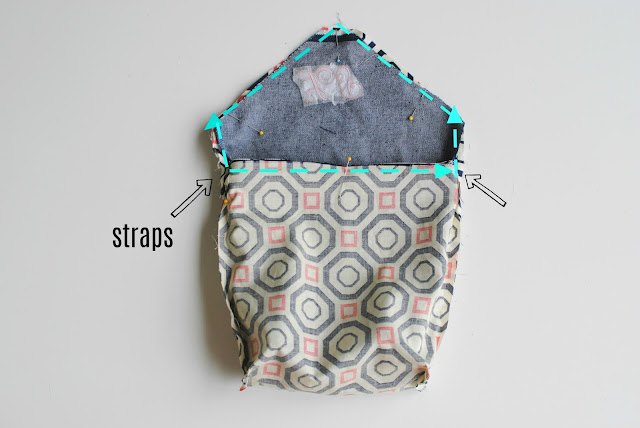
***If you want to add straps you will want to place them in at this point. As I said I use my camera straps as I prefer it that way. If you do insert them on the sides where the arrows are pointing. Make sure they're placed right sides together on the exterior and the straps are inside (facing downward).
Pin and you will sew starting at the side seam going across the to the other side seam, up the flap and all the way back down to the seam you started at. There should be no opening.
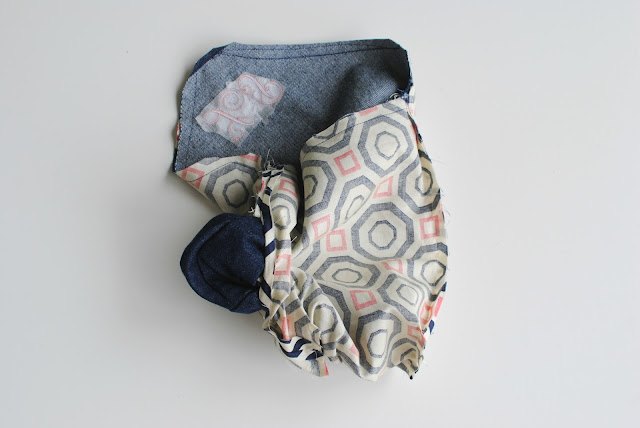
Now take everything out from the opening in the liner.

Sew the (hard part) velcro attachment to the tip of the flap edge. I just sewed a square and then an x in the middle.
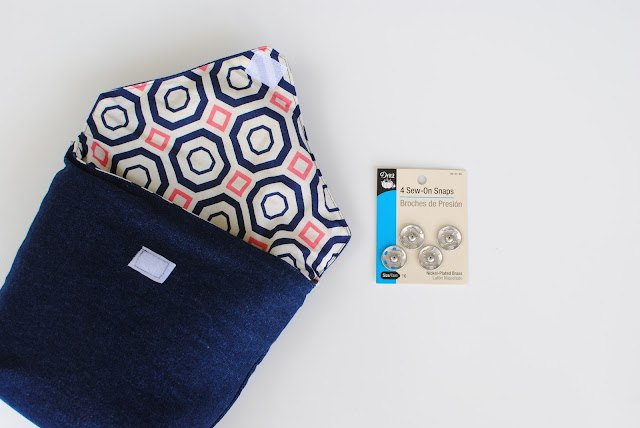
Or use Sew-On Snaps, I love these ones by Dritz. I used velcro because I like just pulling it open and closed quickly and it seems to hold up well with how often I do use this.

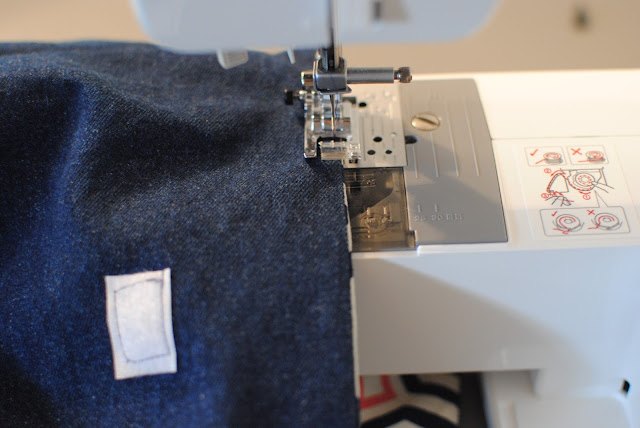
Now you will want to top stitch along the flap portion of the case. Again start at the side seam and go all the way around to the same point.
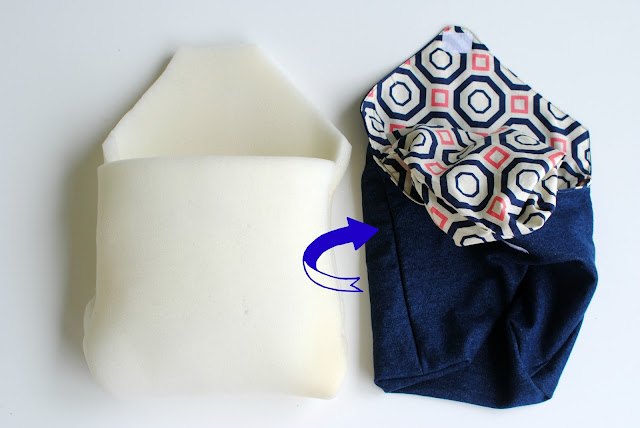
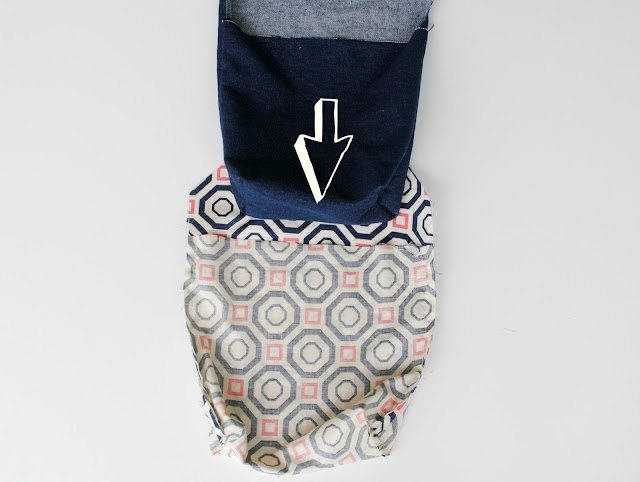
Take your padded piece and stick it in the liner opening. It works! Take your time tucking it in and make sure it's positioned right.
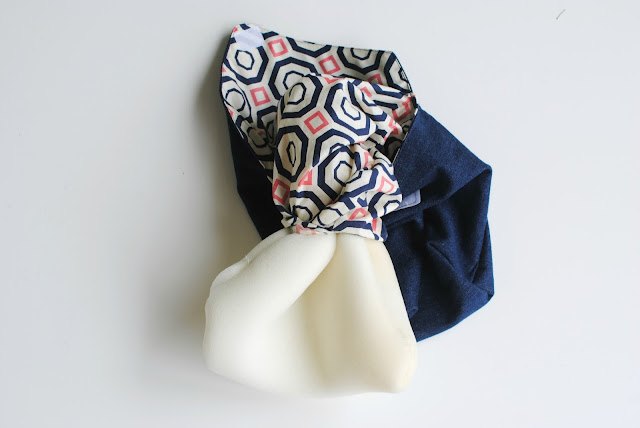
Adjust so it fits perfectly in between the liner and outside. Last thing to do is just sew up the opening of the liner.

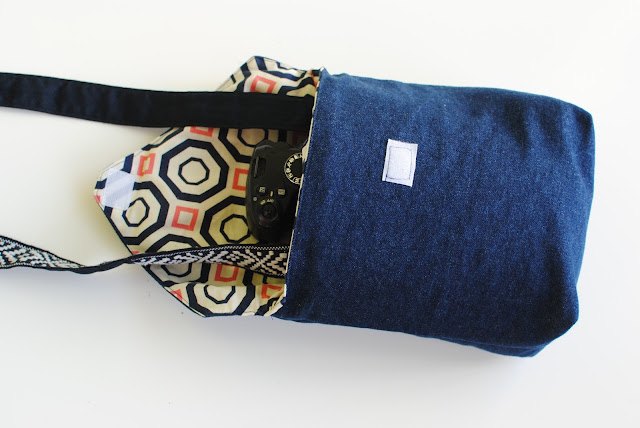
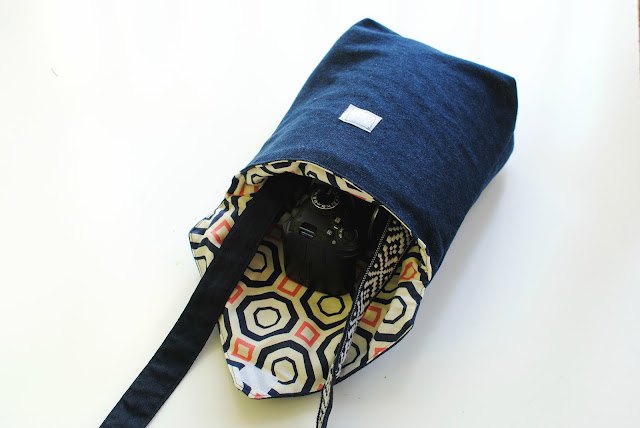
I place the camera in so the lens is up right and the straps are in between the flap.
This is my most used DIY project to date and it has stood the test of time. Sew this camera case for yourself or as gift for the photographer in your life! If you do please share by tagging: @TrashtoCouture & @SulkyThreads
The author may collect a small share of sales from the links on this page.


Comments
Join the conversation