How to Make a Cute DIY Drawstring Tote Bag (Free Pattern in 2 Sizes)

Today, I'm sharing an easy drawstring bag sewing pattern that you can use to sew a lined drawstring bag. I’ve got two sizes that are perfect for yourself or to give as gifts. Let’s get started making a DIY drawstring tote bag!
Tools and materials:
- Outer fabric (preferably linen)
- Lining (preferably cotton)
- Waxed cotton cord
- Wooden beads
- Scissors
- Ruler
- Marking pen
- Sewing machine
- Coordinating thread
- Iron
This bag comes in 2 sizes. Cut the outer fabric, straps, and lining for your bag.
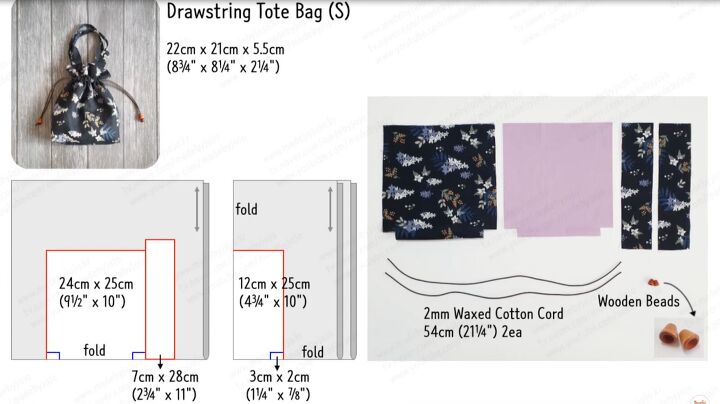
Drawstring bag sewing pattern (small size)
For the smaller bag, you’ll need one large piece of the outer fabric and lining that’s 9½ X 10 inches folded.
Cut the small corners as shown in blue. Cut 2 straps 2¾ X 11 inches long. Cut the waxed cotton cord to be 21¼ inches long.
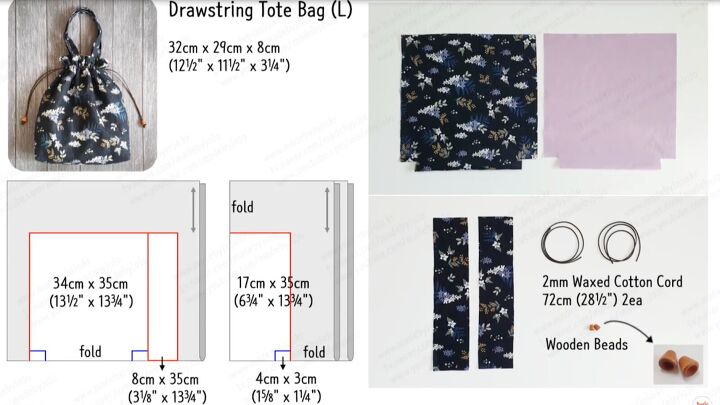
Drawstring bag sewing pattern (large size)
For the larger bag, you’ll need an outer fabric and lining that’s 13½ X 13¾ inches folded.
Cut the small corners as shown in blue. You’ll need to cut two straps that are 3⅛ X 13¾ inches. Cut two pieces of waxed cotton cord at 28½ inches.
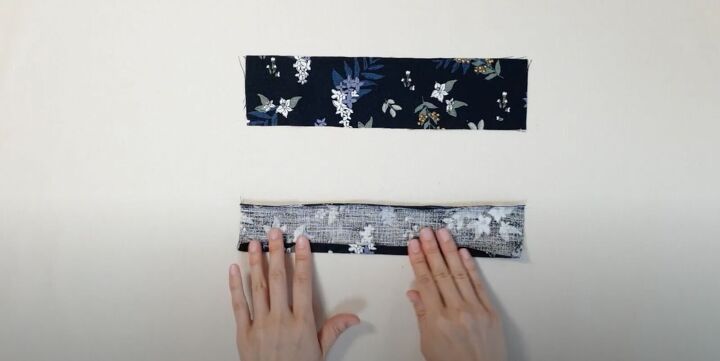
1. Make the straps
Fold the straps down ½ on either side along the length of the fabric. Press down these folds.
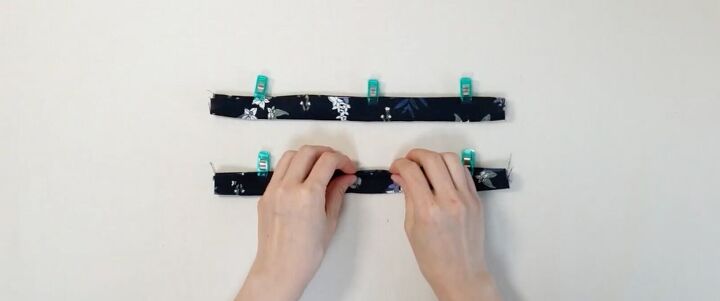
Fold the strap in half. Clip in place. Sew along the length on both sides as close to the edge as possible. Fold the straps into thirds to get a sense of the center.
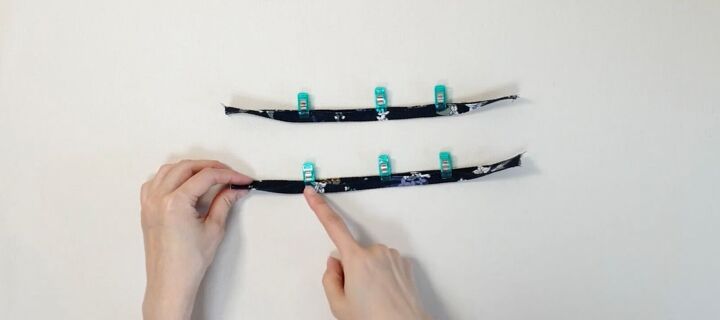
Fold and clip the center third in.
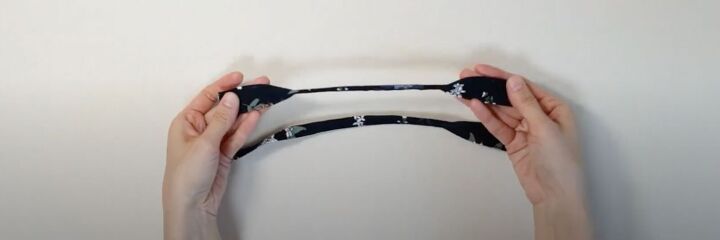
Stitch in place leaving the ends wider.
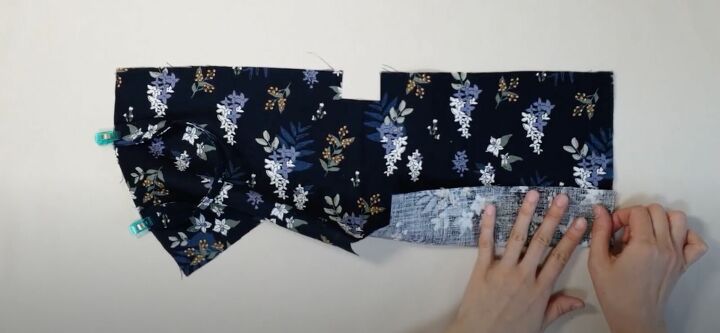
2. Attach the straps
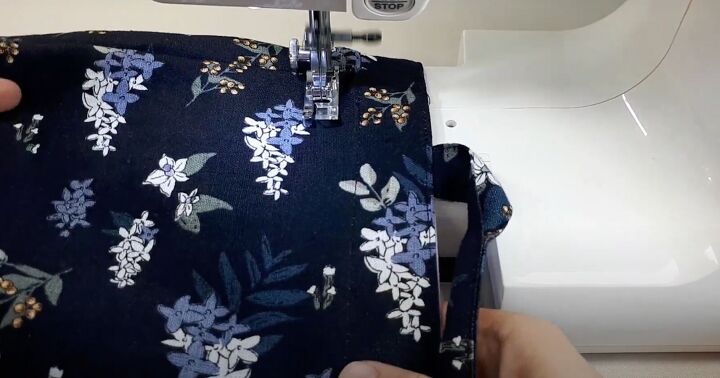
Fold your outer fabric in towards the right side to determine strap placement. Place them on the right side, attaching the raw end of the strap to the top edge of the lining.
Clip to both sides.
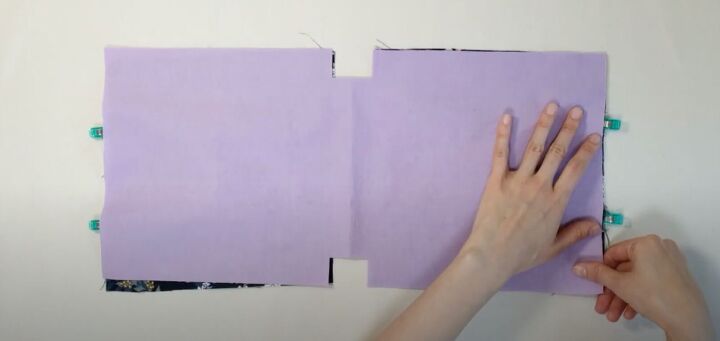
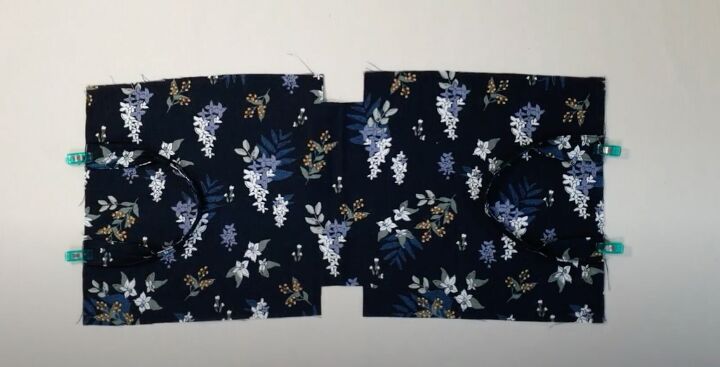
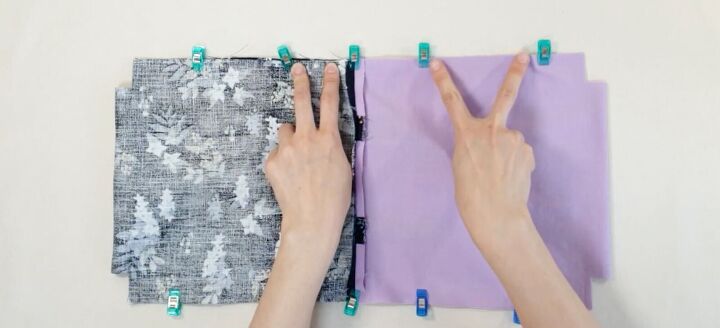
3. Attach the lining
With the straps clipped in place on the right side of the fabric, lay the lining with the right side facing down. Align the edges of the lining to the fabric.
Adjust the clips to include the lining so the straps are still clipped in place. Place another clip to secure the fabric.
Sew across these seams with a straight stitch, remembering to backstitch at the beginning and the end.
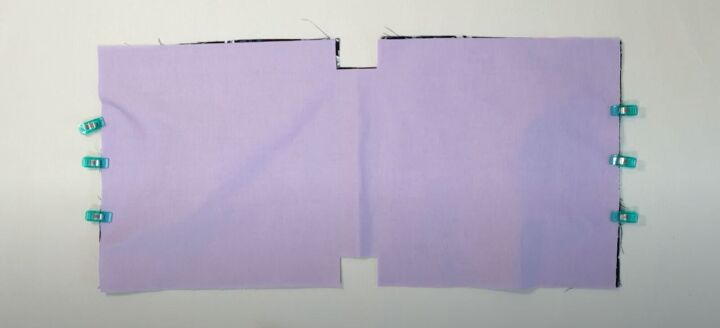
4. Sew the bag together
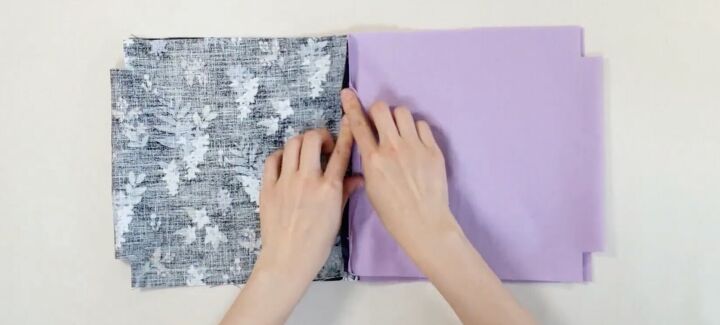
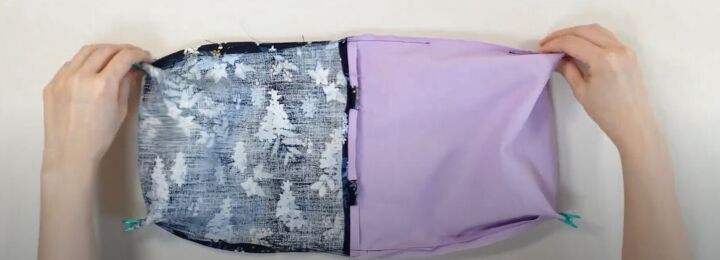
Separate the lining from the outer fabric. Flatten the center seams.
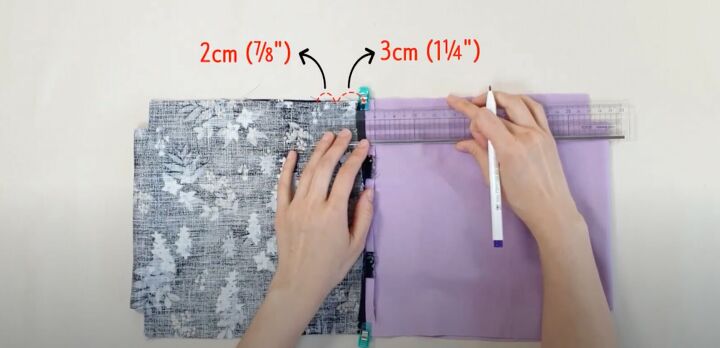
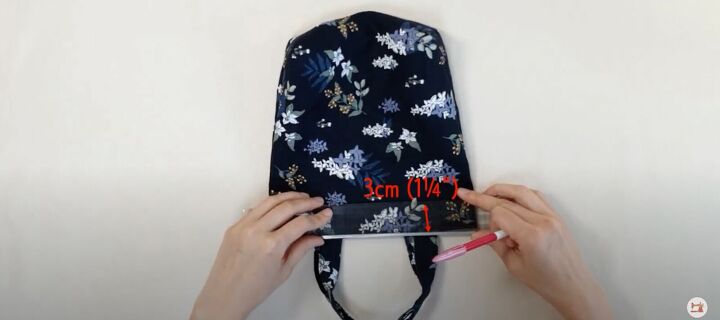
Use your ruler to measure 1¼ inches from the center seam and then ⅞ inches from that measurement on the outer fabric as shown at both the top and bottom. Mark these measurements.
Clip the side seams. Sew the side seams leaving these spaces unsewn on the outer fabric at the top and bottom.
Leave about 3 inches on the lining unsewn so you can flip the bag to the right side once it is sewn. Sew with a straight stitch.
Flatten the seams. Clip the ends of the side seam.

Clip the corner together on one side from both the outer and lining fabric. Sew across in a horizontal line, backstitching at the beginning and the end.
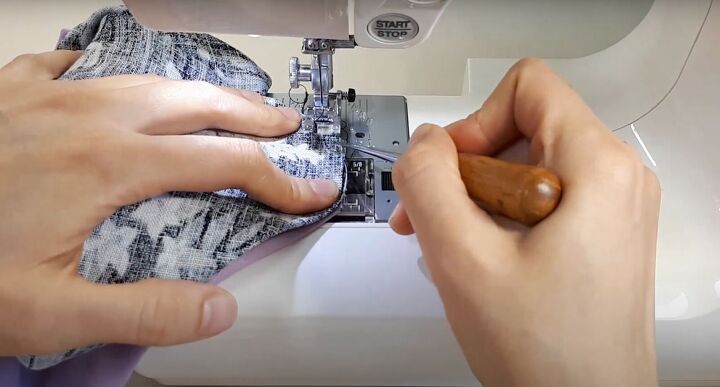
Once that side is sewn, clip and sew the second side in the same way.

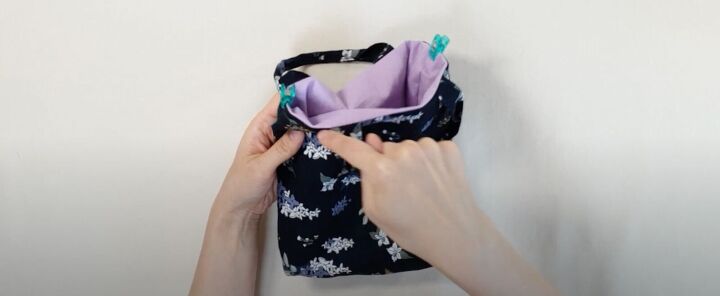
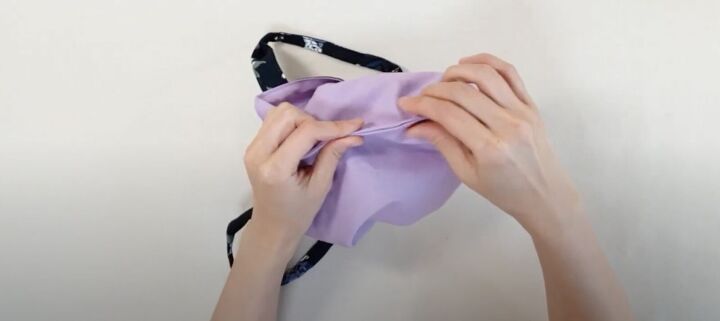
You’ll have what looks like a ball. Look for the space you left in the lining and pull the outer fabric through to get the bag right side out.
5. Finish the bag
Clip the top side seams. Sew a topstitch across the top of the bag in coordinating thread.
Use your ruler to measure down the 1¼ inches and ⅞ inch measurements you left unsewn before.
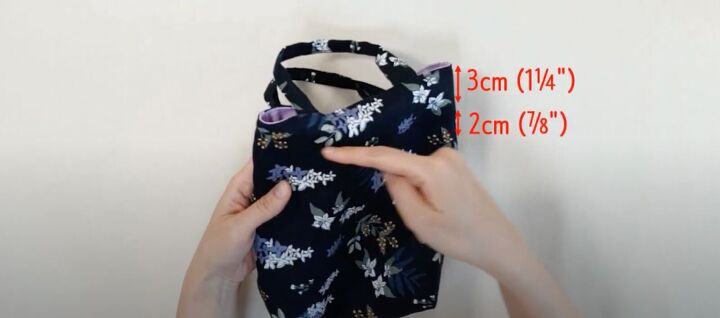
Mark these measurements.
Sew across to create a channel.
Take out the lining of the bag and stitch up the space you left to flip the bag out.
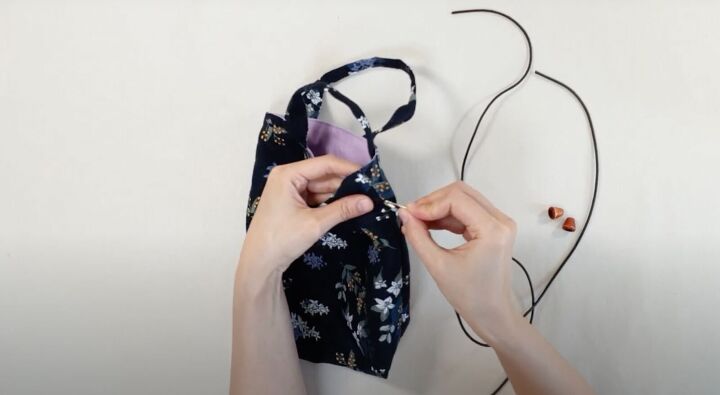
Place a safety pin at the end of the waxed cotton cord. Pull it through the channel. When you reach the end, pull on both ends.
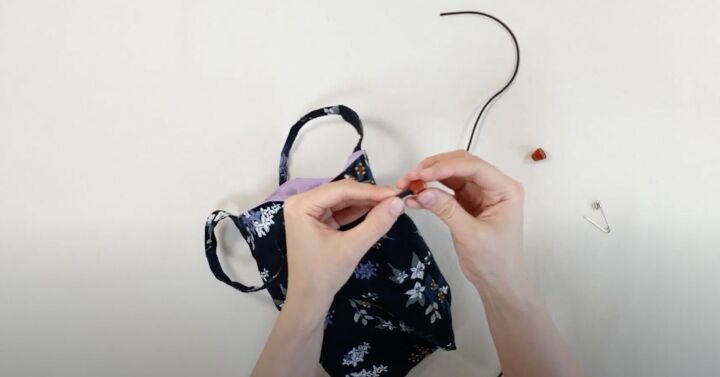
Place a wooden bead on both cords and pull the cords out. Make a tight knot. Take the second cord and pull it through going in the other direction. Follow the same technique.
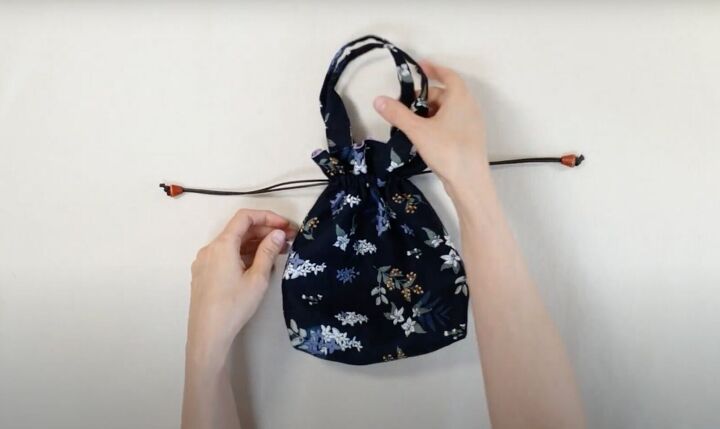
Pull on both cords to create and secure your DIY drawstring bag!
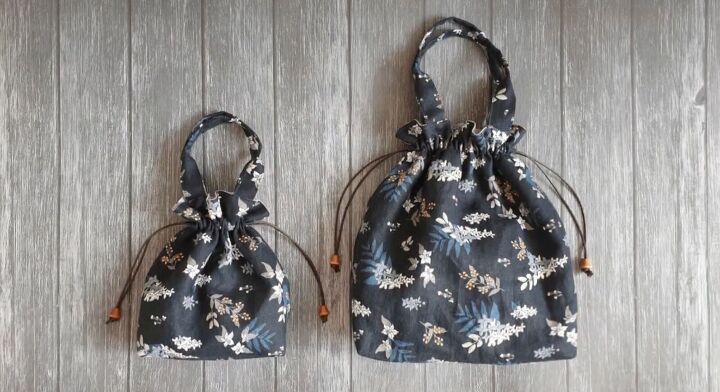
DIY drawstring tote bag tutorial
I hope this tutorial helped you learn how to make a drawstring bag.
Please let me know in the comments how helpful you found this drawstring bag sewing pattern and if you made this bag for yourself or as a gift. Thanks for joining!
The author may collect a small share of sales from the links on this page.


Comments
Join the conversation
Enjoy sewing!
If you have any questions, please leave a comment.
Thanks! 😄
Cute bags...what is the sewing with an awl picture???