Eyeglass Case Tutorial With Printable Pattern

Tea Rose Home
by Tea Rose Home

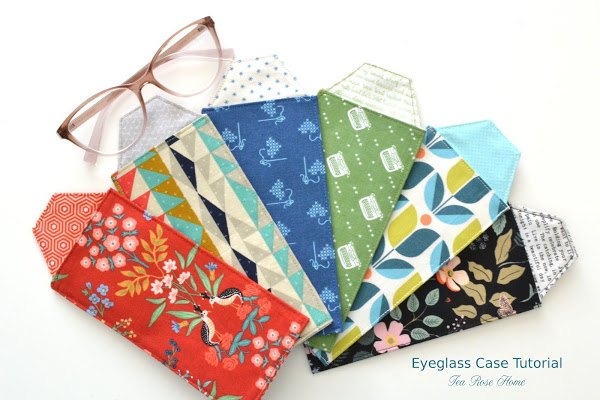
The idea for this project came purely from my own need, but I thought there might be some of you going through the same thing and looking for an eyeglass case.


I always had good eyesight up until few years ago (darn aging! My teen daughter often say, "Is there anything good about getting old??"), but I started needing glasses to see far and it seems to be getting worse. Because I am not used to carrying glasses around, I always forget to take them with me and I won't even think about them until I need to see the menu on the far away wall at the restaurant and such. Also, the glass case that came with my glasses was a big, bulky plastic case. I don't like carrying a big purse, and there is no way that that glass case will fit in my small purse... I just wanted a small, minimal fabric case to prevent scratches. After I did a few sketches, I came up with this design.

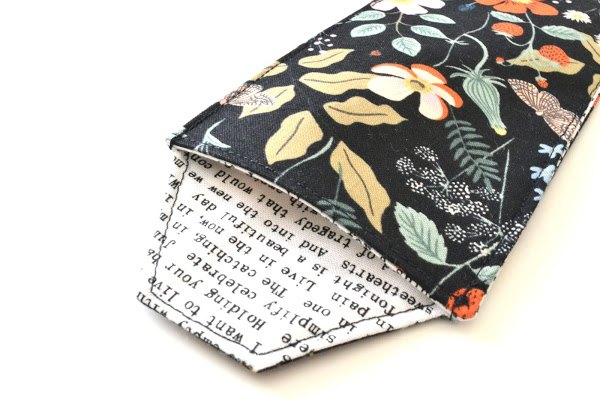
For the closure, I designed it so that you can just fold the tab inside, kind of like tucking the opening of a pillowcase when you are making the bed. If you prefer to add snap button or Velcro you could totally do that.


*You will need


1 - Outer fabric (8" x 9")


1 - Lining fabric (8" x 9")


1 - Interfacing (8" x 9") I used Pellon 809 Decor Bond. I like the stiffness.


Matching thread


*How to


1. Print PDF pattern and cut out the template.


2. Trace the template onto the fabrics and interfacing and cut them out. You can do this one by one, but I like to layer all three material together, trace and cut. This is not only a short cut, it is easier to ensure which side of the material is suppose to be put together. You can look at the picture below to see what I mean.

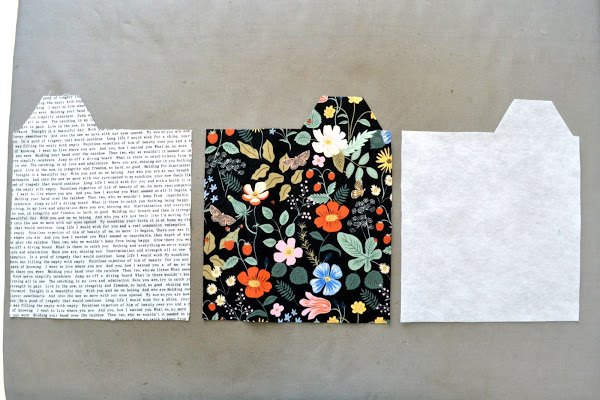
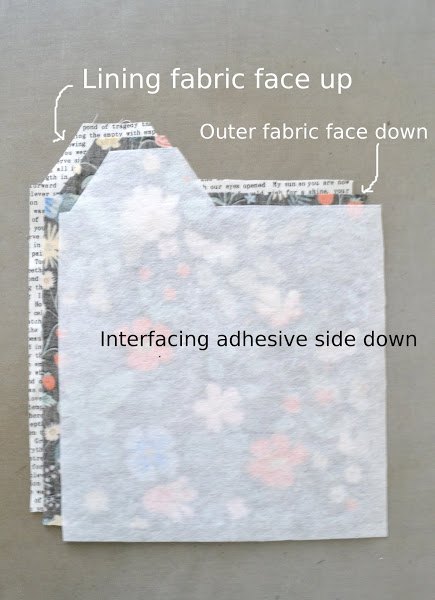
3. Fuse the interfacing on the the wrong side of the outer fabric.


4. Put all three layers together perfectly. Leaving a 3" opening in the bottom, sew all the way around. Cut and snip the corners for a cleaner finish.

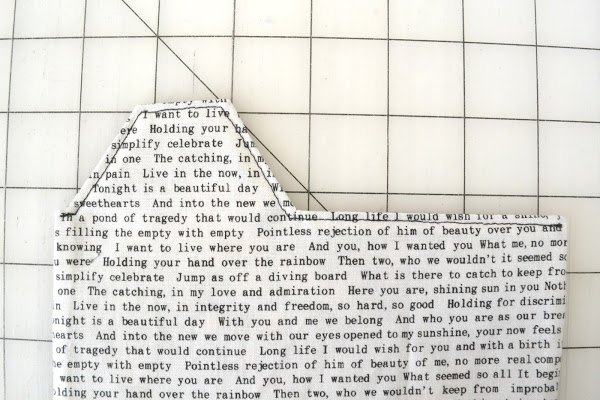
5. Turn it inside out and press with an iron.

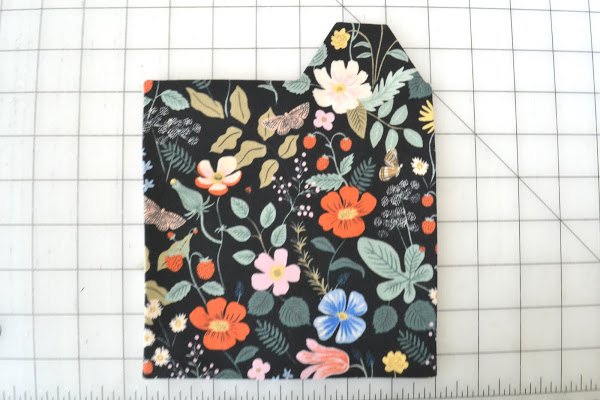
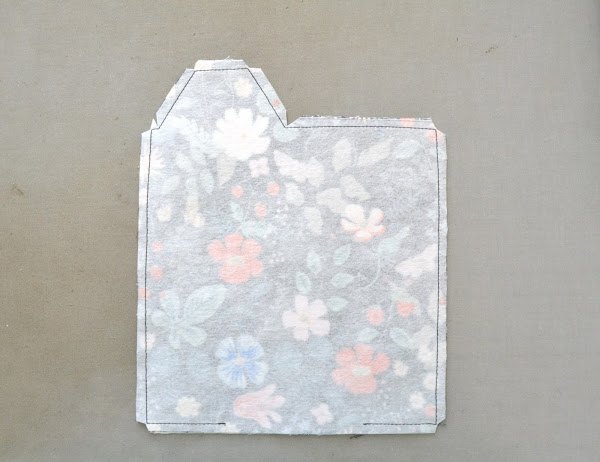
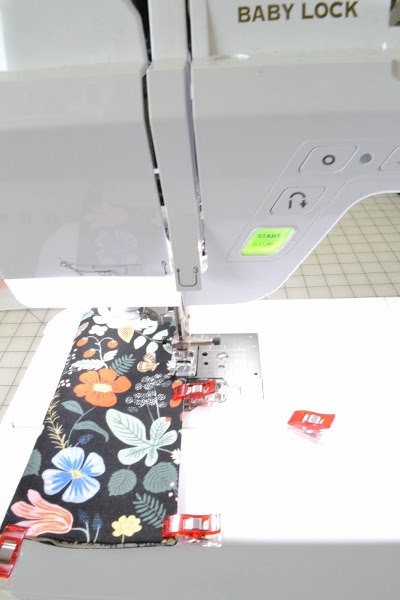
6. Top stitch the portion of the case.

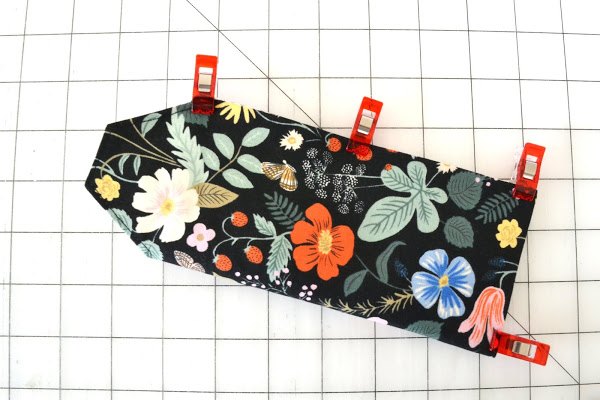
7. Fold in half vertically. Use clips to keep them in place while you sew. Sew one side all the way to the other side.


At this point, it might be difficult to stitch through all the layers with some machines. In that case, it might be helpful to use thicker needles and go slow. People often ask me what kind of machine I use and I always say "Baby Lock. and I LOVE IT!" Whether you are beginner or an advanced sewist, I highly recommend Baby Lock machines to everyone. They offer a variety of machines (beginner ones start around $150!) I know how frustrating it is to have a machine that keeps having problems, and that actually takes the fun out of sewing. I have been sewing with Baby Lock machines for the last 10 years or so, and they are sturdy and dependable; totally worth looking into it. :)

8. Enjoy!

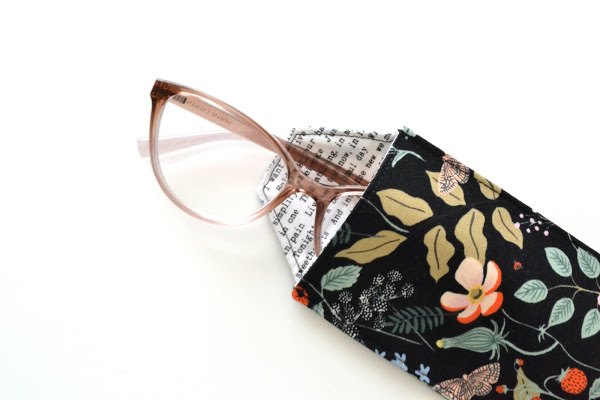
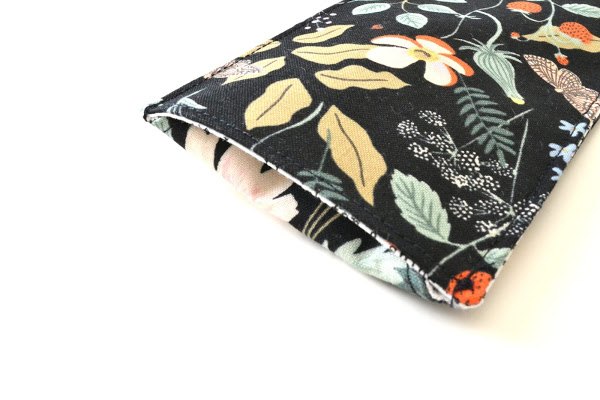
Here are the images of the case"open" and "closed"...

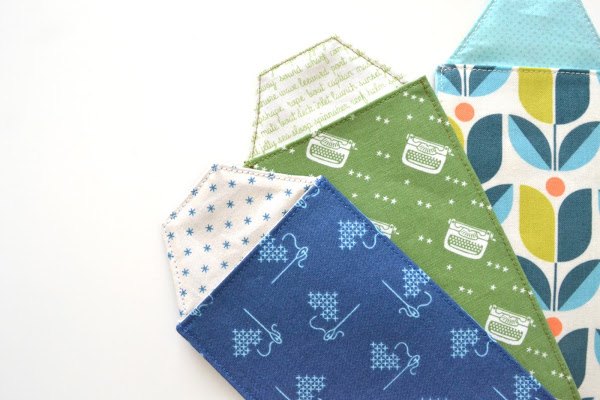
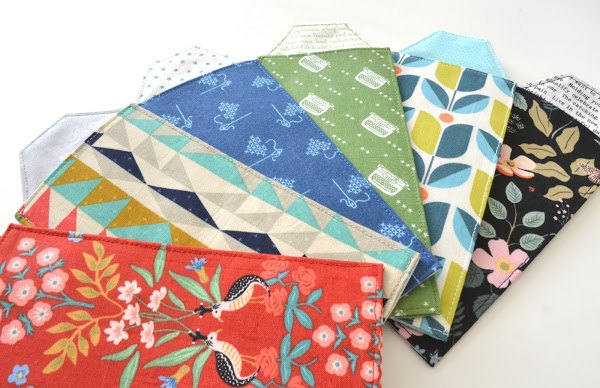
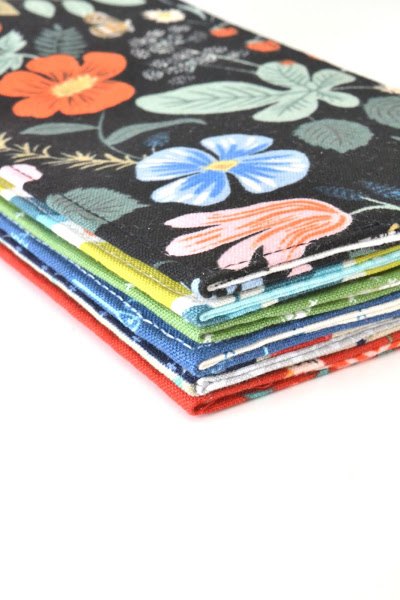
I got carried away and made more, thinking that this will make a great gift for my friends.

The thick interfacing gives just the right amount of stiffness without being bulky. This eyeglass case will definitely protect my glasses from scratches and easily fit in my purse which is exactly what I wanted. Happy sewing everyone!

The author may collect a small share of sales from the links on this page.

Tea Rose Home
Want more details about this and other fashion and style ideas? Check out more here!
Go
Comments
Join the conversation
2 of 6 comments
  • Mary Jo Savageau Mary Jo Savageau on Jun 16, 2021

    Hi, nice simple pattern, thank you! I might try it for my sunglasses. Just wondering, is there a reason for not sewing each layer separately into the case shape, then sewing the flaps together, leaving the gap there for reversing to right side? Seems like the seams might be smoother and the case more roundish...?

  • Tea Rose Home Tea Rose Home on Jun 17, 2021

    I guess you could do that too. Let me know how it turned out if you decided to go that route! 😊

Next