No-Sew Felt Taco Pouch
Store your favorite school supplies in a handmade No-Sew Felt Taco Pouch!
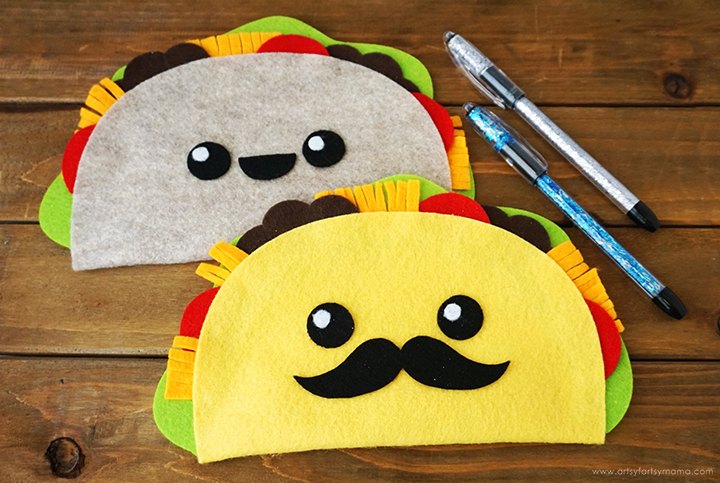
There are so many creative things you can make using felt, and it's always a lot of fun! Using my latest pattern, kids of all ages can make their very own Felt Taco Pouch! While this is a simple no-sew project, it can also be assembled using embroidery floss if you'd like. This adorable pouch is a fantastic pen or pencil pouch to take to school, or to keep your money safe when used as a wallet.
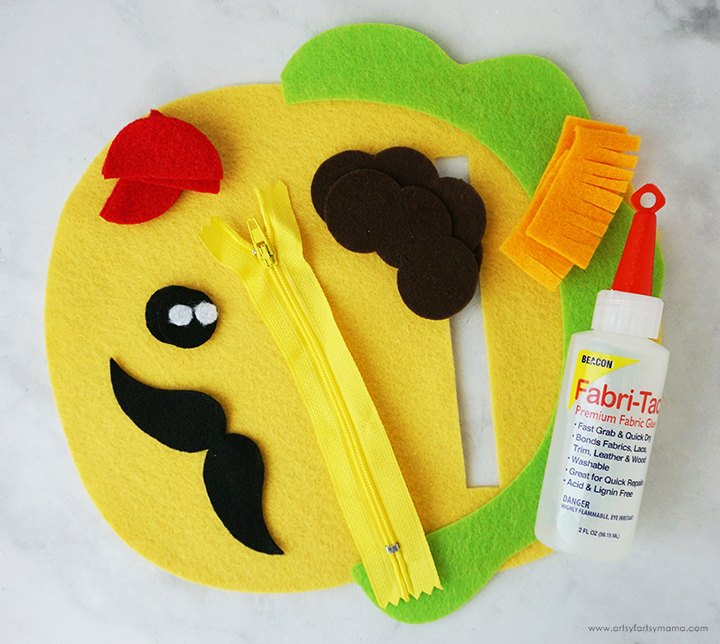
To make your own No-Sew Felt Taco Pouch, you will need these supplies:
- Taco Pouch Pattern (personal use only)
- Cricut machine or Fabric Scissors
- Felt - yellow, black, white, green, red, brown, orange
- Fabric Adhesive OR
Embroidery Floss + Embroidery Needle - 5" Zipper
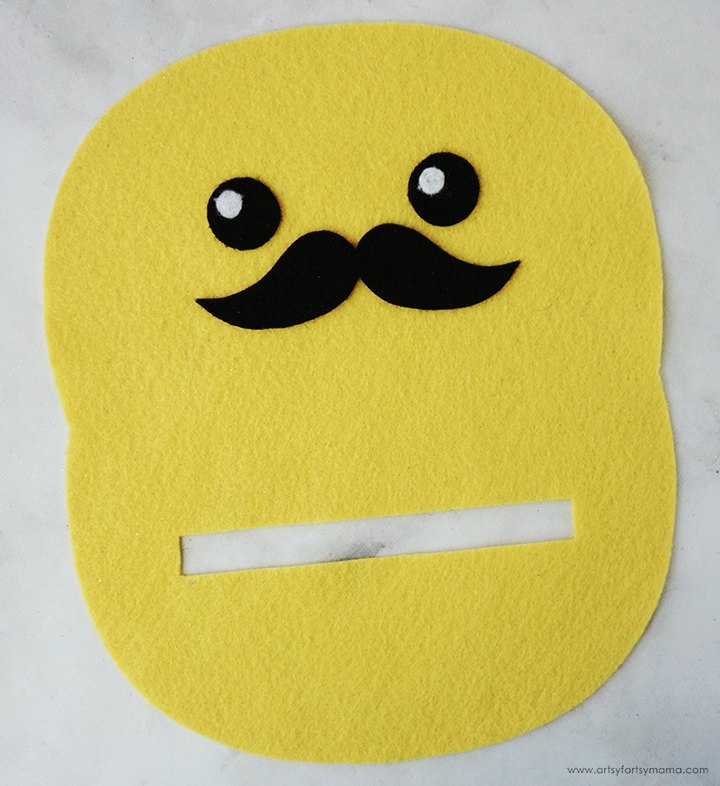
Lay the pouch piece out flat with the zipper opening at the bottom. Next, arrange the eyes and mouth (or mustache) on the top half of the pouch. Keep the face pieces in place by using fabric adhesive or by sewing them on with a matching embroidery floss.
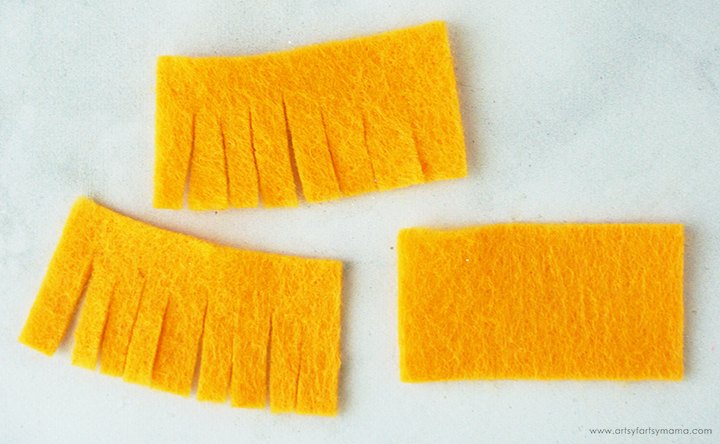
In the pattern, the "cheese" is a simple rectangle. Grab some fabric scissors and snip into the rectangles to create fringe. Be careful to not cut all the way through the ends!
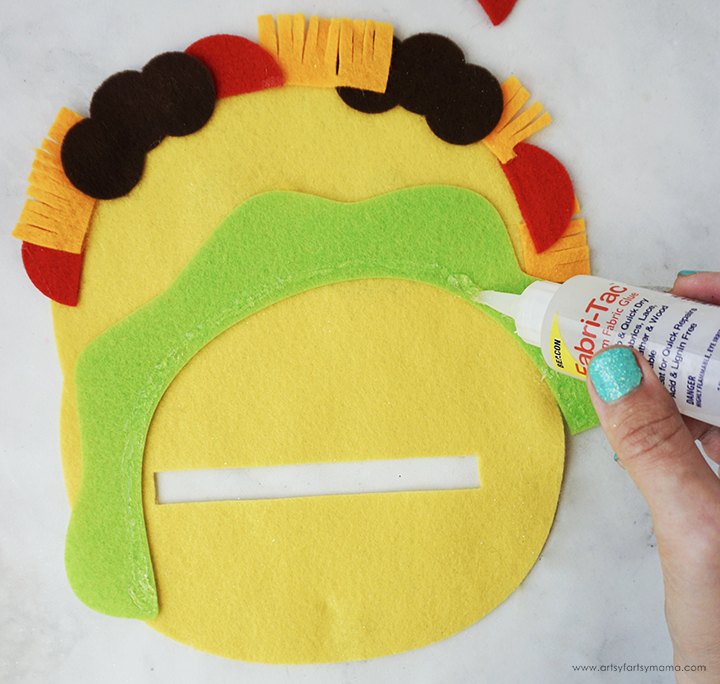
Turn the pouch face-down (literally). Add some adhesive to the back of the toppings (tomatoes, cheese, meat) and arrange them to fit around the top edge of the pouch. Next, add some adhesive around the inner edge of the lettuce piece. Place it over the toppings and press it down well.
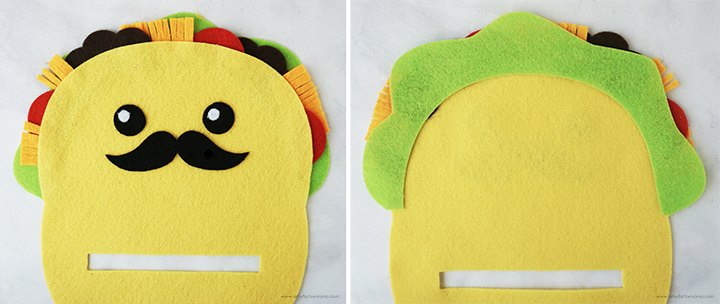
Once all of the toppings are in place, this is what the front and back of the pouch should look like.
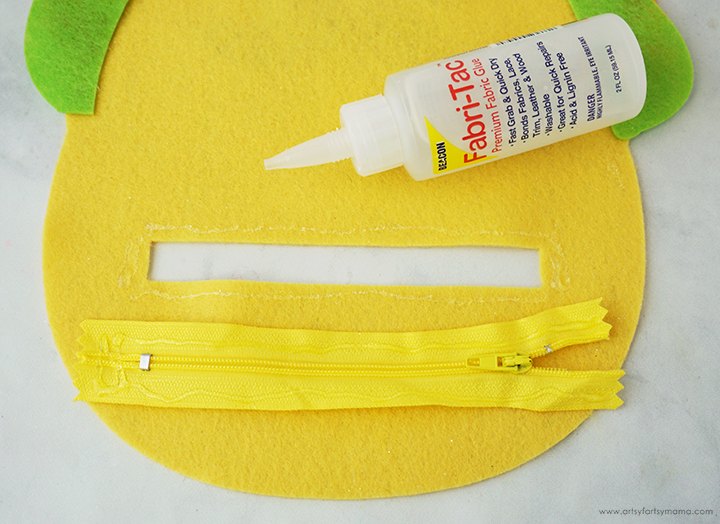
Make sure the pouch is face-down. Add a thin line of adhesive around the edges of the zipper and around the opening on the pouch. Carefully lay the zipper over the opening, making sure that the slider and the stop aren't being covered. Press the edges together well until the glue dries to get a secure hold.
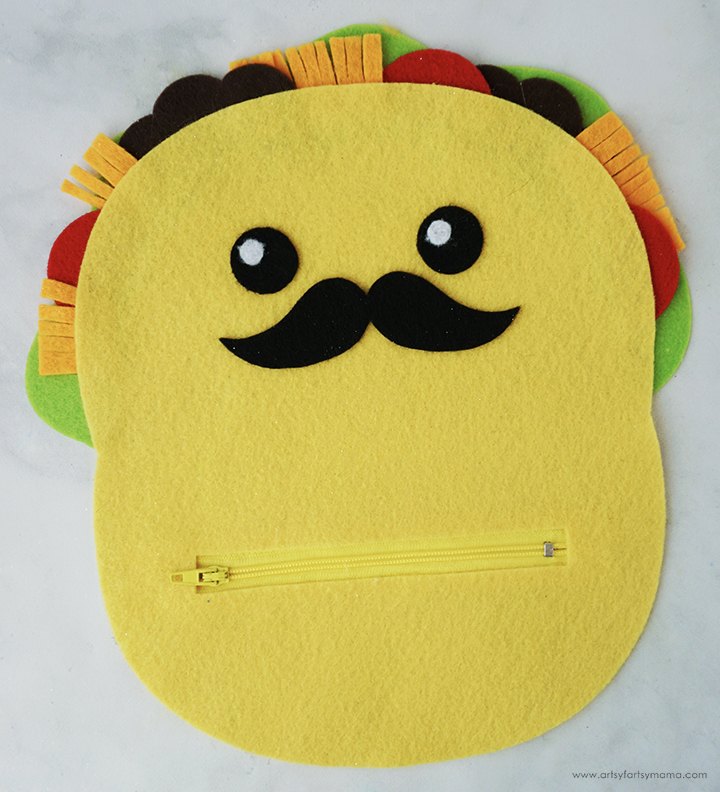
When you turn the pouch over, this is what the zippered area should look like. Test the zipper a few times. If the zipper detaches at all from the pouch, re-apply adhesive and press it down well. For an extra-secure hold, you could sew around the edge of the opening with a matching embroidery floss.

Last, but not least, is to close up the pouch. Add a line of adhesive around the bottom edge of the pouch, and then fold it in half. Press the edges together well until the glue sets. Carefully poke around the taco toppings to check for any open areas and close them together with a little more adhesive. Leave it in place to dry completely.
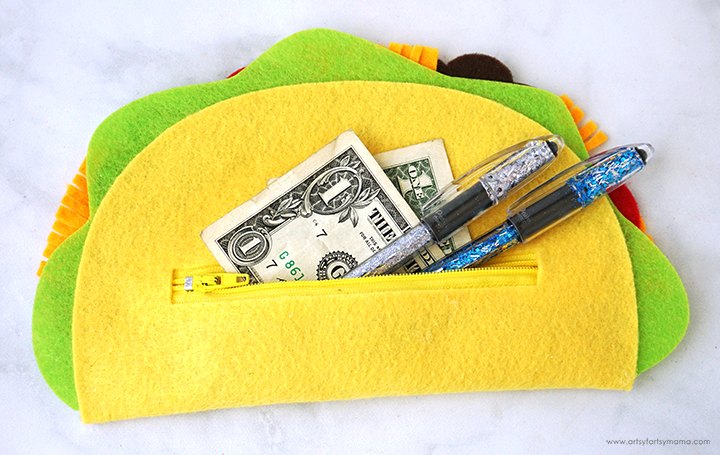
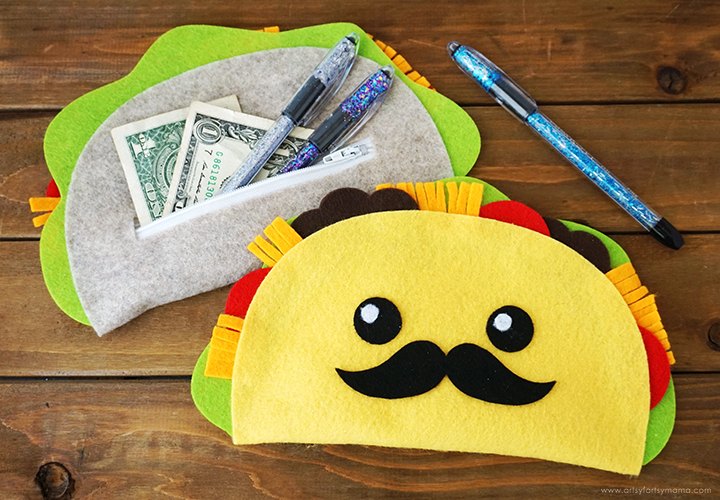
Now you can stuff your Felt Taco Pouch with all kinds of things, like money, pens, pencils, and more! I love that this adorable pouch can be used as a wallet, a school pencil pouch, or just a fun little way to store some of your favorite things.
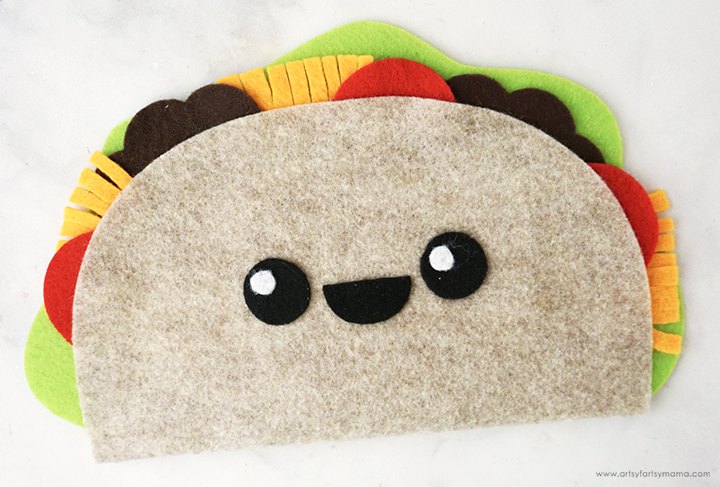
Perhaps you aren't into a corn (yellow) taco shell? Use a light tan or off-white piece of felt for a more realistic looking taco pouch! Assemble the pouch the exact same way, but with a different look. This little taco pouch also features another mouth option to replace the mustache that is included in the pattern.
This No-Sew Felt Taco Pouch is such a fun and simple project that anyone can make. I love that it's both adorable AND functional! As always, I would love to see your creations! Share yours on Instagram, Facebook, or leave a comment/photo on the project pin on Pinterest!
The author may collect a small share of sales from the links on this page.


Comments
Join the conversation