Keep Hair Neat & Looking Cute With This Easy Headband Braid Tutorial

In this headband braid tutorial, I'll show you one of my favorite hairstyles to do whenever I want to look cute without putting in a lot of time or effort.
It’s an easy and stylish way to get your hair out of your face without resorting to a ponytail, and it works for all lengths - short, medium, and long hair!
Let's learn how to do a headband braid step by step.
Tools and materials:
- Comb
- Hairstyling powder
- Bobby pins
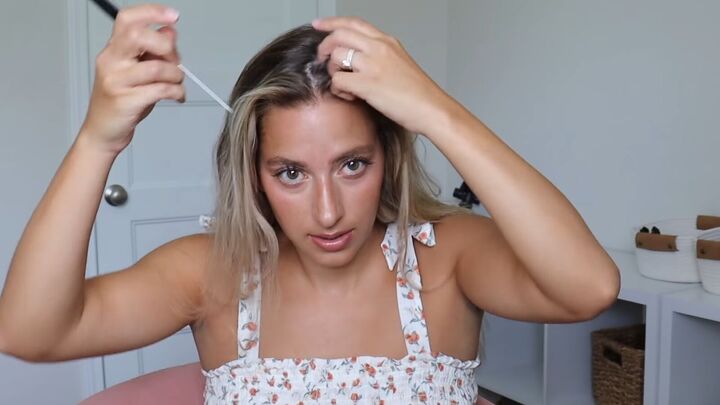
1. Part the hair
Grab a parting comb and part your hair down the center. Then, part down the sides.
To do this, measure three inches to the back and slide your comb down to your ear to separate that chunk of hair.
Twist the rest of your hair and clip it away to make it easier to work with. Then, do the same thing on the opposite side. Make sure the sections are even.
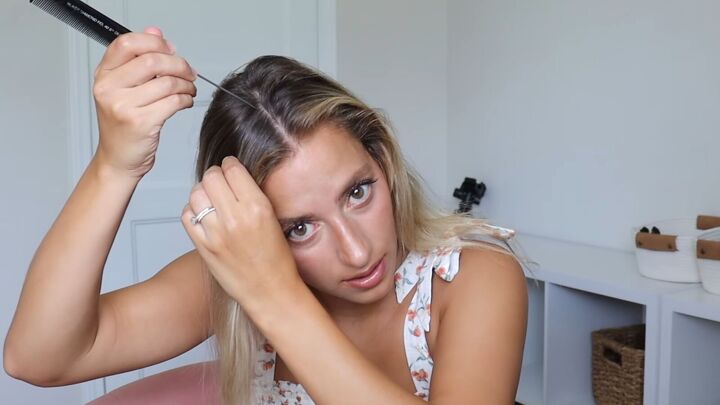
2. How to do a headband braid
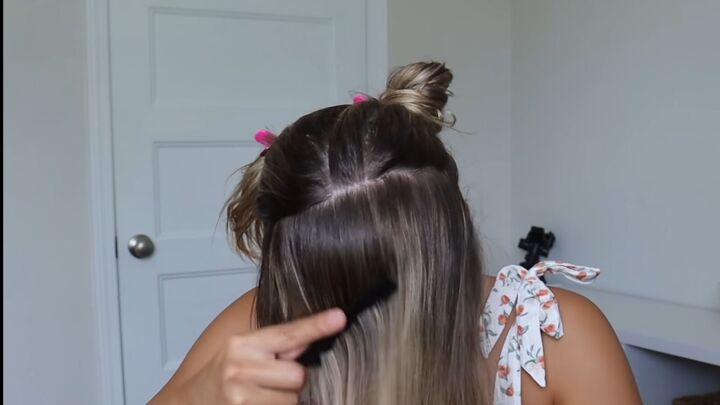
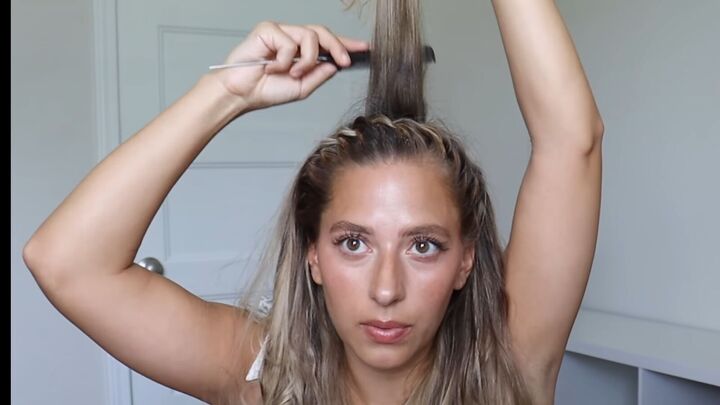
Comb your hair so it falls in the front of your face and then comb through it to remove any knots or tangles.
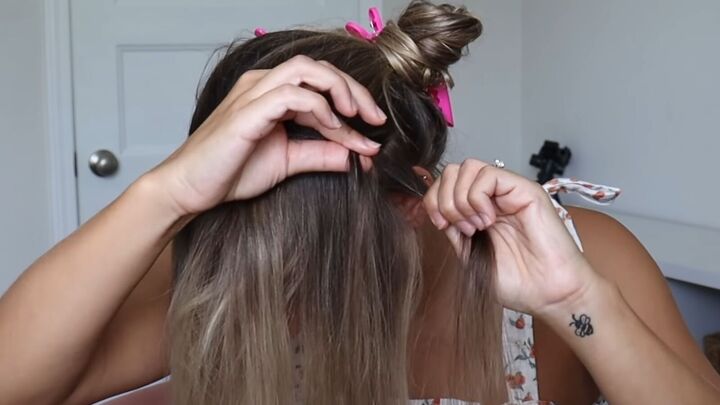
Starting from the left side, take a small section and split it into two.
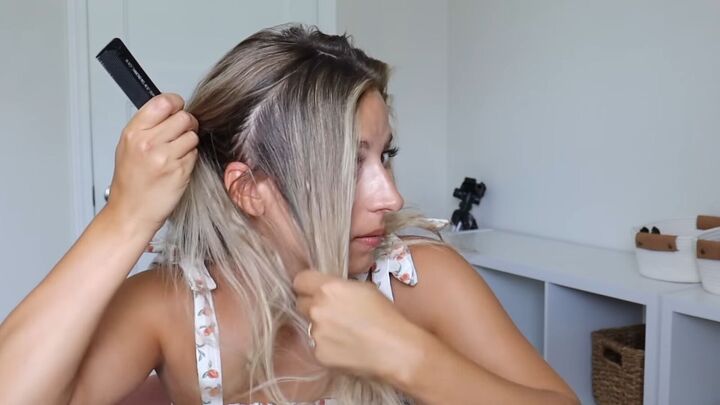
Then take your front section and cross it over your back section.
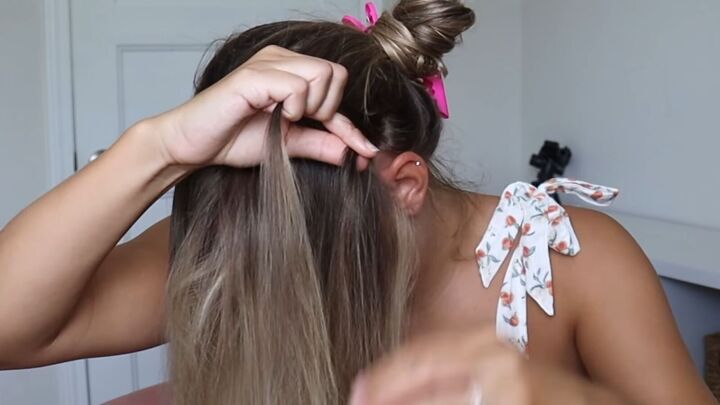
Take a new section from the rest of your hair, similar to the size of the two-split sections, and add it to the front section.
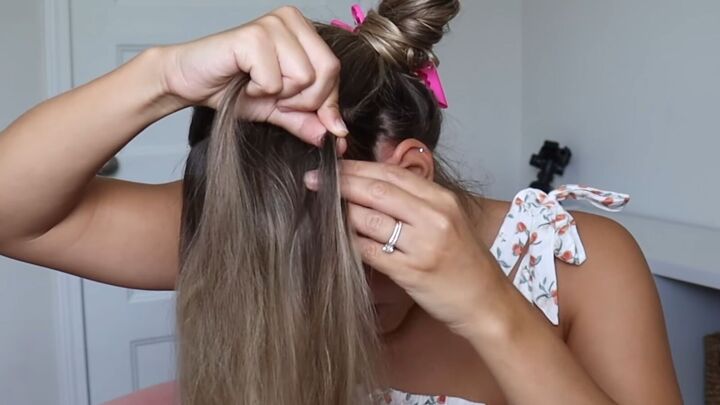
Then cross the two combined sections over the back section.
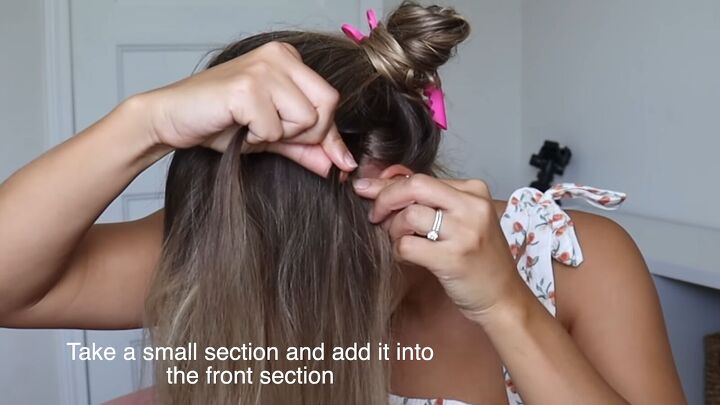
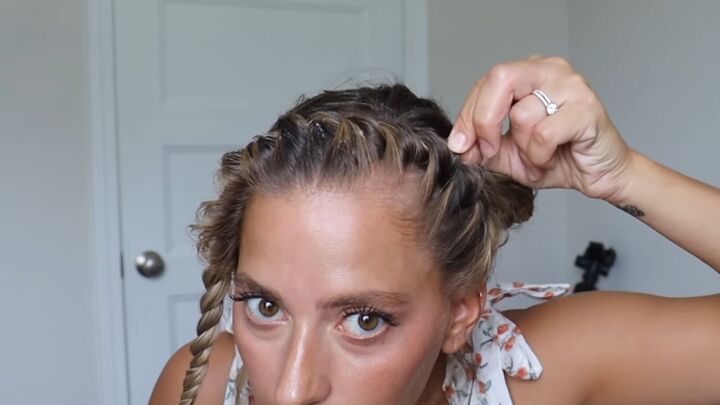
Now, all you have to do is repeat! Continue to take a small section from your hair, add it to the frontmost section, and cross the combined sections over the back section.
The front section becomes the “new” back section as the sections will alternate as you continue to cross.
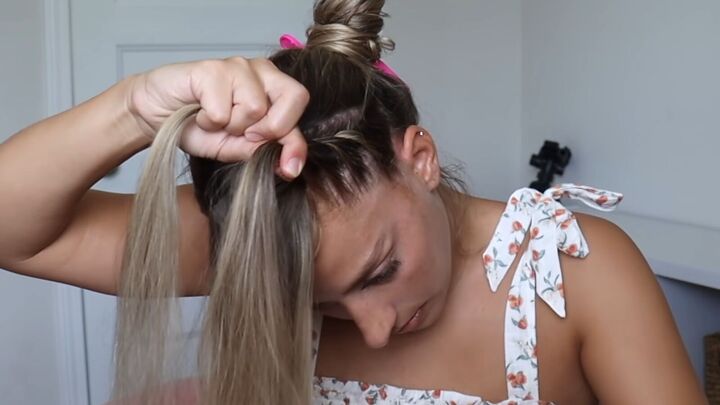
Make your sections are equal-sized and that you’re doing the same amount each time to avoid it looking lumpy or uneven. Likewise, while you work, make sure you’re braiding tight against your scalp.
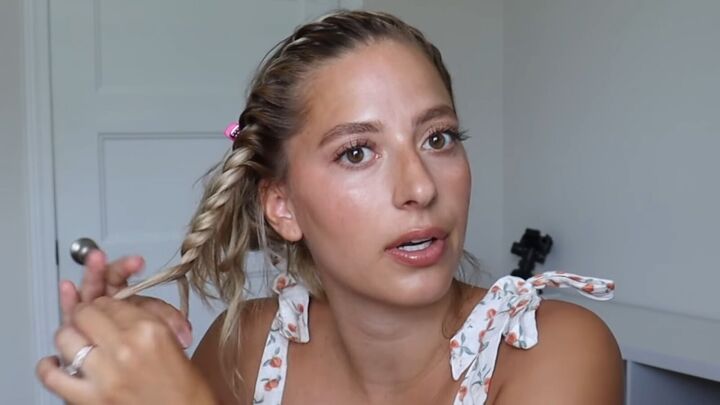
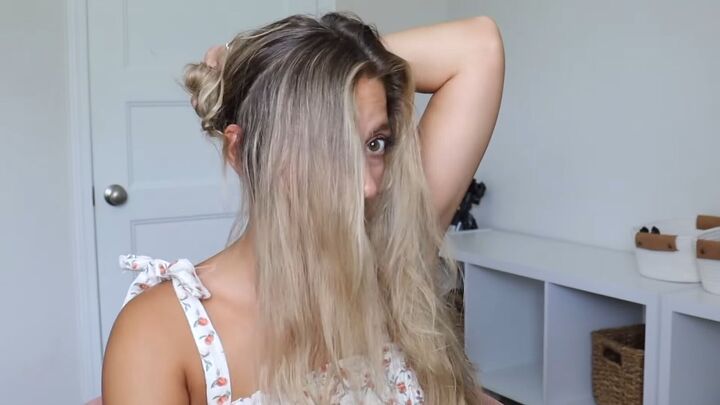
Eventually, you’ll get to a point where you run out of new hair to add. At this point, you’ll want to cross the two sections over each other and twist down to the ends of your hair. It should end up looking like this:
3. Add volume and texture
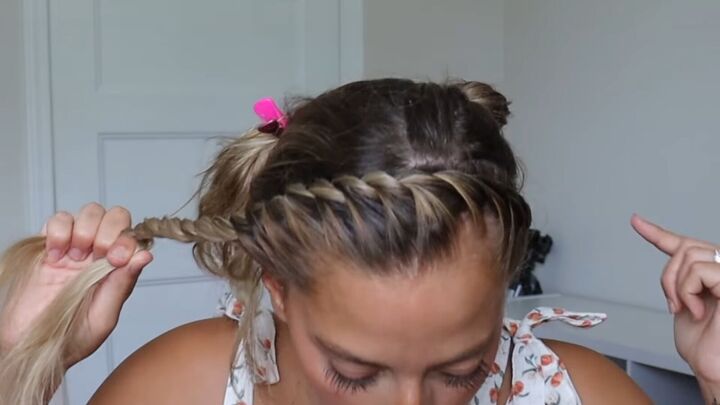
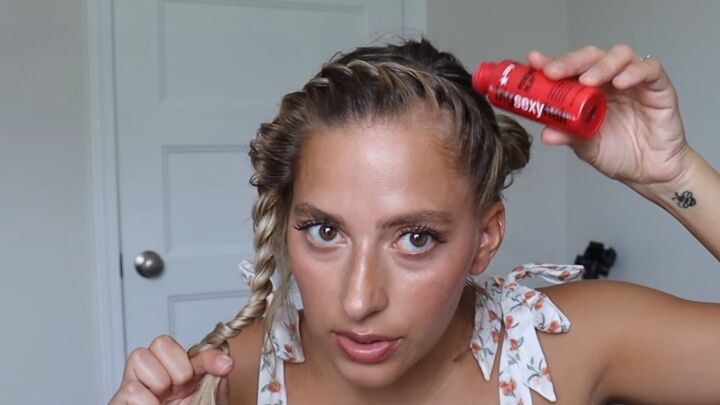
Before continuing, I’m going to sprinkle a little bit of styling hair powder over the braid, which adds volume. The one I’m using is the SexyHair Big Powder Play.
Next, pinch parts of the braid and just pull it a little. Make sure to tightly hold onto the end of the braid so you don’t pull the hair out of the braid. You only want to pull out a little bit.
This is going to add some texture to your braid.
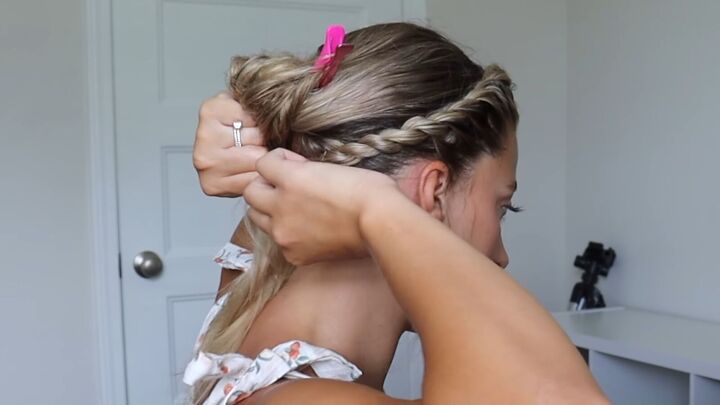
Then we’re going to use a bobby pin to pin the headband braid to the back of your head underneath the buns you made in the first step.
The ideal way to use the bobby pin is by pushing it up and then inside the twist. This hides the bobby pin from showing and keeps the headband braid nice and secure.
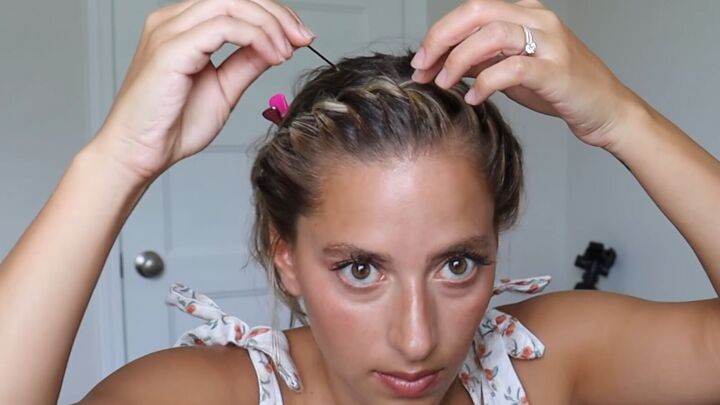
Put some additional bobby pins in the front to pin your headband braid down so it lays flat against your scalp. For this one, use bobby pins close to your hair color so they blend it easily.
4. Finishing touches
Now you can put the rest of your hair down.
Grab a section and sprinkle some more of the styling powder in your hair before lightly teasing it with a comb for some additional volume. Do this all around the top sections of your hair.
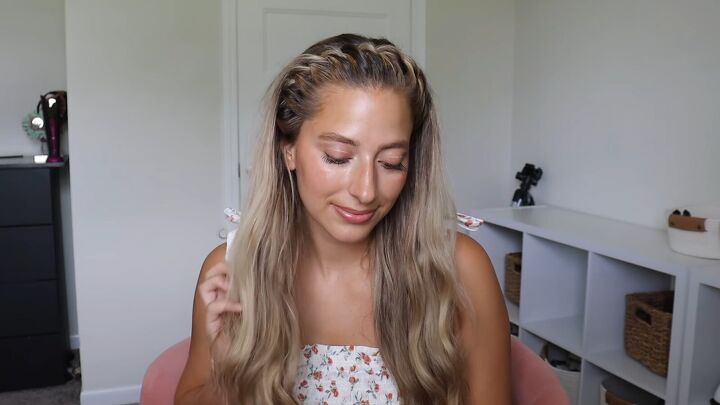
Headband braid tutorial
That’s it! This easy headband braid is a great style for summer when you want nothing more than to keep hair out of your face. It’s super cute and easy to do! Let me know if you guys try it out below!
The author may collect a small share of sales from the links on this page.


Comments
Join the conversation
Thanks going try,beautiful young lady and baby is a little doll so cute,God Bless
I love this! Yours looks fantastic and comfortable. I have an injured hand but I think I can manage this.
Thank you so much for sharing.