Streak-free Tutorial: How to Float Nail Polish

Do you know how to float your nail polish? It's one of my tips for creating a streak-free manicure at home.
So follow along with this step-by-step tutorial to learn how to make nail polish not streaky.
Best cuticle oil!
Tools and materials:
- Nail polish
- Clear top coat
- Almond cuticle oil
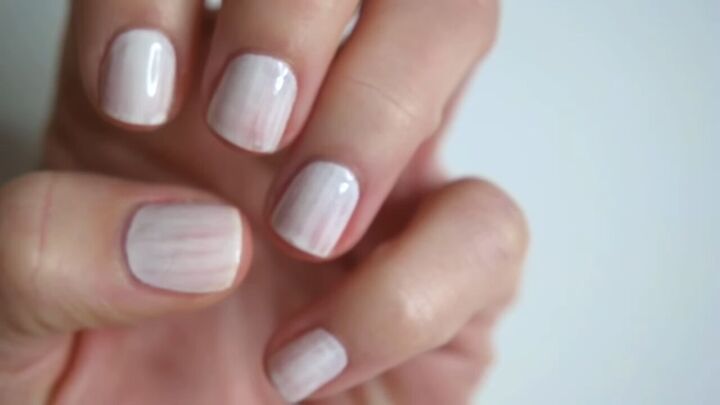
Here is what I mean by streaky nail polish, which particularly occurs with light nail polish colors, and this is what we are trying to avoid.
1. Paint the 1st coat
The key here is to paint the thinnest coat of polish possible while still covering all of the nail.
It’s going to be streaky at this point, and that’s okay. I skipped the base coat, but you can include one if you want.
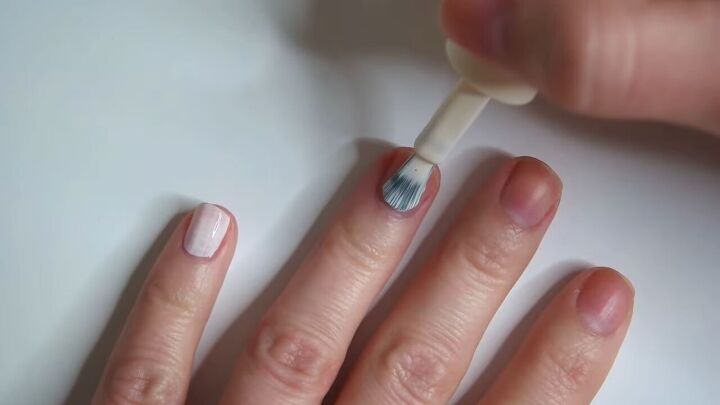
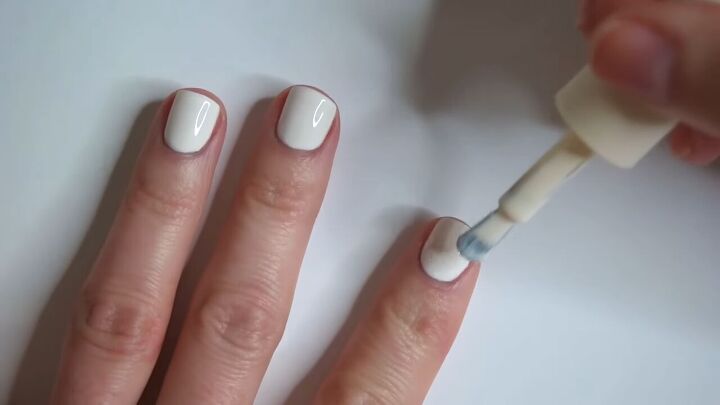
2. Float the 2nd coat
Once the 1st coat is dry, we are going to “float” onto the nails.
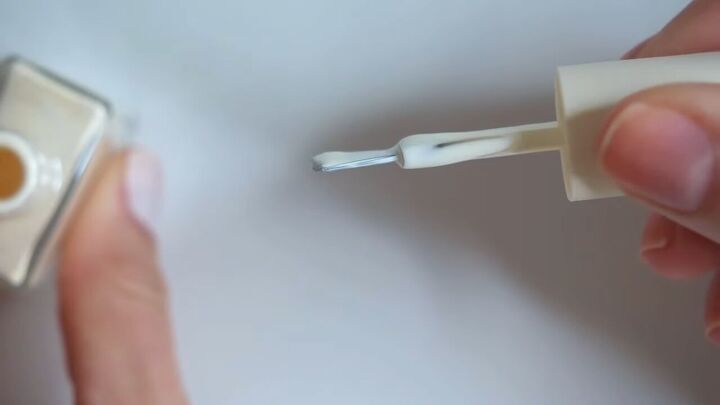
Start by getting a good bead of polish on one side of the brush. This means a nice, heaping ball of polish at the end.
Apply this bead of polish without the brush actually touching the nail (as much as possible). Think of just moving the polish from the nail bed to the ends.
It’s going to be more polish than you’re used to using. But when it dries, it will settle and look amazing.
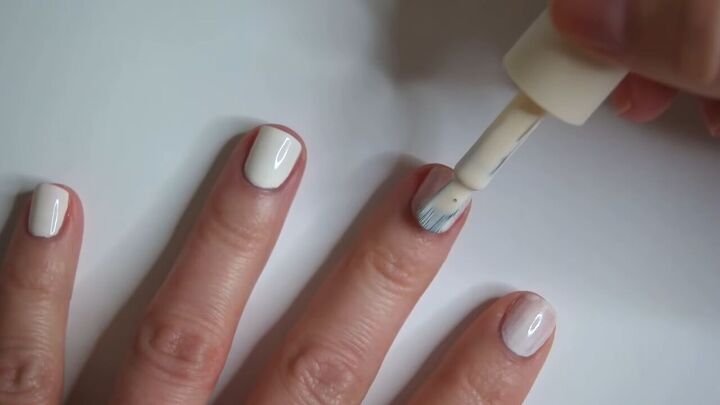
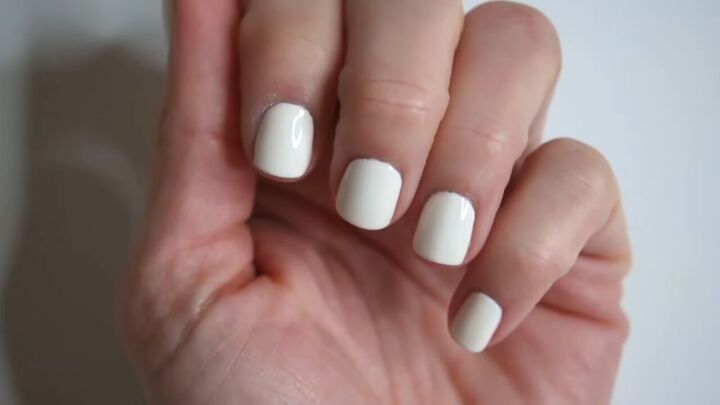
As you can see, it’s going on flawlessly–no streaks or bubbles here! If you were to paint a thin 2nd coat, that would cause the streakiness.
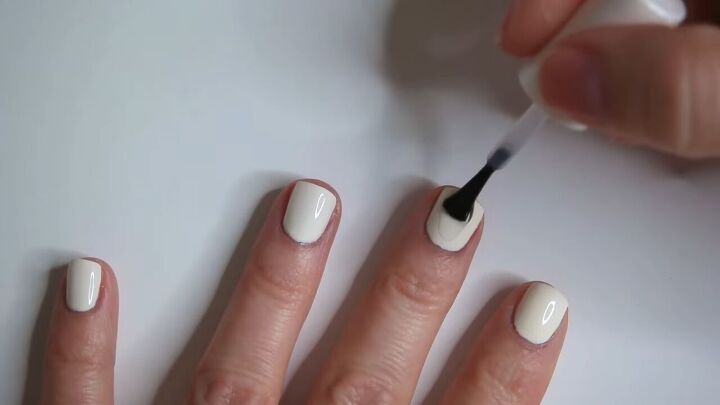
3. Generously apply a top coat
Once the nail polish is completely dry, apply a thick layer of glossy, top coat.
Be patient because we are using more nail polish than usual, so it’s more likely to smudge if it’s still wet. Be sure to cap the tips of the nails to help prevent chipping.
It’s true that with this method of applying the polish thickly, the nails are more likely to smudge after the application. But, if you’re patient and wait for your nails to dry, the streak-free results will be well worth it.
To me, this looks and feels like a gel manicure!
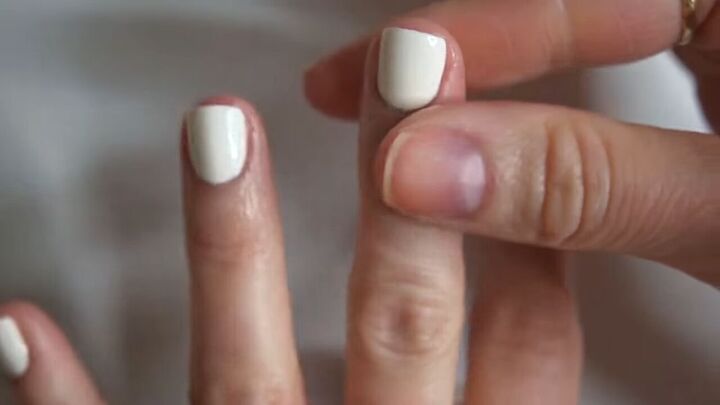
4. Hydrate your cuticles
The final step that I always do at the end of my at home manicures is to hydrate my cuticles.
Apply a thin coat of almond cuticle oil all around the cuticle beds. This will help prevent nicks and chips as well as nourish your cuticles.

Once applied, gently rub the oil around the nails.
How to float nail polish
A lot of the light, opaque nail colors tend to go on streaky, but this method of how to float nail polish has worked for me time and time again!
Check out my tutorial on How to Shape Your Nails Like a Pro.
The author may collect a small share of sales from the links on this page.


Comments
Join the conversation
OMG, this is mind blowing because I’m always buying these adorable pastel colors but they look horrible and after 3 coats I end up just removing them. I’ve been disappointed time after time. I’m definitely gonna try this technique next time!! Thank you so much for sharing this!! 😁
Thank you for the tip……..will definitely try this!