How to Paint Christmas Trees on Your Nails - the Easiest Way

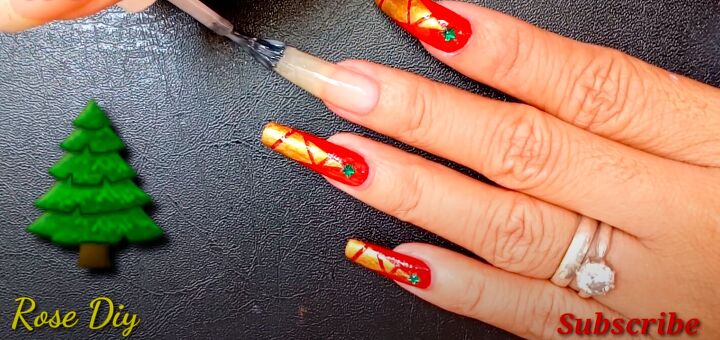
In today’s DIY nail tutorial, I'm going to show you how to paint Christmas trees on your nails. Christmas tree nail art is the perfect way to get into the holiday spirit. This design is easy to do and perfect for the holiday season. Let's get started!
Tools and materials:
- Clear nail polish
- Red nail polish
- Stripping tape
- Tweezers
- Star beads
- Gold nail polish
- Nail polish remover
1. Apply the base coat
Apply a base coat of clear nail polish and let it dry. This ensures the colored nail polish won't stain your nail.
2. Apply red nail polish
Apply two coats of red nail polish, waiting in between for the coat to dry.
3. Clean up
Use a q-tip or fine-tipped brush with nail polish remover to clean up any nail polish residue around the edges of the nail.
4. Shape the Christmas tree
Cut stripping tape and apply it to the nail in a criss-cross shape, as shown above
5. Paint the tree
Using a fine-tipped brush, apply gold nail polish to each pocket of space between the stripping tape.
6. Remove the stripping tape
Carefully take the stripping tape off your nail using tweezers or scissors. It's best to do this before the nail polish fully dries, so the tape isn't stuck to the nail.
7. Apply the bead
Apply the green star bead on top by dipping the back in clear polish and firmly applying it to the top of your gold Christmas tree.
8. Apply the top coat
Apply a clear top coat and let it dry.
How to paint Christmas trees on your nails
There you have it, DIY Christmas tree nail art! This look is both super edgy and homey at the same time. Rock this look at a holiday party or in the comfort of your home.
Let me know in the comments below how this easy nail DIY works out for you!
Enjoyed the project?
Suggested materials:
- Clear nail polish
- Red nail polish
- Stripping tape
- Tweezers
- Star beads
- Gold nail polish
- Nail polish remover
The author may collect a small share of sales from the links on this page.


Comments
Join the conversation